


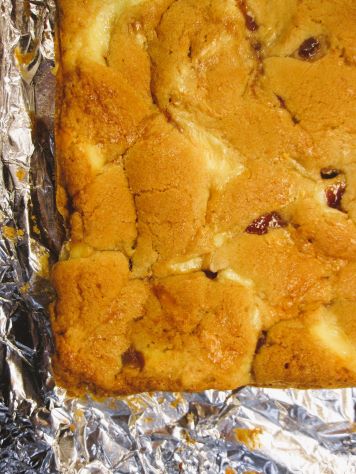
Bready or Not: Gooey Butter Bars [Cake Mix Variation]
A few months ago, I shared a time-consuming yeast-based recipe for making St. Louis Butter Cake. I continue to explore different takes on this Missouri classic, and this time around, the Gooey Butter Bars use convenient cake mix! (If you’re more interested in cookies than cake, I can also point you towards a Bready or Not guest post from Dan Koboldt back in 2018 where he shared Gooey Butter Cake Cookies that also use cake mix.)
![Bready or Not: Gooey Butter Bars [Cake Mix Variation]](https://www.bethcato.com/blog/wp-content/uploads/2024/01/Gooey-Cake-with-cake-mix2_sm.jpg)
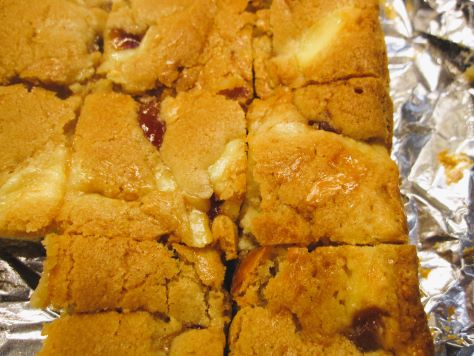
To maximize the cheapness and convenience of this recipe, I used entirely Aldi ingredients. Their cake mix is as good as the name brands.
![Bready or Not: Gooey Butter Bars [Cake Mix Variation]](https://www.bethcato.com/blog/wp-content/uploads/2024/01/Gooey-Cake-with-cake-mix5_sm.jpg)
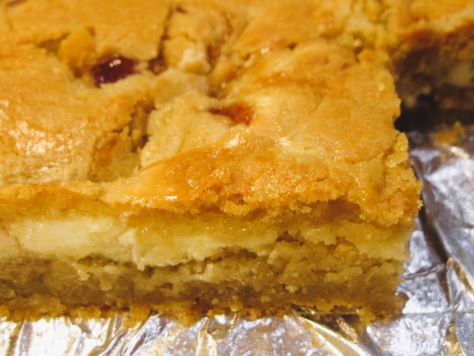
When it comes down to taste, I far prefer the yeast version. It is sweet and delicate with nuance–but it also takes a long time to make. This version is easy, but the sweetness could come across as cloyingly strong. So, keep that in mind in regards to your audience’s tastes.
![Bready or Not: Gooey Butter Bars [Cake Mix Variation]](https://www.bethcato.com/blog/wp-content/uploads/2024/01/Gooey-Cake-with-cake-mix4_sm.jpg)
Modified from Centennial Kitchen Fall Baking 2021 Magazine.
Bready or Not: Gooey Butter Bars [Cake Mix Variation]
Equipment
- 15x10x1 pan
- aluminum foil
- nonstick spray
Ingredients
Cake base
- 15.25- ounce yellow cake mix or white cake mix
- 1/2 cup unsalted butter softened
- 1 large egg
Top layer
- 8 ounces cream cheese softened
- 2 large eggs
- 4 cups confectioners’ sugar
Instructions
- Preheat oven at 350-degrees. Line a 15x10x1 inch pan (also called a jelly roll pan) with foil; apply nonstick spray.
- In a large bowl, stir together cake mix, butter, and egg, until they are crumbly. Pat the entire dough into the bottom of the prepared pan. It will be very thin and fiddly to work with.
- In the same bowl, beat together the cream cheese and eggs until they are fairly smooth; a few clumps are okay. Gradually mix in the confectioners’ sugar to make a cohesive mix. Spread on top of the crust.
- Bake for 25 to 30 minutes, until the middle is set and golden brown. Cool at room temperature, and chill in fridge to completely set.
- A reminder that this is called ‘Gooey Butter Cake.’ Cut pieces finger-sized. Some in the middle may be particularly gooey. If not serving immediately, move pieces to a lidded container and use waxed paper between the stacked layers. They will stay firmer and less-gooey if they are kept chilled.
OM NOM NOM!
Bready or Not: Southern Cream Cheese Pound Cake
This Southern Cream Cheese Pound Cake is simple but oh so good. Rich flavors of butter, vanilla, and cream cheese infuse the whole thing.
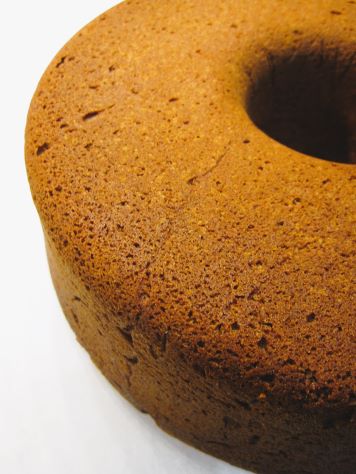
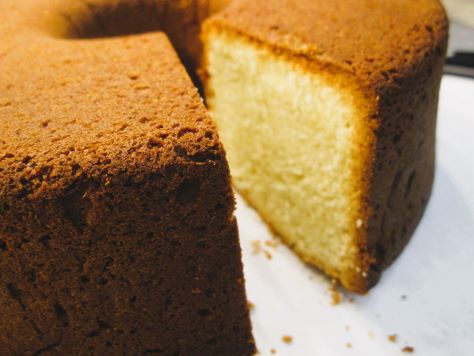
The middle features a velvety crumb while the crust is browned and crisp, creating a wonderful contrast. This has All the Textures.
In full disclosure, this is a recipe that will test your mixer. My poor Kitchen Aid strained to handle this thick, massive quantity of batter. It kept tripping the circuit at the end!
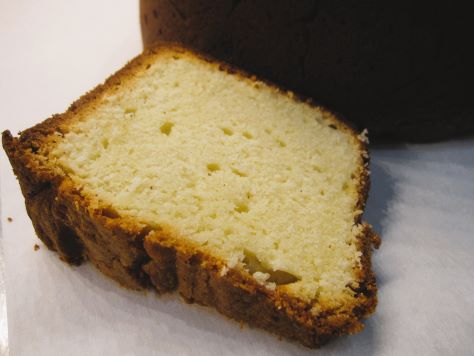
The annoyance was worthwhile, though. This cake is extraordinary. So basic in appearance, and then you take a bite and your mind is blown. Make this one for the holidays this year, and you’ll feed a crowd and awe them while you’re at it.
Modified a lot from Bake from Scratch: Cake 2019.
Bready or Not: Southern Cream Cheese Pound Cake
Equipment
- nonstick spray with flour
- large straight-sided tube pan or angel food cake pan
- stand mixer
Ingredients
- 1 1/2 cups unsalted butter (3 sticks) room temperature
- 8 ounces cream cheese (1 box) room temperature
- 3 cups white sugar
- 1 Tablespoon vanilla extract
- 1 1/2 teaspoons kosher salt
- 6 large eggs room temperature
- 3 cups cake flour
Instructions
- Preheat oven at 325-degrees. Generously coat the interior of the pan with nonstick spray with flour.
- In a stand mixer with a paddle attachment, beat together the butter, cream cheese, sugar, vanilla, and salt until they are fluffy and pale, about 8 minutes, scraping the bowl several times during the process. Add the eggs one at a time, making sure the recent addition is fully mixed in before adding the next. Scrape the bottom of the bowl again. Mix on medium-high for about 3 minutes, until everything is light and airy.
- Gradually add the flour. If the paddle attachment can't handle the load (and/or it is too messy), remove the paddle and use a spatula to incorporate the flour.
- Scoop the batter into the prepared pan. Level out the top. Bake for about 1 hour and 30 minutes to 1 hour and 40 minutes. When it is done, the top will be golden brown and the middle will pass the toothpick test. Let it cool in pan for about 20 minutes, then invert it onto a rack to cool completely.
- Slice into pieces. It is delicious by itself or can accompany fruit and/or ice cream. Store covered or in individually wrapped pieces at room temperature.
OM NOM NOM!
Notes
Bready or Not Original: Swirled Cookie Butter Brownie Bars
These Swirled Cookie Butter Brownie Bars are thick and luscious with just the right balance of chocolate and cookie dough flavors.

If you’re one of those people who had just to discover the joys of cookie butter–you’re in for a treat! Think cookies blended with oil to create a spreadable mass just like peanut butter. There is nothing healthy about it, but it tastes like cookie dough. You can find it at Trader Joe’s as Speculoos and at other stores as Biscoff or as a generic.
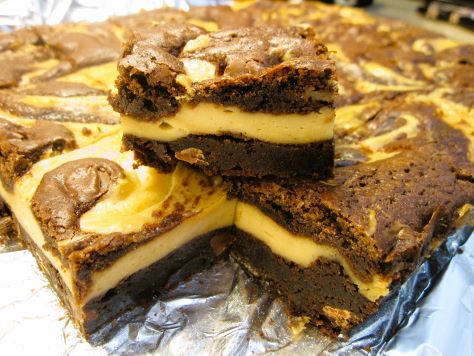
Cookie butter can pretty much replace peanut butter in any recipe, or even on something as simple as a sandwich. Here, it’s great swirled in with brownie batter. Chocolate and cookie dough, ever the perfect combination.
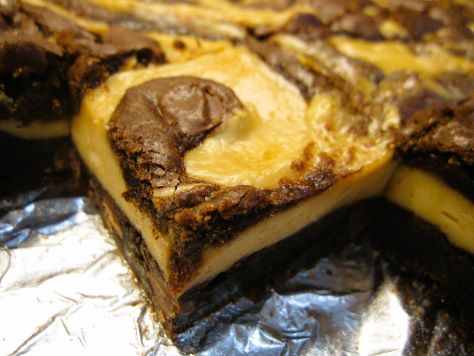
Since the swirl-in includes cream cheese, be sure to refrigerate these after they’ve baked and cooled. They are divine straight from the fridge!
Bready or Not Original: Swirled Cookie Butter Brownie Bars
Equipment
- 13×9 pan
- aluminum foil
- nonstick spray
- uneven spatula
- cutting board
Ingredients
Brownie base
- 3 large eggs room temperature
- 1 cup unsalted butter (2 sticks) melted
- 2 teaspoons vanilla extract
- 2 cups white sugar
- 1 1/4 cups all-purpose flour
- 3/4 cup baking cocoa sifted
- 1/2 teaspoon baking powder
- 1/4 teaspoon salt
- 1 cup milk chocolate chips
Cookie butter swirl-in
- 2 boxes cream cheese (8 ounces each) softened
- 1/2 cup creamy cookie butter
- 1/4 cup white sugar
- 1 large egg room temperature
- 2 Tablespoons milk
Instructions
- Preheat oven at 350-degrees. Line a 13×9 pan with foil and apply nonstick spray.
- In a big bowl, beat together eggs, butter, and vanilla. In another bowl, combine the brownie dry ingredients and gradually add them to the egg mix. Fold in the chocolate chips. Set aside 1 cup of the brownie batter for the topping. Scoop the rest into the prepared pan and use an uneven spatula to even it out.
- In another bowl, beat together the cream cheese blocks, cookie butter, and sugar. Once that is blended, add the egg and milk. Use an uneven spatula to spread the mixture in a thin layer across the top of the brownie batter in the pan. Dollop the reserved brownie batter on top. Use the tip of the uneven spatula or a butter knife to create swirls.
- Bake pan for 35 to 40 minutes, until the very middle passes the toothpick test. Cool on a wire rack for an hour, then place in fridge to completely chill. Use the foil to lift the contents onto a cutting board. Slice up and store in a sealed container in the fridge. Keeps for at least 3 days.
OM NOM NOM!
Bready or Not Original: Paprika Cheddar Crackers
These Paprika Cheddar Crackers are a perfect snack or appetizer, and they even keep well for travel!
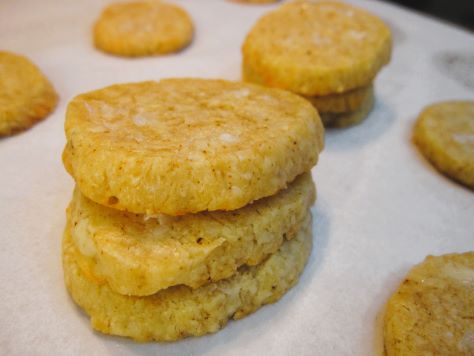
Use a good aged cheese here–or one labeled extra sharp. The cheese should be the main thing here, with the paprika and salt serving to heighten that flavor. Of course, you can mix in some other spices as well–or even use chipotle pepper for a zing.
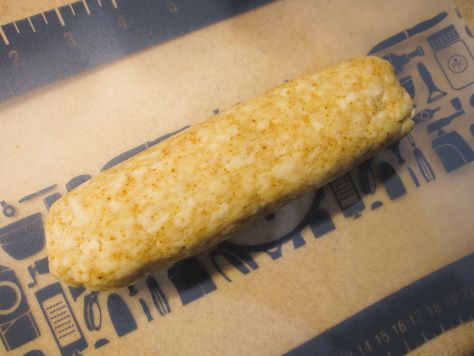
I split up this batch and baked them months apart. One of the nice things about these tubes of dough is that they don’t take up much room in the freezer–or in the fridge when it’s time to thaw them.
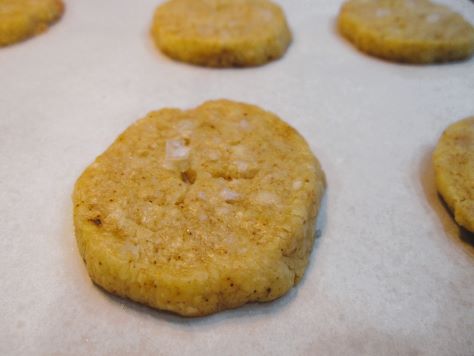
I got 16 crackers out of each batch (so 32 total), and mind you, these are pretty thick, hearty crackers. These aren’t the kind you grab a handful of, maybe just a few at a time. They would be great at a fancier function, served with wine or champagne, but are good with pretty much any drink. Cheese is versatile like that.
Bready or Not Original: Paprika Cheddar Crackers
Equipment
- food scale
- plastic wrap
- parchment paper
- baking sheet
- knife
Ingredients
- 1/2 cup unsalted butter (1 stick) room temperature
- 8 ounces aged cheddar shredded
- 1 cup plus 2 Tablespoons all-purpose flour
- 1/2 teaspoon paprika
- 1 1/2 Tablespoons water
- 1 teaspoon kosher salt
- flaked sea salt
Instructions
- Mix together the butter, cheddar, flour, paprika, and salt. Add the water. Continue to mix together until it forms a cohesive dough; add a touch more flour if it’s too wet, or a dribble of water if it’s dry.
- Use a food scale to weigh the dough and divide it in half. Roll out the plastic wrap to about 10 inches. Place half the dough on the plastic and shape into a thick tube, then wrap it in plastic to compress it and make it into an even log about an inch in diameter. Completely seal in plastic wrap. Repeat with other half of dough.
- The dough can be kept in the fridge for up to 4 days, or frozen for several months.
- When ready to bake, preheat the oven at 350-degrees. Place parchment paper on baking sheet. Place a chilled (thawed) dough tube on a cutting board and slice about 1/4-inch thick. Place with minimal spacing on the parchment. Add a pinch of flaked sea salt onto each cracker and gently press it into the surface.
- Bake for 17 to 20 minutes, until edges are just starting to turn golden. Let set to cool on cookie sheet. Store in a sealed container. They are best eaten within 3 days.
OM NOM NOM!
Bready or Not Original: Fruity-Cheesy Swirled Blondies
These Fruity-Cheesy Swirled Blondies are easy to customize based on your budget and ingredient availability. Go expensive and fancy and use a goat cheese log, or more budget-conscious and still-delicious with standard cream cheese.
I’ve done it both ways. Both are fantastic. For the goat cheese, I recommending hitting someplace like Costco or Sam’s Club. For cream cheese, my go-to has become Aldi.
Use any variety of jams or preserves, but the one necessity is that it is THICK. A watery one will sink to the bottom (says the voice of experience). I found the good basic Smucker’s Strawberry Jam was fine in this recipe.
Bready or Not Original: Fruity-Cheesy Swirled Blondies
Equipment
- 9×9 pan
- aluminum foil
- nonstick spray
- uneven spatula
Ingredients
Blondies
- 12 Tablespoons unsalted butter (1 1/2 sticks) room temperature
- 1/2 cup white sugar
- 3/4 cup light brown sugar packed
- 2 large eggs room temperature
- 1/2 teaspoon vanilla extract
- 1 3/4 cups all-purpose flour
- 1 1/4 teaspoons baking powder
- 1/2 teaspoon salt
Cheesecake Swirl
- 8 ounces soft goat cheese or cream cheese, softened
- 2 Tablespoons white sugar
- 1 Tablespoon plain or vanilla Greek yogurt or sour cream
- 1 large egg room temperature
- 1/2 teaspoon vanilla extract
- 3/4 cup jam or preserves
Instructions
- Preheat oven at 325-degrees. Line a 9-inch square pan with foil and apply nonstick spray.
- In a large bowl, cream together the butter and sugars until fluffy. Add the eggs and vanilla. Stir in the flour, baking powder, and salt until just combined.
- In a separate bowl, beat together the cheese, sugar, yogurt, egg, and vanilla to make smooth.
- Pour about half the blondie batter into the prepared pan. Smooth it out with an uneven spatula.
- Dollop on all of the cheese mixture. Then add spoonfuls of the jam to fill any gaps. Follow up by adding dollops of the remaining blondie batter. Use a butter knife to swirl the layers together for a marbled effect.
- Bake for 45 to 50 minutes, until the middle is not jiggly and passes the toothpick test. Cool for at least an hour at room temperature, then chill in fridge. Once the pan is cool, use the foil to lift the blondies onto a cutting board to slice into bars.
- Enjoy promptly or store in a sealed container in the fridge to eat over the coming days.
OM NOM NOM!
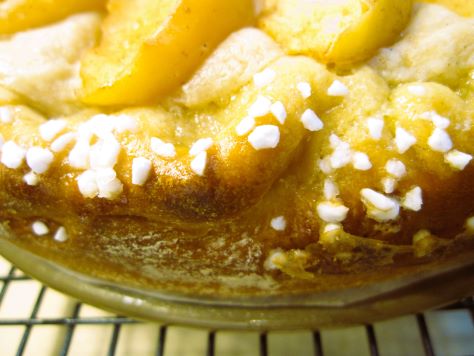
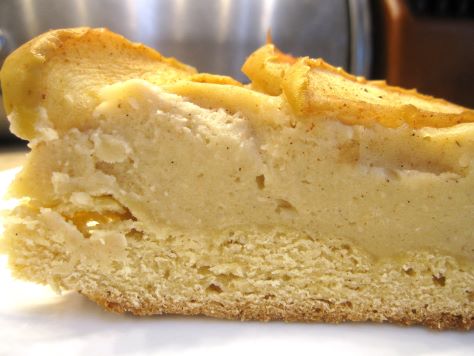
Bready or Not: Apple Cream Cheese Brioche Tart
This Apple Cream Cheese Brioche Tart isn’t a beginner’s recipe, I’ll say that straight up. There are gobs of steps, multiple rise times, lots of dirty dishes. But the result? Wow.

This is really a show-stopper kind of bread for a dessert, breakfast, or brunch. You have an enriched bread with a creamy, rich filling topped with spiced apples.
We had to test the best ways to eat the leftovers, too. The tart is fantastic fresh. Because of the creamed cheese, it needs to be stored in the fridge–but it’s thick and cloggy if eaten cold.
However, heating it in the toaster oven doesn’t work–the cream cheese will melt off! Like Goldilocks, we eventually found the “just right.” It was a quick zap in the microwave, maybe 15-20 seconds depending on your machine. Enough to take the chill off without making it hot.
The things we bakers must do for science and the good of the people…
Bready or Not: Apple Cream Cheese Brioche Tart
Equipment
- rimmed baking sheet
- 9-inch springform pan
- parchment paper
- stand mixer with paddle and dough hook
- nonstick spray with flour
- pastry brush
- uneven spatula
- instant read thermometer
Ingredients
Apples
- 2 cups apples peeled then sliced to 1/4-inch, about 1 1/2 medium apples (Honeycrisp recommended)
- 1 Tablespoon white sugar
- 1/2 teaspoon lemon juice
- 1/4 teaspoon apple pie spice
Dough
- 2 cups all-purpose flour divided
- 1 1/2 Tablespoons white sugar
- 1 1/2 Tablespoons light brown sugar packed
- 1 0.25oz package Platinum Yeast
- 1 1/2 teaspoons kosher salt
- 1/4 cup milk or half & half, warmed to 120-F to 130-F
- 2 large eggs room temperature
- 3/4 teaspoon pure vanilla extract
- 1/4 cup unsalted butter softened
Filling
- 2 Tablespoons unsalted butter softened
- 3 Tablespoons white sugar
- 2 Tablespoons light brown sugar firmly packed
- 1 teaspoon pure vanilla extract
- 1/4 teaspoon kosher salt
- 1/4 teaspoon apple pie spice
- 8 ounces cream cheese room temperature
- 1 large egg room temperature
- 3 Tablespoons all-purpose flour
Topping
- 1 large egg for egg wash
- 1 Tablespoon water for egg wash
- Swedish pearl sugar for sprinkling
Instructions
- Preheat oven to 400-degrees. Line a rimmed baking sheet with parchment paper.
- Prepare the sliced apples by using a large bowl to stir them with sugar, lemon juice, and pie spice. Let the mixture stand for 15 minutes, stirring occasionally. Spread apple mixture in an even layer on prepared pan.
- Bake the apples until they are fork-tender and have released significant moisture, 12 to 16 minutes. Rotate the pan and stir halfway through. The apples should reduce in size slightly but retain their shape. Let the apples cool while continuing with other stages. Also, turn off the oven, as it won’t be needed for a while.
- Begin the dough. In the bowl of a stand mixer fitted with the paddle attachment, beat 1/2 cup flour, white sugar, brown sugar, yeast, and salt at medium-low speed. Add the warm milk, eggs, and vanilla, beating everything on medium about 2 minutes until it’s combined. Scrape the bottom and sides of bowl a few times. Gradually add the remaining 1 1/2 cups flour.
- Switch to the dough hook attachment. Beat at low speed until dough is smooth and elastic. It should start to pull away from sides of bowl. This will be around 6 to 9 minutes.
- Add the softened butter, 1 tablespoon at a time, beating well after each addition. This will take 6 to 8 minutes total. Scrape the sides of bowl and dough hook as needed. If the dough looks slightly broken during this stage, that's okay–keeping beating it and it'll come back together.
- Increase mixer speed to medium-low and beat until a smooth, elastic dough forms, about 6 minutes.
- Turn out dough onto a clean surface and knead 4 to 5 times. Shape into a smooth round. Place dough in a large ungreased bowl. (At this stage, the dough could be covered and placed in the fridge for a few hours or overnight.) Cover it and place it in a warm spot until it doubles in size, about 45 minutes to 1 hour.
- Cut a piece of parchment to fit in the base of a springform pan. Apply nonstick spray with flour in pan. Add cut paper. Spray again to coat paper and sides.
- Punch down dough, then cover it and let it rest for about 10 minutes. On a lightly floured surface, roll dough into an 11-inch circle. Use the bottom of the springform pan to poke a 9-inch circle in the middle of the dough. Fold and press outside edges inward to create a crimped edge. Lift the dough to place it in the prepared pan. Press dough to make sure it fills the bottom. Crimp and secure the edges again if needed. Cover and let rise again in a warm place for 25 minutes. Dough should be puffed and hold an indentation when it’s poked.
- Preheat oven to 325-degrees.
- Now make the filling. In the clean bowl of the stand mixer, using the paddle attachment, beat the butter, white sugar, brown sugar, vanilla, salt, and pie spice at medium speed. Gradually add the cream cheese, beating until smooth. Add egg, beating until combined, then add the flour. Scrape the bowl to make sure everything is mixed.
- Use your fingertips to dimple center of dough back down, leaving outside crust higher and puffed. Crimp and secure edges if necessary, and press out any air bubbles if you see them.
- Spoon and spread cream cheese mixture in an even layer in center of dough. Arrange the sliced apples slightly overlapping in two concentric circles. (You may have leftover slices. Eat’em on their own!)
- In a small bowl, whisk together egg and water. Brush outer edge of dough with egg wash. Sprinkle pearl sugar along the crust.
- Bake for 20 minutes. Rotate pan. If the crust is browning, cover it with foil. Bake for another 25 to 28 minutes. When the tart is done, the crust will be golden brown. The filling should be set around outside edges and slightly jiggly in center. An instant-read thermometer inserted in center should register at least 175-degrees.
- Let cool in pan for 10 minutes. Using a small offset spatula, loosen edges of bread. Remove sides of springform pan. Let cool completely on pan base on a wire rack.
- The tart can be enjoyed fresh after it cools. Leftovers should be stored in the fridge, but will be cloggy if eaten chilled. It’s best warmed with a short zap in the microwave, about 15-20 seconds; if it’s made too hot, the cream cheese melts! Leftovers can also be individually wrapped and frozen for later. Thaw in fridge.
OM NOM NOM!
Follow me


