


Bready or Not Original: Air Fryer Maple Roasted Nuts
Pardon me, have you heard that air fryers are awesome? Yeah, yeah, I won’t go for the hard sell, but I do love my air fryer, and it sure makes these Maple Roasted Nuts quick and convenient.
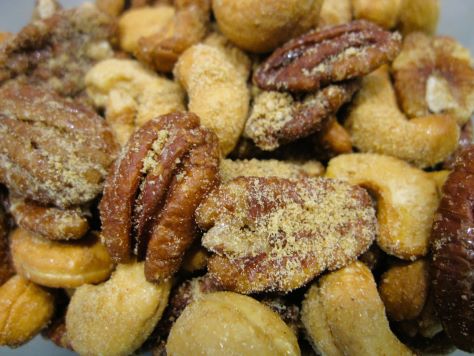
This is a good recipe if you want to prepare nuts for a sports game or any kind of gathering–or if, like me, you enjoy having some lightly-sweet nuts along with cheese.
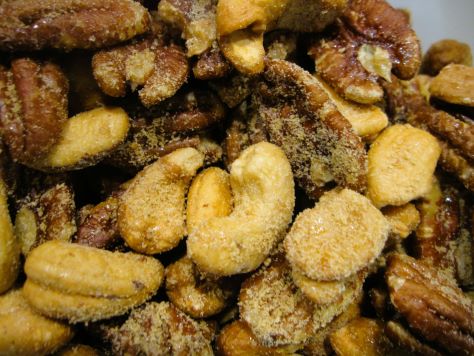
If you’d like, substitute honey for the maple syrup. I imagine something like agave syrup might work, too, but I haven’t tried that. I know maple sugar can be expensive or hard to find offline, but fortunately brown sugar makes for a good substitute for that, too.
Bready or Not Original: Air Fryer Maple Roasted Nuts
Equipment
- air fryer
- parchment paper
Ingredients
- 1 cup whole pecans
- 1 cup whole cashews
- 1 Tablespoon butter melted
- 1 Tablespoon maple syrup
- 1/2 teaspoon salt
- 1 Tablespoon maple sugar or brown sugar
Instructions
- Line the air fryer tray with parchment paper cut to fit, then place tray on top.
- Place the nuts in a large bowl. Pour the butter over the top, followed by the maple syrup and salt. Stir the nuts to coat. Place them spread out on the mesh tray.
- Air fry at 325-degrees for about 5 to 6 minutes or until they begin to smell toasted, stirring one halfway through. They should look browned at the end.
- While they are cooking, pull out another small cookie sheet or plate, putting more parchment on it if desired; this will be a surface on which the nuts will cool.
- When the nuts are done, pull them from the air fryer and carefully transfer them to the fresh cookie sheet. Let them cool for about 10 minutes, then sprinkle maple sugar on top, stirring to coat. Enjoy immediately, or place in a sealed container at room temperature to eat over the next month.
OM NOM NOM!
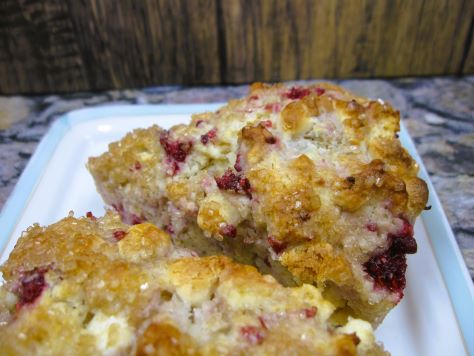
Bready or Not Original: Berry Scones
These Berry Scones are a delicious way to use fresh or frozen fruit to create a batch of baked goods for breakfast.
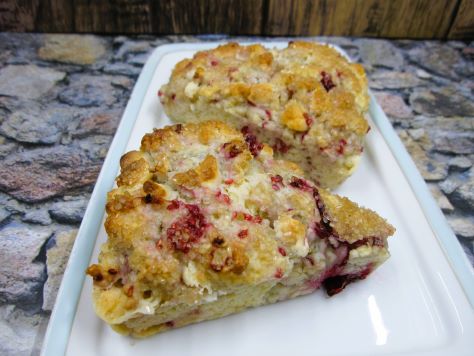
I love scones but I hadn’t made this recipe in over 10 years. Arizona is not a good place to get locally grown fresh fruit like strawberries and raspberries. Soon after we moved to Minnesota, fresh strawberries came into season AND I won a gallon-sized bag of frozen raspberries in my first horticultural club meeting.
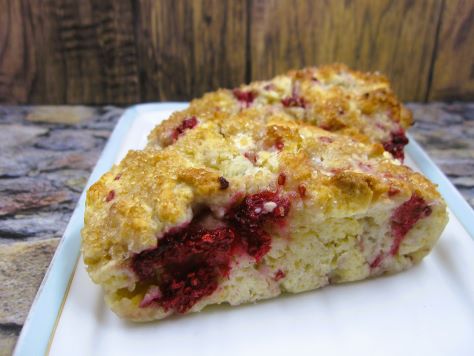
I needed ways to utilize my new bounty. I reworked this old recipe, reducing the fruit amount and adding white chocolate chips. That extra sweet kick really elevates the fruit!
Bready or Not Original: Berry Scones
Equipment
- cookie sheet or scone pan
- nonstick spray
Ingredients
Scones:
- 1/2 cup strawberries or raspberries (fresh or frozen) about 3oz
- 3 Tablespoons white sugar separated
- 2 cups all-purpose flour
- 2 teaspoons baking powder
- 1/4 teaspoon salt
- 6 Tablespoons unsalted butter
- 2/3 cup milk or almond milk
- 1/2 cup white chocolate chips
Topping:
- 1 Tablespoon coarse or white sugar optional
Instructions
- Preheat oven at 400 degrees. Lightly grease a cookie sheet or line with parchment paper, or use a scone pan.
- Use kitchen shears or a knife to cut the fruit into bite-sized pieces. Sprinkle fruit with 1/2 tablespoon sugar; set aside to macerate.
- Combine remaining sugar with flour, baking powder and salt. Add butter, using a pastry cutter or a fork to cut it in. Don’t completely mix in butter, but leave some pea-sized pieces throughout. Stir in milk. Fold in the white chocolate chips followed by the berries.
- Flour hands to coat. Gently knead and turn the dough to incorporate the dry bits from the bottom of the bowl. Sprinkle dough with extra flour if it’s too sticky to work with.
- If using a cookie sheet for baking, pat the dough into a circle 3/4 inch thick. If any berries peek out, push them into dough. Cut circle into 6-8 wedges (or smaller), then transfer wedges to the cookie sheet, leaving at least 1/2 inch of space between them; they will spread. Alternatively, press handfuls of dough into a scone pan, filling each empty space to the end to create even pieces. Sprinkle the tops with coarse or white sugar, if desired.
- Bake 20 to 25 minutes or until the tops are beginning to brown. Remove them from pan. Scones can be eaten immediately, or will keep in a sealed container at room temperature for up to 2 days. Freeze them to enjoy later.
OM NOM NOM!
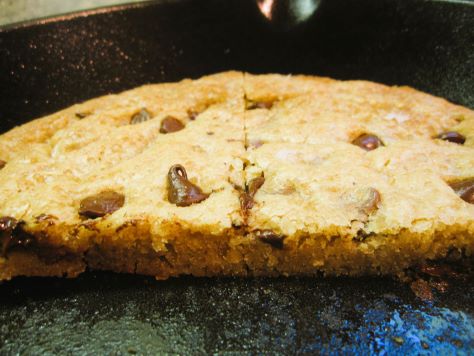
Bready or Not: Chocolate Chip Skillet Cookie
If you’re in need of a small-scale dessert for just a couple of people (hey, it is Valentine’s Day as I post this), this Chocolate Chip Skillet Cookie is perfect.
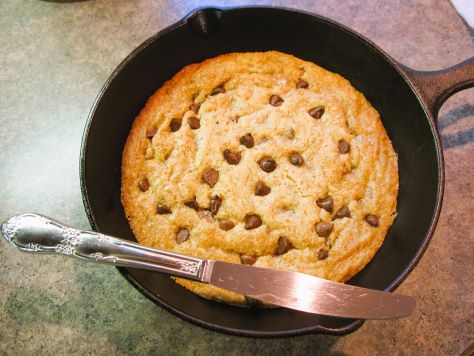
You’ll need a 6-inch cast iron skillet or cake pan for this recipe. I have the former.
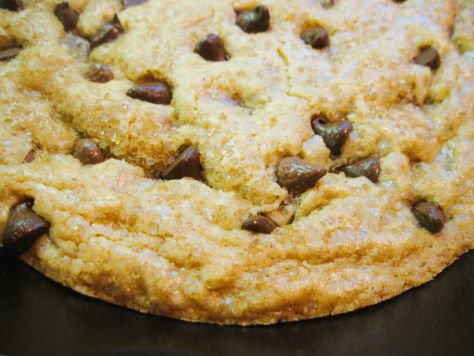
This is a treat best enjoyed while it’s warm. Therefore, let the big cookie cool enough so you won’t get burned, and then dig in. If you want to make this even more luxurious, add some scoops of ice cream in the middle and eat everything with spoons!
Modified from Bake from Scratch July/August 2023.
Bready or Not: Chocolate Chip Skillet Cookie
Equipment
- 6-inch cast iron skillet or 6-inch cake pan
- nonstick spray
- small saucepan
Ingredients
- 1/4 cup unsalted butter
- 2 Tablespoons white sugar
- 2 Tablespoons brown sugar packed
- 1 large egg yolk
- 1 Tablespoon milk or half& half
- 1/2 teaspoon vanilla bean paste or vanilla extract
- 1/2 cup all-purpose flour
- 1/2 teaspoon baking powder
- 1/4 teaspoon kosher salt
- 1/2 cup chocolate chips whatever kind you want
- flaked sea salt and coarse sugar for optional topping
Instructions
- Preheat oven at 350-degrees. Prepare the pan by using nonstick spray or some extra butter to coat.
- In a small saucepan, melt the butter on medium heat, stirring often. The butter will foam and then turn brown after 6 to 8 minutes. Set aside to cool for at least 10 minutes.
- In a mixing bowl, combine browned butter, both sugars, egg yolk, milk, and vanilla. Add the flour, baking powder, and kosher salt. Fold in the chocolate chips. If desired, add a sprinkle of flaked sea salt and coarse sugar on top.
- Bake until the edges are brown and the middle is no longer gooey, about 15 to 20 minutes. Let cool for 15 to 20 minutes before digging in, but it is ideally eaten while it's still warm.
OM NOM NOM!
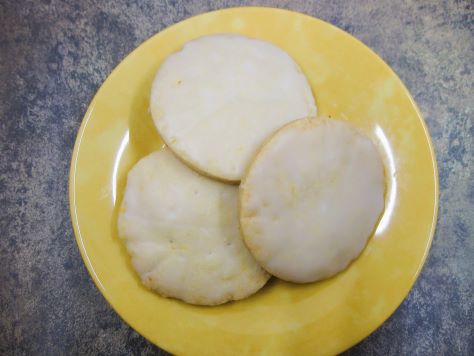
Bready or Not: Lemonade-Like Cookies
It’s February (how did that happen?), but these brightly-flavored Lemon-Lake Cookies will add some sunshine to your day, no matter when you make them.
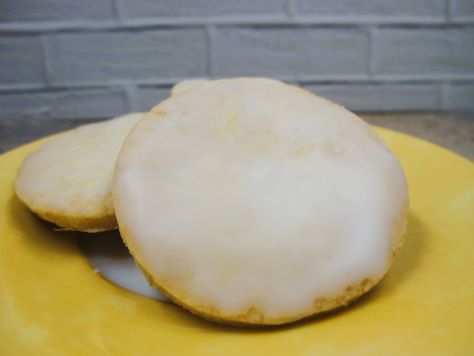
These are not fancy cookies. They are fairly straightforward to make. The only real “extra” bit is etching the lemon effect onto the cookies. I found it annoying that the example picture in Allrecipes Magazine, where I found the original recipe, showed the cookies when they were unglazed, hence the lemon effect is quite bold.
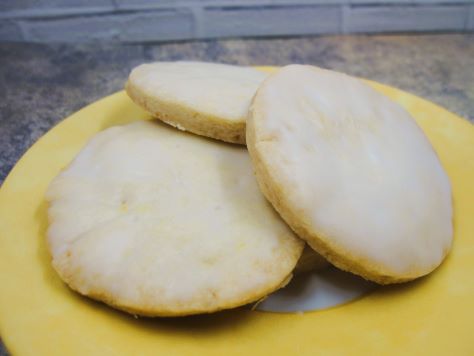
The reality is that the glaze fills in many of the lines and holes, making the etching much more subtle. It is still visible, though (if you impress the lines and dots enough).
Bready or Not: Lemonade-Like Cookies
Equipment
- zester
- juicer
- parchment paper
- Rolling Pin
- plastic wrap
- 2-inch cookie cutter
- skewer or chopstick
- pastry brush
Ingredients
Dough
- 1 cup unsalted butter (2 sticks) cut into thin slices
- 1/2 cup white sugar
- 1 lemon
- 1 teaspoon kosher salt
- 1/2 teaspoon vanilla extract
- 1/2 teaspoon lemon extract
- 2 1/4 cups all-purpose flour plus more for surface
Glaze
- 1 cup confectioners’ sugar
- 2 to 3 Tablespoons lemon juice
Instructions
- Zest the lemon. Cut lemon in half and squeeze out juice. Set aside zest and juice.
- Preheat oven at 300-degrees. Line a cookie sheet with parchment paper.
- Place butter, white sugar, lemon zest, salt, and vanilla in a bowl, stirring together until the butter starts to soften and the ingredients come together. Add flour, mixing until buttery crumbs form. Use hands to press dough together into a ball.
- Lightly flour a flat work surface. Set the dough there and press it into a 1/2-inch thick disk. Place a long stretch of plastic wrap on top and roll the dough to about 1/4-inch thickness. Cut dough with cookie cutter, placing rounds slightly spaced out on prepared sheet. Reroll dough scraps cut out more rounds until it’s all basically shaped.
- If desired, etch a lemon-like effect. Use a sharp knife to form decorative lines atop cookies, pressing in the blade to form 8 triangular wedges on each; make sure to only press into the top of the dough, not all the way through. Use a skewer or chopstick to add decorative holes near the tip of each wedge, creating an effect like a lemon seed.
- Bake cookies until they are light brown around the wedges, 22 to 25 minutes. Transfer to a rack to cool completely, but reserve the parchment and pan for the glazing.
- Return cookies to cooled pan. Mix together the confectioners’ sugar and 2 tablespoons lemon juice, adding more if needed to form a thick but spreadable glaze. Use a pastry brush to apply a layer of glaze to each cookie, adding an extra layer, if desired, with any leftover glaze after the initial coat. Let cookies stand for 30 minutes to an hour, until glaze is set. Pack cookies into a sealed container. Store at room temperature.
OM NOM NOM!
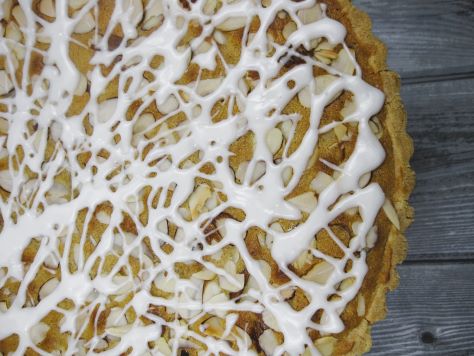
Bready or Not: Cherry-Almond Bakewell Tart
Bakewell Tarts are classic British pastries. This version, modified from Bake from Scratch Magazine, uses store-bought preserves (I used Bonne Maman) with everything else from scratch.
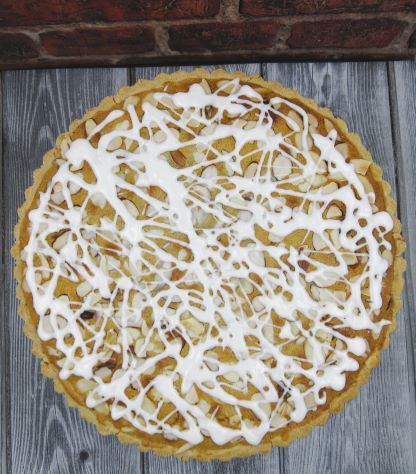
If you’re in America, you’re not likely to find a Bakewell Tart unless you’re near a big city bakery; as for me, I’ve never found it for sale in the US, and I’d probably scream in delight if I came across it. I made a pointed effort to get slices more than once during my 2019 trip to the UK.
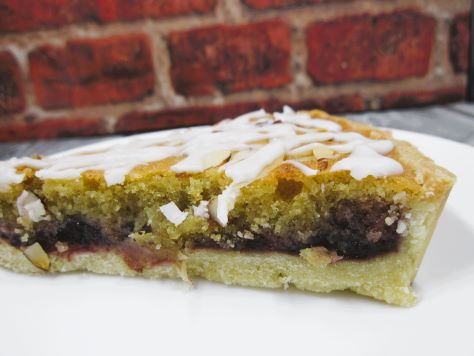
Not gonna lie, this is a dessert that takes some work. The pâte sucrée, the crust, can be done ahead of time, and that helps to space out the labor. The filling, which is a frangipane, needs to not only be mixed, but piped into the crust to help it form a consistent layer.
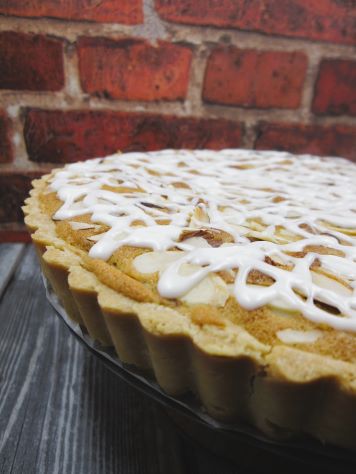
And of course, at the end, the tart needs a nice sweet drizzle that looks gorgeous and amps up the flavor, too. This is really the ultimate special occasion breakfast or dessert.
There are two recipes included here: the pâte sucrée and the full assemblage of the Bakewell Tart.
Bready or Not: Pâte Sucrée
Ingredients
- 1/2 cup unsalted butter (1 stick) softened
- 1/3 cup confectioners’ sugar
- 1/2 teaspoon kosher salt
- 1 large egg room temperature
- 2 cups all-purpose flour
Instructions
- In a stand mixer or by hand. beat together butter, sugar, and salt until they are pale and creamy. Add the egg. Gradually beat in the flour until just combined, scraping the bottom of the bowl a few times.
- Shape the dough into a flat disk and encase in plastic wrap. Place in the fridge for an least an hour, but overnight is preferred. Dough can be refrigerated for up to a week or can be frozen for up to 2 months. If frozen, thaw in fridge before using.
Bready or Not: Cherry-Almond Bakewell Tart
Equipment
- Rolling Pin
- parchment paper
- 9-inch tart pan with removable plate
- pie weights
- pastry brush
- pastry bag or freezer quart bag
- uneven spatula
Ingredients
Tart
- 1 pâte sucrée
- 1 large egg white lightly beaten
- 1/2 cup unsalted butter (1 stick) room temperature
- 1/2 cup white sugar
- 2 large eggs room temperature
- 2 teaspoons vanilla extract or vanilla bean paste
- 1/2 teaspoon kosher salt
- 1/4 teaspoon almond extract
- 1 cup almond flour sifted to remove clumps
- 2 Tablespoons all-purpose flour
- 3/4 cup cherry preserves
Topping
- 1/4 cup sliced almonds
- 1/2 cup confectioners’ sugar
- 1 Tablespoon milk or half & half
Instructions
Form the crust
- If the pâte sucrée is quite firm from chilling, let it set at room temperature for about 20 minutes to make it more pliable. Use a rolling pin to roll it into a 12-inch circle, about 1/8-inch thick.
- Remove the base of the tart pan and trace the shape onto parchment paper. Cut paper to fit in bottom of pan and apply baking spray. Carefully transfer dough to pan, but if it falls apart, that’s okay–press it into an even layer across the bottom of the pan and up the fluted sides. Use a knife to cut excess dough from the top edge. Use a fork to dock the bottom of the pan, stabbing it here and there across the whole surface. Chill until firm, about 30 minutes.
Bake the crust
- Preheat oven at 325-degrees.
- Top the dough with a large piece of parchment paper, with ends extending over the sides. Add pie weights to fill the basin.
- Bake the crust for about 15 minutes. Carefully lift with the parchment and weights, setting on another pan to cool. Brush the bottom of the pan with the egg white. Continue baking for another 15 minutes; the base should look dry with the dough lightly browned. Set aside to cool completely as the filling is made. Increase oven temperature to 350-degrees.
Make the frangipane
- Beat the butter and white sugar until light and fluffy. Scrape the bottom of the bowl a few times to make sure everything is mixed. Add eggs, one at a time, followed by vanilla, salt, and almond extract. Scrape bottom and sides of bowl. Gradually mix in both flours until just combined.
- Spoon frangipane into a pastry bag or a freezer quart bag. Cut off the tip.
- Use an uneven spatula to spread the cherry preserves over the bottom crust. Pipe the frangipane over the preserves. Use a clean uneven spatula to smooth it into an even layer. Sprinkle sliced almonds on top.
- Bake until frangipane is set and golden, about 30 minutes. Let cool about 20 minutes before removing the outer ring of the pan. Let tart cool completely on rack.
Add drizzle
- In a small bowl, stir together confectioners’ sugar and milk. Spoon into a pastry bag or freezer quart bag and snip off a tiny corner. Pipe glaze back and forth over tart. Let glaze set, about 20 minutes, then dig in. Store wrapped up or in sealed container in fridge for up to 4 days.
OM NOM NOM!
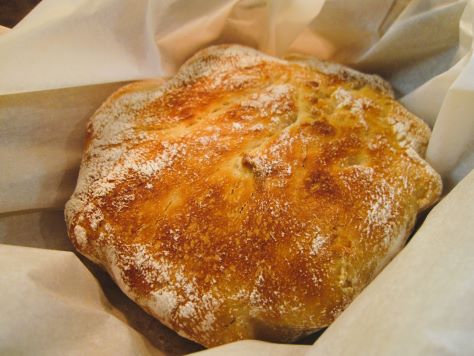
Bready or Not Original: Small Batch Crusty Bread
Some bread recipes make a lot of bread. While bread freezes well, not everyone has the space or wants the bread for later. If you just want a small, special round of bread to be shared by 2 or 3 people, this is the bread for you.
This round is rustic, simple, and delicious. It doesn’t require kneading, and therefore doesn’t even ask for a electronic mixer for ease. You don’t even need bread flour. All-purpose does the job just fine.
I first tried this recipe when most of my kitchen was packed up for the move. I didn’t have all of my usual implements or ingredients, but I could make this, and wow, was it good.
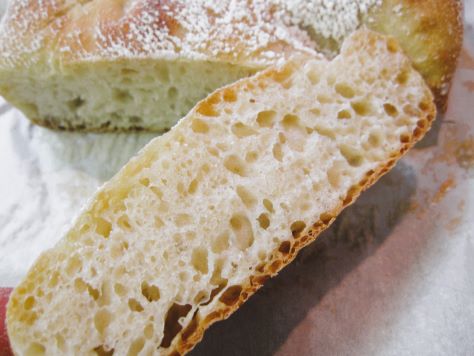
I’ve tried this in my small cast iron skillet and in a Pampered Chef covered stoneware dish. Both worked well, but I actually preferred the rise and extra crustiness that came with using the cast iron. These pictures actually depict the stoneware-baked bread, and I daresay, they still don’t look too bad.
Bready or Not Original: Small Batch Crusty Bread
Equipment
- digital thermometer
- cotton towel or napkin
- small cast iron skillet or small stoneware dish
- parchment paper
Ingredients
- 1 teaspoon active dry yeast
- 1 teaspoon honey
- 2/3 cups warm water 100-110 degrees
- 1 teaspoon kosher salt
- 1 to 1 2/3 cups all-purpose flour plus more for dusting
Instructions
- In a large bowl, stir together the yeast, honey, and warm water. Let it sit about 5 to 10 minutes. The yeast should activate and begin to bloom near the top of the water.
- Add flour. Using a sturdy spoon, stir until everything starts to come together, then add the kosher salt. Continue mixing until no dry flour remains in the bowl. The dough should be shaggy and somewhat sticky. Cover the bowl with a towel or plastic wrap and stash it in a warm spot in the kitchen to rise for an hour. It should double in size.
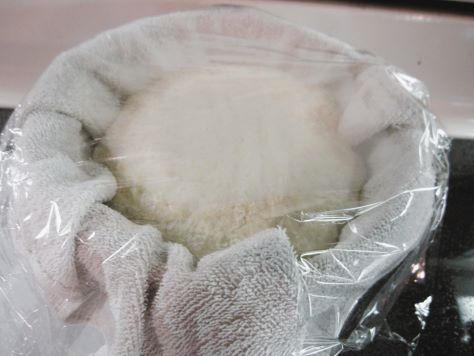
- Set out a small bowl and layer a cotton towel inside. Generously flour the towel. Lightly flour a work surface. Tip the dough onto the work surface. Be gentle as to not lose the bubbles. Shape the dough with cupping and tucking motions, drawing the round to be tighter by tucking the rough bits underneath. Place the formed round in the floured-towel bowl with the seam underneath. Cover with a towel or plastic wrap to rise for 30 minutes.
- Begin preheating the oven at 450-degrees. Place the small cast iron or stoneware inside the oven to heat up as well–and please remember to use potholders when handling it throughout the baking process!
- Pull out a piece of parchment paper. Tip the risen bread onto the parchment, gently tugging it free with the towel if it sticks in spots. Pull the hot pan from the oven. Use the parchment as a sling to set the parchment and bread inside the pan as levelly as possible.
- Bake for 22 to 25 minutes. The bread should be browned and sound hollow if tapped on the bottom. Let cool about 10 to 15 minutes so that it can be handled to be sliced and enjoyed. If there are any leftovers, store them in a sealed bag at room temperature or to freeze for later. Freshly-made bread is best eaten within a day.
OM NOM NOM!
Follow me


