


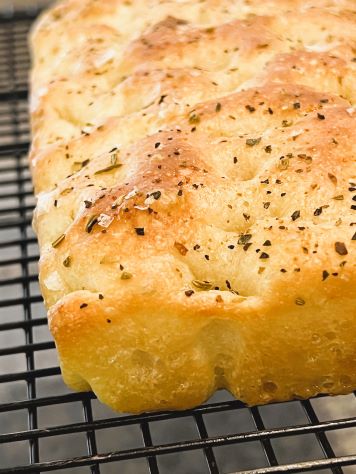
Bready or Not: Mini Focaccia for Two
This Mini Focaccia recipe creates the perfect serving amount for two people to use as a side with a nice meal!

One blessing/curse of most bread recipes is that they can make a lot of bread. This can be problematic if a person has limited freezer space or simply doesn’t want leftovers.
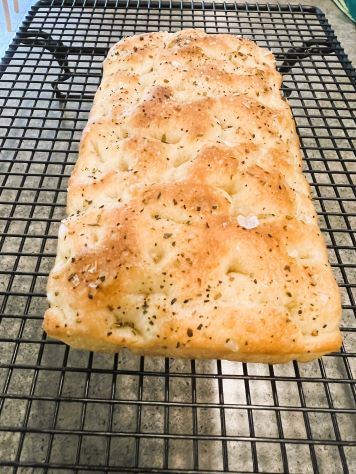
Let this recipe come to the rescue. It uses only about a cup of flour to create a small, thin loaf, the perfect size for, say, a yeast bread side for a date night or for one person to even use as a treat for a meal or two.
I completely rewrote this recipe from a poorly written, confusing one that I found online.
Bready or Not: Mini Focaccia for Two
Equipment
- food scale
- bench knife or spatula
- towel or plastic wrap
- loaf pan
Ingredients
- 120 grams all-purpose flour or bread flour
- 3 grams kosher salt
- 5 grams white sugar
- 90 grams warm water 90-110 degrees
- 3 grams active yeast
- 10 grams extra virgin olive oil plus about 2 Tablespoons for pan
- Italian seasoning or pizza seasoning
- flaked sea salt
Instructions
- In a medium bowl, stir together flour, salt, and sugar. Pour the warm water into the middle. Sprinkle yeast on top and wait a minute for it to begin to bloom. Add oil, then mix dough together.
- Use a bench knife or spatula to begin folding the dough over, turning the bowl to knead from different angles. Dough will be very sticky. Work it until it can form a small ball.
Cover dough with a towel or plastic wrap and let rise for 15 minutes.
- Using a damp hand or the bench knife, knead the bread, folding it over repeatedly until it begins to tighten.
Cover again to rest for 15 minutes.
- Knead again using the same method. It may still be somewhat sticky, but the dough's texture should be smooth.
- Add about 1 Tablespoon of olive oil to the loaf pan. Use fingertips to rub it across bottom and sides. Transfer the dough to the pan. Use already-oiled fingers to stretch it out toward the sides of the pan, but don’t expect it to make contact.
Cover pan and let dough rise.
- After about 30 minutes, oil fingers again and push and stretch dough with fingertips to reach the sides and corners of the pan. It's okay if fingertips touch the bottom or tear the dough; it'll rise again. Cover pan again to rise for another 30 minutes. Preheat oven to 400 degrees.
- Right before putting the focaccia in the oven, drizzle more oil over the top. If desired, add a sprinkling of herb seasoning and a sprinkle of flaked salt.
- Bake for about 20 minutes, until the top is a nice golden brown. Pull pan from oven. Carefully tip the bread out onto a cutting board and let cool for at least 15 minutes before slicing.
- Enjoy right away. Leftovers, if there are any, can be stored in a sealed bag and reheated later.
OM NOM NOM!
Bready or Not Original: Custard/Pudding Powder Chocolate Chip Cookies Redux
These Custard/Powder Chocolate Chip Cookie are made with a recipe I first featured back in 2015. It’s time to revisit it!
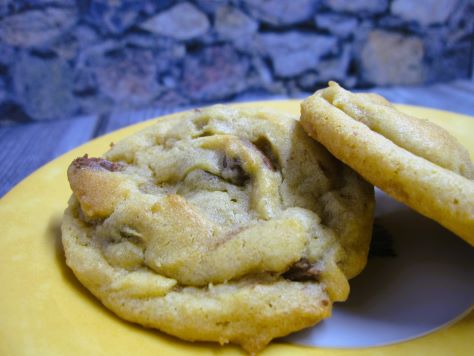
Custard powder isn’t common in the States. It’s very much a British/Canadian thing. Bird’s Custard Powder, in particular, is an important kitchen item. However, if you don’t have a canister of Bird’s available–or it’s prohibitively expensive–you can buy good ol’ instant vanilla pudding powder and use it instead.
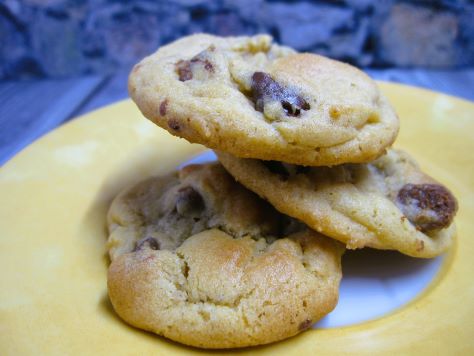
This recipe makes a huge batch of cookies–about 80, if using a small scoop. Therefore, I find this recipe is a good opportunity to divide the dough and freeze half for later.
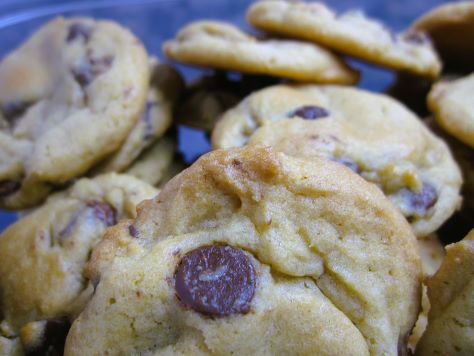
Whatever your pudding powder of choice, give these a try. Live deliciously.
Bready or Not Original: Custard/Pudding Powder Chocolate Chip Cookies Redux
Ingredients
- 1 cup unsalted butter (2 sticks) room temperature
- 1 cup white sugar
- 1 cup brown sugar packed
- 2 large eggs room temperature
- 2 teaspoons vanilla extract
- 3 cups all-purpose flour
- 6 Tablespoons custard powder or instant vanilla pudding powder
- 1 teaspoon baking soda
- 1 teaspoon salt
- 11 ounces chocolate chips 1 bag
Instructions
- Preheat oven to 350 degrees. Line baking sheet with parchment paper.
- In a large bowl, cream together the butter and both sugars. Mix in the eggs, one at a time, and the vanilla extract.
- In another bowl, stir together the flour, custard/pudding powder, baking soda, and salt. Slowly blend the dry ingredients with the butter mix. Add the chocolate chips.
- Use a large cookie scoop or spoon to place dough onto cookie sheet. Bake for 10 to 12 minutes. Let cool on sheet for 10 minutes before transferring to a rack to cool completely.
- Store in a sealed container at room temperature for up to 3 days.
OM NOM NOM!
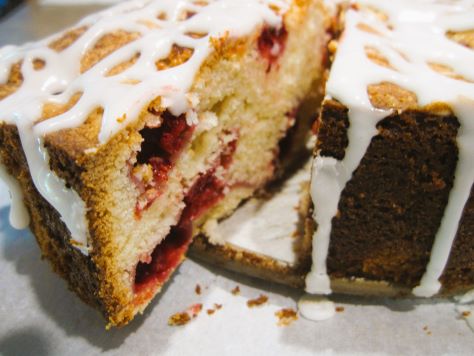
Bready or Not: Berry Butter Cake
Cake is good. This Berry Butter Cake, loaded with fruit, is very good.
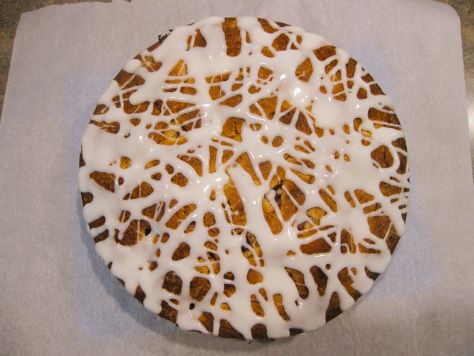
This cake features a tender, moist crumb that provides a delicious cushion for things like strawberries, raspberries, or blueberries. It’s not fancy.
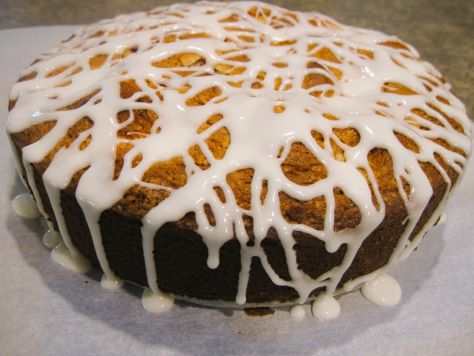
I modified this a lot from Bake from Scratch Magazine, adjusting some ingredients and other directions. The bake time was way too long, for starters. I was also perturbed that they call for vanilla extract in the glaze, but obviously used clear vanilla extract for their picture, because using regular extract muddies the glaze.
This cake is great to freeze and thaw later, even weeks later. It stores beautifully sealed up in the fridge or at room temperature.
Bready or Not: Berry Butter Cake
Equipment
- 9-inch springform pan
- parchment paper
- nonstick spray
Ingredients
Cake:
- 3/4 cup unsalted butter softened
- 1 cup white sugar
- 1/2 cup brown sugar packed
- 2 large eggs room temperature
- 2 teaspoons vanilla extract or vanilla bean paste
- 2 cups all-purpose flour
- 1 1/2 teaspoons baking powder
- 3/4 teaspoon kosher salt
- 1/4 teaspoon baking soda
- 3/4 cup buttermilk or soured milk, see note
Fruit:
- 1 3/4 cups fresh or frozen berries such as raspberries, strawberries, or blueberries (210 grams)
- 2 Tablespoons all-purpose flour
Vanilla Glaze:
- 3/4 cup confectioners' sugar plus more if needed
- 1 Tablespoon milk or half & half, plus more if needed
- 1/2 teaspoon clear vanilla extract
Instructions
- Preheat oven at 350-degrees. Prepare springform pan by cutting a piece of parchment paper to fit inside. Use nonstick spray on interior of pan, then place cut parchment inside and spray again.
- Beat together butter and both sugars until they are light and fluffy. Add eggs one at a time, followed by the vanilla.
- In a separate bowl, stir together flour, baking powder, salt, and baking soda. Gradually add the dry ingredients to the butter bowl alternatively with the buttermilk/soured milk. Scrape the bottom of the bowl a few times.
- In another bowl, stir the flour into the fruit to coat it. Reserving 1/4 cup of fruit, fold most of it into the batter. Spread batter into prepared pan. Sprinkle the reserved fruit over the top.
- Bake for 1 hour to 1 hour 10 minutes, until the cake looks golden brown and the middle passes the toothpick test. Let it cool in the pan for 20 minutes, then pop open the springform ring to remove it. Let cake cool completely on rack.
- Combine glaze ingredients in a bowl until they are smooth. Add more confectioners’ sugar or milk, if necessary, to achieve a thick but good consistency for drizzling. Immediately drizzle across the top of the cake. Let set at least 20 minutes before slicing in.
- Cake keeps well in sealed container at room temperature for up to 3 days. It can also be frozen in individual slices for weeks or kept in fridge.
OM NOM NOM!
Notes
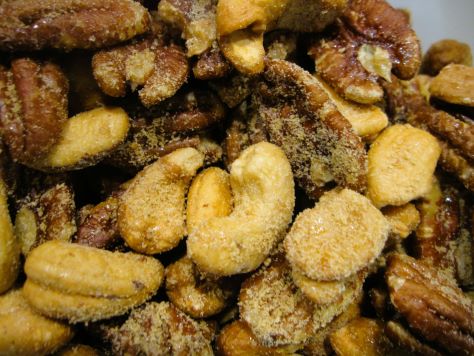
Bready or Not Original: Air Fryer Maple Roasted Nuts
Pardon me, have you heard that air fryers are awesome? Yeah, yeah, I won’t go for the hard sell, but I do love my air fryer, and it sure makes these Maple Roasted Nuts quick and convenient.
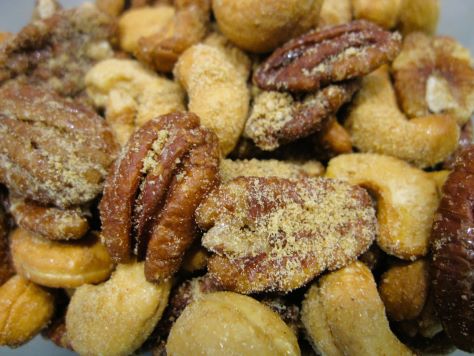
This is a good recipe if you want to prepare nuts for a sports game or any kind of gathering–or if, like me, you enjoy having some lightly-sweet nuts along with cheese.
If you’d like, substitute honey for the maple syrup. I imagine something like agave syrup might work, too, but I haven’t tried that. I know maple sugar can be expensive or hard to find offline, but fortunately brown sugar makes for a good substitute for that, too.
Bready or Not Original: Air Fryer Maple Roasted Nuts
Equipment
- air fryer
- parchment paper
Ingredients
- 1 cup whole pecans
- 1 cup whole cashews
- 1 Tablespoon butter melted
- 1 Tablespoon maple syrup
- 1/2 teaspoon salt
- 1 Tablespoon maple sugar or brown sugar
Instructions
- Line the air fryer tray with parchment paper cut to fit, then place tray on top.
- Place the nuts in a large bowl. Pour the butter over the top, followed by the maple syrup and salt. Stir the nuts to coat. Place them spread out on the mesh tray.
- Air fry at 325-degrees for about 5 to 6 minutes or until they begin to smell toasted, stirring one halfway through. They should look browned at the end.
- While they are cooking, pull out another small cookie sheet or plate, putting more parchment on it if desired; this will be a surface on which the nuts will cool.
- When the nuts are done, pull them from the air fryer and carefully transfer them to the fresh cookie sheet. Let them cool for about 10 minutes, then sprinkle maple sugar on top, stirring to coat. Enjoy immediately, or place in a sealed container at room temperature to eat over the next month.
OM NOM NOM!
Follow me


