


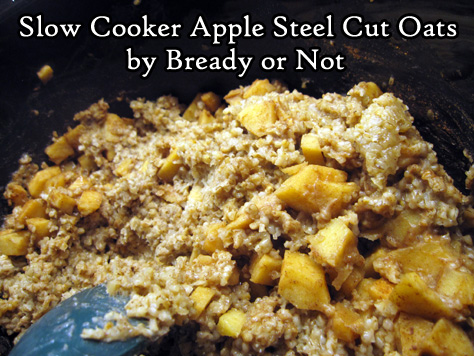
Bready or Not Original: Slow Cooker Apple Steel Cut Oats
These Slow Cooker Apple Steel Cut Oats are not the most photogenic of foods, but they are delicious, healthy, and good, and probably one of the most convenient meals in my cooking repertoire.
I’ve been cooking this recipe for over five years now, tweaking it here and there, making it better. What I present here is really a foundation. This recipe can be customized all kinds of ways–either when the food is being assembled, by adding in different spices or apples, or by tweaking it at serving time.
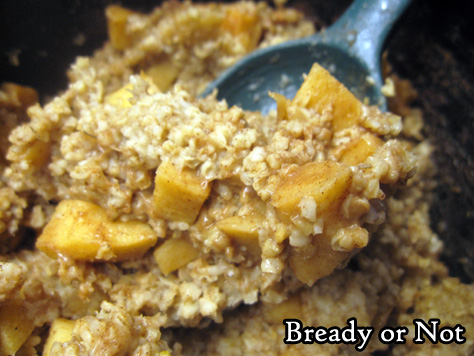
I love using Gala, Honeycrisp, or Pink Lady apples, but go for any good baking-type apple or a variety thereof. You don’t want the apples to go to mush. Or maybe you do? That might not be a terrible thing here.

I typically use unsweetened vanilla almond milk or cashew milk, but any plain or vanilla nut, soy, or oat milks would work, or you can opt for dairy milk.
This isn’t an overnight slow cooker oats recipe. I’ve tried that. Even on low and warm settings, the oats just plain overcooked for my preference. The consistency goes brick-like and the pot requires some intense scraping if you don’t use a removable liner. I prefer to make this during the day, and then portion out the oats to go in the fridge and freezer. They reheat beautifully.
Bready or Not Original: Slow Cooker Apple Steel Cut Oats
Equipment
- large slow cooker
Ingredients
- 2 cups steel cut oats no substitutes
- 2 cups nut milk or oat milk, regular or vanilla, sweetened or unsweetened
- 2 cups water
- 2 medium apples peeled and chopped
- 1/4 cup brown sugar packed
- 1/4 cup pure maple syrup
- 2 teaspoons ground cinnamon
- 1/4 teaspoon sea salt
- 2 teaspoons vanilla extract
Instructions
- Place all ingredients in slow cooker and stir to distribute. Place lid on pot and put heat level to LOW. Cook for 3 hours before lifting lid again. Stir and taste to test doneness. Continue to cook for 30 minutes to an hour more, dependent on the desired texture for the oats. The longer it cooks, the thicker it will be.
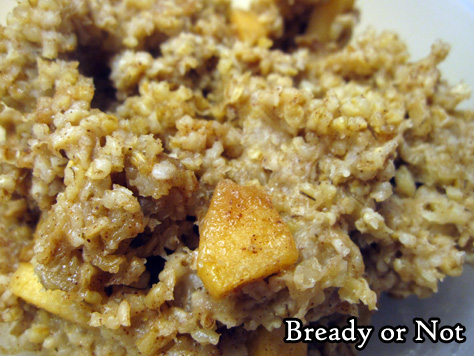
- Serve oats fresh, or stash in fridge to reheat in microwave over the next week. These oats are great to portion out and freeze for later. If desired, add more spices, fresh fruit, or extra milk when serving–the customization possibilities are endless!
*OM NOM NOM!*
Bready or Not Original: Hard Maple Candy
This Hard Maple Candy garnered the name “Canadian meth” at my husband’s work. By that nickname, I take it that they 1) liked it, and 2) kept eating it.
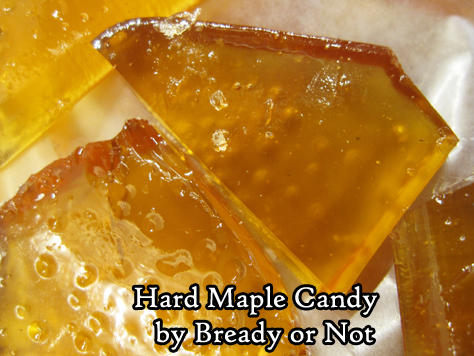
On a more personal note, this candy could also work as a shiv, because this stuff is like GLASS. Trust me when I say that if you decide to break this into pieces with your hands, you will get little cuts all over. Ow.
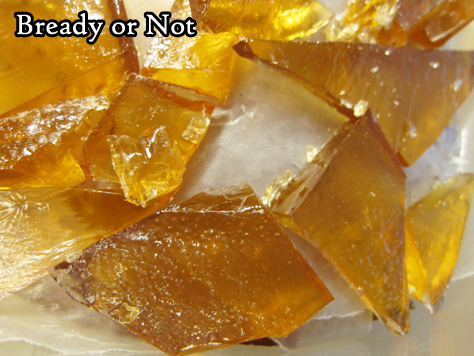
So maybe tap the candy gently with the butt of a butter knife or use a little mallet, whatever you have that will break the candy apart without harming your pan, counter, or you.
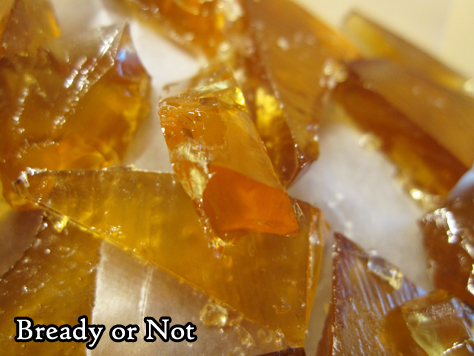
Once you survive that stage, though, wow will you have a lot of candy to enjoy. Definitely make this to share with a crowd, or you just might go into diabetic shock.

It’d be a delicious way to go, but seriously, I don’t recommend going at all. We’ve made it this far in 2020. Hold on a while longer.
Bready or Not Original: Hard Maple Candy
Equipment
- 15x10x1-inch pan (jelly roll pan)
- candy thermometer
Ingredients
- nonstick spray
- 3 1/2 cup white sugar
- 1 cup light corn syrup
- 1 cup water
- 3 Tablespoons maple flavor
Instructions
- Heavily apply nonstick spray to the jelly roll pan.
- In a large saucepan, stir together the sugar, corn syrup, and water. Start heating up. Set up candy thermometer and stir frequently as the heat rises to 300-degrees, which is hard-crack stage.
- Remove pan from heat. Stir in maple flavoring. Immediately pour candy into the prepared pan. Cool completely, which won’t take long.
- Carefully break into pieces. Note that this stuff is like candy glass, and if breaking with hands, it can and will cut the skin.
- Pack into individual bags or tins for gift-giving, or stack it in a large sealed container with waxed paper between layers. Can keep for weeks.
OM NOM NOM!
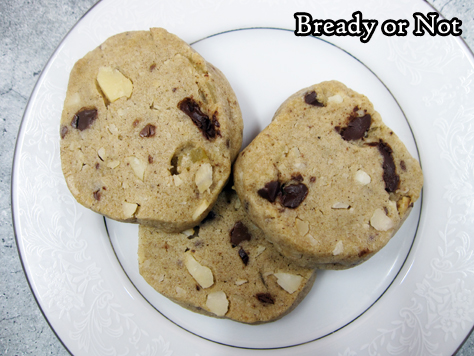
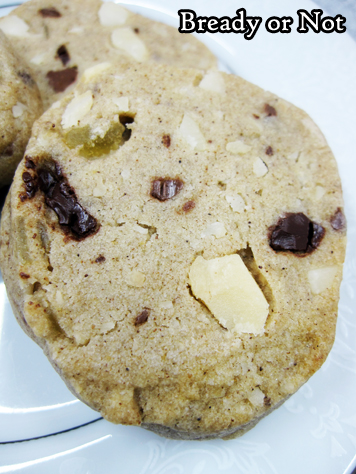
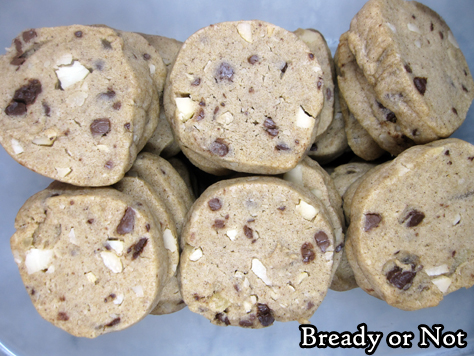
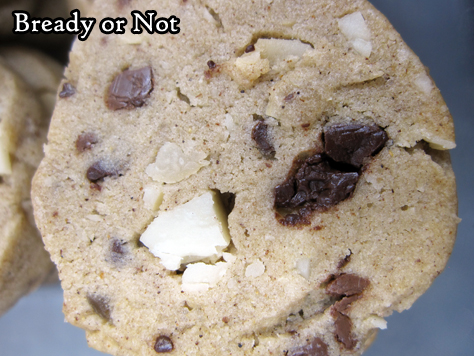
Bready or Not Original: Spiced Maple Macadamia Nut Cookies
These Spiced Maple Macadamia Nut Cookies mix maple sweetness and warm spices and chocolate with the wonderful crunch of macadamias. They are perfect for fall–and throughout the year.
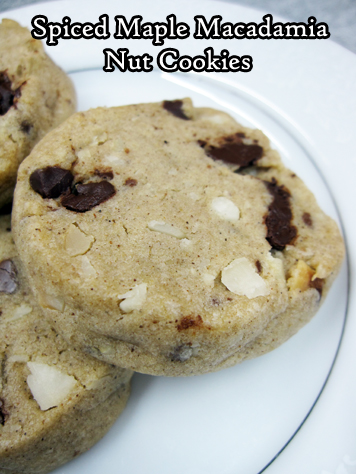
A food processor will be a big help in this recipe. The nuts and chocolate need to be in fine slivers. If the chunks are too big, the sliced cookies won’t be cohesive.
These are fridge cookies. Form the dough into tube shapes, wrap up well, then stash them in the fridge or freezer. Then thaw, slice, and bake when you need cookies.
If you do the full batch at once, you’ll likely get a lot of cookies, depending on your tube size and how you slice them. I got about 70 cookies.
These are perfect cookies to warm up your belly on a cool autumn or winter night (or in Arizona, to make-believe in such a temperature shift).
Bready or Not Original: Spiced Maple Macadamia Nut Cookies
Equipment
- food processor
Ingredients
- 1 1/2 cups unsalted butter 3 sticks, room temperature
- 1/2 cup white sugar
- 3/4 cup real maple syrup
- 4 cups all-purpose flour
- 3 teaspoons ground ginger
- 3 teaspoons ground cinnamon
- 1 teaspoon allspice
- 1/2 teaspoon ground cloves
- 1 teaspoon salt
- 1 1/2 teaspoons baking soda
- 1 cup macadamia nuts
- 3/4 cup chocolate chips semisweet or dark or mixture
- 1/3 cup candied ginger finely chopped
Instructions
- In a food processor or by knife, finely chop macadamia nuts, followed by the chocolate chips. Set aside. (If these are not in fine pieces, the dough will fall apart when sliced.)
- In a large bowl, cream together butter and sugar until light and fluffy. Beat in maple syrup.
- In a separate bowl, stir together the flour, spices, salt, and baking soda. Gradually work this into the creamed mixture. Fold in the nuts, chocolate, and candied ginger until incorporated.
- Divide dough in half and shape into foot-long logs. Encase in plastic wrap. Chill at least two hours, or freeze for later baking.
- Preheat oven at 350-degrees. Unwrap log and cut dough into 1/4-inch thick medallions, reshaping with fingers as needed. Place spaced out on parchment-covered cookie sheet.
- Bake for 10 to 12 minutes, until set with a firm, golden base. Cool on pan for 5 minutes then move to rack to completely cool.
- Cookies keep for at least 3 days in sealed containers at room temperature.
OM NOM NOM!
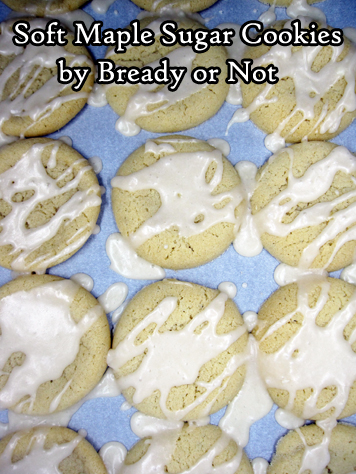
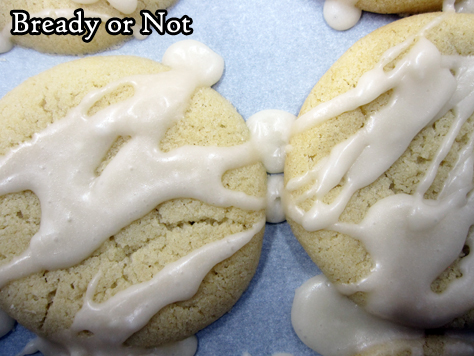
Bready or Not Original: Soft Maple Sugar Cookies
Soft Maple Sugar Cookies! That’s right, this recipe combines two of the best things ever for an original treat.
It has been way too long since I offered up a maple-flavored treat. These are so good, they make up for that lapse in a major way.
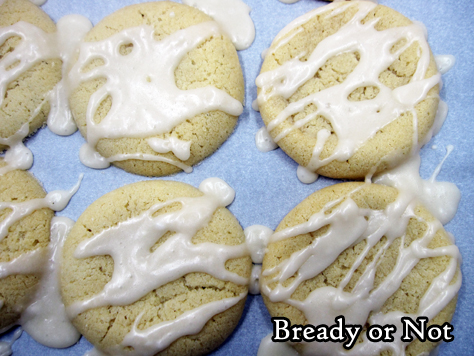
These are soft, chewy cookies. Maple flavor is built into the dough, and the drizzle of glaze adds a touch more.
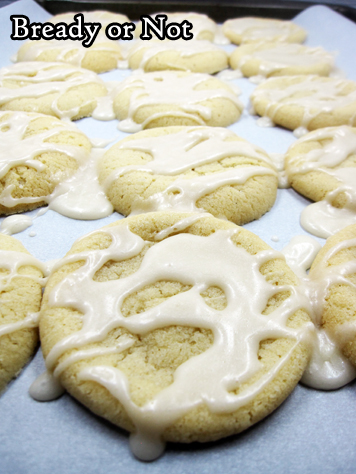
I wish I could say how long these cookies will keep, but I don’t know. They stayed delicious for at least one full day, then they went to my husband’s work and were goooooooone.
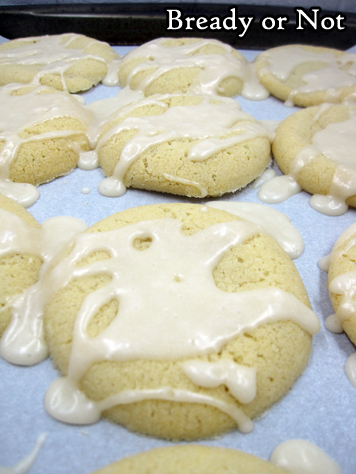
You’ll have to bake them yourself and see how long they last!
Bready or Not Original: Soft Maple Sugar Cookies
Equipment
- teaspoon scoop
- parchment paper
Ingredients
Dough
- 1/2 cup unsalted butter softened 1 stick
- 1/2 cup shortening
- 1 1/2 cups white sugar
- 1/4 cup brown sugar packed
- 1/4 cup pure maple syrup
- 1 teaspoon baking soda
- 1 teaspoon cream of tartar
- 1/8 teaspoon salt
- 3 egg yolks
- 1 teaspoon vanilla extract
- 1 teaspoon maple flavor
- 1 3/4 cups all-purpose flour
Glaze
- 1/4 cup unsalted butter half stick
- 2 cups confectioners' sugar plus more is needed for thickness
- 1/4 cup half & half or milk
- 3 Tablespoons maple syrup
Instructions
- Preheat oven at 300-degrees. In a large bowl, beat together butter and shortening. Add both sugars, maple syrup, baking soda, cream of tartar, and salt. Beat for about 2 minutes, scraping bottle of bowl often. Add egg yolks one at a time, followed by vanilla extract and maple flavor. Mix in flour until just combined.
- Use a scoop or spoon to dollop dough onto a parchment paper-lined cookie sheet, spacing out to account for spread. Bake for 11 to 16 minutes. Let set on cookie sheet for 10 minutes, then transfer to a rack to completely cool.
- Once all cookies are baked and cooled, move them back to the parchment-covered pan, close together, before mixing glaze.
- In a small bowl, melt butter in microwave. Add the confectioners' sugar to bowl, followed by half & half and maple syrup. Stir. Add more sugar, if needed, to form a thick consistency. Drizzle all over cookies. Let set for 30 minutes to 1 hour before moving to sealed containers.
OM NOM NOM!
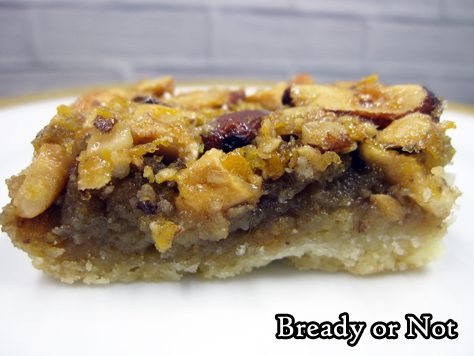
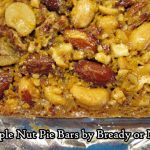
Bready or Not: Maple Nut Pie Bars
Bready or Not returns to the theme of maple goodness with these delicious Maple Nut Pie Bars.
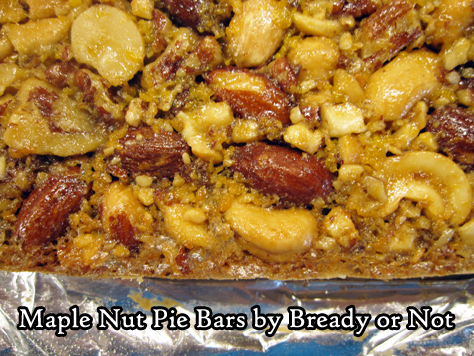
These are like pecan pie, but BETTER because they are portable and easily shared. And really, I love the variety of nuts.
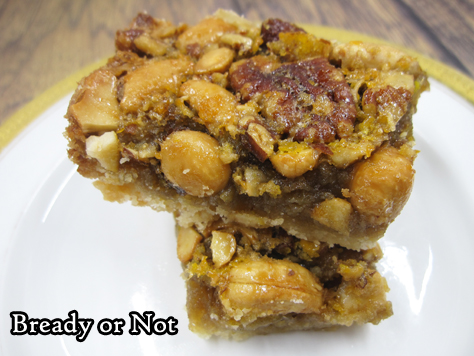
That ‘easily shared’ bit is important, as this recipe bakes up an entire 13×9-inch dish of goodness. That’s quite a bounty to keep to oneself.
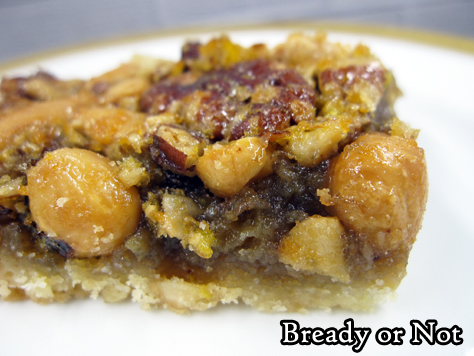
Each bar is exquisite, too: a shortbread base covered with sweetened mixed nuts. The variety of tastes and textures is perfection.
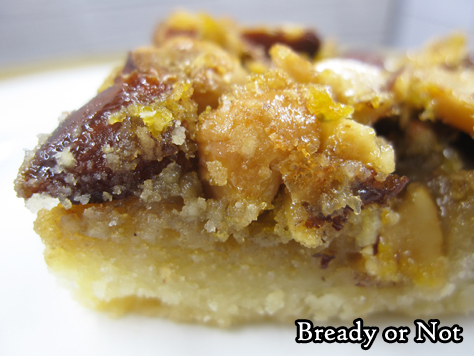
Store these in the fridge when all is done, and note that you can also freeze them for later. Make the goodness last even longer!
Modified from Brownies & Bars Magazine.
Bready or Not: Maple Nut Pie Bars
Ingredients
- 1 1/2 cups all-purpose flour
- 2/3 cup confectioners' sugar
- 1/4 teaspoon salt
- 2/3 cup unsalted butter room temperature
- 3 eggs room temperature
- 1 1/4 cups mixed nuts chopped
- 3/4 cup brown sugar packed
- 3/4 cup pure maple syrup
- 3 Tablespoons unsalted butter melted
- 1/2 teaspoon maple flavor or substitute 1 teaspoon vanilla extract
Instructions
- Preheat oven at 350-degrees. Line a 13x9 pan with foil and grease with nonstick spray or butter. Set aside.
- In a medium bowl, stir together the flour, powdered sugar, and salt. Use a pastry blender or a knife and fork to cut in the butter until it resembles small crumbs. Evenly press into the bottom of the pan. Bake for about 20 minutes, until light brown.
- As that bakes, make the filling. In a medium bowl, lightly stir the eggs. Add the mixed nuts, brown sugar, maple syrup, melted butter, and maple flavoring. Spread over the hot crust.
- Bake for another 18 to 20 minutes, until top is golden and set. Cool in pan for several hours. Lift contents onto a cutting board using the foil and slice into bars.
- Store with waxed paper between layers in a sealed container in fridge. Bars can also be frozen for later enjoyment.
- OM NOM NOM!
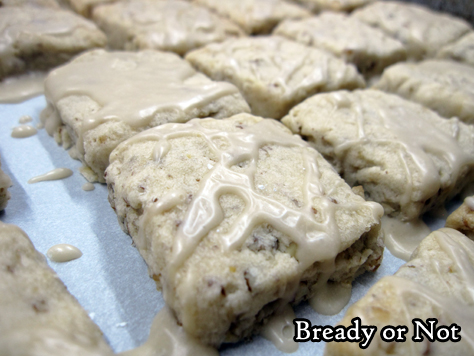
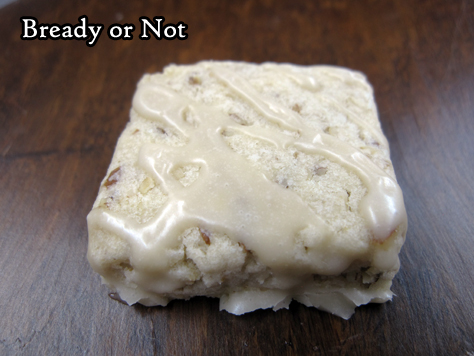
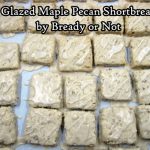
Bready or Not Original: Glazed Maple Pecan Shortbread Cookies
We made it three weeks into 2019 before we hit a maple recipe. Glazed Maple Pecan Shortbread Cookies, to be exact.
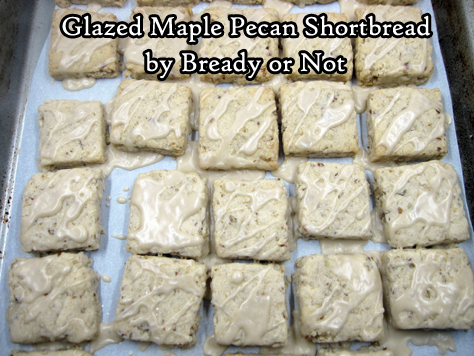
This is a recipe that involved heavy experimentation for me. The base recipe made maple logs, which were then dipped in chocolate. I found the log-making process awkward. I didn’t want milk chocolate paired with maple, either.
Therefore, I tweaked and twisted things around, and the end result was a cookie that reminds me a lot of Pecan Sandies from the grocery store, just with a necessary oomph of maple.
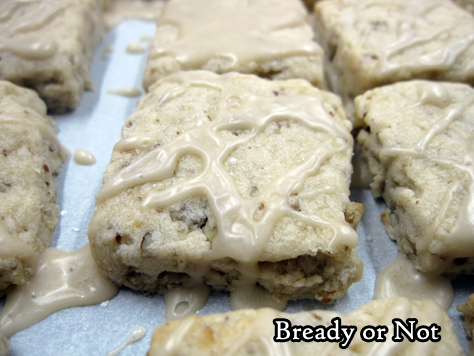
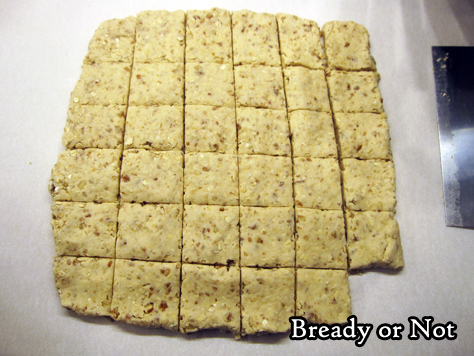
Instead of making the cookies into logs, I press them flat and used by bench knife to slice them into squares. A drizzle of maple glaze added just the right touch of sweetness after baking.
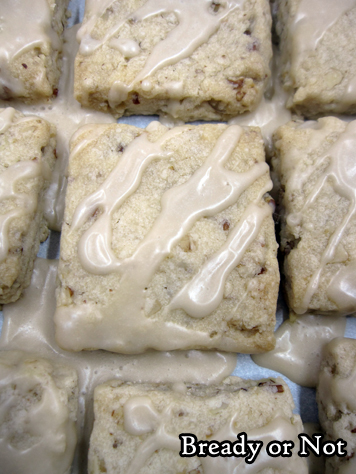
These are ideal cookies to go along with coffee or tea. They are a little dry and crumbly, but easy to eat in a bite or two.
Plus, you can omit the pecans if necessary! You’ll get fewer cookies, but the texture and maple goodness are still downright scrummy.
Bready or Not Original: Glazed Maple Pecan Shortbread Cookies
Ingredients
Cookies:
- 1/2 cup unsalted butter softened
- 1/2 cup shortening
- 1/2 cup confectioners' sugar
- 1 teaspoon vanilla extract
- 1 teaspoon maple flavor
- 1 1/2 cups all-purpose flour
- 1 cup quick oats
- 1/2 cup pecans finely chopped
- 1/2 teaspoon salt
Glaze:
- 1/2 cup confectioners' sugar
- 1 Tablespoon + milk or half & half
- 1 teaspoon maple flavor
Instructions
- Preheat oven at 325-degrees. In a large bowl, cream together the butter, shortening, and confectioners' sugar. Beat in the vanilla and maple flavor.
- In another bowl, sift together the flour, oats, pecans bits, and salt. Gradually combine with the wet mixture until it forms a cohesive mix.
- Clean off a space of counter or tear off a large piece of parchment paper. Dump the cookie dough out and form it a roughly 8x8 square. Use a bench knife or a pizza cutter to slice into squares about an inch in diameter.
- Transfer cookies to a parchment-lined cookie sheet. Add a little space between cookies, but they won't spread much.
- Bake for 14-17 minutes, until cookies are set and lightly browned. Transfer to a rack to cool.
- Once all the cookies are baked and at room temperature, set out another piece of parchment paper. Place the cookies there, close together.
- In a small bowl, mix together glaze ingredients, adding enough milk to create a dribbling consistency. Use a fork to dribble glaze or the back of a spoon to coat each one. Leave out for an hour or so to set, then seal in container at room temperature.
- OM NOM NOM!
Follow me


