


Bready or Not: No-Bake Maple Pecan Pie
I am never baking a pecan pie again. This will be my go-to recipe forever more: No-Bake Maple Pecan Pie.
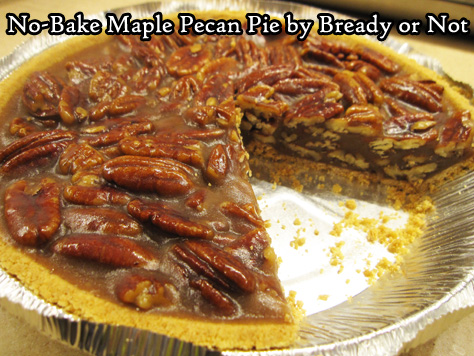
Depending on how fast your stovetop heats up, you may have your pie assembled in 15 to 20 minutes without ever having to heat up the oven.
No worries about making a crust or pre-baking a crust or any of that. Every time I’ve made this, I’ve used a graham cracker crust from Wal-mart. You could make a from-scratch graham crust if you want, but I’m all about making this pie as quickly and conveniently as possible.
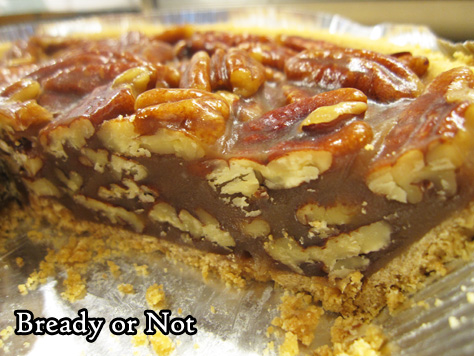
The way the filling solidifies once chilled is kind of amazing. It’s easy to cut but stays intact, with the exception of some graham cracker crumbles. My husband was able to cut slices and wrap them in plastic wrap to take with his lunch to work, then eat the pieces right out of hand. No need for a fork.
This is the perfect holiday pie, to my way of thinking. It dirties almost no dishes. It doesn’t use the oven. It keeps perfectly well, tucked in the fridge.
Oh yeah, and it’s DELICIOUS. Sweet, slightly-crunchy, and decadent, just as a pecan pie should be.

Modified from Southern Plate.

Bready or Not: No-Bake Maple Pecan Pie
Ingredients
- 3/4 cup brown sugar light or dark, packed
- 3/4 cup unsalted butter 1 1/2 sticks
- 1/4 cup pure maple syrup
- 1/4 cup honey
- 3 Tablespoons milk or cream or half & half
- 1 teaspoon vanilla extract
- 2 1/2 cups whole pecans
- 1 graham cracker crust homemade or store-bought
Instructions
- Place the brown sugar, butter, maple syrup, and honey in a medium-sized pot. Set the heat to medium high and stir constantly as it comes to a boil.
- Once it's boiling, add the pecans and milk/cream. Reduce to a low boil and keep it there for 10 to 12 minutes, stirring often. Remove from heat and add vanilla extract.
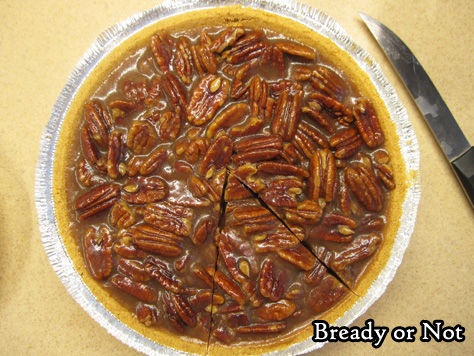
- Pour everything into the graham cracker crust. Let cool on counter to set. Cover and place in fridge to completely chill for several hours before cutting.
- Keep pie stored in fridge. Pie keeps well for at least a week.
- OM NOM NOM!
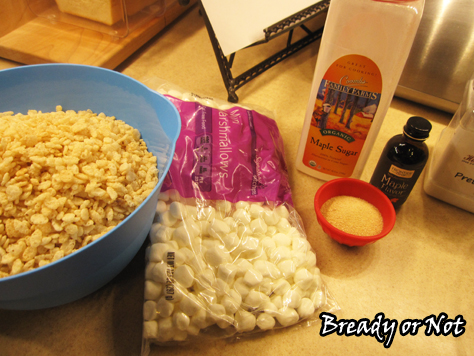
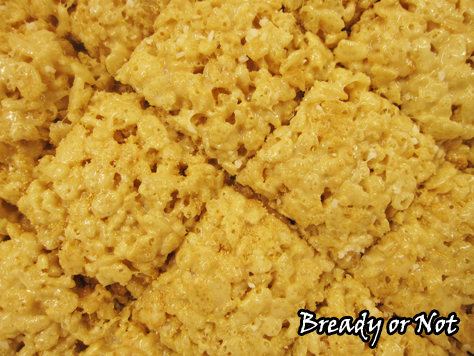
Bready or Not: Maple Krispy Treats
Regular Bready or Not readers know that I espouse that everything is better with maple. Case in point: Rice Krispy Treats, now with maple.
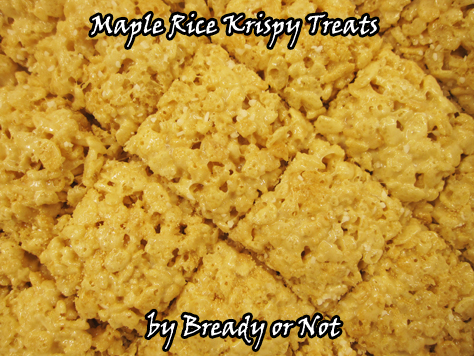
I had to make this several times to get the right flavor and balance. An onerous task, I assure you. In the end, I created an original recipe that’s perfect for maple lovers.
This recipe can be made in the microwave or on the stovetop. Just make sure you’re using a large bowl or pot, as you need room to stir in a lot of cereal, and take care when heating. Burned marshmallows are a bad, bad thing.
If you do this in the microwave, which is my preference, you will have ready to eat treats in under 30 minutes.
Even more importantly–for people in hot environs like me–you won’t heat up the house when it’s already a zillion degrees outside. That makes this the perfect summer recipe.
Did someone scoff at that because of the maple flavor? Pfft. Maple flavor knows no season. If it’s tasty and you like it, make it, no matter what the calendar says.

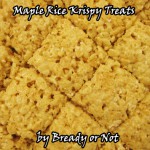
A Bready or Not Original: Maple Krispy Treats
Ingredients
- 6 tablespoons unsalted butter
- 2 Tablespoons maple sugar or use brown sugar and more maple flavor
- 2 teaspoons maple flavor
- 10 ounces miniature marshmallows 1 bag
- 1/4 teaspoon kosher salt
- 6 cups Rice Krispies or similar puffed rice cereal
- sprinkle maple sugar optional, or kosher or pretzel salt for the top
Instructions
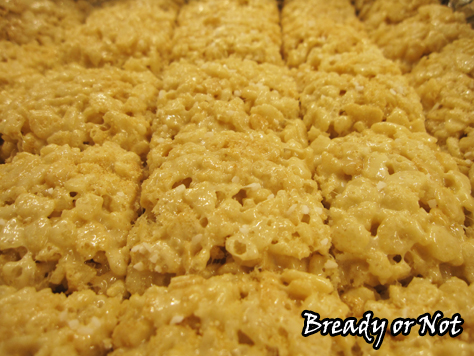
- Line an 8-inch square pan with aluminum foil then coat the surface with butter or non-stick spray. Stage the maple sugar, maple flavor, and marshmallows so they are ready to add quickly.
- These treats can be made in the microwave or on the stovetop. Either method: on low, gradual heat, melt the butter in a large bowl.
- Once the butter is melted, remove from heat and stir in the maple sugar and maple flavor. Add marshmallows and stir. This will just barely start to soften the mix, so continue to heat gradually until the marshmallows become smooth goop; in the microwave, use 20 second zaps and stir well between each pass. Stir until no white streaks remain. Remove from heat again, if needed.
- Add the cereal and 1/4 teaspoon salt. Mix until everything is coated, then pour into the prepared pan. Quickly spread it to the corners and evenly press it down with a rubber spatula. (If the goop sticks to the spatula too much, quickly use nonstick spray on it or rub it with butter.)
- When the cereal mix is even, sprinkle coarse salt and maple sugar on the top, if desired.
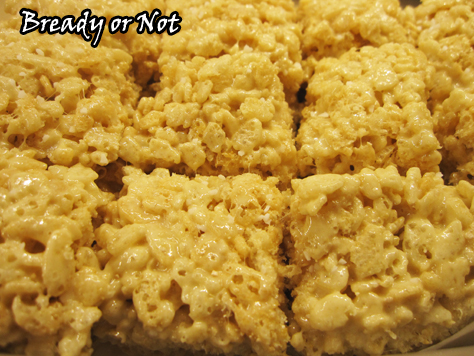
- Let the pan cool for at least 15 minutes. Slice into bars while everything is still in the pan, then use the foil to lift them all out at once. Store for up to two days in a sealed container, with waxed paper between layers to prevent sticking.
- OM NOM NOM!
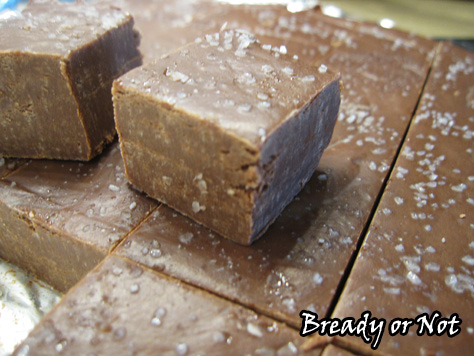
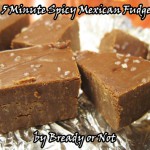
Bready or Not: Five-Minute Spicy Mexican Fudge
I am here today to preach about fudge inclusiveness as I share a recipe for Five Minute Spicy Mexican Fudge.
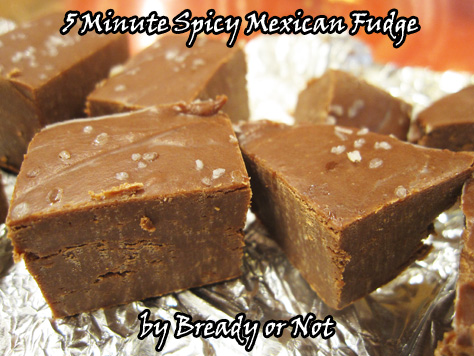
I do not sneer at some fudges as being “better” or “real.” To me, it does not matter if the fudge is produced on stove top with a candy thermometer, or with a jar of marshmallow cream, or melted in the microwave.
When it comes to fudge, what matters is this:
Does the fudge taste good? Is the texture pleasing to the palate? Does it make me mutter, “Calories be darned to heck,” and reach for another piece?
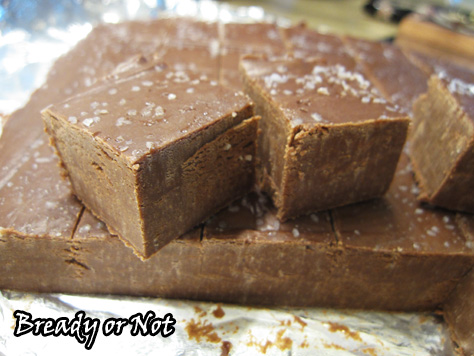
That is the criteria by which fudge should be judged.
That said, I present to you a fudge that is zapped in the microwave and assembled all of five minutes. Let it set in the fridge for a few hours, and ta-da! You have a fudge that will keep well for days. It also holds up well at room temperature if you’re serving it at a party.
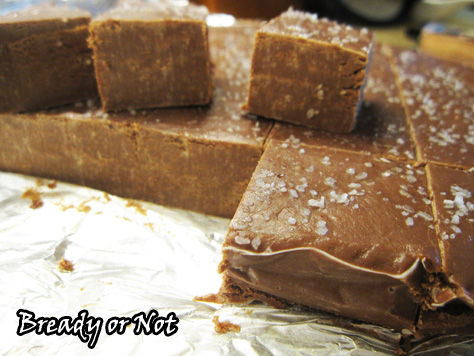
The Mexican spice element comes from cinnamon and cayenne pepper. I used the minimal amount of pepper, 1/8 teaspoon, which provides complexity but absolutely no discernible heat. Tweak the scorch level to your personal taste. Do, however, sprinkle coarse salt to add some lovely contrast.
Originally featured at the Holy Taco Church. Recipe adapted from Wine and Glue.
Bready or Not: Five-Minute Spicy Mexican Fudge
Ingredients
- 3 cups milk chocolate chips about a bag and a half
- 14 ounce sweetened condensed milk can
- 1 tsp vanilla extract
- 1 tsp cinnamon Mexican cinnamon preferred
- 1/8 - 3/4 tsp cayenne pepper
- kosher salt or coarse sea salt
Instructions
- Line an 8 or 9-inch square pan with aluminum foil or parchment paper. Lightly grease it.
- Use a microwave or sauce pan to melt together the chocolate and sweetened condensed milk. If you're using the microwave, use short bursts of 20-30 seconds and stir well between each.
- Once the chocolate mix is smooth, pour in the vanilla extract, cinnamon, and cayenne pepper. (Note that 1/8 teaspoon provides a little flavor, not much heat, so add cayenne and taste to adjust to desired heat level.)
- Immediately pour the fudge into the prepared pan. Smooth out to edges and sprinkle salt all over the top. Let set in fridge at least four hours before cutting. Keeps in covered dish in fridge for upwards of a week.
- OM NOM NOM!

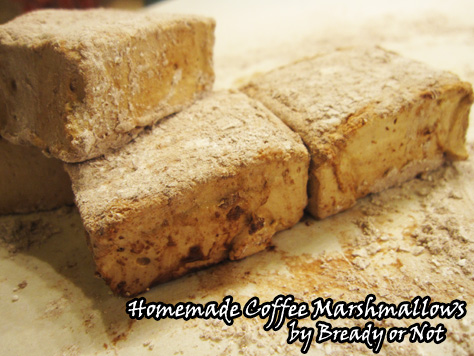
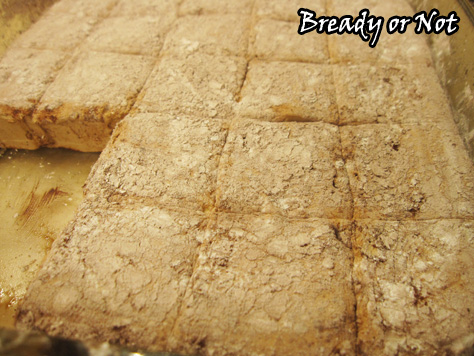
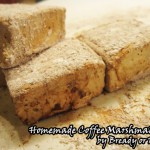
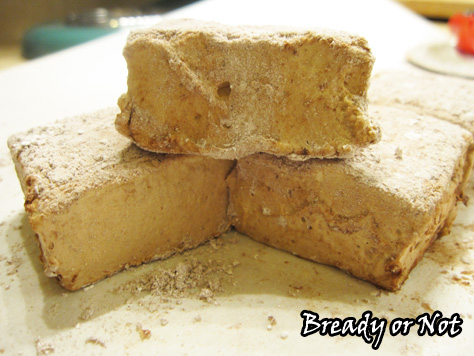
Bready or Not: Coffee Marshmallows
Let’s end the year on an obnoxiously sweet note with homemade Coffee Marshmallows. If you want to send someone a late gift or sabotage a New Year’s resolution, here you go.
This recipe involves lots of beating. No, not with a stick. You’ll want a good stand mixer, or be ready for your hand to vibrate to numbness if you use a hand mixer. I don’t recommend doing this with a whisk in hand. Your hand might fall off.
Not recommended, unless your last name is Skywalker and you have access to cool prostheses.
Once I started the recipe, I had the bulk of it done in about an hour. My stove is reeeeaaally slow to heat up. I did the mixing in my valiant Kitchen Aid.
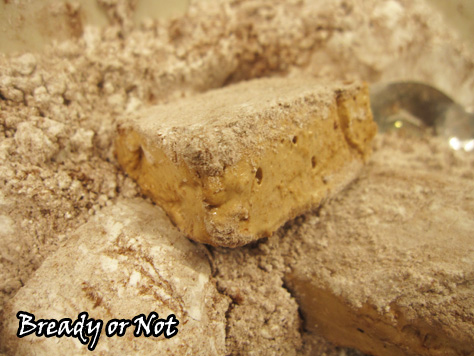
The results were fantastic: soft yet dense blocks of sugary goodness, coated in more sugary goodness.
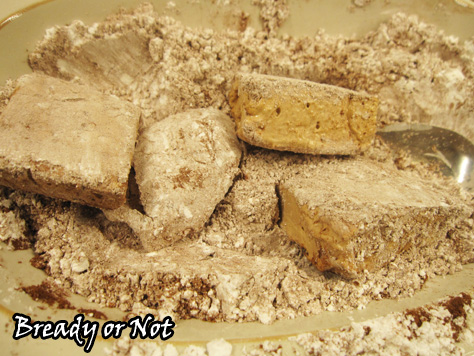
This makes a 9×13 pan. That’s a lot of mallows. They’re supposed to stay fresh up to a week if they are well-sealed. Bag these things up! Eat them by themselves, or plunked in coffee or hot chocolate.
Originally posted at the Holy Taco Church.
Bready or Not: Coffee Marshmallows
Ingredients
Powder coating
- 1/4 cup confectioners' sugar
- 1/4 cup corn starch
- 1 tablespoon Dutch-processed cocoa powder sifted
Marshmallows
- 3/4 cup warm water divided
- 1 Tablespoon espresso powder
- 3 envelopes Knox gelatin
- 1 1/2 cups white sugar
- 1 cup light corn syrup
- 1/2 teaspoon salt
Later mixing stage additions
- 2 Tablespoons Dutch-processed cocoa powder sifted
- 2 teaspoons vanilla extract
- Pam or oil for pan
Instructions
- Whisk together 1/2 cup warm water and the instant espresso. Let this cool in the fridge for a bit.
- In a medium bowl, sift together the powdered sugar, corn starch and cocoa powder.
- Grease a large casserole dish (like 9x13 or 10x8) with Pam or vegetable oil. Sift a small bit of the powdered sugar/cocoa mix over the bottom of the pan.
- Pour the cooled coffee into the large bowl you will use for the mixing phase. Sprinkle the gelatin onto the coffee and let it sit for at least 10 minutes. Have a whisk attachment ready on your mixer.
- In a medium sauce pan with an attached candy thermometer, combine the granulated sugar, corn syrup, salt and remaining 1/4 cup of water. Start heating this on medium until the sugar is dissolved and then crank it to high heat. Bring the mixture to a hard boil and cook for 1 minute, until the candy thermometer reaches 240 degrees. The color will start to change.
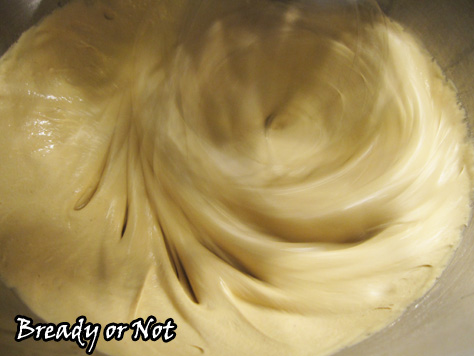
- With the mixer on low, VERY CAREFULLY pour the boiling liquid into the gelatin/coffee mix. Once it's all in there, turn it to high and beat for 10-15 minutes, until it has doubled in volume and holds stiff peaks. Note that the color will change dramatically in stages.
- Add in the remaining cocoa powder and vanilla extract and beat for another minute or so, until they are mixed in.
- Pour the very sticky goop into the ready casserole dish. Use a well-greased spatula to even it out. Add a few tablespoons of the cocoa/sugar mix and use your fingers to dust that over the top. Cover the dish with foil or plastic wrap and let it firm up. Give it at least four hours, or overnight.
- Run a knife along the edges of the pan to loosen the marshmallows. You can try inverting the whole block onto a large cutting board, or use a knife or pizza cutter to do basic rectangles and then remove portions at a time. Cut the marshmallows into 1-inch cubes and toss them in the cocoa/sugar mix.
- Store the coffee marshmallows in an airtight container for up to one week. Enjoy them straight-up, or in coffee or hot cocoa.
- OM NOM NOM!
Read More
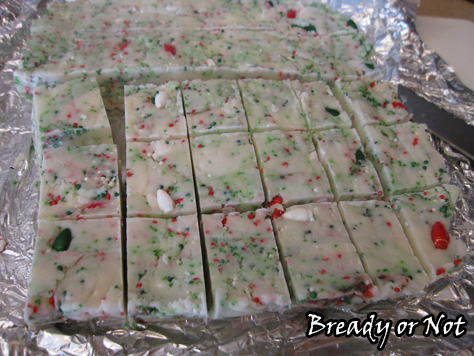
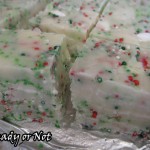
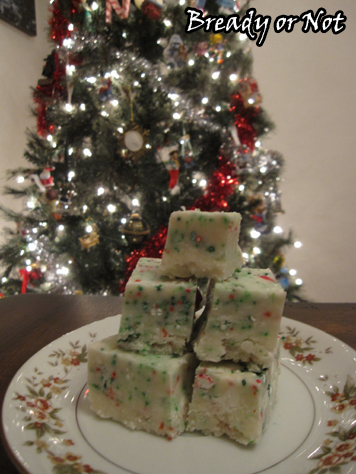
Giftmas Bready or Not: Cake Batter White Chocolate Fudge (Microwave)

I’m offering a holiday-favorite Bready or Not recipe again to help kick off Rhonda Parrish’s Giftmas Blog Tour. Rhonda lives up in Edmonton, Alberta, and she’s hoping to raise funds for the Edmonton Food Bank. I’m all about helping to feed people! Please donate if you can. Note that funds are listed in Canadian dollars.
Rhonda is also doing a giveaway as part of the tour. She’s making a crocheted throw. The winner gets to choose the color, and she is shipping it anywhere in the world!
Wander around to other stops on the tour over the next week. I’ll post another favorite recipe at Eileen Bell’s site on the 10th!

This is a sweet cause, so here’s a recipe to make something especially sweet: microwave fudge that uses cake mix!
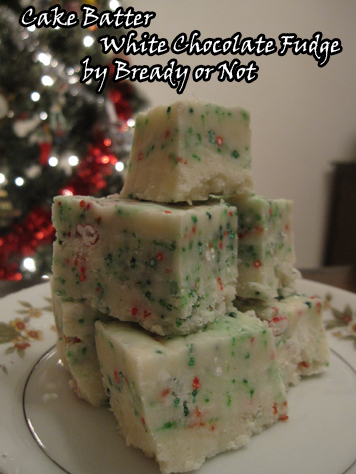
Eating this fudge is like licking the paddle after mixing up cake mix batter. If you prefer savory over sweet, this recipe isn’t for you. This is for the people who love fudge and frosting and all things sweet.
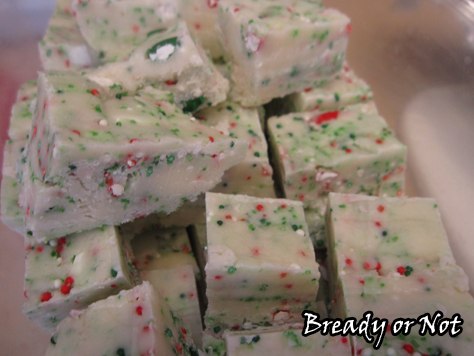
I didn’t limit myself to sprinkles in this. I had some Christmas candies, the type for topping cupcakes and such, that had been sealed away for a year. It had been a great post-holiday clearance buy. I wanted the containers GONE, so I pretty much dumped the contents into this fudge. That’s why you see little light bulb shaped candies in there.
This is obviously a great Christmas recipe, but it’s an easy one to customize year round depending on the colors you mix in. Make fudge to support your favorite sport team, or pink and red for Valentine’s Day, or pastels for spring. Cake mix goes on sale all year round, too, making this a pretty cheap recipe to throw together.
Whatever you add in, I’m sure it will be pretty. And delicious. So very, very delicious.
Modified from Sally’s Baking Addiction.
Bready or Not: Cake Batter White Chocolate Fudge (Microwave)
Ingredients
- 2 cups + 2 Tbsp white or yellow cake mix any brand, sifted
- 2 cups confectioners' sugar sifted
- 1/2 cup salted butter cut into chunks (or use unsalted and add a pinch of salt)
- 1/4 cup milk almond milk works
- 2/3 cup white chocolate chips
- 1/2 cup rainbow sprinkles/non pareils/jimmies
Instructions
- Line an 8×8 baking pan with aluminum foil or parchment and spray with nonstick spray. Set aside. Measure the white chocolate chips and the sprinkles in separate dishes so they are ready to add quickly.
- Mix sifted cake mix and powdered sugar in a large bowl. Add milk and butter, without stirring, and microwave for 2 minutes.
- Promptly mix ingredients until the butter is fully melted and incorporated. The batter will be very thick. Fold in white chocolate. Add the sprinkles last and stir gently so they don't leak too much color.
- Scoop into prepared baking pan. Level it across the top. Chill the fudge in the refrigerator for at least 2 hours before cutting into small blocks.
- Fudge will keep upwards of a week in the fridge, if it lasts that long.
OM NOM NOM
Read More
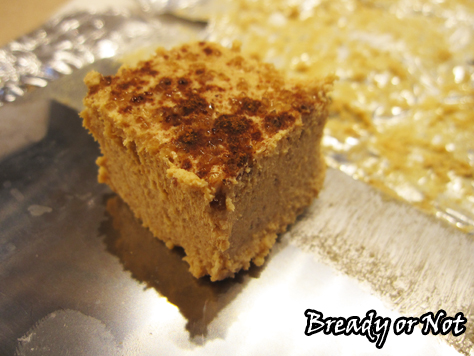
Bready or Not: Quick Cookie Butter Pumpkin Fudge
Is frosting your favorite part of cake? Well, do I have a fudge recipe for you!
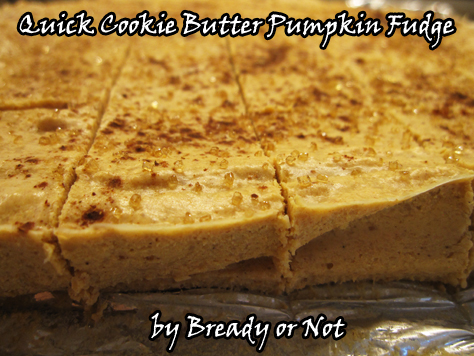
This easy microwave fudge tastes like pumpkin spice frosting. It’s that rich. That delicious. This makes a big batch, so cut the pieces small and share with a crowd!

The original version of this recipe used peanut butter. Well, you know me. Why go with cliché peanut butter when you can use creamy COOKIE BUTTER? Use Biscoff, Speculoose, or any of the new off-brand versions–heck, my local Sprouts even has their own cookie butter now!
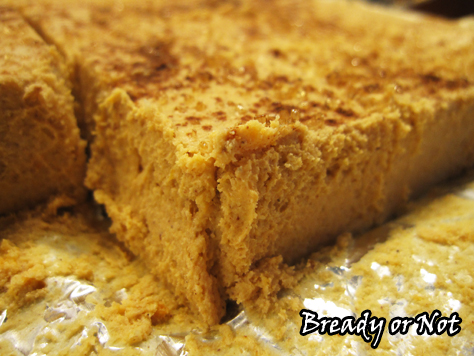
In baked recipes, cookie butter makes cooked goodies taste like cookie dough. Here, that effect is much more mild. It adds a lovely color and helps the pumpkin and spices to shine through.
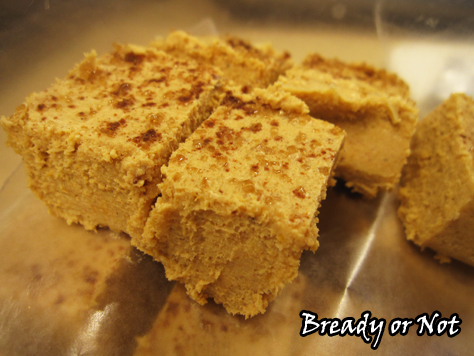
Make this for a potluck or family gathering, and share the joy of cookie butter and pumpkin spice!
Modified from Peanut Butter Pumpkin Fudge at Crazy for Crust.

Bready or Not: Quick Cookie Butter Pumpkin Fudge
Ingredients
- 4 cups white chocolate chips
- 1/2 cup Creamy Biscoff or Speculoos or other brand cookie butter
- 3/4 cup pumpkin puree
- 2 teaspoons pumpkin pie spice
- 2 teaspoons vanilla extract
- turbinado sugar optional
Instructions
- Line an 8x8-inch pan with foil and coat it with cooking spray. Measure out all of your ingredients and have them at hand.
- Place white chocolate chips and cookie butter in a large microwave-safe bowl. Heat on 50% power for 45 seconds--and stay close, because white chocolate can burn fast in the microwave. Stir well, then continue heating on 50% power in 25 second increments, stirring between each bout, until melted and smooth.
- (Yes, you could also do this in a saucepan over medium-low heat on the stovetop, but that wouldn't be quite as quick!)
- Once the chocolate and cookie butter are blended with no lumps, immediately stir in the pumpkin puree, spice, and vanilla extract. Combine it as fast as you can. Pour the fudge batter into the prepared pan. If desired, sprinkle turbinado sugar and some more pumpkin spice over the top.
- Place in fridge to set for several hours before cutting and serving--this makes a lot! Keep stored in a sealed container in fridge, with blocks of fudge between layers of wax paper or parchment. The fudge softens fast at room temperature.
- OM NOM NOM!
Follow me


