Bready or Not Original: Marble Swirl Bundt Cake
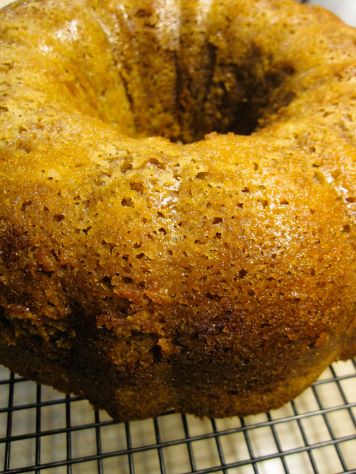
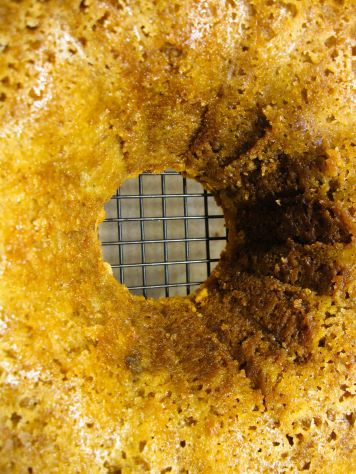
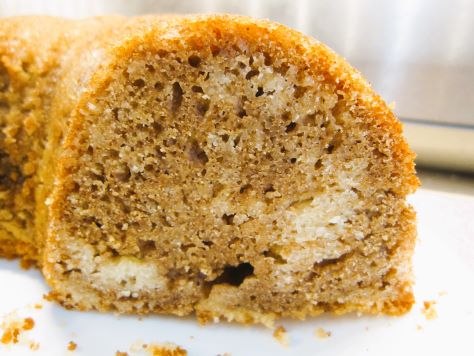
This Marble Swirl Bundt Cake is not only delicious but pretty, as it contains a light and dark swirl inside!
Spices are the prevalent flavor through the darker portions of the cake, with the pale portions plain and sweet in balance.
There are a lot of ingredients in this cake, though the assembly is straightforward. Save yourself some effort at baking time by combining the spice ingredients a day ahead!
Bready or Not Original: Marble Swirl Bundt Cake
Equipment
- large bundt cake pan
- nonstick spray with flour or regular nonstick spray
Ingredients
- 2 2/3 cup all-purpose flour
- 4 teaspoons baking powder
- 1/2 teaspoon salt
- 4 large eggs room temperature
- 2 cups white sugar
- 1 1/3 cup almond milk or regular milk
- 1/2 cup unsalted butter melted
- 1/3 cup canola oil
- 1/4 cup maple syrup
- 2 teaspoons instant espresso powder or unsweetened cocoa powder (sifted)
- 2 teaspoons ground cinnamon
- 1 teaspoon ground allspice
- 1 teaspoons ground cloves
- 1 teaspoon ground nutmeg
Instructions
- Move rack to lower 1/3 of oven; set to preheat at 350-degrees. Generously coat the interior of a large bundt pan with nonstick spray, preferably a baking spray with flour.
- In a medium bowl, combine flour, baking powder, and salt. Set aside. In a big mixing bowl, place eggs, sugar, milk, butter, and oil, beating until creamy yellow. Gradually mix in the dry ingredients, but reserve the empty bowl to one side. Scrape the bowl of batter as needed, mixing until it is smooth.
- Measure out 3 cups of the batter into the reserved bowl. Add the maple syrup, espresso powder or cocoa, cinnamon, allspice, cloves, and nutmeg, whisking until smooth.
- Pour half the plain batter into the greased pan. Top with half the spiced batter, spreading to the sides. Draw a butter knife through the layers, swirling up and down and around. Pour the remaining batters into the pan, repeating the swirl process with the butter knife.
- Bake bundt cake for 45 to 50 minutes. The top should feel dry and the middle should pass the toothpick test. Let cool in pan for 1 hour, then carefully invert onto a cooling rack; if any chunks stick to the pan, try to nestle them back into place on the cake.
- Finish cooling. Slice into wedges. Store under a cake dome or otherwise wrapped; individual slices can also be wrapped in plastic.
OM NOM NOM!
Bready or Not: St. Louis Gooey Butter Cake
A disclaimer straight up: there are many variations on this recipe, and mine is based on a version published in Bake from Scratch Magazine. I can’t say how it compares to others out there, but I can say with confidence that my recipe here is DELICIOUS.
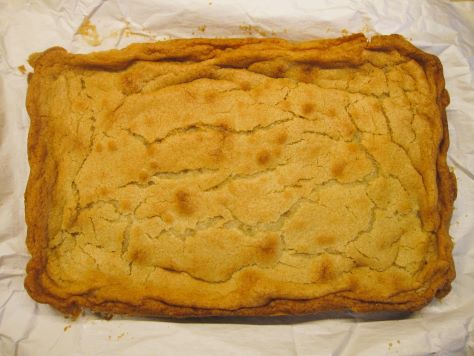
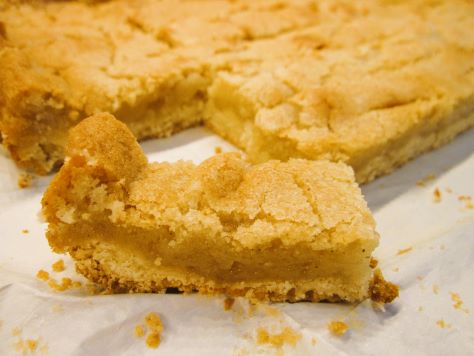
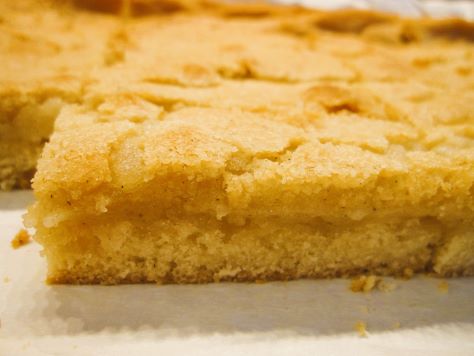
There are a lot of steps here but the progression is straightforward. In the old European style, this consists of a yeast cake base with a varied top. Both layers are sweet, soft, and chewy, but in distinct ways. You can see that in the pictures.
This cake is also rich. Not the kind of thing you need a big slice of. I recommend cutting it into finger-sized portions, as some shortbreads are also cut.
Bready or Not: St. Louis Gooey Butter Cake
Equipment
- stove pot
- 13×9 pan
- aluminum foil
- nonstick spray or butter
- stand mixer
- uneven spatula
Ingredients
Browned butter:
- 3/4 cup unsalted butter
Base dough:
- 5 Tablespoons whole milk or half & half, warmed to 105-110-degrees F
- 2 teaspoons active dry yeast
- 1/4 teaspoon white sugar yes this is a tiny amount to feed the yeast
- 3 Tablespoons white sugar
- 1 teaspoon kosher salt
- 6 Tablespoons unsalted butter room temperature
- 1 3/4 cups all-purpose flour
- 1 egg room temperature
- 1/2 teaspoon vanilla extract or vanilla bean paste
Topping:
- 1 1/2 cups white sugar
- 1/2 teaspoon kosher salt
- 1 egg room temperature
- 3 Tablespoons light corn syrup
- 2 Tablespoons water
- 3 teaspoons vanilla extract or vanilla bean paste
- 1 1/4 cups all-purpose flour
Instructions
Brown the butter:
- In a stove pot, heat the 3/4 cup butter on medium, stirring often. Cook until the butter is medium-brown with a nutty aroma, which takes about 7 to 10 minutes. Set aside to bring to room temperature.
Make the dough:
- Line a 13×9 pan with foil and apply nonstick spray or a coating of butter.
- In a small bowl, mix together warm milk, yeast, and 1/4 teaspoon sugar. Let stand about 5 minutes. It should become foamy.
- In a stand mixer with a paddle attachment, mix more base dough ingredients: white sugar, kosher salt, and remaining butter, beating for about 3 to 4 minutes until they become creamy. Stop and scrape the bowl as needed. To that, add the yeast mixture, flour, egg, and vanilla. Raise the speed to medium and beat until everything is combined and elastic, about 4 to 5 minutes, scraping the bowl on occasion. The dough should be tacky but shouldn’t stick to hands.
- Press the dough into the prepared pan in a thin layer. Cover loosely with plastic wrap and let it rise in a warm spot in the kitchen until it doubled in size, about 2 hours. In the meantime, clean the mixer bowl and paddle attachment.
Make the topping:
- Preheat oven at 350 degrees.
- To the mixer bowl, add the browned butter, white sugar, and salt, beating to combine, then raising the rhythm to medium to beat until fluffy, about 4 to 5 minutes. Beat in the egg.
- In a separate small bowl, whisk together the corn syrup, water, and vanilla. With the mixer on low, add the flour to the butter mixture alternatively with the corn syrup mix. Scrape the bowl as needed. Use an uneven spatula to spread the topping over the risen dough.
- Bake until the top is set and the edges are golden brown, anywhere from 25 to 35 minutes. The center can still be a touch soft and jiggly. Let cool completely in pan, chilling in fridge if desired. To cut, use the foil to lift the contents onto a cutting board. Slice into finger sized (1×4) portions.
OM NOM NOM!
Bready or Not: Apple Cream Cheese Brioche Tart
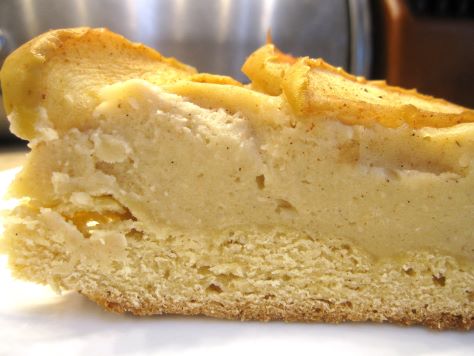
This Apple Cream Cheese Brioche Tart isn’t a beginner’s recipe, I’ll say that straight up. There are gobs of steps, multiple rise times, lots of dirty dishes. But the result? Wow.
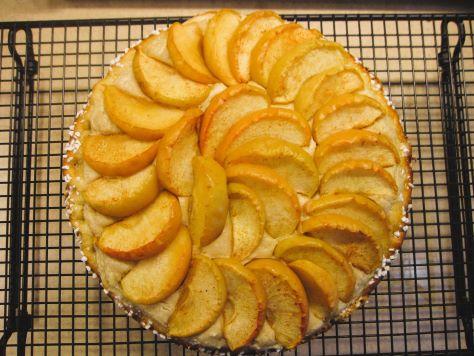
This is really a show-stopper kind of bread for a dessert, breakfast, or brunch. You have an enriched bread with a creamy, rich filling topped with spiced apples.
We had to test the best ways to eat the leftovers, too. The tart is fantastic fresh. Because of the creamed cheese, it needs to be stored in the fridge–but it’s thick and cloggy if eaten cold.
However, heating it in the toaster oven doesn’t work–the cream cheese will melt off! Like Goldilocks, we eventually found the “just right.” It was a quick zap in the microwave, maybe 15-20 seconds depending on your machine. Enough to take the chill off without making it hot.
The things we bakers must do for science and the good of the people…
Bready or Not: Apple Cream Cheese Brioche Tart
Equipment
- rimmed baking sheet
- 9-inch springform pan
- parchment paper
- stand mixer with paddle and dough hook
- nonstick spray with flour
- pastry brush
- uneven spatula
- instant read thermometer
Ingredients
Apples
- 2 cups apples peeled then sliced to 1/4-inch, about 1 1/2 medium apples (Honeycrisp recommended)
- 1 Tablespoon white sugar
- 1/2 teaspoon lemon juice
- 1/4 teaspoon apple pie spice
Dough
- 2 cups all-purpose flour divided
- 1 1/2 Tablespoons white sugar
- 1 1/2 Tablespoons light brown sugar packed
- 1 0.25oz package Platinum Yeast
- 1 1/2 teaspoons kosher salt
- 1/4 cup milk or half & half, warmed to 120-F to 130-F
- 2 large eggs room temperature
- 3/4 teaspoon pure vanilla extract
- 1/4 cup unsalted butter softened
Filling
- 2 Tablespoons unsalted butter softened
- 3 Tablespoons white sugar
- 2 Tablespoons light brown sugar firmly packed
- 1 teaspoon pure vanilla extract
- 1/4 teaspoon kosher salt
- 1/4 teaspoon apple pie spice
- 8 ounces cream cheese room temperature
- 1 large egg room temperature
- 3 Tablespoons all-purpose flour
Topping
- 1 large egg for egg wash
- 1 Tablespoon water for egg wash
- Swedish pearl sugar for sprinkling
Instructions
- Preheat oven to 400-degrees. Line a rimmed baking sheet with parchment paper.
- Prepare the sliced apples by using a large bowl to stir them with sugar, lemon juice, and pie spice. Let the mixture stand for 15 minutes, stirring occasionally. Spread apple mixture in an even layer on prepared pan.
- Bake the apples until they are fork-tender and have released significant moisture, 12 to 16 minutes. Rotate the pan and stir halfway through. The apples should reduce in size slightly but retain their shape. Let the apples cool while continuing with other stages. Also, turn off the oven, as it won’t be needed for a while.
- Begin the dough. In the bowl of a stand mixer fitted with the paddle attachment, beat 1/2 cup flour, white sugar, brown sugar, yeast, and salt at medium-low speed. Add the warm milk, eggs, and vanilla, beating everything on medium about 2 minutes until it’s combined. Scrape the bottom and sides of bowl a few times. Gradually add the remaining 1 1/2 cups flour.
- Switch to the dough hook attachment. Beat at low speed until dough is smooth and elastic. It should start to pull away from sides of bowl. This will be around 6 to 9 minutes.
- Add the softened butter, 1 tablespoon at a time, beating well after each addition. This will take 6 to 8 minutes total. Scrape the sides of bowl and dough hook as needed. If the dough looks slightly broken during this stage, that's okay–keeping beating it and it'll come back together.
- Increase mixer speed to medium-low and beat until a smooth, elastic dough forms, about 6 minutes.
- Turn out dough onto a clean surface and knead 4 to 5 times. Shape into a smooth round. Place dough in a large ungreased bowl. (At this stage, the dough could be covered and placed in the fridge for a few hours or overnight.) Cover it and place it in a warm spot until it doubles in size, about 45 minutes to 1 hour.
- Cut a piece of parchment to fit in the base of a springform pan. Apply nonstick spray with flour in pan. Add cut paper. Spray again to coat paper and sides.
- Punch down dough, then cover it and let it rest for about 10 minutes. On a lightly floured surface, roll dough into an 11-inch circle. Use the bottom of the springform pan to poke a 9-inch circle in the middle of the dough. Fold and press outside edges inward to create a crimped edge. Lift the dough to place it in the prepared pan. Press dough to make sure it fills the bottom. Crimp and secure the edges again if needed. Cover and let rise again in a warm place for 25 minutes. Dough should be puffed and hold an indentation when it’s poked.
- Preheat oven to 325-degrees.
- Now make the filling. In the clean bowl of the stand mixer, using the paddle attachment, beat the butter, white sugar, brown sugar, vanilla, salt, and pie spice at medium speed. Gradually add the cream cheese, beating until smooth. Add egg, beating until combined, then add the flour. Scrape the bowl to make sure everything is mixed.
- Use your fingertips to dimple center of dough back down, leaving outside crust higher and puffed. Crimp and secure edges if necessary, and press out any air bubbles if you see them.
- Spoon and spread cream cheese mixture in an even layer in center of dough. Arrange the sliced apples slightly overlapping in two concentric circles. (You may have leftover slices. Eat’em on their own!)
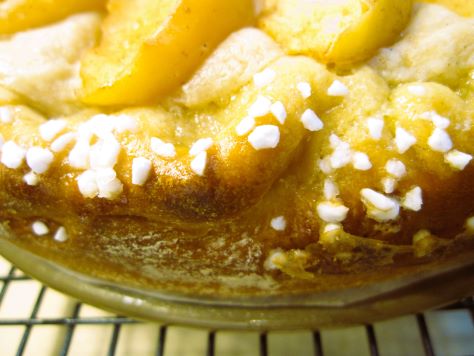
- In a small bowl, whisk together egg and water. Brush outer edge of dough with egg wash. Sprinkle pearl sugar along the crust.
- Bake for 20 minutes. Rotate pan. If the crust is browning, cover it with foil. Bake for another 25 to 28 minutes. When the tart is done, the crust will be golden brown. The filling should be set around outside edges and slightly jiggly in center. An instant-read thermometer inserted in center should register at least 175-degrees.
- Let cool in pan for 10 minutes. Using a small offset spatula, loosen edges of bread. Remove sides of springform pan. Let cool completely on pan base on a wire rack.
- The tart can be enjoyed fresh after it cools. Leftovers should be stored in the fridge, but will be cloggy if eaten chilled. It’s best warmed with a short zap in the microwave, about 15-20 seconds; if it’s made too hot, the cream cheese melts! Leftovers can also be individually wrapped and frozen for later. Thaw in fridge.
OM NOM NOM!
Bready or Not: Classic Vanilla Bundt Cake
This Classic Vanilla Bundt Cake is nothing fancy, but it’s all good.
This cake isn’t about hardcore sweetness. It’s about vanilla. With a tablespoon of extract in the batter, you get the fragrance and flavor coming through strongly in the final bake.
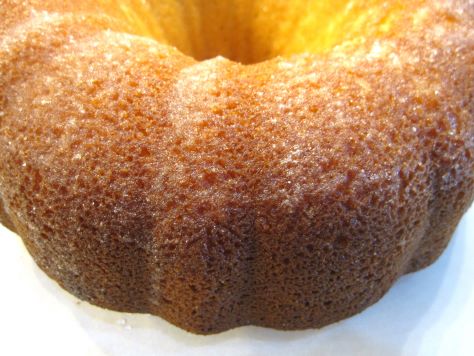
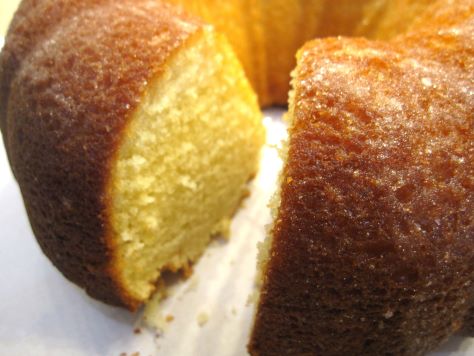
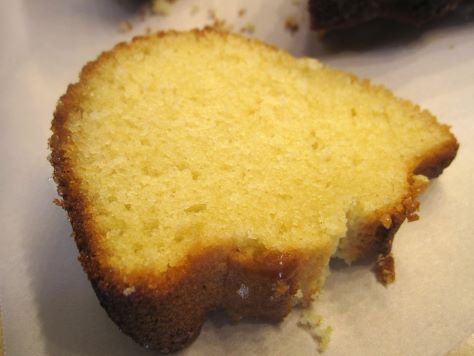
One thing I love about bundt cakes is the variety of textures. The crusty bottom is so good. If you want the cake to rest flat for a prettier presentation, then by all means, level off the base–but don’t squander those trimmings!
This is a great cake to serve with fruit and ice cream, as it’s similar to a pound cake, but much lighter. Me, I thought the glaze alone made things just right.
Modified from King Arthur Flour.
Bready or Not: Classic Vanilla Bundt Cake
Equipment
- large bundt pan
- nonstick spray
- pastry brush
Ingredients
Cake
- 1 1/2 cups unsalted butter (3 sticks) room temperature
- 1 1/2 cups white sugar
- 2 1/4 teaspoons baking powder
- 1 1/2 teaspoons salt
- 6 large eggs room temperature
- 3 cups all-purpose flour
- 1 Tablespoon vanilla extract
- 1/4 teaspoon almond extract
- 3/4 cup milk or half & half
Glaze
- 1/3 cup white sugar
- 5 teaspoons water
- sprinkle salt
- 2 teaspoons vanilla extract
Instructions
- Preheat oven at 350-degrees. Generously grease the interior of a large bundt pan.
- In a mixer, beat butter and sugar until light and fluffy. Mix in baking powder and salt, followed by 3 of the eggs.
- Measure out the flour. Add a few tablespoons of it into the mix. Add another egg. Add a bit more flour followed by another egg. Repeat to incorporate the last egg. Add the two extracts and the milk, followed by the last of the flour. Scrape the bottom and sides of the bowl well, then beat until the batter is smooth and fluffy.
- Pour batter into the pan and smooth out the top. Bake for 50 to 60 minutes, until the cake passes the toothpick test. Let cool for about 15 minutes, then invert it onto a rack to cool completely.
- Make the glaze. The amount will look like a lot, but there’s a lot of exterior to this cake. For easier clean-up, place parchment paper beneath the rack. Use a pastry brush to apply the glaze to the cake. Let glaze set an hour or so before slicing.
- Store in a sealed container or with slices individually wrapped.
OM NOM NOM!
Bready or Not: Apple Sheet Cake
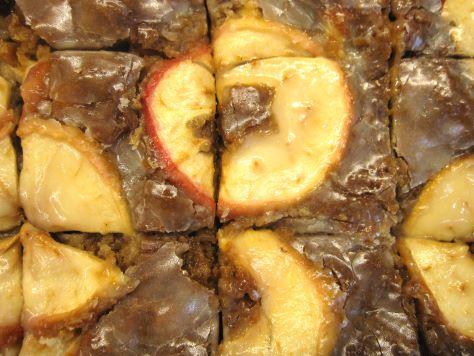
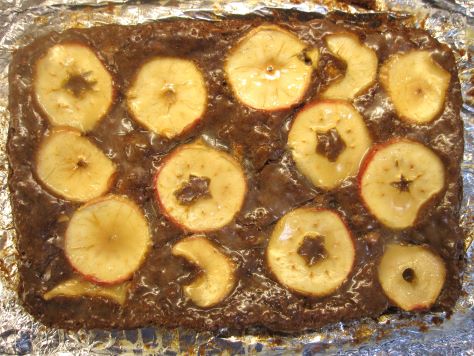
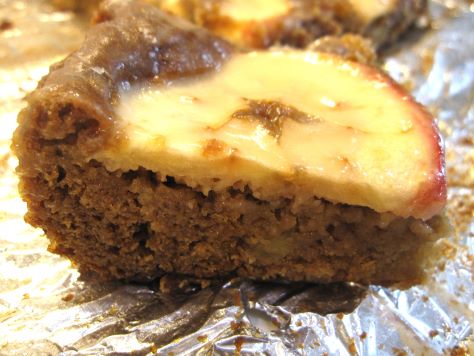
I’ve done a lot of different apple cakes. This Apple Sheet Cake is unique in that it’s 1) in a casserole dish, so can feed a lot of people, and 2) uses apple butter, diced fresh apple, diced dried apple, and cross-wise sliced fresh apples on top!
It probably goes without saying that this cake is loaded with apple flavor. There’s just enough batter to complement the fruit. Really, this is all about the apples.
I think the apple butter in particular carries a lot of weight here. It adds a touch more spice, but most of all it adds moist texture to the crumb.
Modified from a clipping for Applicious Sheet Cake.
Bready or Not: Apple Sheet Cake
Equipment
- 13×9 pan
- aluminum foil
- uneven spatula
Ingredients
Cake
- 2 medium baking apples
- 1/3 cup unsalted butter melted
- 1 2/3 cup brown sugar packed
- 1 cup apple butter
- 2 large eggs room temperature
- 2 teaspoons vanilla extract or vanilla bean paste
- 1 2/3 cups all-purpose flour
- 1 teaspoon baking powder
- 1 teaspoon baking soda
- 1/4 teaspoon salt
- 1 cup dried apples finely chopped
Icing
- 1 Tablespoon unsalted butter melted
- 1 Tablespoon maple syrup
- 1/2 cup confectioners’ sugar
- 1/4 teaspoon vanilla extract
- 1 Tablespoon milk or half & half
Instructions
- Preheat oven at 350-degrees. Line a 13×9 pan with foil and apply nonstick spray or butter. Set aside.
- Peel, core, and shred or finely dice-up one apple. Thinly slice the other apple cross-wise, removing the seeds.
- In a large bowl, mix together butter, brown sugar, apple butter, eggs, and vanilla. Add flour, baking powder, baking soda, and salt, scraping bottom of bowl to make sure everything is mixed. Fold in the shredded/diced fresh apple and the chopped dried apple. Spread batter in pan, using uneven spatula to level out. Arrange apple cross-sections over cake.
- Bake for about 40 minutes. The middle should pass the toothpick test. Move to a wire rack.
- Immediately mix glaze to go over hot cake. Drizzle it all over the top, using the back of a spoon or a pastry brush to distribute across surface. Cool completely to set the glaze, speeding process in fridge if desired.
- Use foil to lift cake onto a cutting board to slice. Pieces can be individually wrapped and frozen for later, or will keep several days covered in the fridge. Eat cold or warmed slightly in microwave.
OM NOM NOM!
Bready or Not: Double Apple Spice Cake
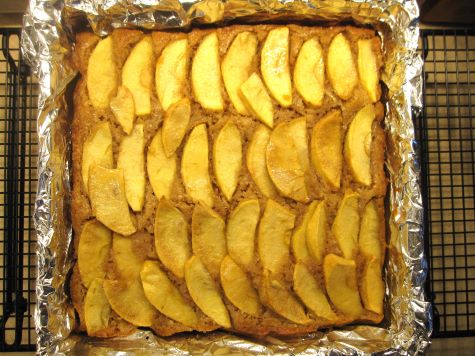
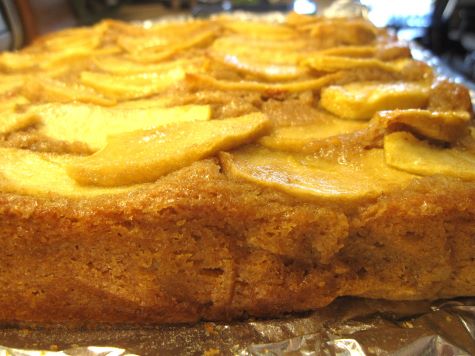
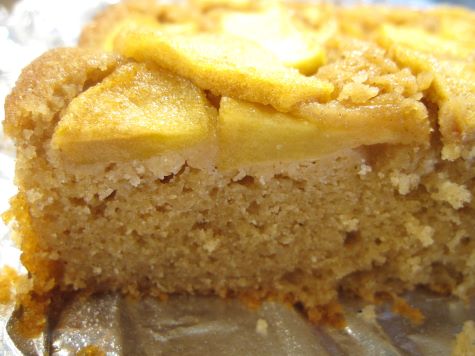
This Double Apple Spice Cake includes chopped apples in the batter and sliced apples prettily arranged on top. You’re pretty much guaranteed to get apple in every bite!
I came across a version of this recipe promoted by Kerrygold Irish Butter. I thought it looked amazing, but I wanted to change it to a square pan for easier slicing and freezing and make a number of other little changes, too.
Instead of dusting the top with confectioners’ sugar, I decided to use a technique I also use for my Calvados Apple Galette: brushing honey across the top near the end of baking to add some sweetness and glisten.
This is really such a pretty cake. The spices are gentle, but present enough to boost the flavor of the apples.
Modified from Kerrygold.
Bready or Not: Double Apple Spice Cake
Equipment
- 8×8 or 9×9 square pan
- aluminum foil
- nonstick spray
- basting brush
Ingredients
- 3/4 cup brown sugar packed
- 2 large eggs room temperature
- 3/4 cup sour cream or full-fat Greek yogurt
- 2 teaspoons pure vanilla extract
- 8 ounces Kerrygold Salted Butter melted
- 1 1/2 cups all-purpose flour
- 1/2 teaspoon kosher salt
- 1 1/2 teaspoons baking powder
- 2 teaspoons ground cinnamon
- 1/8 teaspoon ground cardamom
- 1/2 teaspoon ground ginger
- 1/4 teaspoon allspice
- 3 medium baking apples like Pink Lady, Envy, Granny Smith, etc
- 2 Tablespoons turbinado sugar
- 1/3 cup honey
Instructions
- Preheat the oven to 350° F. Line an 8×8 or 9×9 square pan with aluminum foil and apply nonstick cooking spray.
- Prepare the apples. Peel then dice up one of the apples. The other two, peel and slice thinly.
- To a large bowl, add the brown sugar and eggs. Whisk for about a minute until thoroughly combined and creamy.
- Add the sour cream/yogurt, pure vanilla extract, and melted butter. Whisk well.
- In a separate medium size bowl, combine flour, kosher salt, baking powder, cinnamon, cardamom, ginger, and allspice.
- Add the dry ingredients to the wet ingredients. Before the dry ingredients are fully incorporated, add the diced apples. Continue to fold in until no streaks of flour remain.
- Pour batter into the prepared baking pan, then use an offset spatula to smooth it out. Shingle the thinly sliced apples on top. The sprinkle turbinado sugar all over the slices.
- Bake for 35 minutes. Pull out the cake and brush on the honey across all of the nooks and crannies. Place the cake back in oven to bake for another 5 to 10 minutes, until the top is turning golden brown. The apples on top should be fork-tender with the center cake passing the toothpick test.
- Let cool at least 30 minutes before slicing in. Store covered in the fridge. Cake can also be frozen for later enjoyment.


