


Bready or Not EXTRA CHEESY: Coconut Cream Cheese Pound Cake
Welcome to the last installment of our special month of Bready or Not. My cheese-centric cozy mystery Cheddar Luck Next Time just came out a few weeks ago, so we’re celebrating with another cheesy recipe from the Bready or Not archives.
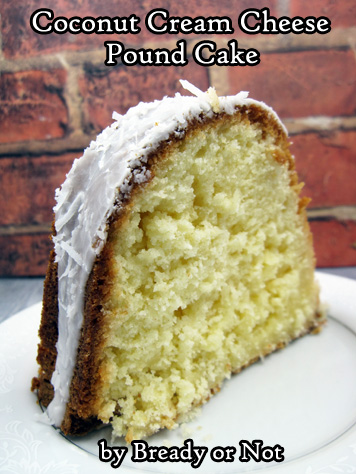
This week’s feature is Coconut Cream Cheese Pound Cake. Only right to end things with cake, right?
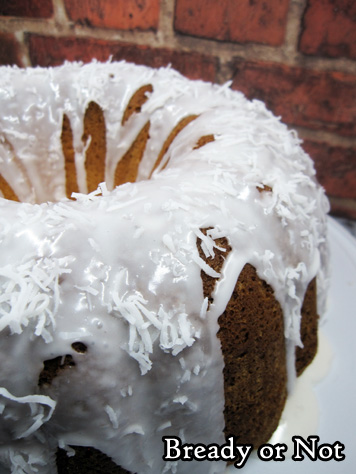
This stunning Coconut Cream Cheese Pound Cake is gorgeous and delicious, and will win over even people (like me) who are not big coconut fans. The cake ends up being chewy, but not too chewy; sweet, but not cloying. Really, this is great as a breakfast, brunch, or dessert cake.

Serve this as cake alone, or like with any pound cake, it would be lovely alongside fresh fruit.
Please grab a copy of Cheddar Luck Next Time, which features an autistic (like me!) lead character with a passion for cheese (like me!).

Amazon: paperback | ebook (affiliate links)
Barnes & Noble: paperback & ebook
Bookshop: paperback
Bready or Not: Coconut Cream Cheese Pound Cake
Ingredients
Cake
- 1 cup unsalted butter 2 sticks, room temperature
- 8 ounces cream cheese 1 box, room temperature
- 3 cups white sugar
- 6 large eggs room temperature
- 2 teaspoons vanilla extract
- 1 teaspoon kosher salt
- 1 teaspoon baking powder
- 3 cups all-purpose flour
- 2 cups shredded coconut
Glaze
- 2 cups confectioners’ sugar
- 2-3 Tablespoons milk
- extra shredded coconut
Instructions
- Preheat oven at 325-degrees. Coat a 10-cup bundt pan with nonstick spray or butter.
- In a large bowl, beat butter and cream cheese together until smooth. Add sugar and mix until light and fluffy.
- Add eggs one at a time, followed by the vanilla extract, salt, and baking powder. Gradually mix in the flour until just combined, then fold in the coconut.
- Pour batter into pan and distribute evenly. Bake for 75 to 80 minutes, until it passes the toothpick test.
- Cool pan for 20 minutes, then invert the cake onto a wire rack to completely cool. Move to a plate or cake platter.
- To make the glaze, stir together the confectioners’ sugar and milk to form a smooth yet thick consistency. Pour or spoon glaze over the top, then sprinkle with additional coconut.
OM NOM NOM!
Bready or Not EXTRA CHEESY: Legendary Macaroni and Cheese
Welcome to the fourth installment of our special month of Bready or Not. My cheese-centric cozy mystery Cheddar Luck Next Time came out earlier this month, so we’re celebrating with another cheesy recipe from the Bready or Not archives.
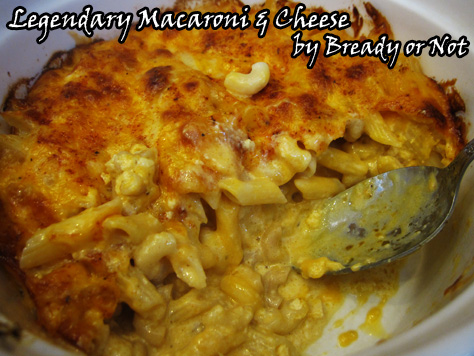
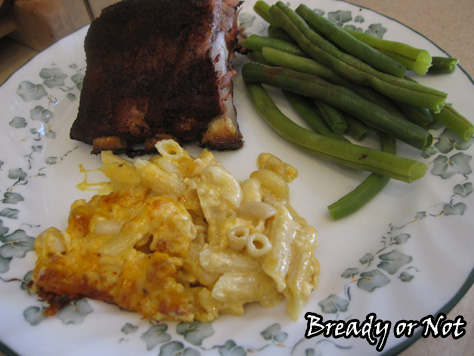
This week’s feature is Legendary Macaroni and Cheese. This one gained incredible popularity during the shut-down in 2020.
There are a gazillion macaroni and cheese recipes out there. This one is special because it can be prepared ahead of time, making it incredibly convenient to heat up for a meal during a busy week or during a holiday event.
This is a heavily modified version of musician John Legend’s macaroni recipe, which he originally shared on the Martha Stewart Show a long time ago.
Please grab a copy of Cheddar Luck Next Time, which features an autistic (like me!) lead character with a passion for cheese (like me!).
Amazon: paperback | ebook (affiliate links)
Barnes & Noble: paperback & ebook
Bookshop: paperback
Bready or Not: Legendary Macaroni and Cheese
Ingredients
- 2 Tablespoons unsalted butter plus more for baking dish
- 1 1/2 cups elbow macaroni
- 1 can evaporated milk
- 1 large egg
- 3/4 teaspoon seasoning salt
- 1/2 teaspoon garlic powder
- 1/2 teaspoon salt
- 1/4 teaspoon pepper
- 12 ounces sharp cheddar cheese or a mix of cheddars, shredded
- sprinkle paprika
- bread crumbs
Instructions
- If you plan to bake this right away, preheat oven to 375-degrees. Butter or spray a 9×9 baking dish.
- Bring a large pot of water to a boil and add salt and macaroni. Cook until al dente. Drain the water and return the macaroni to the pot. Add butter and stir until it has melted.
- In a medium bowl, whisk together evaporated milk and egg. Add seasoned salt, garlic powder, salt, and pepper.
- Place about 1/3 of the macaroni in an even layer in the bottom of prepared baking dish. This should be just enough to cover the bottom. Cover with 1/3 of the cheese. Repeat twice more with remaining macaroni and cheese.
- Pour the milk and seasonings mixture evenly over the contents of the baking dish. At this point, you can stash the dish in the fridge overnight or during the day until it’s meal time.
- When you’re ready to bake, make sure the oven is preheated. Sprinkle the top of the macaroni with paprika and bread crumbs.
- Bake until top layer is lightly browned, 25 to 30 minutes; note that if the dish is cold, bake time will likely need to be extended to closer to 40 minutes. Let stand 10 minutes before serving.
- OM NOM NOM!
Bready or Not EXTRA CHEESY: Cheese and Chives Yorkshire Puddings (Small Batch)
Welcome to the third installment of our special month of Bready or Not. My cheese-centric cozy mystery Cheddar Luck Next Time just came out last week, so we’re celebrating with another cheesy recipe from the Bready or Not archives.
This week’s feature is Cheese and Chives Yorkshire Puddings.
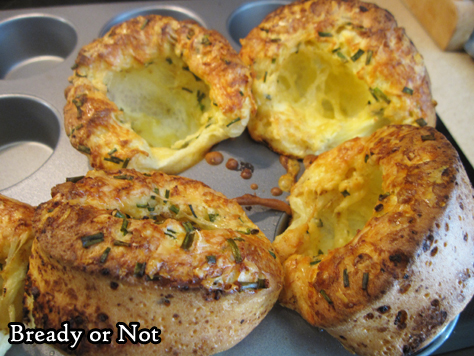
Yorkshire puddings are what many Americans also know of as pop-overs–light, airy, crisp sponges perfect to eat with a roast and gravy!
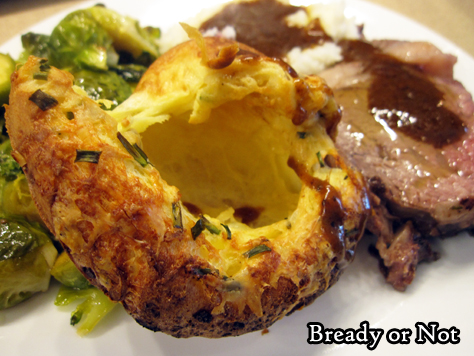
This recipe is for a small batch of puds. Since they are so airy (if they rise right), the six puddings of this recipe are perfect for two or three people. These will not reheat well, so eat’em up fresh!
Use a good quality cheddar here to really take these puddings to the next level. I used Kerrygold Dubliner.
Please grab a copy of Cheddar Luck Next Time, which features an autistic (like me!) lead character with a passion for cheese (like me!).
Amazon: paperback | ebook (affiliate links)
Barnes & Noble: paperback & ebook
Bookshop: paperback
Bready or Not: Cheese and Chives Yorkshire Puddings (Small Batch)
Equipment
- metal muffin pan
- blender
Ingredients
- 3/4 cup milk or half & half
- 2 large eggs room temperature
- 3 Tablespoons unsalted butter melted, divided
- 3/4 cup all-purpose flour
- 1/2 teaspoon kosher salt
- 1/4 cup quality cheddar cheese (25 grams), freshly grated
- 1 1/2 Tablespoons fresh chives chopped, plus more for garnish
Instructions
- Preheat oven at 425-degrees.
- In the container of a blender, place milk, eggs, 1 tablespoon melted butter, flour, and salt; process just until smooth. Let rest for 10 minutes.
- In a small bowl, toss together grated cheese and chives.
- Place a 12-cup muffin pan in oven for 5 minutes to preheat.
- Remove muffin pan from oven, and quickly spoon the remaining 2 tablespoons melted butter into the 6 muffin cups that are being used. Return pan to oven for 2 minutes.
- Remove pan from oven. Working fast, spoon or pour batter into buttered muffin cups, dividing as evenly as possible. Top each with a spoonful of cheese mixture.
- Bake until puffed and golden brown, 15 to 18 minutes. Garnish with more chives, if desired. Serve immediately. Yorkshires are best fresh as they deflate after baking.
OM NOM NOM!
Bready or Not EXTRA CHEESY: Farmer’s Cheese Cookies
Welcome to the second installment of our special month of Bready or Not. My cheese-centric cozy mystery Cheddar Luck Next Time just came out yesterday (picture the Kermit-flail gif) so we’re celebrating with another cheesy recipe from the Bready or Not archives.
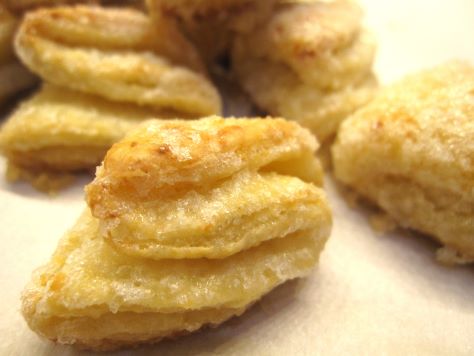
This week’s feature is Farmer’s Cheese Cookies.
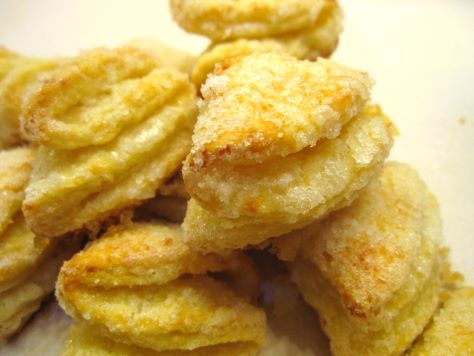
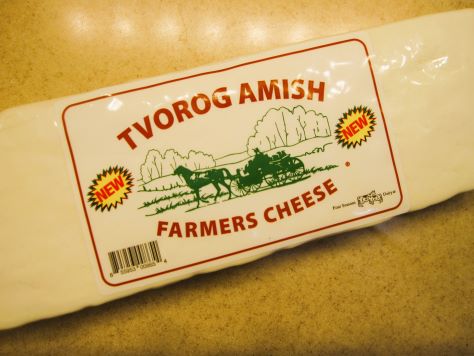
These cookies aren’t cheesy in a gooey, cheese-pull kind of way. Instead, the cheese here adds a touch of savory flavor and a lot of light, chewy texture. Expect a dry, crumbly texture in the cheese. Mine became somewhat powdery as I broke it down, which was fine. I was able to incorporate everything with an extra touch of water.
Cookies like this are traditional in Ukraine and Russia. Look for a product like Ukrainian Tvorog Farmer’s Cheese at your local import markets.
The end result is a cookie that, quite honestly, tastes fancy–light, crisp, sugary, like something that one would find in a fine bakery. Most people wouldn’t guess there’s cheese in the dough, I bet, but they’ll know there’s something different about them. Something delicious.
Please grab a copy of Cheddar Luck Next Time, which features an autistic (like me!) lead character with a passion for cheese (like me!).
Amazon: paperback | ebook (affiliate links)
Barnes & Noble: paperback & ebook
Bookshop: paperback
Bready or Not: Farmer’s Cheese Cookies
Equipment
- grater or food processor
- pastry blender
- 3-inch round cutter or the top of a glass
- parchment paper
- saucer or bowl
- Rolling Pin
Ingredients
- 1 cup unsalted butter 2 sticks, chilled
- 8 oz farmer's cheese such as Ukrainian Tvorog cheese
- 2 cups all-purpose flour
- 2 egg yolks
- 2-3 Tablespoons water
- 1 1/2 cups white sugar
Instructions
- Grate the butter using a hand grater or a grater attachment on a food processor. In a large bowl, use a pastry blender to cut in the cheese, which will be crumbly. Add the flour, followed by the yolks and water. Knead the dough until it comes together in a cohesive mass.
- Form the dough into a disc and encase it in plastic wrap to chill for anywhere from an hour to several days.
- When it’s cookie time, preheat oven at 375-degrees. Line a large baking sheet with parchment paper. Place a small amount of water in a saucer or bowl. Measure the white sugar into a deep bowl.
- Prepare a clean work surface with a dusting of flour. Break off some of the dough and roll it into a thin layer, like for a pie crust. Use the cutter to slice out 3-inch rounds; place the leftover and unused dough to chill in the fridge while cookies are shaped.
- Dampen fingers in the prepared water. Brush wet fingers over one side of a dough round. Dip moist dough into the sugar to coat it. Fold in half with the sugared portion on the inside. Dampen fingers and stroke another folded side of the dough, and dip that in sugar. Fold a final time with the sugared section on the inside. Use wet fingers on outside of cookie and coat that in sugar, too. Gently press the pleats together to prevent them from unfolding during baking. Place formed cookie on sheet and repeat process with remaining rounds.
- Bring together dough scraps, using a little water if needed, to roll out again. Use rest of dough to form cookies.
- Bake in batches for 19 to 22 minutes, until puffed and set with a golden base. Store in a sealed container at room temperature.
OM NOM NOM!
Bready or Not EXTRA CHEESY: Swirled Goat Cheese Brownies
Welcome to a special month of Bready or Not. My cheese-centric cozy mystery Cheddar Luck Next Time will be released on April 8–next Tuesday–so we’re celebrating with a month of cheesy recipes from the Bready or Not archives. These recipes haven’t been featured for years and are well worth a revisit.
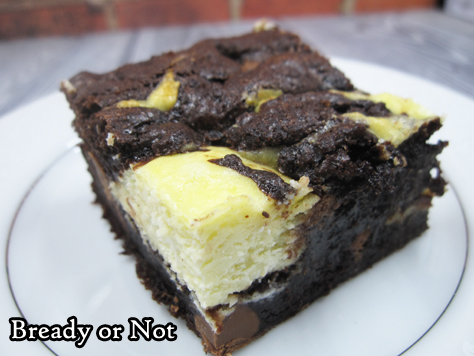
We’re starting with a luscious and indulgent recipe for Swirled Goat Cheese Brownies.
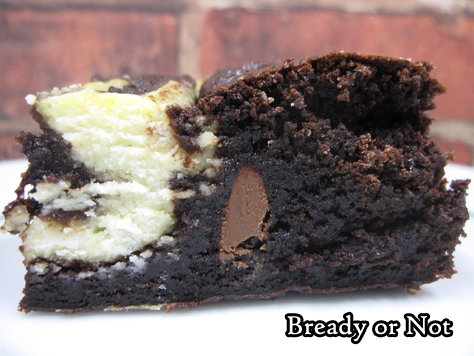
This recipe makes a small pan of brownies, 8×8 or 9×9, but it’s heavy on the cheese. A plain goat cheese log from Costco or Sam’s Club is especially cost efficient here, or get a couple of small logs from Aldi, if you’re so fortunate as to have one nearby. There’s a good dose of chocolate flavor here as well through both cocoa powder and chocolate chips.
These brownies are thick and rich, perfect alongside some tea or coffee–and a good book.
Please grab a copy of Cheddar Luck Next Time, which features an autistic (like me!) lead character with a passion for cheese (like me!).
Amazon: paperback | ebook (affiliate links)
Barnes & Noble: paperback & ebook
Bookshop: paperback
Bready or Not Original: Swirled Goat Cheese Brownies
Ingredients
Goat Cheese Swirl
- 10 1/2 ounces goat cheese room temperature
- 2 Tablespoons confectioners’ sugar
- 2 Tablespoons all-purpose flour
- 2 large eggs room temperature
Brownie Base
- 2/3 cup Dutch process cocoa powder sifted
- 1 cup white sugar
- 1/2 cup brown sugar packed
- 1/2 cup confectioners’ sugar
- 3/4 teaspoon sea salt
- 1 cup all-purpose flour
- 1 cup semisweet chocolate chips or milk chocolate chips
- 3 large eggs room temperature
- 1/2 cup canola oil
- 1 teaspoon vanilla extract
Instructions
- Preheat oven to 350-degrees. Line an 8×8 or 9×9-inch square pan with aluminum foil and apply nonstick spray or butter.
- Mix goat cheese swirl ingredients. Set aside.
- Make the brownie base by whisking together the cocoa, sugars, salt, flour, and chips in a big mixing bowl. Add the eggs, oil, and water and vanilla extract until everything is just combined.
- Spoon half the brownie batter into the prepared pan. Dollop the cheese mixture atop it, then add the remaining brownie batter into the open spots. Use a knife to swirl the two layers together while still keeping them a bit distinct.
- Bake the brownies for 35 to 45 minutes, depending on the pan size. Use the toothpick test to check for doneness. The center should be set with the consistency still moist and fudgy. Cool to room temperature, then place in fridge to chill an hour or two prior to cutting.
- Use foil to lift brownies onto cutting board for easy slicing. Store in a sealed container in fridge, with parchment or waxed paper between the layers.
- OM NOM NOM!
Bready or Not: Gingerbread Cookie Cheesecake Bars
If you love both gingerbread cookies and cheesecake, oh boy, do I have the recipe for you. These Gingerbread Cookie Cheesecake Bars are dense, rich, and outright divine.
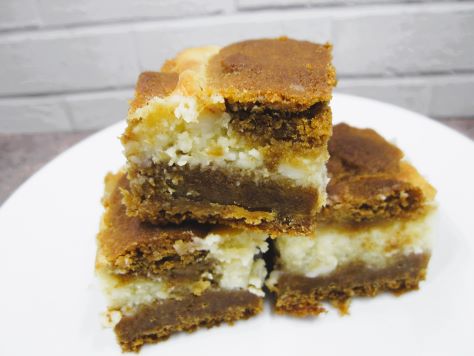
The creation process also dirties a lot of dishes, but hey, sometimes that’s what is required to make something that truly comes across as special. This recipe makes a 9×13 pan of thick bars, so bake this to feed a crowd!

Modified from Holiday Cookies magazine 2019.

Bready or Not: Gingerbread Cookie Cheesecake Bars
Equipment
- 9×13 pan
- aluminum foil
- nonstick spray
- uneven spatula
Ingredients
Gingerbread
- 1 1/2 cups unsalted butter (3 sticks) softened
- 1 1/4 cups white sugar
- 3/4 cup brown sugar packed
- 1/2 cup molasses
- 2 large eggs room temperature
- 4 cups all-purpose flour
- 2 teaspoons ground cinnamon
- 2 teaspoons ground ginger
- 1 1/2 teaspoons kosher salt
- 1 teaspoon baking powder
- 1 teaspoon baking soda
- 1/4 teaspoon nutmeg
- 1/8 teaspoon allspice
- 1/8 teaspoon cloves
- 3 Tablespoons minced candied ginger
Cheesecake
- 16 ounces cream cheese (2 blocks) softened
- 1 cup white sugar
- 1 Tablespoon all-purpose flour
- 2 large eggs room temperature
- 1 Tablespoon vanilla extract
Instructions
- Preheat oven at 350 degrees. Line a 13×9-inch pan with aluminum foil. Apply nonstick spray.
- In a large bowl, beat the butter and sugars until fluffy. Add the molasses, mixing until no streaks remain. Add eggs, one at a time, scraping the bottom of the bowl on occasion.
- In a separate bowl, combine the flour, cinnamon, ground ginger, salt, baking powder, baking soda, nutmeg, allspice, and cloves. Gradually add the dry ingredients to the wet. Fold in the candied ginger.
- Measure out 2 cups of the dough and set it aside.
- Press the remainder of the dough into the pan, forming an even layer.
- Time to make the cheesecake layer. Beat the cream cheese until creamy. Add the sugar and flour. Add the eggs one at a time, followed by the vanilla. The mixture should be fairly consistent in color and texture, but it’s okay if there are some small lumps.
- Use an uneven spatula to spread the cheesecake into an even layer. Crumble the reserved topping over it.
- Bake for 50 to 60 minutes; the middle should not look jiggly and should pass the toothpick test. If the top is browning too much, cover with foil.
- Cool at room temperature for about an hour, then place in fridge to completely chill for a few hours. Use foil to lift onto cutting board to slice into small pieces. Store in fridge in a sealed container.
