


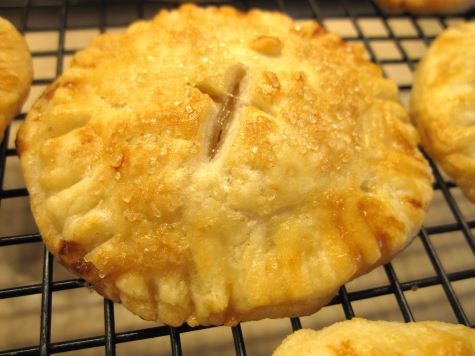
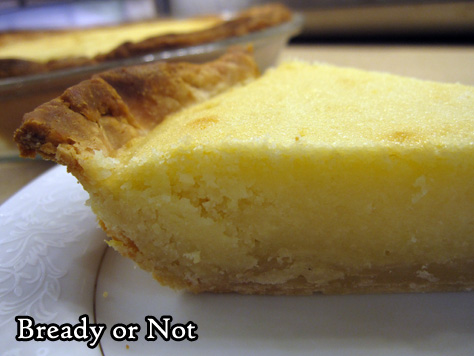
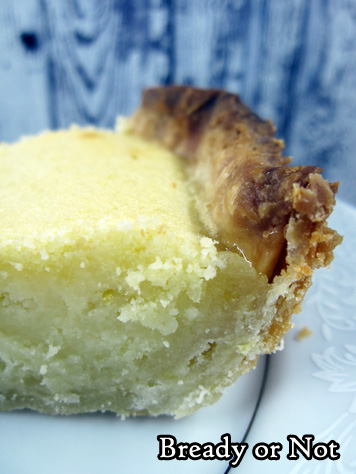
Bready or Not: Baked Lemon Curd Hand Pies
Pie is good. Portable pie is something special indeed. These Baked Lemon Curd Hand Pies are a real treat.
This is a pairing of recipes that dirties numerous dishes and spaces, but the result is a good batch of hand pies. The recipe makes roughly 18 to 20, so make these for a group!
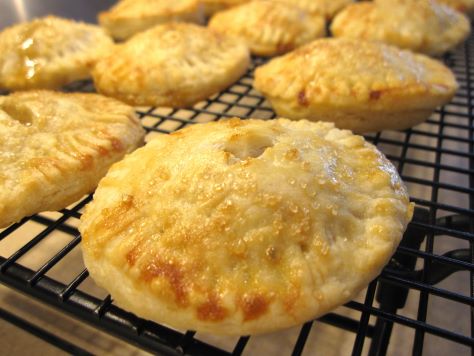
I usually experiment with freezing my baked goods to see how they keep, but I didn’t do so with these. My husband took them to work, where they were pretty much inhaled!
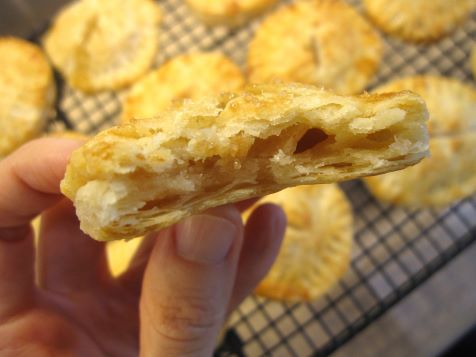
Use homemade lemon curd, if you have a reliable recipe, or use a trustworthy brand. I recommend going with one that is pretty thick, as a watery one might interfere with the seal of the pies.
Bready or Not: Hand Pie Dough
Equipment
- food processor
- food scale
- plastic wrap
Ingredients
- 2 3/4 cups all-purpose flour
- 1 teaspoon kosher salt
- 1 cup plus 1 Tb unsalted butter
- 1/2 cup ice water
- 2 teaspoons apple cider vinegar
Instructions
- Place the flour and salt in the bowl of the food processor. Pulse to combine. Cut the butter into cubes and add, pulsing until the pieces are pea-sized.
- In a liquid measured cup, combine the ice water and vinegar. With the processor running, pour in the liquid until the dough comes together. It will look crumbly but should come together if squeezed between fingers.
- Turn out the dough and divide it in half. Wrap tightly in plastic and chill for at least 2 hours. Store in fridge for a few days or freeze for later.
Bready or Not: Baked Lemon Curd Hand Pies
Equipment
- flour for dusting
- 2 1/2-inch cutter
- basting brush
- parchment paper
- baking sheet
Ingredients
- hand pie dough
- 1 cup lemon curd
- 1 large egg room temperature
- 1 Tablespoon water
- coarse sugar optional
Instructions
- On a lightly floured surface, roll out half of the prepared pie dough to be about 1/8-inch thick. Using a 2 1/2-inch cutter, cut dough, reforming scraps to roll out again.
- Dollop about a teaspoon of lemon curd into the center of half of the dough rounds.
- In a small bowl, beat together the egg and water. Brush the egg mix around the edges that surround the curd; do not discard egg wash. Top each with a remaining dough circle, stretching them slightly to cover. Press edges firmly to seal, then apply the tines of a fork to bind the halves. Chill hand pies in fridge for 1 hour.
- Preheat oven at 425-degrees. Line baking sheet with parchment paper. Place hand pies on parchment. Brush tops with remaining egg wash, then use the tip of a knife to cut a small x in each to vent steam during baking. If desired, sprinkle coarse sugar over the tops.
- Bake for 13 to 16 minutes, until pies are golden. Move to a rack or different sheet to completely cool. Store in a covered container. Best eaten within a day or two.
OM NOM NOM!
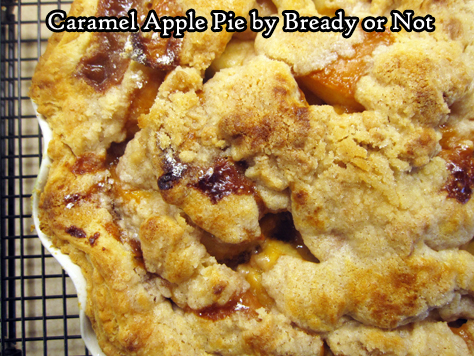
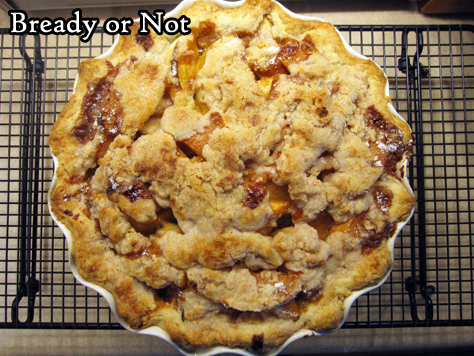
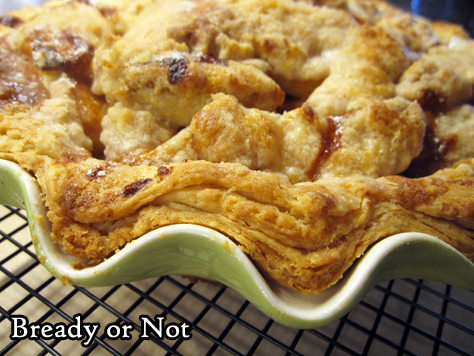
Bready or Not Original: Caramel Apple Pie
Bready or Not has featured many kinds of apple pie and cake over the years, but this is the recipe that I have made most often across my twenty years of marriage: Caramel Apple Pie.
I was shocked to realize I hadn’t featured it on Bready or Not since I started it on my domain site in 2014. I posted an earlier version on my LiveJournal, back in the day.
The base recipe came from Mr. Food. Who else remembers the Mr. Food spots on TV? He used to be on Channel 30’s midday news in Fresno. I was newly engaged when I saw him demonstrate this on his five-minute TV spot, and I mailed to the TV station with a SASE to get a print copy of the recipe.
The air date on the sheet is October 8th, 1999. I would have been watching the news from my dorm room at Fresno Pacific University!
I’m pretty sure I made this recipe for my fiancé when he came to visit me that Christmas (and we hoped that the Y2K Disaster would happen so he didn’t have to fly back to the Navy on January 1st).
It seems only right to feature this recipe at holiday time all these years later. I wouldn’t be surprised if I’m asked to make this again in just a few weeks!
Greatly modified from Caramel Crunch Apple Pie from Mr. Food (rest in peace, good chef).
Bready or Not Original: Caramel Apple Pie
Ingredients
Pie filling:
- 1 deep-dish pie shell homemade dough or store-bought
- 5 medium apples mix of varieties best, including Granny Smith, Honeycrisp, Pink Lady, etc
- 2 Tablespoons all-purpose flour
Topping:
- 2/3 cup all-purpose flour
- 1/2 cup white sugar
- 1/2 teaspoon ground cinnamon
- 1/2 cup unsalted butter 1 stick, cold
- 1 jar caramel drizzle as much as desired; most of the jar will be unused
Instructions
- Preheat oven at 375-degrees; set a baking sheet in the oven to heat up as well (this will reduce the likelihood of a pie with a soggy bottom). Press the pie dough into a deep dish pie pan, if not already formed. Stash it in the fridge while the filling is being prepared.
- Peel and core apples and slice into thin wedges. Toss them with the 2 Tablespoons flour to coat. Set aside.
- In a mixing bowl, sift together the flour, sugar, and cinnamon. Dice up the butter and toss it in the mix. Use a pastry cutter or a fork to mash up the butter to make pea-sized and smaller pieces of various shapes. Set bowl in fridge briefly, and bring out the pie shell.
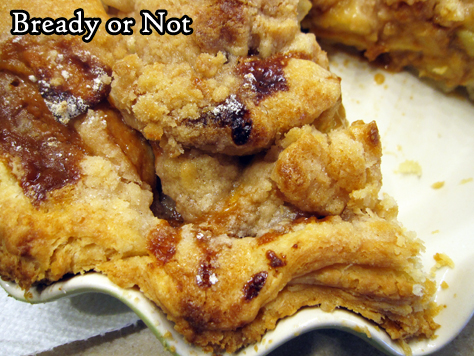
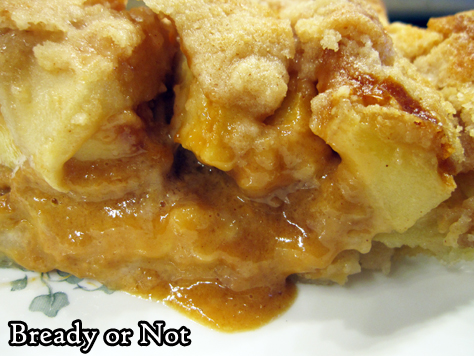
- Pour the apple slices into the pie shell and distribute them to make a nice mound. Drizzle jarred caramel over the top, to personal preference. Use a spoon to distribute crumb topping to cover apples, using butter lumps and powder to fill the nooks and crannies.
- Set pie on hot baking sheet. Bake for 40 to 45 minutes, until apples are tender when pierced by fork. Cool for at least 30 minutes before cutting in.
- Store pie covered by foil in fridge. Will keep for as long as a week. Great eaten cold or warmed up!
OM NOM NOM!
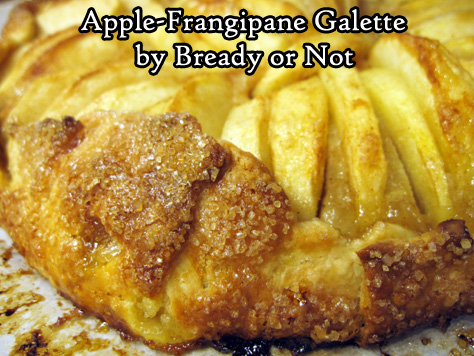
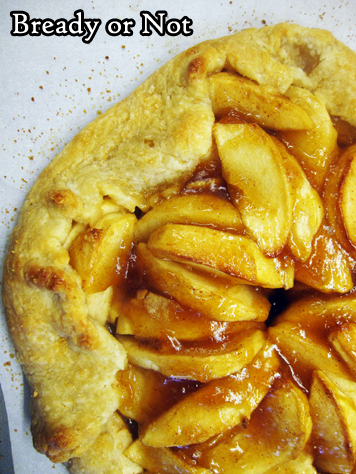
Bready or Not Original: Apple-Frangipane Galette
This Apple-Frangipane Galette is like a leaner apple pie. It’s the way to enjoy a sweet treat without going full overkill.
This recipe has a lot of ingredients and steps, but they can be spread out over a few days, if you want. The actual recipe is pretty straightforward!
I’ve been doing a number of recipes that use frangipane, and I get asked almost every time: “what is frangipane?”
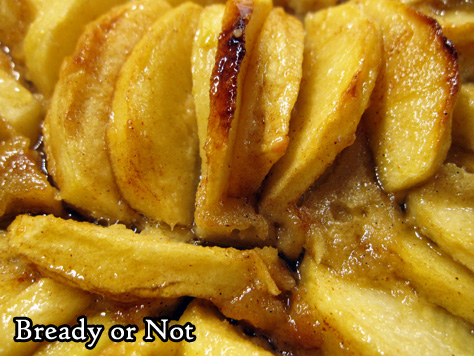
To quote Wikipedia, it’s: “a sweet almond-flavored custard used in a variety of ways including cakes and… pastries. …Today it is normally made of butter, sugar, eggs, and ground almonds.”
In other words, it’s a spreadable, sweet, nutty layer of goodness. It acts as the perfect complement to apples in this recipe.
Do note that this is best enjoyed the day it is made. It’s fine, though, to freeze slices of it right away. When you thaw them later, enjoy the pieces that same day!
Bready or Not Original: Apple-Frangipane Galette
Equipment
- parchment paper
- food processor
- pastry brush
Ingredients
Crust:
- 1 cup all-purpose flour plus more for dusting
- 4 teaspoons white sugar
- 1/2 teaspoon salt
- 6 Tablespoons cold unsalted butter cut into small pieces
- 1 large egg
Frangipane:
- 2/3 cup almond flour sifted to remove lumps
- 1/4 cup white sugar
- 1 Tablespoon all-purpose flour
- 1 Tablespoon unsalted butter room temperature
- 1 large egg
- 1 Tablespoon apple brandy such as Calvados (optional)
- 1 teaspoon pure vanilla extract
- 1/2 teaspoon apple pie spice
- pinch salt
Apple filling:
- 2 medium apples such as Honeycrisp or Golden Delicious
- 1 Tablespoon brown sugar packed
- 1 Tablespoon white sugar
- 1 teaspoon lemon juice
- 1/4 teaspoon apple pie spice
- 1 large egg beaten
- turbinado or other coarse sugar
Glaze:
- 2 Tablespoons honey
- 2 teaspoons apple brandy such as Calvados
Instructions
Make the crust:
- In a food processor, pulse together the flour, sugar, and salt. Add the butter and chop until it’s pea-sized. Add the egg and pulse until it comes together; if it doesn’t, add tiny drizzles of water until it does–just make sure the dough ends up cohesive, not wet. Turn out the dough onto a big piece of plastic wrap and compress the dough to form a disc. Wrap it up and chill it in fridge for a few hours, minimum, or a few days.
Make the frangipane:
- Use a rubber spatula to combine the almond flour, sugar, flour, butter, egg, apple brandy, vanilla, pie spice and salt, making it smooth. Stash it in the fridge until ready to use.
Assembling the galette:
- Preheat oven at 400-degrees. Prepare a big cookie sheet with a piece of parchment. Bring out the dough to warm for a few minutes, then lightly flour a surface and roll it out to about a 12-inch round. Move it to the parchment paper.
- Spread the frangipane over the dough, leaving a blank 1 1/2-inch border. Set the baking sheet in the fridge while preparing the apples.
Prepare the apples:
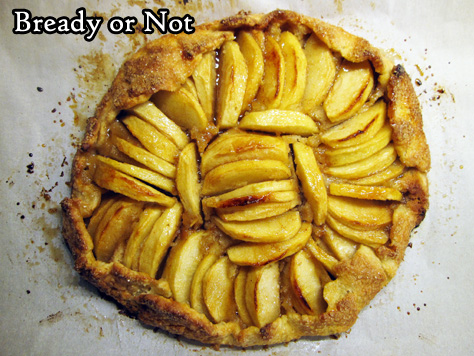
- Peel the apples and slice to 1/4-inch thickness. In another bowl, stir together the brown sugar, sugar, lemon juice, and pie spice. Add this to the apples, and toss them to coat. Bring out the galette dough. Arrange the apples on the frangipane starting from the middle, spiraling them outward while slightly overlapping them. Fold the blank edge over the apples to form a thin, pleated crust. Brush the beaten egg over the crust, then sprinkle it with coarse sugar.
- Bake galette for 35 to 40 minutes. Apples in middle should be fork-tender when done. Cool for about 30 minutes.
Make the glaze:
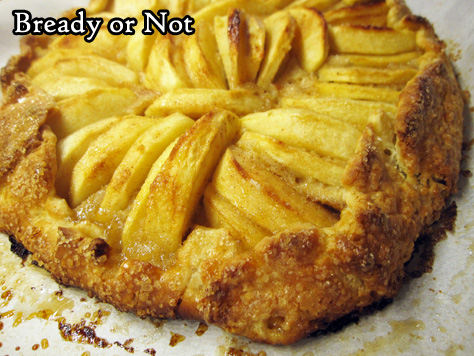
- In a small saucepan on the stovetop or in a microwave-safe bowl in the microwave, warm the honey and brandy until it is loose and spreadable. Using a clean pastry brush, brush glaze over the apples.
- Let galette cool another 30 minutes, minimum, before cutting it–a pizza slicer is great for this. The galette is best eaten the day it is made, or promptly frozen in slices to be eaten soon after it thaws.
OM NOM NOM!
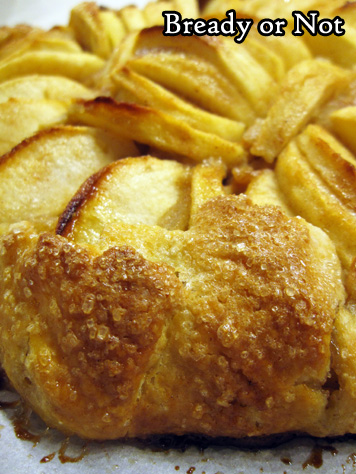
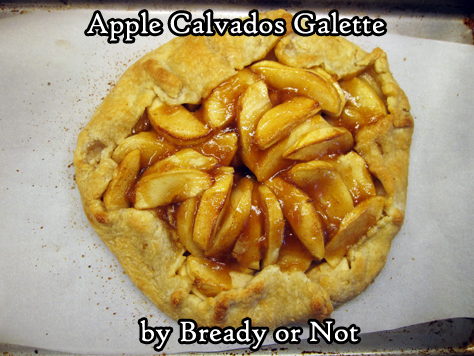
Bready or Not Original: Apple Calvados Galette
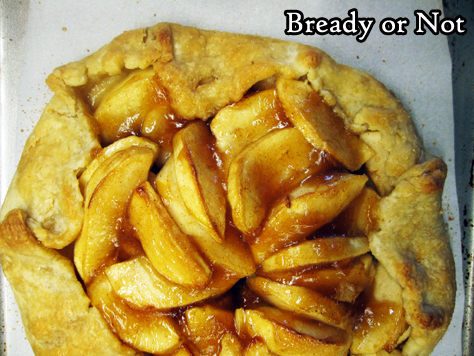
This Apple Calvados Galette is a perfect dessert for one or two people. Plus, it’s rustic and pretty to behold!
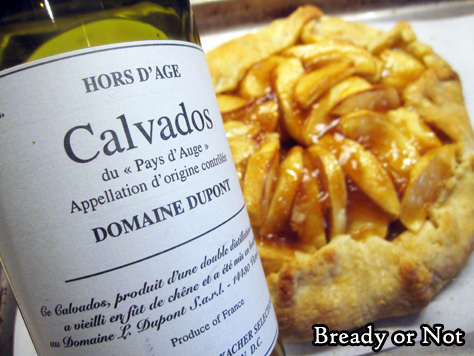
Calvados is an apple brandy made in Normandy. The price point of it can vary quite a bit. Feel free to use another kind of apple brandy in the recipe.
The delicious, original aspect of this treat is that you use the calvados to make a quick stovetop jelly that you then coat the apples with at the end of the bake time.
The alcohol flavor doesn’t linger. What you get is a concentrated sweet flavor of apples, right atop the fresh apples.
The baked galette keeps for days wrapped up in foil in the fridge. A quarter slice is the perfect amount for breakfast or dessert, and it’s not anywhere near as bready and dense as a full piece of pie.
Bready or Not Original: Apple Calvados Galette
Equipment
- baking sheet
- parchment paper
- basting brush
Ingredients
Galette
- 1 single-layer pie dough store-bought or homemade
- 4 medium apples such as Gala, Fuji, and Ambrosia
- 1 Tablespoon lemon juice
- 1/3 cup calvados or other apple brandy
- 1 Tablespoon cornstarch
- 3 Tablespoons brown sugar packed
- 1/2 teaspoon ground cinnamon
Glaze
- 1 Tablespoon pure maple syrup
- 1 Tablespoon maple sugar or turbinado sugar
Instructions
- Preheat oven at 400-degrees. Line a baking sheet with parchment paper.
- On a lightly floured surface, roll out the pie crust to about a 10-inch diameter circle. Transfer it to the baking sheet and set in fridge while the other ingredients are prepared.
- Peel, core, and thinly slice the apples, placing them in a large bowl. Pour in the lemon juice, calvados, cornstarch, brown sugar, and cinnamon. Toss the apples to coat them completely.
- Pull out the chilled crust. Begin to arrange apple slices in the middle, fanning them out and stacking them, but leaving a 2-inch border of dough around the outside. DO NOT DISCARD THE LIQUID IN THE BOWL! Once the apples are arranged, fold the dough over to partially cover the apples.
- Start baking the galette for 15 minutes. While that is cooking, pour the leftover liquid into a small pot on medium-high. Stay close to the stove and stir liquid often. As soon as it gels, which is right at right about boiling temperature, remove it from heat. Set aside.
- Reduce oven temperature to 350-degrees. Bake galette for another 20 minutes.
- Pull out the galette. Drizzle the gel over the exposed apples in the middle of the galette then use basting brush to coat every nook and cranny. Measure out maple syrup. Use same brush (no need to wash it) to coat the top crust, then sprinkle maple sugar or coarse sugar over it to add a crystalline crunch.
- Bake for another 10 to 15 minutes, until apples in middle are fork-tender.
- Let cool slightly before cutting–a pizza cutter is ideal. Leftovers can be kept wrapped up in foil in the fridge for days.
*OM NOM NOM!*
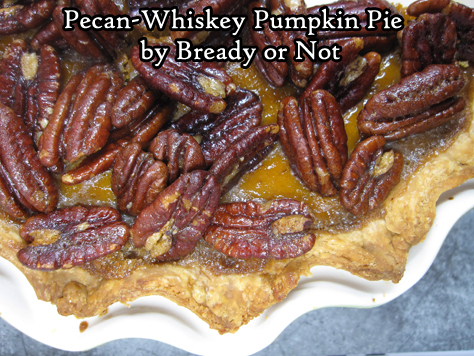
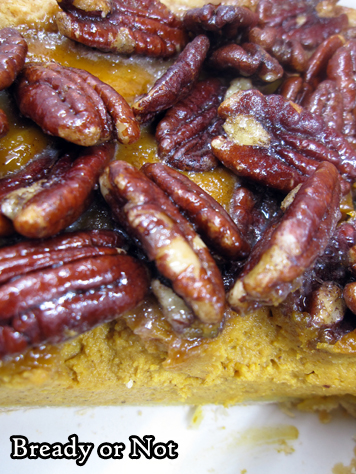
Bready or Not: Pecan-Whiskey Pumpkin Pie
This Pecan-Whiskey Pumpkin Pie is FANCY. It looks fancy, and let me assure you, it tastes fancy.
I’m relieved that the results are amazing, because honestly, this is the most complicated pumpkin pie recipe I have ever made.

I’m used to the basic, yummy Libby’s pie. This pie is substantially more intimidating, but doable.
I found the original recipe in the November 2019 issue of Bon Appetit. I do not like how the original recipe is written. It’s confusing at several points. Therefore, I largely rewrote it, creating what (I hope) is a more straightforward version.
But it is still complicated. I suggest making the pie crust a day ahead, just to avoid dirtying everything all at once.
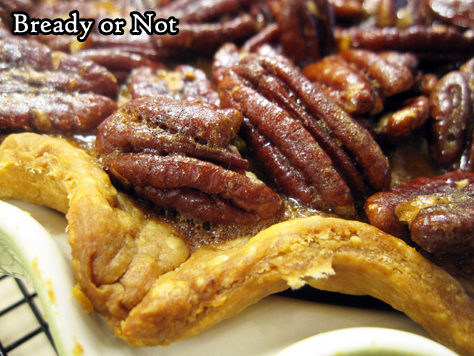
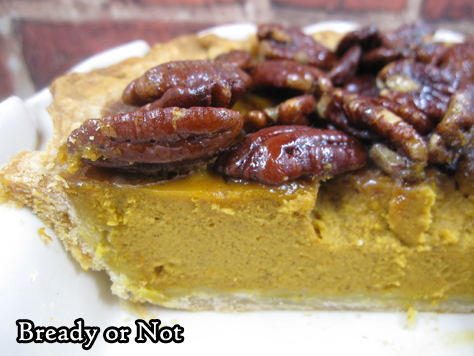
The end result is a pumpkin pie with a custard that is delicately firm and soft, with nuanced spices that perfectly complement the candied pecans on top.
This is a pie to make to impress people. Truly, this is a Bake Off showstopper kind of pie.
Recipe heavily rewritten from original in Bon Appetit November 2019.
Bready or Not: Pecan-Whiskey Pumpkin Pie
Equipment
- deep dish pie pan
- parchment paper
- pie weights
- immersion blender or blender
Ingredients
Crust
- 1 3/4 cups all-purpose flour
- 1 Tablespoon white sugar
- 3/4 teaspoon kosher salt
- 3/4 cup unsalted butter (1 1/2 sticks) cold, cut into pieces
- 3/4 cup ice water
- 1 large egg white reserve yolk to use in pie filling
Pecan Topping
- 1 1/2 cups whole pecans
- 2 Tablespoons brown sugar packed
- pinch kosher salt
- 1 Tablespoon unsalted butter melted
- 1 Tablespoon pure maple syrup
Pumpkin Pie
- 3 large eggs
- 1 egg yolk
- 15 oz pure pumpkin puree
- 3/4 cup heavy cream
- 1/4 cup white sugar
- 2 Tablespoons rye whiskey
- 1 teaspoon ground cinnamon
- 1 teaspoon ground ginger
- 1/4 teaspoon ground nutmeg
- 1/4 teaspoon ground cardamom
- pinch ground cloves
- 6 Tablespoons brown sugar packed
- 2 Tablespoons unsalted butter melted
- 1/4 teaspoon kosher salt
Instructions
Make the crust
- Note that the dough can be made as days in advance and kept chilled. The crust can also be baked a day or two before the pie is finished; keep it covered at room temperature in the meantime.
- Whisk together flour, sugar, and salt. Add butter and coat it with flour, then use fingers to press butter into shaggy pieces of varying sizes. Drizzle in about 5 Tablespoons of cold water and knead it into flour. Add additional small increments of water until dough just starts to come together. There should still be visible pieces of butter.
- Dump dough onto a clean, lightly-floured surface and knead a few more times to work in any dry, shaggy bits. Form the dough into an even, broad disc and encase in plastic wrap. Tuck inside fridge to chill for at least 30 minutes, or up to 3 days.
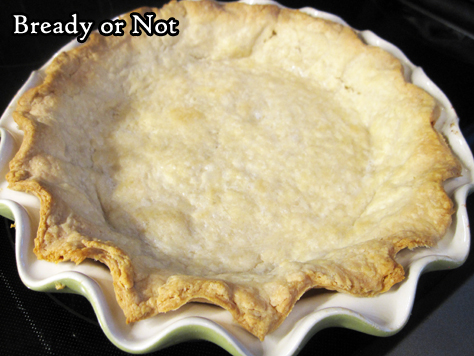
- To blind-bake crust, preheat oven at 400-degrees.
- On a floured surface, roll out dough to make about an even 12-inch round. Loop it over the rolling pin to lift it onto a deep dish pie plate. Shape it into pan. Form the crust edge as desired and trim away any excess dough.
- Line the inside of the crust with parchment paper. Fill entire crust with pie weights, such as dry beans.
- Bake until the edges of the crust start to brown, about 20 minutes. Use parchment to lift out pie weights and set aside to cool--do so with great care!
- Decrease the oven temperature to 350-degrees, and continue to bake for another 20 to 25 minutes. While it is baking, separate an egg; place the white in a bowl and beat it slightly, and reserve the yolk in fridge to use for the pie filling.
- Remove crust from oven. Immediately brush a tablespoon of egg white over the bottom, which will help it resist going soggy once the filling is added. Return crust to oven for another 5 to 10 minutes. Reserve the remaining egg white for use in the pie.
- At this point, the recipe can proceed to the filling stage, or the crust can cool completely and be covered to sit at room temperature for a few days.
Filling
- Heat oven at 350-degrees; set a baking sheet inside oven at heat up, too.
- While mixing the filling ingredients, toast the pecans on a foil-lined rimmed baking sheet for about 8 to 10 minutes, stirring them once at the halfway point. The pecan should be a little darker and fragrant.
- If using an immersion blender, combine the following ingredients in an even-bottomed large pot (a slow cooker pot works for this) or use a large blender (in two batches, if needed). Combine eggs, egg yolk, pumpkin puree, heavy cream, and white sugar. Add the whiskey, cinnamon, ginger, nutmeg, cardamom, cloves, 6 Tablespoons brown sugar, 2 Tablespoons melted butter, and kosher salt. Blend until smooth.
- Pour into crust and bake until the filling is puffed and mostly set--a little wobble is okay--about 40 to 45 minutes.
- While that is finishing up, coat the pecans. Pull out the leftover egg white and whisk in 2 Tablespoons brown sugar and kosher salt. Add maple syrup and Tablespoon of melted butter, stirring until just combined. Add the pecans and toss to coat.
- Carefully use baking sheet to bring out the pie. Use a slotted spoon to add the pecans on top of the pumpkin, letting the excess egg white slurry stay in the bowl.
- Return pie to oven. Bake until filling is completely set, until a butter knife stabbed into center (avoiding pecans) comes out clean. This can take anywhere from 10 to 30 minutes. If necessary, cover the edge of crust with foil to prevent overbrowning.
- Let pie cool at least 2 hours before cutting in, chilling first if desired. Store pie loosely covered by foil at room temperature or in fridge.
OM NOM NOM!
Read More
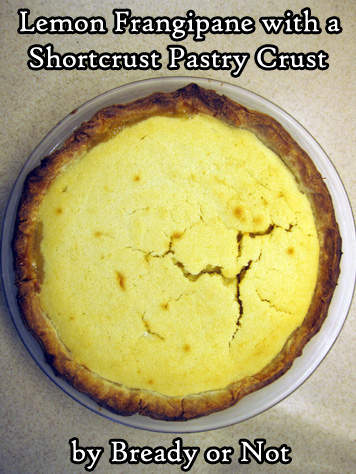
Bready or Not Original: Lemon Frangipane with Shortcrust Pastry
To finish off Lemon Month, I present a Lemon Frangipane along with a bonus recipe for Shortcrust Pastry.
What is frangipane? It’s a sweet filling made from almonds. It can be used in cookies, pastries, or–in this case–a shortcrust pie crust.
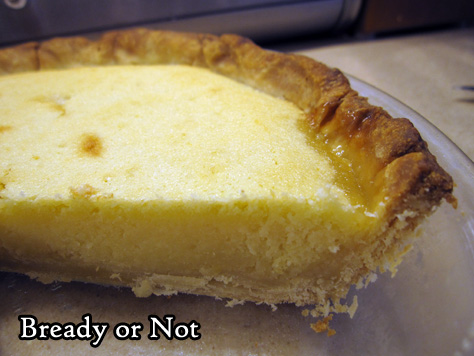
The nutty flavor of frangipane isn’t upfront in this recipe. This one is really all about lemony freshness, which happens to complement frangipane nicely.
The shortcrust recipe is a good, basic pie crust recipe, one that is doable even for beginning bakers. The dough can be made days or weeks in advance.

I first encountered frangipane on the Great British Bake Off. Since I associated it with fancy bakes, I was a bit intimidated about trying it myself, but this recipe makes it straightforward.
The end result is a lemony fresh frangipane with a crisp, delicious homemade crust. A crust that, thanks to being blind-baked first, should not have a soggy bottom.
Bready or Not Original : Sweet Shortcrust Pastry
Equipment
- food scale
- parchment paper
- pie weights
Ingredients
- 225 grams all-purpose flour
- 4 Tablespoons confectioners' sugar
- 150 grams cold butter cut into small cubes
- 1 large egg beaten
- 2 Tablespoons cold water plus more as needed
Instructions
- Mix flour and confectioners' sugar in a large bowl. Add pieces of butter and rub in with fingertips to break into smaller, flatter morsels. Make a well in the middle and add the beaten egg and one tablespoon of water. Use fingers to work in a bit before adding the second tablespoon.
- Work dough until it begins to lump together! Drizzle in tiny increments of additional water, if needed, to make it cohesive. The dough should be able to come together in a ball, not gluey.
- Wrap dough in plastic wrap and stash in fridge for at least 20 minutes--or for a few days, or freeze until ready to use.
- When ready to blind-bake crust, preheat oven at 375-degrees (180 C, Gas 5). Lightly grease pie plate.
- Lightly flour work surface. Use rolling pin to roll dough into proper size for your pan, at about 1/2 cm thickness. Gently set dough into dish and press into place. Make sure excessive amounts of dough don't stick out over the edge but do NOT trim exactly to edge yet.
- Cover the pastry surface with parchment paper. Use dried beans or other pie weights to completely fill plate. If using a 9-inch pie plate, bake for 20 to 25 minutes, until crust takes on a light golden color; for a smaller plate, reduce time and monitor color.
- Use parchment to lift out pie weights. Use a knife to trim excess dough from edge to form a nice, neat line. Follow filling recipe from here on and bake again as necessary.
OM NOM NOM!
Bready or Not Original: Lemon Frangipane with Shortcrust Pastry
Equipment
- 9-inch shallow pie/quiche plate
Ingredients
- 1 shortcrust pastry crust already partially baked
- 2 Tablespoons lemon curd
- 1/2 cup unsalted butter 1 stick, room temperature
- 1/2 cup white sugar
- 2 eggs room temperature
- 1 1/3 cup ground almonds sifted
- 2 1/2 Tablespoons all-purpose flour or substitute with extra ground almonds
- 1 lemon zested and juiced
- 1 Tablespoon lemon juice
- 4 Tablespoons milk or half & half
Instructions
- Preheat oven at 375-degrees (190C, Gas 5).
- Warm the lemon curd in the microwave for only 5-10 seconds, long enough to make it looser and more spreadable. Brush all over the bottom of the crust.
- In a large bowl, cream together butter and sugar until light and fluffy. Beat in eggs, one at a time. Add almond flour, flour, and lemon zest. Follow up with a tablespoon of lemon juice and the milk. Mix until just cohesive.
- Pour filling into crust. Bake for 25 minutes, or until it passes the toothpick test in center. If parts of the filling uplift in crazy ways, worry not--it should even out as it cools.
- Cool pan for an hour at room temperature for an hour to set. Cut into it then, or chill in fridge to enjoy later. Keep stored in fridge with foil covering.
OM NOM NOM!
Follow me


