Bready or Not Original: Earl Grey Shortbread Bars
Whether you are coping with cold weather right now or psychologically easing into winter (something I know well from my time in Arizona), these Earl Grey Shortbread Bars will make you feel warm and cozy. Also, caffeinated.
These bars are dense, soft, and a touch crumbly, the flavor of warm spice throughout. The drizzle of glaze adds sweetness and prettiness.
The tea flavor is quite strong here–it actually seemed to get bolder after a day–so the 1/4 cup amount is best made for people who like Earl Grey. I used Bigelow bags, but the amount of tea likely varies across brands. If you want a milder flavor, use less tea.
Bready or Not Original: Earl Grey Shortbread Bars
Equipment
- 9×13 pan
- spice grinder or mortar and pestle
- wax paper or plastic wrap
- heavy glass or other weight
- piping bag or freezer bag
Ingredients
Dough
- 1/4 cup Early Grey tea leaves about 4-5 Bigelow bags
- 4 cups all-purpose flour
- 1/2 teaspoon salt
- 2 cups unsalted butter (4 sticks) room temperature
- 2 1/2 cups confectioners’ sugar
- 2 teaspoons vanilla extract
Glaze
- 1 cup confectioners’ sugar
- 1 1/2 Tablespoons milk or half & half
Instructions
- Preheat oven at 350 degrees. Line a 9×13 baking pan with aluminum foil and apply nonstick spray or butter.
- Use a spice grinder or a mortar and pestle to grind the Earl Grey leaves down a bit more, but not fully to powder. Move the tea to a medium bowl and stir with the flour and salt.
- In a large bowl, beat the butter until fluffy. Gradually add the confectioners’ sugar, followed by the vanilla. Beat until smooth. Gradually beat in the flour mixture to incorporate.
- Dollop the dough into the prepared pan. Use a piece of wax paper or plastic wrap to spread out the dough, then use something like a heavy glass to evenly compress the dough into the pan.
- Bake until shortbread is firm with golden edges, about 40 to 45 minutes. Cool in pan on rack.
- After the pan comes to room temperature, mix the glaze ingredients. Transfer them to a piping bag or to a freezer bag. Snip the corner to pipe the glaze in stripes over the pan. Let set for an hour, then use foil to lift contents onto a cutting board to slice into bars.
- Store in sealed container at room temperature. Bars will keep for an least 2 days.
OM NOM NOM!
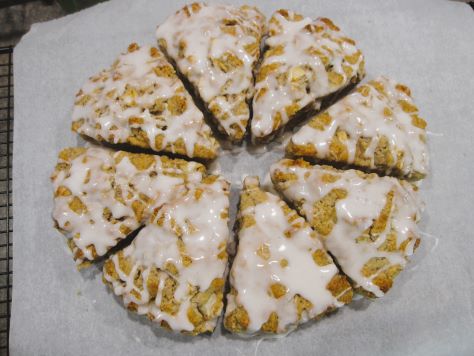
Bready or Not: Spiced Apple Scones
These Spiced Apple Scones make for a delicious breakfast. They are great fresh, but they can also be frozen for a convenient meal on the go later in the week.
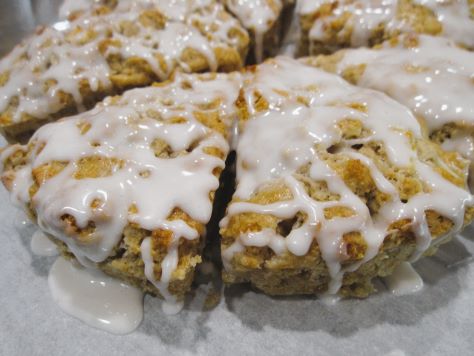
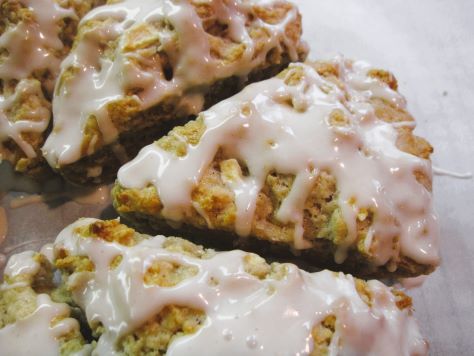
These are not super sweet. There is enough sugar inside to elevate them above what Americans regard as a biscuit; the glaze not only adds some sweetness, but a texture for contrast. If you want these plainer, just omit the glaze!
If you don’t have pie spice, just use cinnamon with perhaps a sprinkle of nutmeg.
Greatly modified from Bake from Scratch Magazine September/October 2023.
Bready or Not: Spiced Apple Scones
Equipment
- baking sheet with parchment or scone pan
- knife or bench knife
Ingredients
Scones
- 2 cups all-purpose flour plus more for surface
- 1/4 cup white sugar
- 2 1/2 teaspoons baking powder
- 1 1/4 teaspoons pie spice
- 1 teaspoon kosher salt
- 1/2 teaspoon baking soda
- 6 Tablespoons unsalted butter cut into cubes and cold
- 1 teaspoon vanilla extract
- 1 cup half & half or milk, plus more for tops if desired
- 1 medium baking apple (about 120 grams) peeled and diced
Glaze
- 1 cup confectioners' sugar plus more if needed
- sprinkle pie spice
- 1 Tablespoon half & half plus more if needed
- 1/2 teaspoon clear vanilla extract
Instructions
- Preheat oven at 375-degrees. Line a baking sheet with parchment paper or pull out a scone pan.
- In a big bowl, stir together flour, sugar, baking powder, pie spice, salt, and baking soda. Cut in the butter, mashing it until it resembles coarse crumbs. Pour in the vanilla and half & half, stirring until just combined. Fold in the diced apple.
- If using a baking sheet to bake, flour a work space. Flour hands and fold and pat the dough into a thick disc. Use a knife or bench knife to slice it into 8 wedges. Move wedges, spaced out, onto baking pan. Alternatively, press dough into scone pan to evenly fill each hole. Whichever method is used, chill scones for about 15 minutes.
- If softer scones are desired, measure out a tablespoon of milk and brush that atop the scones. If crisper tops are wanted, leave the scones be.
- Bake scones until tops are golden brown, 15 to 20 minutes. Let cool for about 20 minutes.
- Make the glaze. Whisk together confectioners’ sugar, a sprinkle of pie spice, half & half, and clear vanilla until they achieve a thick but oozy texture. Drizzle over scones.
- Enjoy scones right away, or store at room temperature in a sealed container for up to 2 days. They can also be frozen and thawed for later enjoyment.
OM NOM NOM!
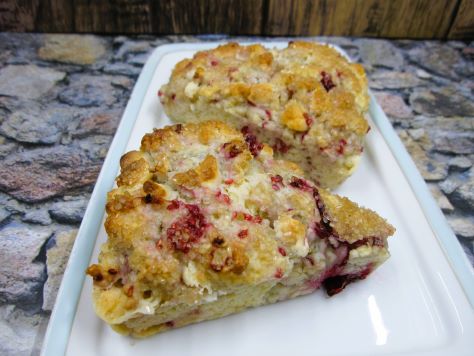
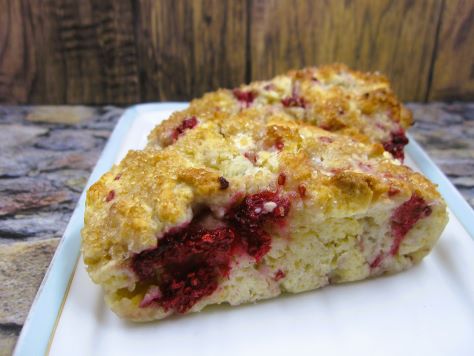
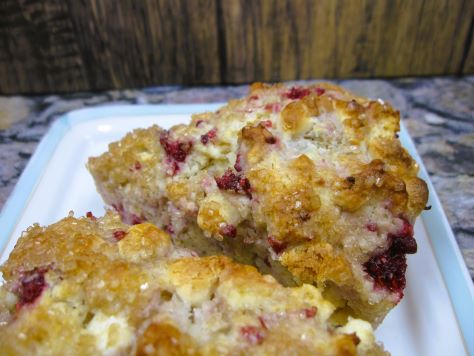
Bready or Not Original: Berry Scones
These Berry Scones are a delicious way to use fresh or frozen fruit to create a batch of baked goods for breakfast.
I love scones but I hadn’t made this recipe in over 10 years. Arizona is not a good place to get locally grown fresh fruit like strawberries and raspberries. Soon after we moved to Minnesota, fresh strawberries came into season AND I won a gallon-sized bag of frozen raspberries in my first horticultural club meeting.
I needed ways to utilize my new bounty. I reworked this old recipe, reducing the fruit amount and adding white chocolate chips. That extra sweet kick really elevates the fruit!
Bready or Not Original: Berry Scones
Equipment
- cookie sheet or scone pan
- nonstick spray
Ingredients
Scones:
- 1/2 cup strawberries or raspberries (fresh or frozen) about 3oz
- 3 Tablespoons white sugar separated
- 2 cups all-purpose flour
- 2 teaspoons baking powder
- 1/4 teaspoon salt
- 6 Tablespoons unsalted butter
- 2/3 cup milk or almond milk
- 1/2 cup white chocolate chips
Topping:
- 1 Tablespoon coarse or white sugar optional
Instructions
- Preheat oven at 400 degrees. Lightly grease a cookie sheet or line with parchment paper, or use a scone pan.
- Use kitchen shears or a knife to cut the fruit into bite-sized pieces. Sprinkle fruit with 1/2 tablespoon sugar; set aside to macerate.
- Combine remaining sugar with flour, baking powder and salt. Add butter, using a pastry cutter or a fork to cut it in. Don’t completely mix in butter, but leave some pea-sized pieces throughout. Stir in milk. Fold in the white chocolate chips followed by the berries.
- Flour hands to coat. Gently knead and turn the dough to incorporate the dry bits from the bottom of the bowl. Sprinkle dough with extra flour if it’s too sticky to work with.
- If using a cookie sheet for baking, pat the dough into a circle 3/4 inch thick. If any berries peek out, push them into dough. Cut circle into 6-8 wedges (or smaller), then transfer wedges to the cookie sheet, leaving at least 1/2 inch of space between them; they will spread. Alternatively, press handfuls of dough into a scone pan, filling each empty space to the end to create even pieces. Sprinkle the tops with coarse or white sugar, if desired.
- Bake 20 to 25 minutes or until the tops are beginning to brown. Remove them from pan. Scones can be eaten immediately, or will keep in a sealed container at room temperature for up to 2 days. Freeze them to enjoy later.
OM NOM NOM!
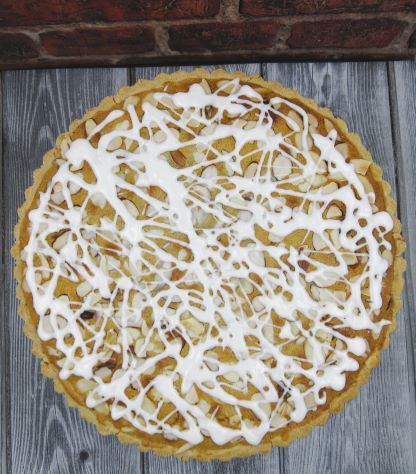
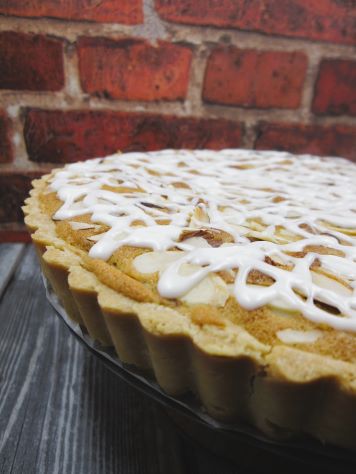
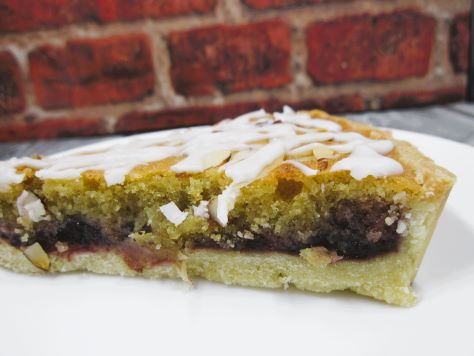
Bready or Not: Cherry-Almond Bakewell Tart
Bakewell Tarts are classic British pastries. This version, modified from Bake from Scratch Magazine, uses store-bought preserves (I used Bonne Maman) with everything else from scratch.
If you’re in America, you’re not likely to find a Bakewell Tart unless you’re near a big city bakery; as for me, I’ve never found it for sale in the US, and I’d probably scream in delight if I came across it. I made a pointed effort to get slices more than once during my 2019 trip to the UK.
Not gonna lie, this is a dessert that takes some work. The pâte sucrée, the crust, can be done ahead of time, and that helps to space out the labor. The filling, which is a frangipane, needs to not only be mixed, but piped into the crust to help it form a consistent layer.
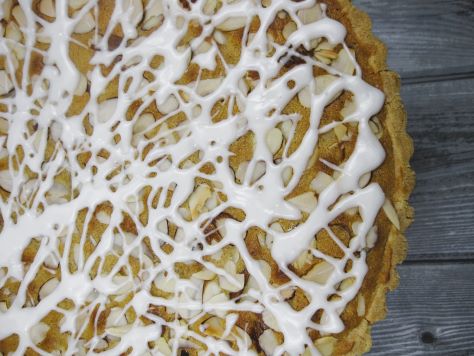
And of course, at the end, the tart needs a nice sweet drizzle that looks gorgeous and amps up the flavor, too. This is really the ultimate special occasion breakfast or dessert.
There are two recipes included here: the pâte sucrée and the full assemblage of the Bakewell Tart.
Bready or Not: Pâte Sucrée
Ingredients
- 1/2 cup unsalted butter (1 stick) softened
- 1/3 cup confectioners’ sugar
- 1/2 teaspoon kosher salt
- 1 large egg room temperature
- 2 cups all-purpose flour
Instructions
- In a stand mixer or by hand. beat together butter, sugar, and salt until they are pale and creamy. Add the egg. Gradually beat in the flour until just combined, scraping the bottom of the bowl a few times.
- Shape the dough into a flat disk and encase in plastic wrap. Place in the fridge for an least an hour, but overnight is preferred. Dough can be refrigerated for up to a week or can be frozen for up to 2 months. If frozen, thaw in fridge before using.
Bready or Not: Cherry-Almond Bakewell Tart
Equipment
- Rolling Pin
- parchment paper
- 9-inch tart pan with removable plate
- pie weights
- pastry brush
- pastry bag or freezer quart bag
- uneven spatula
Ingredients
Tart
- 1 pâte sucrée
- 1 large egg white lightly beaten
- 1/2 cup unsalted butter (1 stick) room temperature
- 1/2 cup white sugar
- 2 large eggs room temperature
- 2 teaspoons vanilla extract or vanilla bean paste
- 1/2 teaspoon kosher salt
- 1/4 teaspoon almond extract
- 1 cup almond flour sifted to remove clumps
- 2 Tablespoons all-purpose flour
- 3/4 cup cherry preserves
Topping
- 1/4 cup sliced almonds
- 1/2 cup confectioners’ sugar
- 1 Tablespoon milk or half & half
Instructions
Form the crust
- If the pâte sucrée is quite firm from chilling, let it set at room temperature for about 20 minutes to make it more pliable. Use a rolling pin to roll it into a 12-inch circle, about 1/8-inch thick.
- Remove the base of the tart pan and trace the shape onto parchment paper. Cut paper to fit in bottom of pan and apply baking spray. Carefully transfer dough to pan, but if it falls apart, that’s okay–press it into an even layer across the bottom of the pan and up the fluted sides. Use a knife to cut excess dough from the top edge. Use a fork to dock the bottom of the pan, stabbing it here and there across the whole surface. Chill until firm, about 30 minutes.
Bake the crust
- Preheat oven at 325-degrees.
- Top the dough with a large piece of parchment paper, with ends extending over the sides. Add pie weights to fill the basin.
- Bake the crust for about 15 minutes. Carefully lift with the parchment and weights, setting on another pan to cool. Brush the bottom of the pan with the egg white. Continue baking for another 15 minutes; the base should look dry with the dough lightly browned. Set aside to cool completely as the filling is made. Increase oven temperature to 350-degrees.
Make the frangipane
- Beat the butter and white sugar until light and fluffy. Scrape the bottom of the bowl a few times to make sure everything is mixed. Add eggs, one at a time, followed by vanilla, salt, and almond extract. Scrape bottom and sides of bowl. Gradually mix in both flours until just combined.
- Spoon frangipane into a pastry bag or a freezer quart bag. Cut off the tip.
- Use an uneven spatula to spread the cherry preserves over the bottom crust. Pipe the frangipane over the preserves. Use a clean uneven spatula to smooth it into an even layer. Sprinkle sliced almonds on top.
- Bake until frangipane is set and golden, about 30 minutes. Let cool about 20 minutes before removing the outer ring of the pan. Let tart cool completely on rack.
Add drizzle
- In a small bowl, stir together confectioners’ sugar and milk. Spoon into a pastry bag or freezer quart bag and snip off a tiny corner. Pipe glaze back and forth over tart. Let glaze set, about 20 minutes, then dig in. Store wrapped up or in sealed container in fridge for up to 4 days.
OM NOM NOM!
Bready or Not: Cornish Fairings Cookies
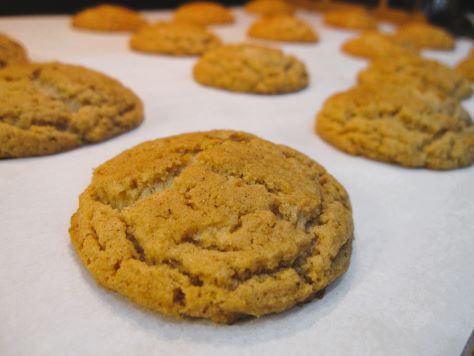
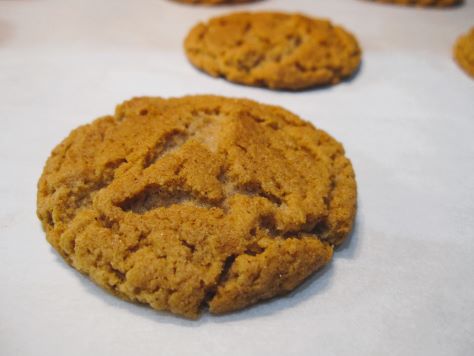
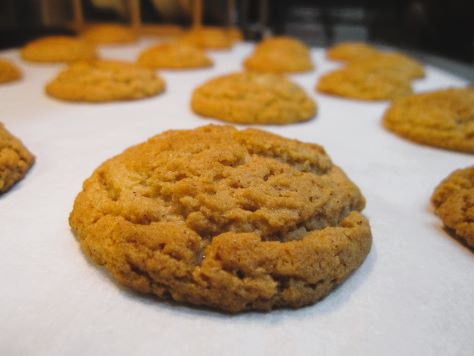
Cornish Fairings Cookies (to use the American wording, as these would be Corning Fairings Biscuits at their point of origin in Cornwall) are light, delicious cookies that use golden syrup for flavor and sweetness.
Golden Syrup is a delicious ingredient out of the UK. Some recipes call for using a half and half mix of light corn syrup and honey to replace it in American recipes, but I’ve found that’s not a good replacement for the flavor. If you’re in the US, look for Lyle’s Golden Syrup in the British section of a grocery store or at World Market.
Ginger gives these cookies a pleasant warming element, but I should note that these aren’t heavy like most gingerbreads. This is something different, light and chewy.
Do note that I found these cookies got stiffer in texture after a day, but they were still delicious.
Adapted from Bigger Bolder Baking by Gemma Stafford.
Bready or Not: Cornish Fairings Cookies
Equipment
- parchment paper
- baking sheet
- food processor
- teaspoon scoop
Ingredients
- 1/2 cup unsalted butter 1 stick
- 1 1/2 cups all-purpose flour
- 1/2 cup light brown sugar packed
- 2 teaspoons ground ginger
- 2 teaspoons baking powder
- 1 teaspoon baking soda
- 1 teaspoon ground cinnamon
- 1/2 teaspoon salt
- 6 Tablespoons golden syrup
Instructions
- Preheat oven to 400-degrees. Line a baking sheet with parchment paper.
- Using a food processor, dice up butter. Add flour, brown sugar, ginger, baking powder, baking soda, cinnamon, and salt, and pulse to mix, scraping the blades clean as needed. Add golden syrup and pulse to incorporate.
- Use a teaspoon scoop to dole out dough, spaced out, on parchment paper. Bake for 7 to 9 minutes, until cookies are set and crackled across the top. Cool on sheet for a few minutes, then transfer to a rack to completely cool. Store in an airtight container at room temperature; they will get stiffer in texture after a day, but the flavor is still wonderful.
OM NOM NOM!
Bready or Not: Crunchy Biscuits
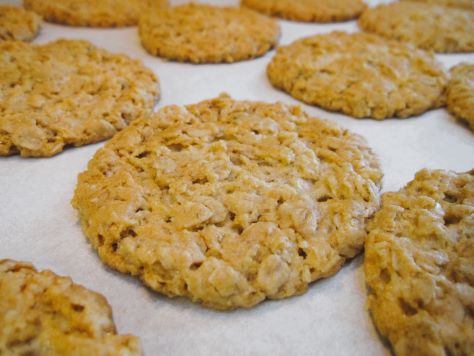
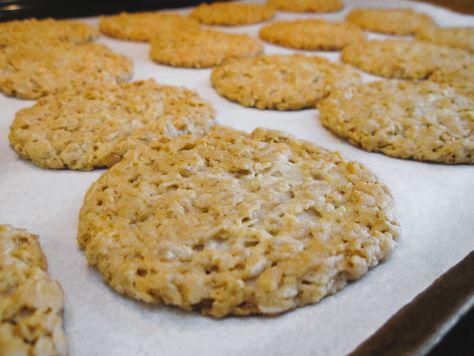
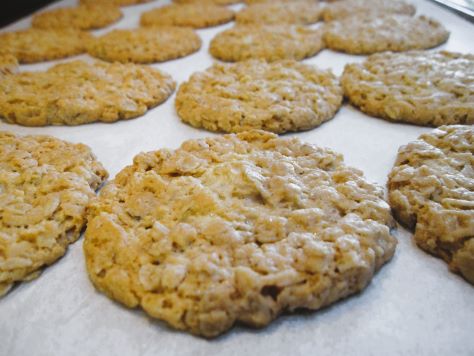
These are Crunchy Biscuits in the British sense–that is, they are crunchy cookies with a satisfying snap.
I found the recipe in Bigger Bolder Baking by Gemma Stafford [affiliate link], a book gifted to me by my mother-in-law. Gemma is Irish-born and now lives in America, and her fantastic cookbook has ingredients and cooking temperatures in both British and American measurements.
This small-batch recipe includes a quintessentially British ingredient, golden syrup, that has no real American parallel. I’ve seen some recommendations to substitute with half measures of light corn syrup and honey, and while that works as a liquid replacement, the flavor isn’t quite the same.
That said, golden syrup isn’t hard to find in America, it just tends to be expensive. Even in the wastelands of Phoenix, I could find Lyle’s Golden Syrup in the small British goods section of my local Fry’s (Kroger) chain.
Bready or Not: Crunchy Biscuits
Equipment
- parchment paper
- baking sheet
- tablespoon scoop
- cooling rack
Ingredients
- 1 cup unsalted butter (2 sticks) softened
- 3/4 cup white sugar
- 3 Tablespoons golden syrup
- 1 cup self-rising flour
- 2 2/3 cup rolled oats also called old fashioned oats
- 1 teaspoon baking soda
- 1/4 teaspoon salt
Instructions
- Preheat oven to 350-degrees. Line a baking sheet with parchment paper.
- In a large bowl, cream together butter and sugar until it is soft and light in color. Add golden syrup. Follow up with the flour, oats, baking soda, and salt, mixing until just combined.
- Use a tablespoon scoop to shape dough, rolling each lump briefly with hands to compress and flatten, then place spaced out two-inches apart on baking sheet. They will spread as they bake.
- Bake 12 to 14 minutes, until golden brown and set. Let them idle on the cookie sheet about 5 to 10 minutes, then transfer them to a cooling rack. Store them in an airtight container at room temperature.


