


Bready or Not: Apple Fritter Cake
I have many different kinds of apple cake here on Bready or Not. This Apple Fritter Cake is special because it tastes like the luscious apple fritters found in donut shops and bakeries!

This is not a thick cake. The crumb is really there to hold a lot of apple pieces together. The use of apple butter versus applesauce adds a deeper color and richer flavor.

Then there is, of course, the icing. That’s essential to make this cake like the pastry. It adds sweetness and a delicate crunch that’s fast to melt in the mouth.

Really, I look at this as a special occasion kind of apple cake, something for a birthday, special guest, or date.
Bready or Not: Apple Fritter Cake
Equipment
- 8×8 pan
- aluminum foil
- nonstick spray or butter
Ingredients
Cake
- 1 3/4 cups all-purpose flour
- 1 1/2 teaspoons baking powder
- 1 teaspoon ground cinnamon
- 3/4 teaspoon kosher salt
- 2 cups crisp baking apples diced and divided (232 grams) (use apples like Honeycrisp, State Fair, or Kindercrisp)
- 1 cup brown sugar packed
- 1 large egg
- 1 large egg white
- 1/2 cup unsalted butter (1 stick) melted and slightly cooled
- 1/3 cup vanilla yogurt or sour cream or crème fraiche
- 1/3 cup apple butter
- 1 Tablespoon lemon juice
- 1 teaspoon vanilla extract
Glaze
- 1 cup confectioners’ sugar
- 2 Tablespoons half & half
Instructions
- Preheat oven at 350 degrees. Line an 8×8 with foil and apply butter or nonstick spray.
- In a medium bowl, stir together flour, baking powder, cinnamon, and salt. Add 1 1/2 cups of the diced apples. Toss to coat.
- In a big mixing bowl, beat the brown sugar, egg, and egg white until light and fluffy. Mix in the melted butter, yogurt, apple butter, lemon juice, and vanilla. Fold in the dry ingredients, making sure to scrape the bottom, until everything is just combined.
- Pour batter into the prepared pan. Smooth out top. Sprinkle on the remaining 1/2 cup of apple pieces.
- Bake until browned, with the middle passing the toothpick test, about 45 to 55 minutes.
- Cool completely before mixing the glaze. Drizzle it all over the top. Serve warmed or at room temperature. Individual slices can also be frozen for later enjoyment.
OM NOM NOM!
Bready or Not: Apples and Honey Cake
Yes, yet another delicious version of apple cake. This Apples and Honey Cake uses apple butter, giving it a darker, moister crumb and a deeper infusion of spices.

This is truly a wonderful breakfast cake or a portable snack cake to tote along to work on school. It’s not messy to eat, and it’s refreshing and filling.

Note that, because of the apple butter, the top is dark in color, so don’t use the coloration to judge doneness in the oven. Rely on the good old toothpick test in the middle.

Bready or Not: Apples and Honey Cake
Equipment
- 9×9 pan
- nonstick spray
Ingredients
- 2 medium baking apples such as Honeycrisp or Cortland
- 1 cup olive oil
- 1 cup white sugar
- 3/4 cup apple butter
- 1/2 cup honey
- 1 teaspoon vanilla extract
- 2 large eggs room temperature
- 2 1/4 cups all-purpose flour
- 1 teaspoon ground cinnamon
- 1 teaspoon ground nutmeg
- 1 teaspoon kosher salt
- 1/2 teaspoon baking soda
- 1/2 teaspoon baking powder
Instructions
- Preheat oven at 350 degrees. Line a 9-inch square pan with foil and apply nonstick spray or butter.
- Peel and dice up the apples. Set aside.
- In a large bowl, whisk together the olive oil, sugar, apple butter, honey, vanilla, and eggs, creating a smooth mixture. Stir in the flour, cinnamon, nutmeg, salt, baking soda, and baking powder. Scrape the bottom of the bowl to make sure everything is combined. Fold in the apples.
- Pour the batter into the prepared pan. Bake for 45 to 55 minutes, until a toothpick plunged into the middle comes out clean. Let cool completely, chilling in fridge to speed the process if desired, then use the foil to lift the cake onto a cutting board for easier slicing.
- Store in a sealed container at room temperature or in the fridge for up to 5 days. Pieces can also be individually wrapped and frozen for weeks.
OM NOM NOM!
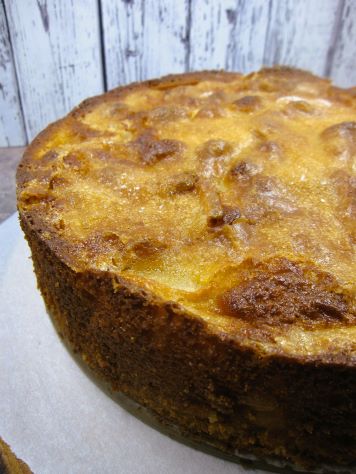
Bready or Not Original: Apple Custard Cake
This newest entry in my series of apple cakes is on the fancier side. This Apple Custard Cake is light, airy, and loaded with fruit. It truly does have a gourmet vibe.

While it’s not difficult to make, it is tedious to construct. This is a recipe that dirties a lot of dishes. Bowl after bowl after bowl. That said, the result truly is something special.
If you’re going to go through a lot of fuss, it should be worthwhile, right?

Bready or Not Original: Apple Custard Cake
Equipment
- 9-inch springform pan
- parchment paper
- uneven spatula
Ingredients
- 4 medium baking apples such as Honeycrisp, Granny Smith, and Cortland
- 1/2 cup golden raisins
- 1 medium lemon zested and juiced
- 1 teaspoon ground cinnamon
- 1/2 teaspoon ground nutmeg
- 1 cup whole wheat pastry flour
- 1/2 cup all-purpose flour plus 2 Tablespoons
- 1 Tablespoon baking powder
- 3/4 teaspoon salt
- 3 large eggs divided
- 2/3 cup white sugar
- 1 teaspoon vanilla bean paste or vanilla extract
- 1 cup milk or half & half
- 1 cup canola oil
- 1/3 cup white sugar for topping
Instructions
- Preheat oven to 350 degrees. Cut a piece of parchment paper to fit the disc of the springform pan. Use nonstick spray on pan. Add the cut parchment paper. Spray again over the paper, making sure to cover the sides of the ring.
- Thinly slice the apples. Place them with the raisins in a big bowl. Measure out 1 tablespoon of lemon juice to place in bowl; use any remaining juice for something outside of the recipe. Add all of the zest, the cinnamon, and nutmeg, and stir to coat the fruit. Set aside for a while; there are a lot of other bowls to dirty.
- In a separate bowl, stir together the whole wheat pastry flour, 1/2 cup of all-purpose flour, the baking powder, and salt. Set aside.
- In another mixing bowl, beat together 2 of the eggs with the 2/3 cup sugar, until they are thickened and pale. Add the vanilla. Measure out the milk and oil. Take turns adding the milk and oil to the egg mixture alternatively with the dry ingredients.
- In a small bowl, beat the remaining egg. Add 1 cup of the batter along with the remaining 2 tablespoons flour. Mix until just combined. Set aside to use for the topping.
- Fold the apple bowl contents into the main batter and mix until everything is coated. Scrape the batter into the prepared pan. Use an uneven spatula to spread the reserved batter over the top. Sprinkle the remaining 1/3 cup white sugar over the top of the cake.
- Place the cake on a rimmed baking sheet. Bake until the top is golden brown, about 1 hour. The edges should be pulling away from the sides. Transfer to a wire rack to cool for about 30 minutes. Run a knife around the sides of the inner ring. Pop the release to open the pan and lift away the ring to allow it to cool more.
- Cake can be kept wrapped at room temperature or in the fridge. Slices can also be individually wrapped and frozen for weeks.
OM NOM NOM!
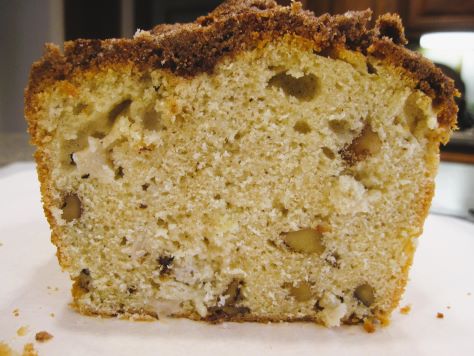
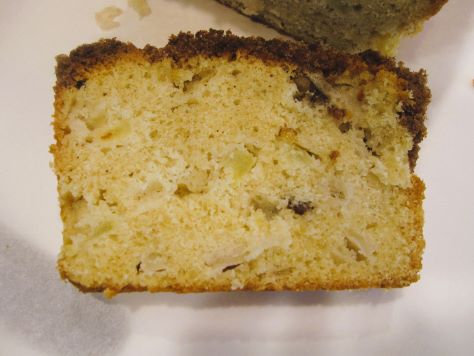
Bready or Not: Dutch Apple Loaf Cake
Need a smaller portion apple cake? Use your loaf pan! This Dutch Apple Loaf Cake has a crumble topping that is a bit messy, sure, but it’s also delicious.

I used three small apples in this cake, which came to about 2 cups diced up. That would probably equal two mediums or one really huge apple. You have more wiggle room in this recipe’s fruit content than you would in, say, an apple pie where the volume is more obvious.
This is an especially nice recipe to cut into slices and freeze for later. They thaw fast, too, making them great to pack for the road to enjoy on a trip or for a snack or lunch–though remember, they might be a little crumbly, so maybe eat where the birds can enjoy those crumbs.
Bready or Not: Dutch Apple Loaf Cake
Equipment
- 9×5 loaf pan
- parchment paper
- nonstick spray
Ingredients
Topping:
- 1/4 cup white sugar
- 1/4 cup all-purpose flour
- 2 teaspoons ground cinnamon
- 1/4 cup unsalted butter cold, cut up
Cake:
- 1/2 cup unsalted butter softened
- 1 cup white sugar
- 2 large eggs room temperature
- 1/4 cup buttermilk or soured milk (see note)
- 1 teaspoon vanilla extract
- 2 cups all-purpose flour
- 1 1/2 teaspoons baking powder
- 1/2 teaspoon salt
- 1/4 teaspoon baking soda
- 2 cups apple pieces peeled and diced (about 3 small apples)
- 1/2 cup walnuts chopped
Instructions
Mix topping
- Combine sugar, flour, and cinnamon. Cut in the butter until the mixture becomes crumbly. Tuck into fridge while the loaf is made.
Create loaf cake
- Preheat oven at 350 degrees. Cut parchment paper to fit into loaf pan like a sling, the paper extending up both long sides. apply nonstick spray into middle.
- In a large bowl, cream the butter and sugar until fluffy. Add eggs one at a time. Add the buttermilk and vanilla.
- In a small bowl, sift together the flour, baking powder, salt, and baking soda. Gradually add the dry ingredients to the wet. Fold in the apple pieces and the walnuts. Pour batter into the pan and even out. Sprinkle topping mix to cover.
- Bake for 55 to 60 minutes, until a toothpick inserted into the middle comes out clean. Cool for 20 minutes in pan before using the parchment to lift the cake onto a rack. Keep stored at room temperature, wrapped in plastic wrap or otherwise covered. Pieces can also be individually wrapped and frozen.
OM NOM NOM!
Notes
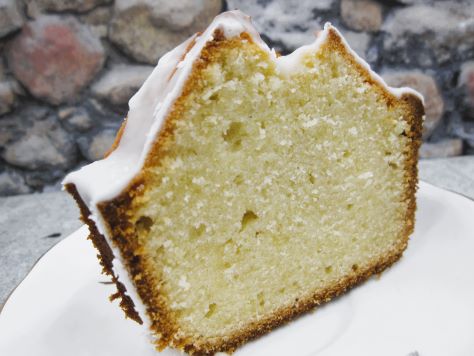
Bready or Not: Cider Pound Cake
This luscious Cider Pound Cake, made in a tube pan, is great by itself or eaten alongside fruit and/or ice cream.

There are no apples in this cake. That means it’s fast and easy to make, too. No peeling, or dicing or grating. Instead, the recipe relies on sparkling apple cider for sweetness and gentle flavor.

“Sparkling cider” means nonalcoholic. That doesn’t mean you should use any old apple juice, though. Apple cider has more flavor and heft (i.e. not so watery). I used a seasonal version from Aldi that is all Honeycrisp, but any basic sparkling cider will do!
Modified from Centennial Kitchen Fall Baking Magazine 2021.
Bready or Not: Cider Pound Cake
Equipment
- large tube pan
- nonstick spray
Ingredients
Cake
- 2 cups unsalted butter (4 sticks) softened
- 2 cups white sugar
- 6 large eggs room temperature
- 3 1/4 cups all-purpose flour
- 1/4 teaspoon salt
- 1/2 cup sparkling apple cider
Glaze
- 1 cup confectioners’ sugar
- 1 teaspoon clear vanilla extract
- 1 Tablespoon sparkling apple cider
Instructions
- Preheat oven to 350 degrees. Coat a tune pan with nonstick spray.
- In a big bowl, cream together the butter and sugar until they are fluffy. Add the eggs in sequence, beating well after each addition.
- In another bowl, stir together the flour and salt. Gradually add it to the large bowl along with the apple cider, going back and forth in increments. Scrape the bottom of the bowl to ensure everything is mixed. Pour batter into prepared pan and smooth out the top.
- Bake for 1 hour and 5 minutes to 1 hour and 20 minutes, until a toothpick plunged into the center of the cake comes out clean. Cool in pan for 20 minutes, then invert onto a cooling rack to completely cool.
- Once the cake is cool, in a small bowl, combine the three glaze ingredients to make a thick but moveable glaze. Dribble over cake so that it oozes over sides.
- Let set at least 30 minutes before cutting. Store under a cake dome or cut into individual slices to encase in plastic wrap.
OM NOM NOM!
Bready or Not Original: Apple Bundt Cake with Apple Cider Caramel Glaze
This Cider Bundt Cake is part of a series of apple cake experiments that will be on Bready or Not over the next while. They are all just a bit different.
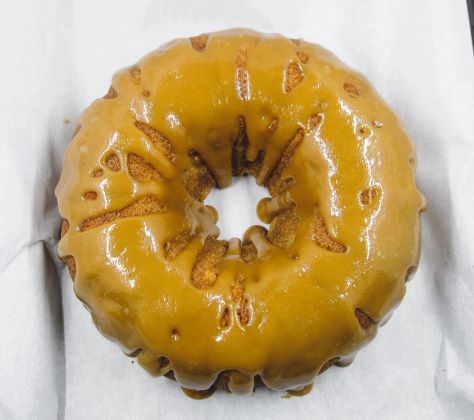
The thing that really sets this cake apart is the Apple Cider Caramel Glaze. Oh boy, this glaze. It’s truly thick, luscious caramel. The cake by itself is fairly standard–this glaze elevates it to star status.

Even better, you’ll likely have some glaze leftover. Store it covered in the fridge and use it in the coming days. Warm up a portion to make it pliable, then use it for dipping apples or cookies, or to top ice cream… or just eat it straight or add even more to the cake slices. Just don’t you dare let it go to waste.

Bready or Not Original: Apple Bundt Cake with Apple Cider Caramel Glaze
Equipment
- large bundt pan
- nonstick spray with flour
- cooling rack
- medium saucepan
Ingredients
Cake
- 3/4 cup unsalted butter (1 1/2 sticks) softened
- 1 cup white sugar
- 1 cup brown sugar packed
- 1 Tablespoon vanilla extract
- 3 large eggs room temperature
- 3 cups all-purpose flour
- 2 teaspoons baking powder
- 1 1/2 teaspoons cinnamon
- 1/2 teaspoon baking soda
- 1/2 teaspoon salt
- 1/2 teaspoon cardamom
- 1/2 cup buttermilk or soured milk (see note)
- 3 medium baking apples peeled and grated or finely diced
Apple Cider Caramel Glaze
- 1 cup nonalcoholic apple cider
- 1 cup brown sugar packed
- 1/2 cup unsalted butter softened
- 1/4 cup half & half
Instructions
- Preheat oven at 325 degrees. Apply nonstick spray with flour to a large bundt pan.
- In a large bowl, beat together butter, both sugars, and vanilla extract, until fluffy. Scrape down bottom of bowl. Add eggs, beating well after each addition.
- In another bowl, combine flour, baking powder, cinnamon, baking soda, salt, and cardamom. Gradually add the dry ingredients to the butter mixture, pausing to add the buttermilk at several points. Scrape the bottom of the bowl, then fold in the apple pieces.
- Scoop batter into the prepared pan. Even it out. Bake until a toothpick inserted into the cake comes out clean, 50 to 60 minutes. Let cool in pan for 20 minutes, then invert onto a rack to completely cool before making the glaze.
- In a medium saucepan, bring the cider to a low boil and keep it there for about 4 minutes, watching it closely to bring down heat if necessary to ensure it doesn’t boil over. Add the brown sugar, butter, and half & half, then bring to a boil for another 2 to 4 minutes, until it has thickened. Remove from heat to set and cool for about 15 to 20 minutes. While the caramel is still warm (if it’s not warm, heat it again gently to make it pliable), drizzle it over cake. (If you have any caramel leftover, let it cool and then refrigerate it for other delicious uses!)
- Let cake set in fridge. Keep covered under a dome or individually slice and wrap for storage, keeping it in the fridge. It'll keep for at least 5 days.
