


Bready or Not Original: Soft Sourdough Loaf or Bratwurst Buns mixed in a bread machine
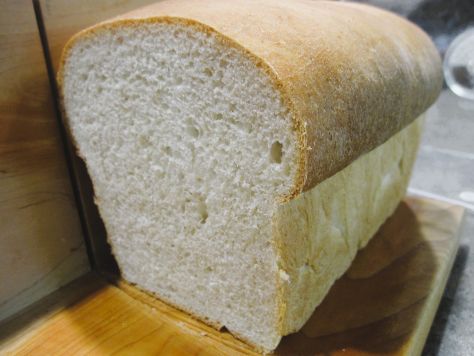
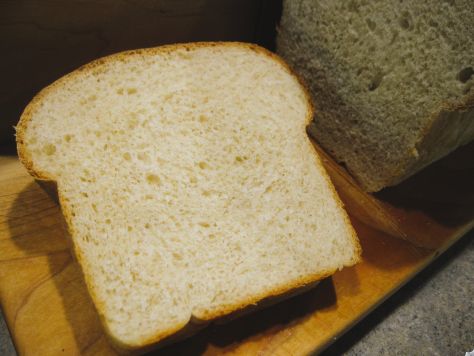
Today’s Bready or Not features two variations on the same ingredients: a Soft Sourdough Loaf baked in a pan or Soft Sourdough Bratwurst Buns.
This recipe is written for use in a bread machine, for maximum physical and time accessibility, but it can absolutely be made by hand or with a stand mixer.
The recipe includes two leaveners, which means it is done in hours rather than all day or over multiple days, as is usually the case with sourdough. The sourdough flavor still comes through beautifully.
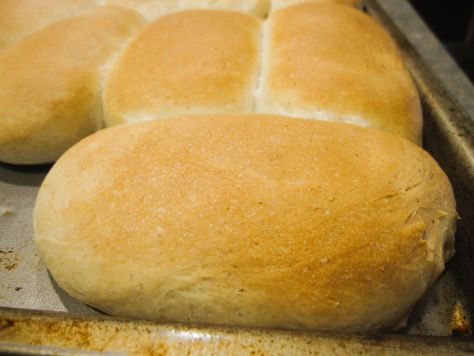
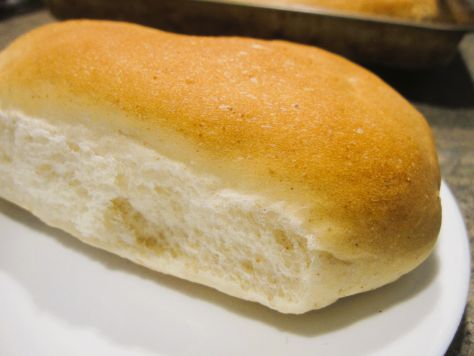
This loaf is ideal for sandwiches or garlic bread. The buns, made by dividing the dough into eighths, are the perfect size for a bratwurst or other large sausage. Yes, it takes practice to get the shaping right by hand. The important thing is to remember to make the top look smooth and nice, and hide the messy seams underneath.
This bread will keep in a sealed, room temperature bag for up to 3 days, and it is fantastic to freeze for later.
By the way, I baked up sourdough recipes like this one because I have maintained a starter for book research reasons: my next release, A House Between Sea and Sky, features a sourdough starter named Mother as an important character. Find out more (and preorder) here!
Bready or Not Original: Soft Sourdough Loaf mixed in a bread machine
Equipment
- digital thermometer
- kitchen scale
- bread machine
- loaf pan
- nonstick spray
- aluminum foil
- pastry brush
Ingredients
Dough
- 3/4 cup active sourdough starter room temperature (about 170 to 190 grams)
- 1/3 cup lukewarm milk or half & half (about 100-110 degrees)
- 1 large egg
- 3 Tablespoons melted butter
- 2 Tablespoons white sugar
- 1 1/2 teaspoons sea salt
- 3 cups white bread flour plus more for surface
- 1 1/2 teaspoons instant dry yeast
Topping
- softened butter to brush on loaf at end
Instructions
- Add ingredients to the bread machine bucket in the order specified by the manufacturer; it is usually wet ingredients first. Set machine on Dough mode and begin. Monitor the dough as it begins mixing, adding a touch more milk if it is lumpy or flour if it is too loose. Dough should come together smoothly.
- After the cycle ends, apply nonstick spray to the loaf pan.
- Dump the dough onto a lightly floured surface. Shape, folding and tucking the dough to tighten what will become the top. Place dough in pan. Set in a warm place to rise, such as on a counter, a cabinet, or in an oven on proofing mode.
- After about 45 minutes to an hour, the dough should rise about 2 inches over the rim of the pan. If it is in the warm oven, remove from there. Preheat oven at 350 degrees.
- Bake bread about 20 minutes. Cover with shaped foil to prevent overbrowning. Continue to bake for about another 20 minutes. Bread should sound hollow when tapped, and if tested with a digital thermometer, over 190 degrees inside.
- Immediately tip loaf from pan, carefully setting upright on a cooling rack. Brush on the softened butter.
- Let cool for at least an hour before slicing. Bread will keep in a sealed bag at room temperature for up to 3 days, and can also be frozen for several months either whole or in slices.
OM NOM NOM!
Bready or Not Original: Soft Sourdough Bratwurst Buns
Equipment
- kitchen scale
- parchment paper
Ingredients
- 3/4 cup active sourdough starter room temperature (about 170-190 grams)
- 1/3 cup lukewarm milk or half & half (about 100-110 degrees)
- 1 large egg
- 3 Tablespoons melted butter
- 2 Tablespoons white sugar
- 1 1/2 teaspoons sea salt
- 3 cups white bread flour plus more for surface
- 1 1/2 teaspoons instant dry yeast
Instructions
- Add ingredients to the bread machine bucket in the order specified by the manufacturer; it is usually wet ingredients first. Set machine on Dough mode and begin. Monitor the dough as it begins mixing, adding a touch more milk if it is lumpy or flour if it is too loose. Dough should come together smoothly.
- After the cycle ends, prepare a sheet pan with parchment paper. Use a kitchen scale to divide the dough by 8.
- Shape each piece, folding and tucking the dough while elongating it, creating a tightened top. Place each bun slightly spaced out on pan; baker’s choice as to if they touch or not after rising. After all of the buns are shaped, place in a warm place to rise, such as on a counter, a cabinet, or in an oven on proofing mode.
- After about 45 minutes to 1 1/2 hours, the buns should look rounded and puffy. If pan is in the oven, remove from there. Preheat oven at 350 degrees.
- Bake bread about 21 to 25 minutes, until they are lightly browned. Bread should sound hollow when tapped, and if tested with a digital thermometer, over 190 degrees inside.
- Cool on pan or rack for at least an hour before eating. Slice bun from the side or top to insert the bratwurst and other toppings.
- Buns will keep in a sealed bag at room temperature for up to 3 days, and can also be frozen for several months.
OM NOM NOM!
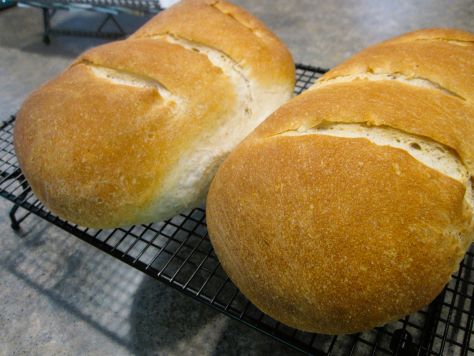
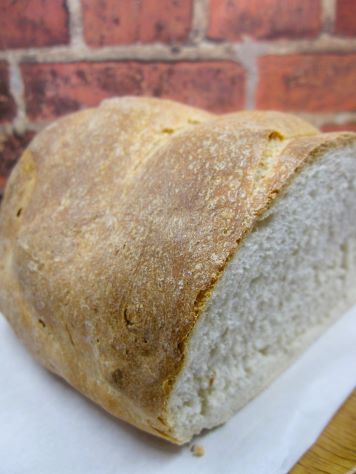
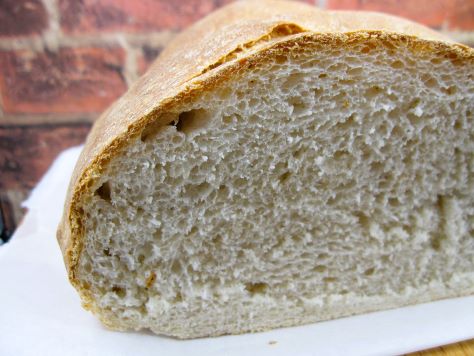
Bready or Not: Sourdough French Bread started in the Bread Machine (2 loaves)
Fresh French Bread is one of the best things on the planet. With your bread machine and a little bit of effort, you can create this wonder at home!
(Of course, you don’t NEED a bread machine to make the dough. You can just use the ingredients and mix by hand. This recipe aims for greater accessibility, though, for those who are crunched for time, have conditions like arthritis, or simply hate kneading.)
This recipe produces two loaves. A food scale will make for more precise results, both in assembling ingredients and dividing the dough later on.
Greatly modified from Making Artisan Breads in the Bread Machine by Michelle Anderson (a book I highly recommend).
Bready or Not: Sourdough French Bread started in the Bread Machine (2 loaves)
Equipment
- food scale
- bread machine
- food thermometer
- parchment paper
- baking sheet
- cake pan
Ingredients
- 1 1/2 cups active sourdough starter (around 350 grams)
- 3/4 cups lukewarm water (180 ml) about 100-110 degrees
- 2 1/2 Tablespoons white sugar (31 grams)
- 2 teaspoons sea salt
- 4 cups bread flour (480 grams)
- 1 1/2 teaspoons instant dry yeast or bread machine yeast
Instructions
- Most bread machines call for adding liquids to the bucket first. Therefore, place the starter and water inside. Use fingertips to whisk them together. Add sugar and salt, followed by the flour and yeast. Start the machine on dough mixing mode.
- Monitor the dough as it mixes. If it seems especially lumpy, drizzle in some extra water until the texture smooths out.
- Once the dough is done, measure it on a food scale to divide in half. Sprinkle extra flour on a clean work surface. Press dough out to a flat rectangle, about 10 inches long, then fold inward as if folding a sheet to go in an envelope. Pinch the seam together while gently elongating bread. Place seam underneath. Set loaf on parchment paper. Repeat with other half of dough.
- Let rise in a warm spot in the kitchen or in an oven on proof mode for an hour or so, until loaves look doubled. If loaves were in warm oven, remove them so the oven can preheat at 400 degrees. On a lower oven rack, place something like a metal cake pan that is an inch or two in depth so that it can heat as well.
- Once the oven is preheated, use a French lame or knife to slash the top of the loaf so that it can vent while baking. Being VERY careful to not overfill or get scalded by steam, pour water into the hot pan in the oven. Immediately place the risen loaves on the rack above and close the oven (and don’t open it again until the bread looks done!).
- Bake for 20-25 minutes, until loaves are golden and sound hollow when tapped. A check with a food thermometer should find an interior temperature over 190 degrees.
- Let loaves cool at least 30 minutes before slicing in. Bread will keep in a sealed bag at room temperature for up to 3 days. It can also be frozen right after cooling, and will keep well for up to a month there.
OM NOM NOM!
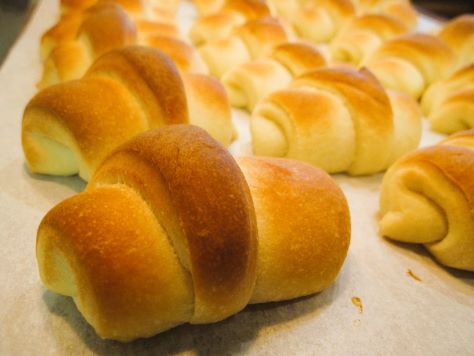
Bready or Not: Sweet Crescent Rolls in the Bread Machine
The blog is titled Bready or Not. Today, it is decidedly bready, as the recipe is one for Sweet Crescent Rolls made using a bread machine.

The recipe requires little hands-on effort. The dough mixes in the bread machine. You divide it and form the crescent rolls, which is actually rather fun. They rise. You then bake. The recipe makes 24 rolls, meaning you can feed a crowd or you can freeze a bunch.

These keep well in the freezer for months. This is the kind of thing you can make at Thanksgiving and then pull out as needed through the rest of the holiday season.
Modified from Allrecipes.com Magazine Oct/Nov 2014.
Bready or Not: Sweet Crescent Rolls in the Bread Machine
Equipment
- food thermometer
- bread machine
- parchment paper
- food scale
- cookie sheet
- knife or pizza cutter
Ingredients
- 1/2 cup warm water (110 degrees)
- 1/2 warm milk or half & half (110 degrees)
- 1 large egg room temperature
- 1/3 cup unsalted butter softened
- 3 3/4 cup all-purpose flour
- 1/2 cup white sugar
- 1 teaspoon salt
- 2 1/4 teaspoon active dry yeast or 1 packet active dry yeast
- 1/4 cup unsalted butter softened, for filling
Instructions
- Place ingredients in recommended order for bread machine, usually liquid first: water, milk, egg, butter, flour, sugar, salt, and yeast. Start dough cycle, and let it mix and complete the first rise.
- Prepare a baking sheet or sheets with parchment paper.
- Once that is done, remove dough and divide in half using food scale. Roll each half into a 12-inch round. Divide the 1/4 cup butter in half and spread over each round. Use a knife or pizza cutter to slice each round into 12 wedges. Starting at the wide end, roll up each triangle gently but tightly to form a crescent roll. Place each roll, narrow side down, on the baking sheet.
- Cover pan with plastic wrap or a clean towel and let rise in a warm spot for an hour. Meanwhile, start preheating oven at 400 degrees.
- Once rolls are risen after the hour, bake for 10 to 15 minutes, switching pan position in oven, if necessary, to prevent overbrowning. Let cool for 15 minutes before serving.
- Cool rolls can also be frozen for later enjoyment; thaw them at room temperature then heat wrapped in aluminum foil at 350 degrees for about 10-12 minutes.
OM NOM NOM!
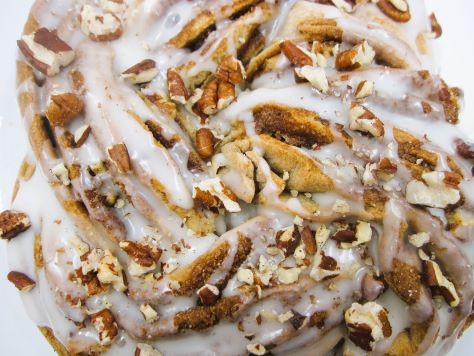
Bready or Not Original: Apple Butter-Pecan Roll
This Apple Butter-Pecan Roll is something special, a gorgeous and small round of braided bread jeweled with pecans. It’s perfect for a few people to share as a treat.
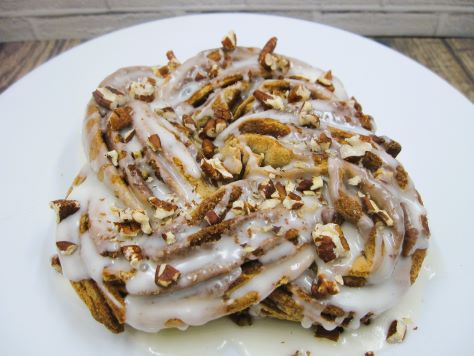
Honestly, I’d rather have this than most cakes. It is as delicious as it looks, but it does take time to make and dirties a lot of dishes in the process. Definitely a special occasion kind of thing.

I modified this immensely from a recipe called Sweet Potato-Pecan Sweet Roll in Bake from Scratch’s September/October 2023 issue. Obviously, I replaced the sweet potato, but I also extensively rewrote the recipe to try to clarify what should be used and when. I find it very confusing when, in an already complicated recipe, I need to divide things within the ingredient list.
I hope that some of you take on the challenge of this recipe and find my new version doable even if it is still daunting!
Bready or Not Original: Apple Butter-Pecan Roll
Equipment
- instant read thermometer
- nonstick spray
- cake pan
- Rolling Pin
- kitchen shears or knife
Ingredients
Dry dough ingredients
- 1 1/2 cups all-purpose flour
- 2 Tablespoons brown sugar packed
- 1 teaspoon kosher salt
- 1 teaspoon instant yeast
- 1/8 teaspoon ground nutmeg
Wet ingredients for dough
- 1/2 cup buttermilk or soured milk [see note]
- 1/3 cup apple butter
- 3 Tablespoons unsalted butter softened
Filling
- 1 1/2 teaspoons ground cinnamon
- 1 teaspoon ground ginger
- 3 Tablespoons brown sugar packed
- 2 Tablespoons unsalted butter softened
- 1/4 cup toasted pecan pieces
Topping
- 2/3 cup confectioners’ sugar
- 1 1/2 Tablespoons milk or half & half
- 1 teaspoon unsalted butter melted (5 grams)
- 1/4 teaspoon kosher salt
- 2 Tablespoons pecan pieces
Instructions
- In a large bowl, whisk together the dry dough ingredients: flour, brown sugar, salt, yeast and nutmeg. Dig a well in the center.
- In a small saucepan, gently bring to medium heat the wet dough ingredients: buttermilk/soured milk, apple butter, and butter. Stir until the butter is melted and an instant-read thermometer is over 100-degrees. (Don’t go over 120 or the heat may kill the yeast.)
- Pour the saucepan contents into the well in the flour. Use a big spoon to stir until combined.
- Heavily flour a clean surface. Turn out the dough onto it and knead until the mixture is elastic and only mildly tacky, about 8 to 10 minutes. Flour hands and surface more if necessary.
- Apply nonstick spray inside a medium bowl. Place dough inside, turning to grease all sides. Cover and let rise in a warm spot for about 40 minutes.
- Meanwhile, put nonstick spray in a round cake pan.
- In a small bowl, stir together the first three filling ingredients: cinnamon, ginger, and brown sugar.
- Punch down the dough and let it rest about 5 minutes. Turn the dough out onto the floured surface again and roll into a 14×8-inch rectangle. Spread the 2 Tablespoon softened butter over the dough, leaving a bare 1/2-inch frame around the edge. Sprinkle the cinnamon mixture over the butter, forming a thick layer. Sprinkle 1/4 cup of pecan pieces on top.
- Roll up the dough, long-ways, and pinch the seam to seal it. Rock and roll the dough tube, stretching it out, evenly extending the length to 15 inches. Arrange it so the seam is on the side facing you.
- Use kitchen shears or a knife to cut the log in half lengthwise, but leave it connected by an inch at one end. Turn the cut sides to face upward. Carefully twine them together in a simple braid, bringing the uncut end around to tuck underneath, forming a braided circlet. Place inside cake pan with the cut sides facing up. Cover again to rise in a warm place for 20 to 30 minutes.
- Preheat oven at 350 degrees.
- Place bread in hot oven. Bake for 35 to 40 minutes; an instant-read thermometer plunged into the middle should be over 190 degrees. If it’s looking very brown near the end, cover it with foil for the rest of the bake.
- Cool for about 20 minutes as the glaze is made.
- Whisk together the confectioners’ sugar, milk, butter and salt. Dribble over warm bread so that the glaze cascades along the ridges. Sprinkle pecan pieces over the top.
- Serve immediately. Any leftovers are best if warmed briefly in the microwave or oven.
OM NOM NOM!
Notes
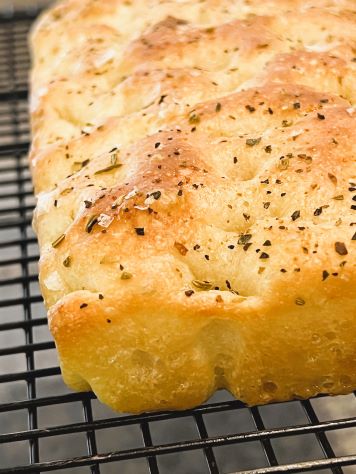
Bready or Not: Mini Focaccia for Two
This Mini Focaccia recipe creates the perfect serving amount for two people to use as a side with a nice meal!

One blessing/curse of most bread recipes is that they can make a lot of bread. This can be problematic if a person has limited freezer space or simply doesn’t want leftovers.
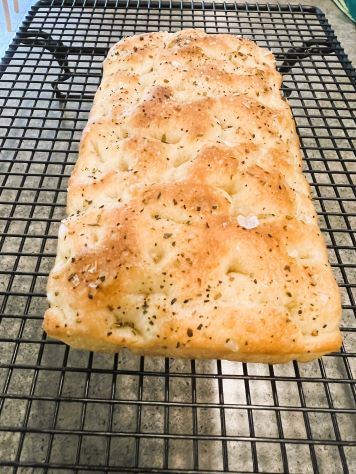
Let this recipe come to the rescue. It uses only about a cup of flour to create a small, thin loaf, the perfect size for, say, a yeast bread side for a date night or for one person to even use as a treat for a meal or two.
I completely rewrote this recipe from a poorly written, confusing one that I found online.
Bready or Not: Mini Focaccia for Two
Equipment
- food scale
- bench knife or spatula
- towel or plastic wrap
- loaf pan
Ingredients
- 120 grams all-purpose flour or bread flour
- 3 grams kosher salt
- 5 grams white sugar
- 90 grams warm water 90-110 degrees
- 3 grams active yeast
- 10 grams extra virgin olive oil plus about 2 Tablespoons for pan
- Italian seasoning or pizza seasoning
- flaked sea salt
Instructions
- In a medium bowl, stir together flour, salt, and sugar. Pour the warm water into the middle. Sprinkle yeast on top and wait a minute for it to begin to bloom. Add oil, then mix dough together.
- Use a bench knife or spatula to begin folding the dough over, turning the bowl to knead from different angles. Dough will be very sticky. Work it until it can form a small ball.
Cover dough with a towel or plastic wrap and let rise for 15 minutes.
- Using a damp hand or the bench knife, knead the bread, folding it over repeatedly until it begins to tighten.
Cover again to rest for 15 minutes.
- Knead again using the same method. It may still be somewhat sticky, but the dough's texture should be smooth.
- Add about 1 Tablespoon of olive oil to the loaf pan. Use fingertips to rub it across bottom and sides. Transfer the dough to the pan. Use already-oiled fingers to stretch it out toward the sides of the pan, but don’t expect it to make contact.
Cover pan and let dough rise.
- After about 30 minutes, oil fingers again and push and stretch dough with fingertips to reach the sides and corners of the pan. It's okay if fingertips touch the bottom or tear the dough; it'll rise again. Cover pan again to rise for another 30 minutes. Preheat oven to 400 degrees.
- Right before putting the focaccia in the oven, drizzle more oil over the top. If desired, add a sprinkling of herb seasoning and a sprinkle of flaked salt.
- Bake for about 20 minutes, until the top is a nice golden brown. Pull pan from oven. Carefully tip the bread out onto a cutting board and let cool for at least 15 minutes before slicing.
- Enjoy right away. Leftovers, if there are any, can be stored in a sealed bag and reheated later.
OM NOM NOM!
Bready or Not Original: Small Batch Crusty Bread
Some bread recipes make a lot of bread. While bread freezes well, not everyone has the space or wants the bread for later. If you just want a small, special round of bread to be shared by 2 or 3 people, this is the bread for you.
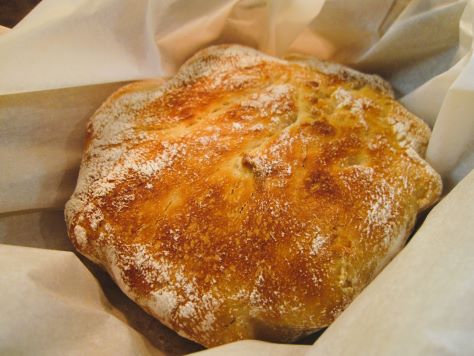
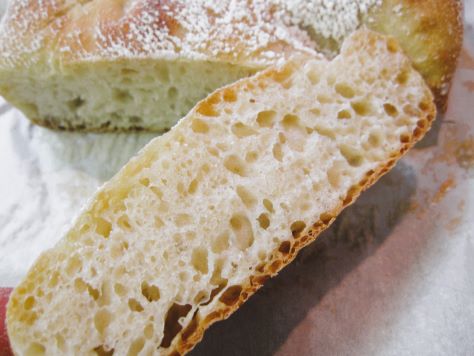
This round is rustic, simple, and delicious. It doesn’t require kneading, and therefore doesn’t even ask for a electronic mixer for ease. You don’t even need bread flour. All-purpose does the job just fine.
I first tried this recipe when most of my kitchen was packed up for the move. I didn’t have all of my usual implements or ingredients, but I could make this, and wow, was it good.
I’ve tried this in my small cast iron skillet and in a Pampered Chef covered stoneware dish. Both worked well, but I actually preferred the rise and extra crustiness that came with using the cast iron. These pictures actually depict the stoneware-baked bread, and I daresay, they still don’t look too bad.
Bready or Not Original: Small Batch Crusty Bread
Equipment
- digital thermometer
- cotton towel or napkin
- small cast iron skillet or small stoneware dish
- parchment paper
Ingredients
- 1 teaspoon active dry yeast
- 1 teaspoon honey
- 2/3 cups warm water 100-110 degrees
- 1 teaspoon kosher salt
- 1 to 1 2/3 cups all-purpose flour plus more for dusting
Instructions
- In a large bowl, stir together the yeast, honey, and warm water. Let it sit about 5 to 10 minutes. The yeast should activate and begin to bloom near the top of the water.
- Add flour. Using a sturdy spoon, stir until everything starts to come together, then add the kosher salt. Continue mixing until no dry flour remains in the bowl. The dough should be shaggy and somewhat sticky. Cover the bowl with a towel or plastic wrap and stash it in a warm spot in the kitchen to rise for an hour. It should double in size.
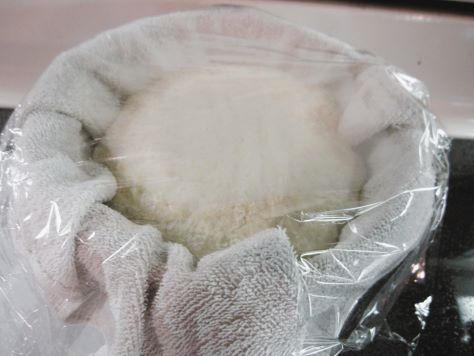
- Set out a small bowl and layer a cotton towel inside. Generously flour the towel. Lightly flour a work surface. Tip the dough onto the work surface. Be gentle as to not lose the bubbles. Shape the dough with cupping and tucking motions, drawing the round to be tighter by tucking the rough bits underneath. Place the formed round in the floured-towel bowl with the seam underneath. Cover with a towel or plastic wrap to rise for 30 minutes.
- Begin preheating the oven at 450-degrees. Place the small cast iron or stoneware inside the oven to heat up as well–and please remember to use potholders when handling it throughout the baking process!
- Pull out a piece of parchment paper. Tip the risen bread onto the parchment, gently tugging it free with the towel if it sticks in spots. Pull the hot pan from the oven. Use the parchment as a sling to set the parchment and bread inside the pan as levelly as possible.
- Bake for 22 to 25 minutes. The bread should be browned and sound hollow if tapped on the bottom. Let cool about 10 to 15 minutes so that it can be handled to be sliced and enjoyed. If there are any leftovers, store them in a sealed bag at room temperature or to freeze for later. Freshly-made bread is best eaten within a day.
