


Bready or Not: Country Loaf
The blog is called Bready or Not, and today we are definitely bready with this gorgeous, old-fashioned Country Loaf.

This is a basic boule in the French style. Water, salt, sugar, flour, yeast. Baking is done with added steam–boiling water in a pan below the bread, sending up a cloud to give this loaf the perfect crust.
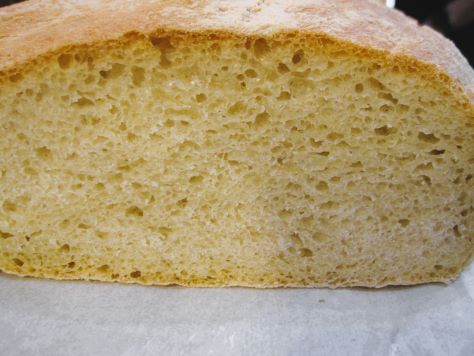
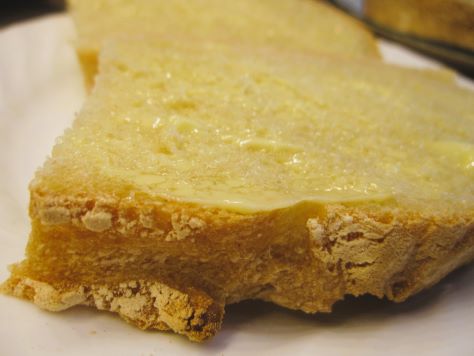
This bread is absolute perfection toasted with butter, but it’s also great for sandwiches or to go along with soup. Some breads are best hot, but this one is more versatile.
I modified this recipe from a fantastic cookbook called Making Artisan Breads in the Bread Machine by Michelle Anderson. Click here to get it through my affiliate link.
Bready or Not: Country Loaf
Equipment
- bread machine
- large bowl
- parchment paper
- baking sheet or pizza stone
- cake pan
- kettle for boiling water
Ingredients
- 1 3/4 cups lukewarm water 100-110-degrees
- 2 teaspoons sea salt
- 1 teaspoon white sugar
- 4 1/4 cups bread flour
- 1 1/4 teaspoons active dry yeast or bread machine yeast
Instructions
- Add ingredients to bread machine bucket, which usually means liquids first–so water, sea salt, sugar, bread flour, and yeast. Let the dough cycle run.
- Transfer the dough to a large greased bowl, tucking dough under the sides to form a tight ball. Cover with a towel or plastic wrap to let rise for an 1 1/2 to 2 hours.
- Lay out a large piece of parchment paper. Flour lightly. Roll dough onto it, deflating the round and tucking the dough to form a new, smooth round. Flour lightly on top. Cover with towel or plastic wrap again to let rise, 1 to 1 1/2 hours.
- Preheat oven at 500-degrees. Place baking pan or stone on middle rack. On rack below that, place a cake pan with 1 or 2-inch sides. In an electric or stovetop kettle, boil about 2 cups of water.
- Use a sharp knife to score a hash mark across the top of the risen dough. Place the hot baking sheet or stone on the stovetop. Very carefully, use the parchment paper as a sling to move the bread onto the hot pan. Place it in the oven. Immediately use the kettle to carefully pour water into the cake pan on the lower rack; no need to measure the water, but get the pan about half full. Close the oven and do not open it again until the end of baking.
- Bake for 5 minutes. Lower the temperature to 400-degrees. Bake an additional 30 minutes. The bread should be risen and golden. Cool for at least 30 minutes before slicing in.
- This bread is fantastic at room temperature or heated up again. Use it with butter, for sandwiches, whatever you want! While the bread is still fresh, freeze leftovers for later enjoyment, too.
OM NOM NOM!
Bready or Not: Apple Cream Cheese Brioche Tart
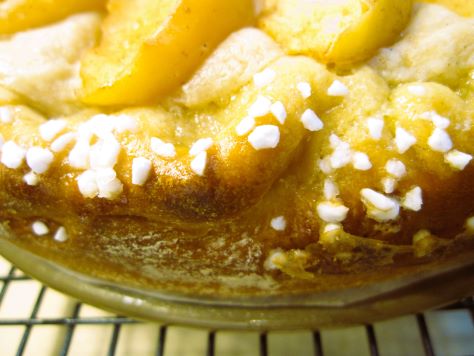
This Apple Cream Cheese Brioche Tart isn’t a beginner’s recipe, I’ll say that straight up. There are gobs of steps, multiple rise times, lots of dirty dishes. But the result? Wow.

This is really a show-stopper kind of bread for a dessert, breakfast, or brunch. You have an enriched bread with a creamy, rich filling topped with spiced apples.
We had to test the best ways to eat the leftovers, too. The tart is fantastic fresh. Because of the creamed cheese, it needs to be stored in the fridge–but it’s thick and cloggy if eaten cold.
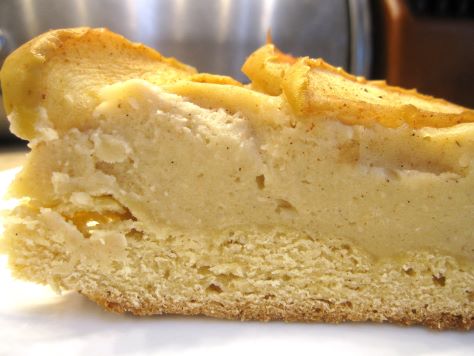
However, heating it in the toaster oven doesn’t work–the cream cheese will melt off! Like Goldilocks, we eventually found the “just right.” It was a quick zap in the microwave, maybe 15-20 seconds depending on your machine. Enough to take the chill off without making it hot.
The things we bakers must do for science and the good of the people…
Bready or Not: Apple Cream Cheese Brioche Tart
Equipment
- rimmed baking sheet
- 9-inch springform pan
- parchment paper
- stand mixer with paddle and dough hook
- nonstick spray with flour
- pastry brush
- uneven spatula
- instant read thermometer
Ingredients
Apples
- 2 cups apples peeled then sliced to 1/4-inch, about 1 1/2 medium apples (Honeycrisp recommended)
- 1 Tablespoon white sugar
- 1/2 teaspoon lemon juice
- 1/4 teaspoon apple pie spice
Dough
- 2 cups all-purpose flour divided
- 1 1/2 Tablespoons white sugar
- 1 1/2 Tablespoons light brown sugar packed
- 1 0.25oz package Platinum Yeast
- 1 1/2 teaspoons kosher salt
- 1/4 cup milk or half & half, warmed to 120-F to 130-F
- 2 large eggs room temperature
- 3/4 teaspoon pure vanilla extract
- 1/4 cup unsalted butter softened
Filling
- 2 Tablespoons unsalted butter softened
- 3 Tablespoons white sugar
- 2 Tablespoons light brown sugar firmly packed
- 1 teaspoon pure vanilla extract
- 1/4 teaspoon kosher salt
- 1/4 teaspoon apple pie spice
- 8 ounces cream cheese room temperature
- 1 large egg room temperature
- 3 Tablespoons all-purpose flour
Topping
- 1 large egg for egg wash
- 1 Tablespoon water for egg wash
- Swedish pearl sugar for sprinkling
Instructions
- Preheat oven to 400-degrees. Line a rimmed baking sheet with parchment paper.
- Prepare the sliced apples by using a large bowl to stir them with sugar, lemon juice, and pie spice. Let the mixture stand for 15 minutes, stirring occasionally. Spread apple mixture in an even layer on prepared pan.
- Bake the apples until they are fork-tender and have released significant moisture, 12 to 16 minutes. Rotate the pan and stir halfway through. The apples should reduce in size slightly but retain their shape. Let the apples cool while continuing with other stages. Also, turn off the oven, as it won’t be needed for a while.
- Begin the dough. In the bowl of a stand mixer fitted with the paddle attachment, beat 1/2 cup flour, white sugar, brown sugar, yeast, and salt at medium-low speed. Add the warm milk, eggs, and vanilla, beating everything on medium about 2 minutes until it’s combined. Scrape the bottom and sides of bowl a few times. Gradually add the remaining 1 1/2 cups flour.
- Switch to the dough hook attachment. Beat at low speed until dough is smooth and elastic. It should start to pull away from sides of bowl. This will be around 6 to 9 minutes.
- Add the softened butter, 1 tablespoon at a time, beating well after each addition. This will take 6 to 8 minutes total. Scrape the sides of bowl and dough hook as needed. If the dough looks slightly broken during this stage, that's okay–keeping beating it and it'll come back together.
- Increase mixer speed to medium-low and beat until a smooth, elastic dough forms, about 6 minutes.
- Turn out dough onto a clean surface and knead 4 to 5 times. Shape into a smooth round. Place dough in a large ungreased bowl. (At this stage, the dough could be covered and placed in the fridge for a few hours or overnight.) Cover it and place it in a warm spot until it doubles in size, about 45 minutes to 1 hour.
- Cut a piece of parchment to fit in the base of a springform pan. Apply nonstick spray with flour in pan. Add cut paper. Spray again to coat paper and sides.
- Punch down dough, then cover it and let it rest for about 10 minutes. On a lightly floured surface, roll dough into an 11-inch circle. Use the bottom of the springform pan to poke a 9-inch circle in the middle of the dough. Fold and press outside edges inward to create a crimped edge. Lift the dough to place it in the prepared pan. Press dough to make sure it fills the bottom. Crimp and secure the edges again if needed. Cover and let rise again in a warm place for 25 minutes. Dough should be puffed and hold an indentation when it’s poked.
- Preheat oven to 325-degrees.
- Now make the filling. In the clean bowl of the stand mixer, using the paddle attachment, beat the butter, white sugar, brown sugar, vanilla, salt, and pie spice at medium speed. Gradually add the cream cheese, beating until smooth. Add egg, beating until combined, then add the flour. Scrape the bowl to make sure everything is mixed.
- Use your fingertips to dimple center of dough back down, leaving outside crust higher and puffed. Crimp and secure edges if necessary, and press out any air bubbles if you see them.
- Spoon and spread cream cheese mixture in an even layer in center of dough. Arrange the sliced apples slightly overlapping in two concentric circles. (You may have leftover slices. Eat’em on their own!)
- In a small bowl, whisk together egg and water. Brush outer edge of dough with egg wash. Sprinkle pearl sugar along the crust.
- Bake for 20 minutes. Rotate pan. If the crust is browning, cover it with foil. Bake for another 25 to 28 minutes. When the tart is done, the crust will be golden brown. The filling should be set around outside edges and slightly jiggly in center. An instant-read thermometer inserted in center should register at least 175-degrees.
- Let cool in pan for 10 minutes. Using a small offset spatula, loosen edges of bread. Remove sides of springform pan. Let cool completely on pan base on a wire rack.
- The tart can be enjoyed fresh after it cools. Leftovers should be stored in the fridge, but will be cloggy if eaten chilled. It’s best warmed with a short zap in the microwave, about 15-20 seconds; if it’s made too hot, the cream cheese melts! Leftovers can also be individually wrapped and frozen for later. Thaw in fridge.
OM NOM NOM!
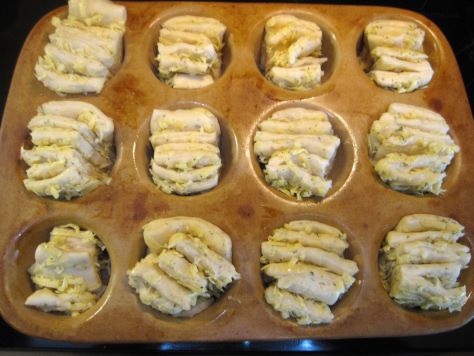
Bready or Not: Cheesy Fantail Rolls
If you know anything about me, you know I’m all about cheese. These Cheesy Fantail Rolls deliver all that good stuff with cheese in the dough and oozing from between the layers of dough.

I based this on a Bake from Scratch recipe for Parmesan-Gouda Fantails. I’m more flexible about the cheese. Just go with a good melter, or a combination of melters. I did a whole block of Roth Dill Havarti. Another firm cheese with herbs would be great. If you like spice? Go with a spicy blend. Have fun with it.
My other big recommendation is that you don’t use pre-shredded cheese, as it’s coated with preservatives and won’t melt as well. But if that’s all you have, well, it won’t end the world.
Do reserve a block of time for this recipe. Shaping the rolls isn’t hard, but it is fiddly, and it will make a mess on your counter or table. However, that effort is well worth it, because these rolls are gorgeous and delicious.
Bready or Not: Cheesy Fantail Rolls
Equipment
- stand mixer
- microwave
- 12-cup muffin pan
- pastry brush
Ingredients
- 1 cup light beer room temperature
- 1 Tablespoon white sugar
- 2 1/4 teaspoons active dry yeast
- 8 Tablespoons unsalted butter melted and divided
- 3 cups all-purpose flour
- 2 cloves garlic minced
- 1 1/2 teaspoons dried parsley divided
- 1 teaspoon kosher salt
- 8 ounces cheese such as cheddar, havarti, or other good melter; shredded
Instructions
- In a microwave-safe bowl, microwave 1/4 cup beer until it is 105-110-degrees Fahrenheit. (If it overheats, cool it for a few minutes.) Add sugar and yeast, stirring to combine. Let it sit about 5 minutes; it should become foamy. Stir in 6 Tablespoons of melted butter and the remaining 3/4 cup beer.
- In a stand mixer with a paddle attachment, mix 2 cups flour, a healthy pinch of shredded cheese, 1 minced garlic clove, 1 teaspoon of dried parsley, and the kosher salt. Add yeast mixture and stir for a minute. Gradually add the remaining 1 cup flour, beating until the dough begins to pull away from the sides of the bowl. That will be after 3 to 4 minutes. Cover the bowl with plastic wrap or a towel, and let it stand in a warm place for about 45 minutes.
- Apply nonstick spray to the wells in a 12-cup muffin pan.
- Punch down dough and divide it in half. On a lightly floured surface, roll a half into a 12-inch square. Sprinkle half of the grated cheese over the dough. Use a bench knife or pizza cutter to slice dough into 6 equal strips. Stack strips, cheese side up, and cut crosswise into 6 equal pieces. Place each segment of 6 stacked mini strips into a muffin cup. Repeat with remaining dough.
- Slightly separate and stretch each piece of dough in the cups. Cover with plastic wrap or a towel to rise in a warm spot for 30 to 45 minutes.
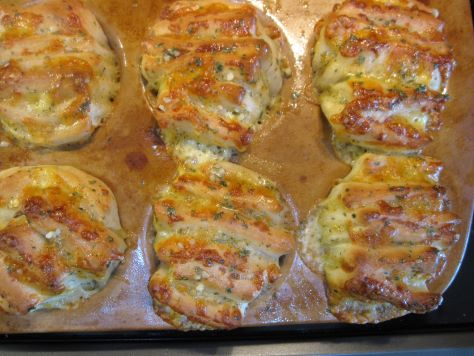
- Preheat oven at 375-degrees, then bake fantails for 20 to 24 minutes, until browned with visible melted cheese.
- In a microwave-safe bowl, melt the remaining 2 Tablespoons butter. Add 1 minced garlic clove and 1/2 teaspoon dried parsley, stirring to distribute. Use a pastry brush to coat each fantail with buttery goodness. Let cool for at least 10 minutes before serving.
- Leftovers should be refrigerated and will reheat beautifully in the coming days. Use an oven or toasted oven, and wrap up the rolls in foil. Add a touch of butter, if desired, to keep them from becoming extra crisp. Heat until warmed.
OM NOM NOM!
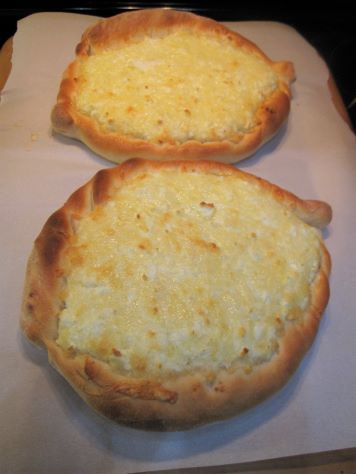
Bready or Not Original: Khachapuri
Let’s start the new year in cheesy fashion! Here’s my take on khachapuri, aka Georgian cheese bread. It’s pretty much the ultimate dish if you like bread and cheese.
This is an original recipe, which I made from studying about four other recipes. I have no way of knowing if this, or the recipes I pull from, are authentic. Really, they can’t be. Those of us in the US likely can’t get the real-deal cheeses, but I did try to go more authentic than some of the other recipe suggestions.

Butterkäse is carried by some supermarkets in the US, especially the Roth brand out of Wisconsin. If you can’t find that, go for a good melter like mozzarella or havarti.
Bulgarian feta is moister than typical domestic fetas and also doesn’t have as strong of a salty flavor. I’ve found that it is regularly carried in Grocery Outlets in California and in larger Asian/European grocery stores. Can’t find it? Go for another moist feta.
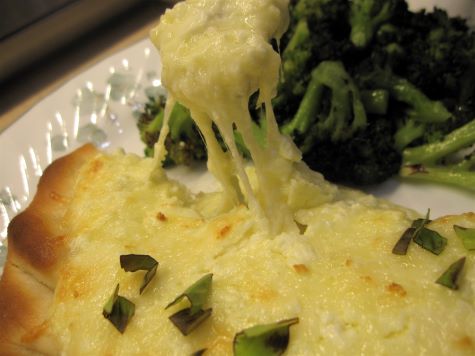
Traditional Khachapuri is topped with an egg. Mine is not, because my husband hates eggs. I knew he wouldn’t even want to see a runny egg on my portion!
I include advice on reheating leftovers as well. I can testify that this dish reheats beautifully in the oven.
Bready or Not Original: Khachapuri (Georgian Cheese Bread)
Equipment
- food scale
- parchment paper
- pizza stone
Ingredients
Dough
- 1/4 cup milk
- 1/2 cup water
- pinch sugar
- 1 teaspoon active dry yeast
- 1 3/4 cups all-purpose flour plus more for dusting
- 1 1/4 teaspoon kosher salt
Filling
- 9 ounces butterkäse also known as butter cheese, shredded (substitute mozzarella or havarti)
- 7 ounces Bulgarian feta broken apart with fork (substitute other moist feta)
- 1 large egg room temperature
- 2 large eggs for topping, optional
- fresh basil or other chopped herbs or red pepper flakes for topping, optional
Instructions
To make the dough
- Warm the milk and water together, in the microwave or on the stove, to about 110-degrees. Transfer it to a large mixing bowl. Stir in sugar and yeast. Let stand about 10 minutes to start bubbling; if the room is cold, cover the bowl with plastic wrap or a towel to encourage warmth.
- Add the flour and salt to the bowl. Beat using a dough hook for about five minutes, or longer if by hand, to form a soft dough. Move to a larger greased bowl and cover, letting rise for an hour to an hour and a half.
Shape and fill the khachapuri
- Combine the two cheeses in a bowl. Mash in the egg to completely incorporate.
- Lightly flour a work surface. Turn out the dough onto the surface, dividing in half. Form each into a round; set one aside. Use a rolling pin to extend a piece of dough to be about ten inches across. Lift it onto parchment paper. Repeat with the other piece of dough, either fitting onto the same parchment or a second piece.
- Spoon half the cheese mixture into the middle of a bread sheet, spreading out to about an inch from the edge. Fold the bare edge over to meet the cheese, shaping it into a cheese canoe, pinching the ends together and twisting to seal. Repeat with the second half.
- Preheat oven at 450-degrees and place pizza stone in oven to heat up. Let khachapuri rise for 30 minutes.
- Carefully pull out the pizza stone. Use parchment to lift khachapuris onto the stone. Bake for 12 minutes. If adding the traditional cracked egg to top each piece, then do so now. In any case, turn around khachapuri and bake for another 4 minutes. Crust should be browned with cheese fully melted.
- Let set for 10 minutes. If desired, add chopped basil, red pepper flakes, or other herbs. Serve!
OM NOM NOM!
Notes
Bready or Not: French Rolls Mixed in the Bread Machine
These French Rolls Mixed in the Bread Machine take some planning–including awakening the starter a day ahead of time–but are well worth the effort due to the sheer deliciousness.
This is one of those recipes that isn’t a huge time drain, but does require work in little bursts. Begin the starter. Get the rest of the dough going. Do another rise. Shape the rolls and rise a third time. Bake.
Also, just like the real thing in France, these are intended to be eaten fresh. However, that’s no big problem so long as you have room in your freezer. Freeze extra rolls the day they are made, and they’ll thaw and heat later and still be amazing.
This recipe is modified from Making Artisan Breads in the Bread Machine by Michelle Anderson, which I highly recommend to any bread machine owners. [affiliate link]
Bready or Not: French Rolls Mixed in the Bread Machine
Equipment
- bread machine
- kitchen scale
- plastic wrap
- parchment paper
- basting brush
Ingredients
Starter (make 12 to 18 hours ahead)
- 1 1/4 cups bread flour
- 1/4 cup whole wheat flour
- 3/4 cup lukewarm water 100-110-degrees F
- 1/8 teaspoon active dry yeast
Dough
- 3/4 cup lukewarm water 100-110-degrees F
- 1 3/4 teaspoon sea salt
- 3 cups bread flour plus more for work surface
- 1/2 teaspoon active dry yeast
- nonstick spray or olive oil
Finish
- 1 large egg
- 1 Tablespoon water
Instructions
Make the starter
- In the bucket of a bread machine or in a separate pitcher, stir together all of the starter ingredients until combined. Cover the top with plastic wrap and let set to rise at room temperature for 12 to 18 hours.
Make the dough
- If the starter didn’t rise in the bread machine, place it there now and add the additional water, salt, flour, and yeast. Start the dough cycle.
- Once the full cycle is done, apply nonstick spray or olive oil in a large bowl. Gather the dough into a ball and place it in the bowl, flipping it to completely coat. Cover with plastic wrap and let rise until it doubles, about an hour. Prepare one or two large baking sheets with parchment paper.
- Weigh the dough and then turn it out in a lightly floured work space. Determine the desired size of rolls; for standard dinner-sized ones, twelve is ideal. Divide the dough accordingly, forming into balls by tucking the lumpier bits and seams underneath. Fill a saucer with water to dab fingertips to make smoothing the dough easier. Space rolls out on prepared pan(s). Lightly cover with plastic wrap.
- Let rolls rise about 45 minutes. They should puff up. Preheat oven at 450-degrees.
Make the egg wash
- Whisk together the egg and water. Remove and discard plastic wrap from rolls. Brush egg wash over the rolls.
- Bake until golden brown, about 12 to 15 minutes. Rolls should sound hollow when tapped. They are best eaten hot the day they are made, but if frozen promptly, they will reheat later for same-day eating and still taste delicious!
OM NOM NOM!
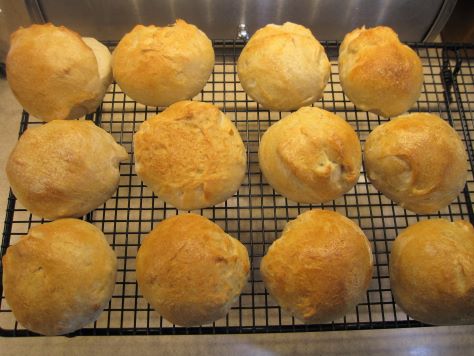
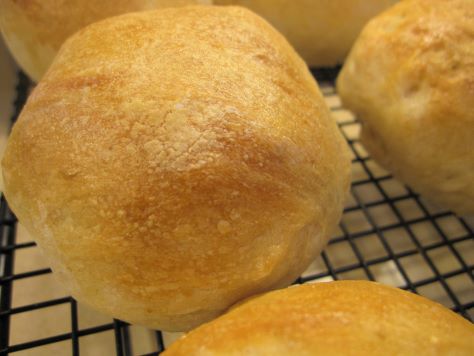
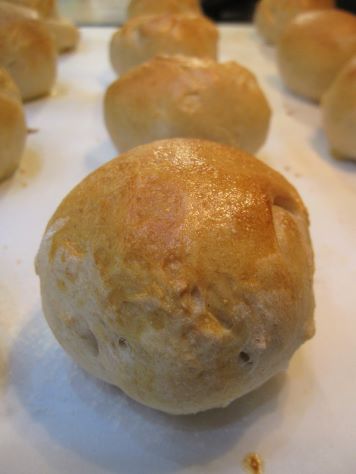
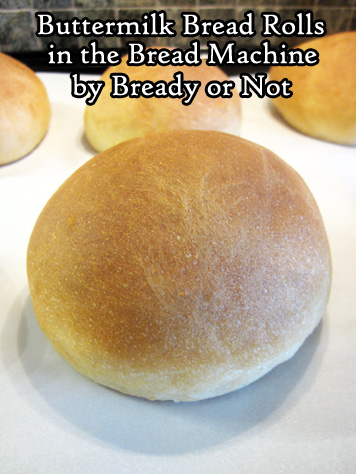
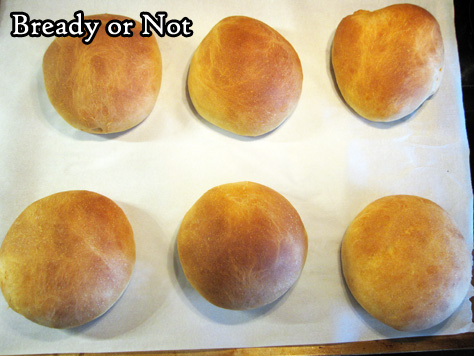
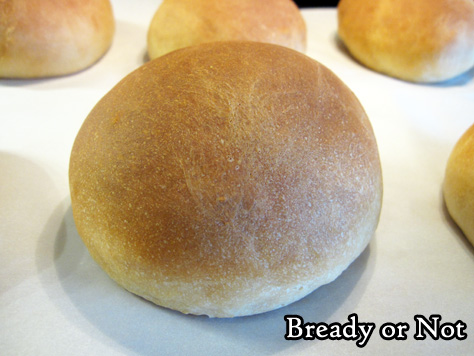
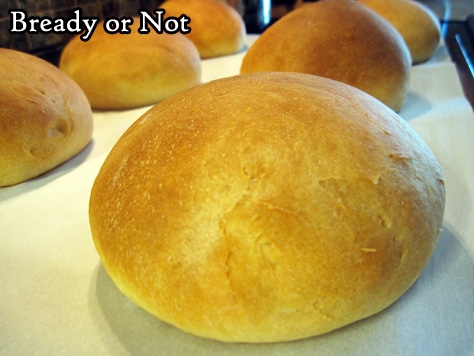
Bready or Not Original: Buttermilk Bread Rolls in the Bread Machine
The blog is called Bready or Not, and today we’re decidedly bready with these Buttermilk Bread Rolls that are conveniently made in the bread machine!
I can make bread by hand or use my KitchenAid, but the bread machine is my favorite way to mix dough. I never use it for the full baking process.
This dough is soft and dreamy to work with. Buttermilk is great for baking because it not only adds dairy to enrich the dough, but acid that causes a chemical reaction resulting in a tender crumb and great flavor.
If you don’t keep buttermilk around, no problem: look at the Note at the bottom of the recipe for advice on how to create soured milk as a substitute. I should also add that powdered buttermilk, which is reconstituted with water, also works well in recipes, though I haven’t tried it with this one in particular.
These sandwich-sized rolls are great to eat fresh, and like so many breads, is also fantastic to freeze. Throw them in a gallon freezer bag and then thaw a roll as needed in the coming weeks.
Bready or Not Original: Buttermilk Bread Rolls in the Bread Machine
Equipment
- bread machine
- food scale
- parchment paper
- baking sheet
Ingredients
- 1 1/2 cups buttermilk lukewarm (100-110-degrees); can substitute soured milk, see NOTE
- 3 Tablespoons unsalted butter melted
- 2 Tablespoons white sugar
- 1 teaspoon sea salt
- 3 3/4 cups bread flour
- 2 1/4 teaspoon instant dry yeast
Instructions
- Place all of the ingredients in the bucket of a bread machine. Start on DOUGH cycle. Set out a baking sheet with parchment paper.
- When the cycle is done, weigh the dough on a food scale. Divide it by six to create large sandwich rolls. Split up the dough, using hands form nicely rounded balls, with any rough bits tucked underneath. Place spaced out on baking sheet. When all of the rolls are formed, cover with plastic wrap or a towel to rise in a warm place until puffed, about 45 minutes.
- Preheat oven at 350-degrees. Uncover the rolls and bake them for about 25 minutes. They should be golden brown and sound hollow when tapped. A digital thermometer discreetly plunged into the center should read about 190-degrees.
- Cool rolls for at least 20 minutes before slicing open. Store in a sealed bag for up to 3 days. Rolls can also be frozen for later enjoyment.
OM NOM NOM!
Notes
Follow me


