


Bready or Not: Classic Pot Roast
Classic Pot Roast. Why haven’t I featured this on Bready or Not before? Because Arizona is not conducive to prolonged use of the oven outside of the two months of ‘winter.’
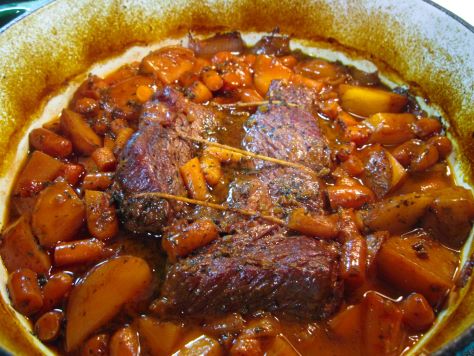
But I’m in the Midwest now. That means I can whip up a proper pot roast (quite likely on a Sunday), and might just use local ingredients, too.
Fun fact: I hate celery, but I like celery flakes. That’s why you see me use celery flakes in recipes like this. You can absolutely use a couple stalks of celery instead.

If you have a large can of tomato paste, portion out standard amounts that are used in recipes (like tablespoon dollops), freeze them on wax paper, then store them in a quart freezer bag to toss into recipes. If you forget to thaw them before cooking, no biggie, just add it in frozen and give it a touch extra time to break down.
Bready or Not: Classic Pot Roast
Equipment
- large oven-safe Dutch oven or pot with lid
Ingredients
- 3-4 pound chuck roast tied
- 2 teaspoons pepper
- 1 1/2 teaspoons salt plus another 1/2 teaspoon
- 2 Tablespoons canola oil
- 2 medium onions cut into 1-inch pieces
- 3 garlic cloves minced
- 2 Tablespoons celery flakes
- 1/4 cup tomato paste
- 1 teaspoon dried thyme
- 2 bay leaves
- 1 cup dry red wine or reduced-sodium beef broth
- 1 can reduced-sodium beef broth
- 1 1/2 pound small red potatoes cleaned and quartered
- 1 1/2 cups baby carrots
- 1/2 Tablespoon apple cider vinegar
- dried parsley
Instructions
- Preheat oven at 325 degrees. Dry roast and sprinkle with the pepper and 1 1/2 teaspoons salt on both sides.
- In a large pot on the stove, heat the oil. Add the roast and brown on all sides. Set meat aside.
- Add onions, garlic, and remaining salt to the pot. Cook over medium heat, stirring often, 8-10 minutes, until browned. Add celery flakes, tomato paste, thyme, and bay leaves, stirring in for about a minute.
- Add wine (or extra broth) and stir to loosen browned bits from pan. Add the can of broth. Return roast to the pan. Arrange vegetables around the roast while bringing the pot to a boil. Once that mark is reached, turn off burner and carefully transfer pot to oven. Cover and bake for 2 to 2 1/2 hours, until meat is fork-tender.
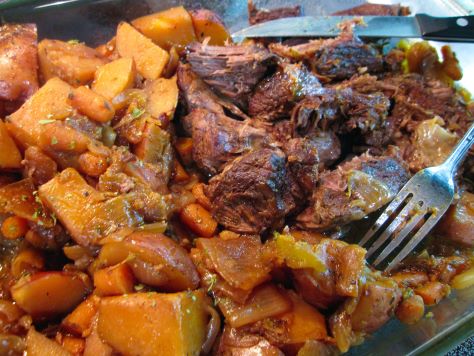
- Pull pot from oven. Carefully remove meat and vegetables to a platter. Discard bay leaves and skim any fat from the top of the liquids. Bring pot to a boil again, cooking for 10-12 minutes, until liquid is reduced by half. (While this is going on, prepare meat by removing string and slicing or cutting into chunks.) Add vinegar and parsley to the pot. Add more salt and vinegar to taste.
- Serve meat, potatoes, and veggies with sauce. Any leftovers are great reheated on the stove over the next day or so.
OM NOM NOM!
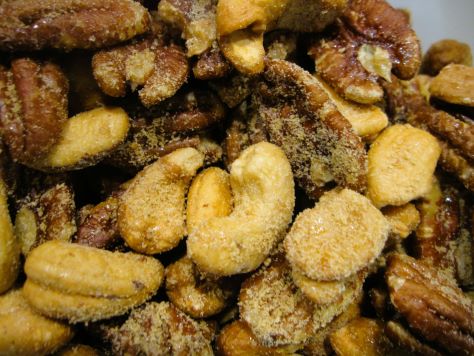
Bready or Not Original: Air Fryer Maple Roasted Nuts
Pardon me, have you heard that air fryers are awesome? Yeah, yeah, I won’t go for the hard sell, but I do love my air fryer, and it sure makes these Maple Roasted Nuts quick and convenient.

This is a good recipe if you want to prepare nuts for a sports game or any kind of gathering–or if, like me, you enjoy having some lightly-sweet nuts along with cheese.
If you’d like, substitute honey for the maple syrup. I imagine something like agave syrup might work, too, but I haven’t tried that. I know maple sugar can be expensive or hard to find offline, but fortunately brown sugar makes for a good substitute for that, too.
Bready or Not Original: Air Fryer Maple Roasted Nuts
Equipment
- air fryer
- parchment paper
Ingredients
- 1 cup whole pecans
- 1 cup whole cashews
- 1 Tablespoon butter melted
- 1 Tablespoon maple syrup
- 1/2 teaspoon salt
- 1 Tablespoon maple sugar or brown sugar
Instructions
- Line the air fryer tray with parchment paper cut to fit, then place tray on top.
- Place the nuts in a large bowl. Pour the butter over the top, followed by the maple syrup and salt. Stir the nuts to coat. Place them spread out on the mesh tray.
- Air fry at 325-degrees for about 5 to 6 minutes or until they begin to smell toasted, stirring one halfway through. They should look browned at the end.
- While they are cooking, pull out another small cookie sheet or plate, putting more parchment on it if desired; this will be a surface on which the nuts will cool.
- When the nuts are done, pull them from the air fryer and carefully transfer them to the fresh cookie sheet. Let them cool for about 10 minutes, then sprinkle maple sugar on top, stirring to coat. Enjoy immediately, or place in a sealed container at room temperature to eat over the next month.
OM NOM NOM!
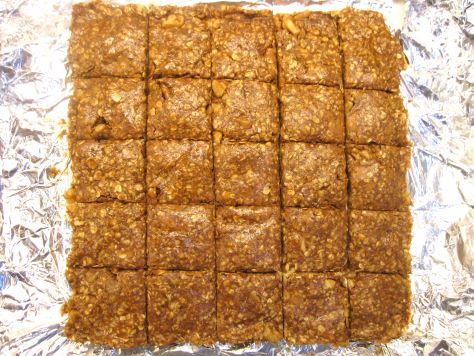
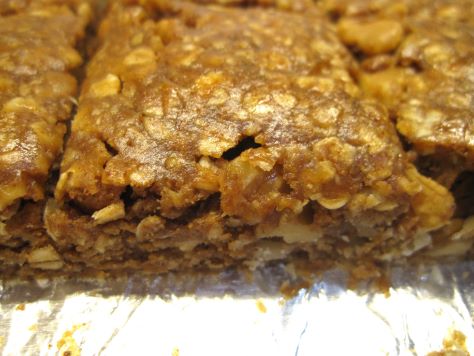
Bready or Not Original: No-Bake Almond Granola Bars
These No-Bake Almond Granola Bars are fast to make and contain wholesome, basic ingredients. Plus, they are delicious.
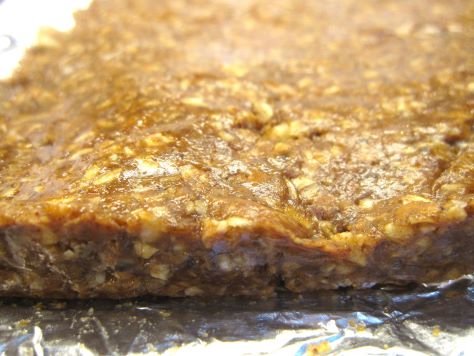
I made this recipe several times to find the right balance of ingredients. Too many almonds and oats, and nothing sticks together. You think it’s solid until you try to cut the chilled bars. (I speak from experience.)
I find it fun to make little swaps with the ingredients, too. Use cashew butter or another kind of nut butter! Try different varieties of honey. You could even use pumpkin spice mix or other spices to give it a different vibe.
The end result will keep for a week or two in the fridge, and even longer in the freezer!
Bready or Not Original: No-Bake Almond Granola Bars
Equipment
- 9×9 pan
- aluminum foil
- nonstick spray
- food processor
- waxed paper
- heavy glass
Ingredients
- 1 cups almonds or buy pre-chopped almonds
- 2 cups quick-cooking oats
- 2 teaspoons ground cinnamon
- 1/2 teaspoon fine sea salt reduce if using regular table salt or salted nut butter
- 1 1/2 cups creamy almond butter
- 1/2 cup maple syrup or honey
- 2 teaspoons vanilla extract
Instructions
- Line a 9×9 square pan with foil and apply nonstick spray.
- If the almonds are whole, give them a rough chop in food processor, just a few pulses.
- In a large mixing bowl, combine the oats, cinnamon, and salt, and stir to blend. If the almond butter is stiff, measure it into a separate microwave-safe bowl and heat it for 20-30 seconds to soften it. Add almond butter, maple syrup or honey, and vanilla extract to the big bowl with the dry ingredients. Stir together until it forms a cohesive mass. If it seems too liquid, add more oats; if it’s too dry, add more almond butter. Stir in the chopped almonds to distribute them throughout.
- Dump the mixture into the prepared pan. Even out some, then use a pan-size piece of wax paper and a heavy glass to compress the dough evenly.
- Stash the pan in the fridge for at least an hour, or until the next day. Slice into bars of desired size. Store between stacked waxed paper layers in the fridge, or freeze for later enjoyment.
OM NOM NOM!
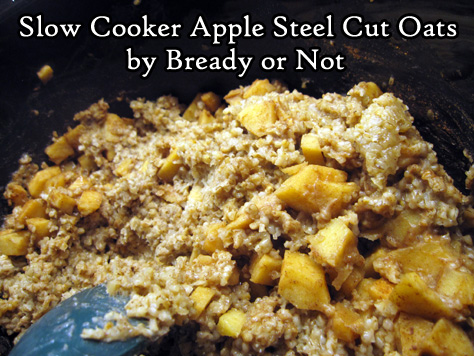
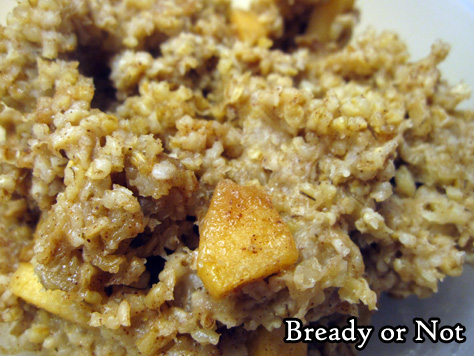
Bready or Not Original: Slow Cooker Apple Steel Cut Oats
These Slow Cooker Apple Steel Cut Oats are not the most photogenic of foods, but they are delicious, healthy, and good, and probably one of the most convenient meals in my cooking repertoire.
I’ve been cooking this recipe for over five years now, tweaking it here and there, making it better. What I present here is really a foundation. This recipe can be customized all kinds of ways–either when the food is being assembled, by adding in different spices or apples, or by tweaking it at serving time.
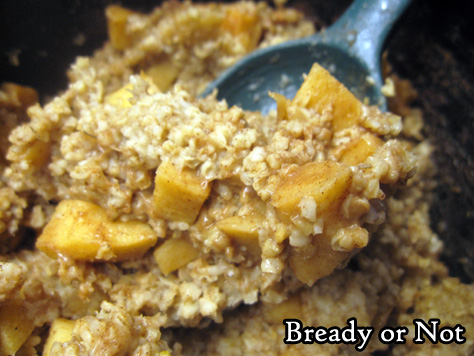
I love using Gala, Honeycrisp, or Pink Lady apples, but go for any good baking-type apple or a variety thereof. You don’t want the apples to go to mush. Or maybe you do? That might not be a terrible thing here.

I typically use unsweetened vanilla almond milk or cashew milk, but any plain or vanilla nut, soy, or oat milks would work, or you can opt for dairy milk.
This isn’t an overnight slow cooker oats recipe. I’ve tried that. Even on low and warm settings, the oats just plain overcooked for my preference. The consistency goes brick-like and the pot requires some intense scraping if you don’t use a removable liner. I prefer to make this during the day, and then portion out the oats to go in the fridge and freezer. They reheat beautifully.
Bready or Not Original: Slow Cooker Apple Steel Cut Oats
Equipment
- large slow cooker
Ingredients
- 2 cups steel cut oats no substitutes
- 2 cups nut milk or oat milk, regular or vanilla, sweetened or unsweetened
- 2 cups water
- 2 medium apples peeled and chopped
- 1/4 cup brown sugar packed
- 1/4 cup pure maple syrup
- 2 teaspoons ground cinnamon
- 1/4 teaspoon sea salt
- 2 teaspoons vanilla extract
Instructions
- Place all ingredients in slow cooker and stir to distribute. Place lid on pot and put heat level to LOW. Cook for 3 hours before lifting lid again. Stir and taste to test doneness. Continue to cook for 30 minutes to an hour more, dependent on the desired texture for the oats. The longer it cooks, the thicker it will be.
- Serve oats fresh, or stash in fridge to reheat in microwave over the next week. These oats are great to portion out and freeze for later. If desired, add more spices, fresh fruit, or extra milk when serving–the customization possibilities are endless!
*OM NOM NOM!*
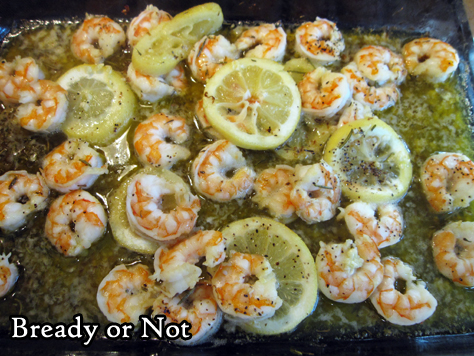
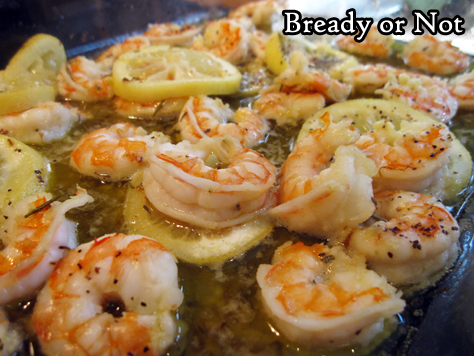
Bready or Not Original: Roasted Lemon Garlic Shrimp
This Roasted Lemon Garlic Shrimp recipe makes for a delicious supper! It’s super-easy and healthy, too.

I’ve made this recipe for about, gosh, ten years now. I make it every month or so. I like to buy 2-pound bags of frozen shrimp of Costco and divide it to make this dish.
One of the great things about this dish is that you can pair it with different foods depending on your own individual needs. Eat it on rice or egg noodles, or go gluten-free and low-calorie with some zoodles or cauliflower rice. The seasoned oil in this recipe makes everything taste good!
On the side, I usually serve steamed broccoli or green beans. Whatever is in season and on sale!

In all the years I’ve made this, we’ve never had leftovers.
Bready or Not Original: Roasted Lemon Garlic Shrimp
Equipment
- 13x9 pan
Ingredients
- 1 medium lemon
- 1/2 cup olive oil or avocado oil
- 1 teaspoon dried thyme
- 1 sprig fresh rosemary or one teaspoon dry
- 1 pound medium-sized shrimp cooked and deveined
- 5 garlic cloves
- salt and pepper
Instructions
- Preheat oven at 400-degrees. Wash and dry the lemon, then zest it; set aside lemon. If using fresh rosemary, shear leaves from the stem. Place zest in 13x9 pan along with olive oil, thyme, and rosemary. Bake pan in oven for 12 minutes.
- While the zest is infusing the oil, thinly slice the lemon and remove seeds. If desired, remove tails from shrimp.
- Pull out pan. Add shrimp and lemon slices--be wary, oil may pop from the dish! Mince garlic cloves into the pan; gently stir everything. Place back in oven to cook for another 8 to 10 minutes, until shrimp is heated through. Add sprinkle of salt and pepper.
- Serve atop pasta, rice, zoodles, cauliflower rice, etcetera. The hot lemon oil is also great for dipping bread.
OM NOM NOM!
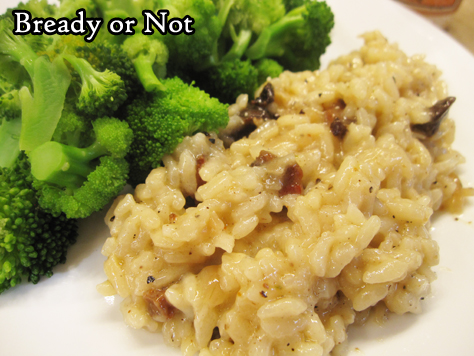
Bready or Not Original: Pancetta Risotto
This Pancetta Risotto is a fantastic meal for two people, or a delicious side for a group. It’s time-consuming but very straightforward to make.

I confess, I spent years being intimidated by the very idea of a risotto. I would see it done on cooking shows. So much stirring! When I finally got up the gumption to give it a try, I found risotto wasn’t hard at all. It really is about lots of stirring.
This recipe here is my fancy occasion recipe, especially when I have some good pancetta on hand, such as the kind carried by Smoking Goose Meatery out of Indianapolis.

As for the wine, I’ve tried this with fancier Sauvignon Blanc from Total Wine (Cloudy Bay from New Zealand) as well as a $6 Trader Joe’s Coastal Sauvignon Blanc. Both versions turned out great! You don’t need to go all-out, but get something that is (hopefully) drinkable with the finished meal.
Bready or Not Original: Pancetta Risotto
Equipment
- large stock pot
- medium saucepan
Ingredients
- 8 oz pancetta diced
- 1 Tablespoon dried shallots or fresh shallot, finely minced
- 3 cloves garlic minced
- 1 1/4 cups Arborio rice
- 1 cup dry white wine Sauvignon Blanc works well
- 4 cups chicken broth or chicken stock, equal to a 32 oz box or 2 cans
- 1/2 cup shredded Parmesan or Pecorino Romano or Grana Padano, plus more to top rice
- salt and pepper to taste
Instructions
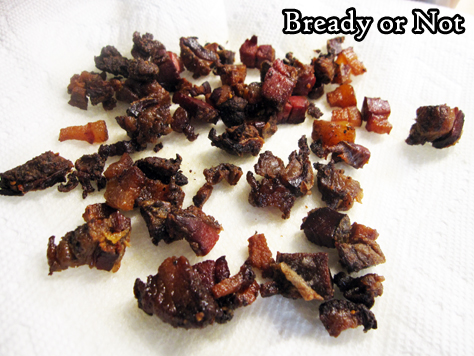
- In a large stock pot, cook the pancetta for 10 to 12 minutes, until it starts to turn brown and crispy. At the same time, on another stove burner, use a medium sauce pan to bring the chicken broth to a very low simmer.
- Use a slotted spoon to transfer pancetta to a paper towel-lined plate; set aside. Add dry shallots and garlic to the fat in the big pot. Sauté for two minutes. Add the Arborio rice and a pinch of salt. Sauté another 2 minutes, until the rice looks glossy with translucent edges.
- Add the white wine and stir until it is absorbed. Add chicken broth in 1/2 cup increments, stirring well after each addition until it is absorbed. After about 12 to 15 minutes, when most of the broth has been added, begin to taste the rice. The goal is a chewy, al dente consistency. Add more broth as needed, and remember to turn off the burner for the broth pot when it is empty.
- When the rice is creamy and al dente, stir in the pancetta and cheese. Taste the risotto again, adding more salt and pepper as needed. Serve with the remaining white wine.
OM NOM NOM!
Follow me


