


Bready or Not: Marcona Almond Bars
I’ve used almonds in many cookie and bar recipes, but these Marcona Almond Bars are especially decadent and good.
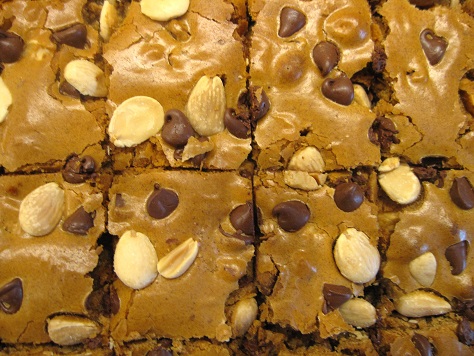
First of all, the base recipe starts with browned butter. Almond butter is also mixed in, which adds to the taste and texture. There’s just a touch of spice involved. These bars are really about the almonds.
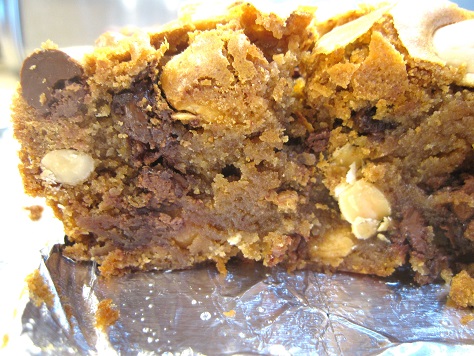
What makes Marcona almonds different? They are from Spain, for one, and have the skin removed. They have a high standard of quality, a buttery, clean, crispness to them that is especially nice in contrast to chocolate. (They are also great on a Spanish-themed cheeseboard with things like Manchego cheese and membrillo paste.)
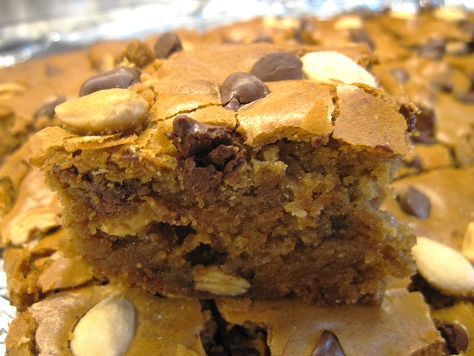
These bars are delicious for a snack or dessert, and they look especially pretty in their simplicity.
Modified from February 2014 issue of Food & Wine Magazine.
Bready or Not: Marcona Almond Bars
Equipment
- large saucepan
- 9×13 pan
- offset spatula
Ingredients
- 2 1/2 sticks unsalted butter
- 3 1/2 cups light brown sugar packed
- 5 large eggs lightly beaten
- 1/2 cup roasted almond butter
- 1 Tablespoon pure vanilla extract
- 1 1/2 teaspoons kosher salt
- 1/4 teaspoon ground cinnamon
- 3 cups all-purpose flour
- 2 cups Marcona almonds 9 ounces
- 1 3/4 cups chocolate chips 11 ounces (1 bag)
Instructions
- In a large saucepan, cook the butter over medium heat until golden brown, about 5 minutes. Set off-heat to cool for about 30 minutes.
- Start oven preheating at 325-degrees. Place a large strip of aluminum foil in a 9×13 pan and apply nonstick spray or butter.
- Add the sugar, eggs, almond butter, vanilla, salt, and cinnamon to the cooled browned butter. Mix until smooth. Add the flour. Fold in 1 1/2 cups of the almonds and 1 1/2 cups of the chocolate chips.
- Pour the batter into the prepared pan. Use an offset spatula to even out dough. Scatter the remaining almonds and chocolate chips over the top and lightly press in.
- Bake for 60 minutes. The middle should pass the toothpick test. Cool at room temperature, speeding process in the fridge, if desired. Use the foil to lift the contents onto a cutting board to slice into bars. Store in a sealed container at room temperature.
OM NOM NOM!
New Publications for January
New year, new month, and finally a chance to update my bibliography with my new releases. Here’s what is new!
Short Story
“Family Get-Together,” Nature (Dec 16 2022)
Poetry
“Birthday Cake,” co-written with Rhonda Parrish, Dreams & Nightmares (issue 123 January 2023)
“The Deal” and “Lucky Shot,” co-written with Rhonda Parrish, The Magazine of Fantasy & Science Fiction (Jan/Feb 2023)
“That Monster Beneath the Bed,” Haven Spec
“Following the White Horse,” Daikaijuzine
#SFWAPro
Read MoreBready or Not: Soft Batch-Style Chocolate Chip Cookies Stuffed with Chocolate
How do you make Chocolate Chip Cookies better? More chocolate, of course–in this case, a chocolate disc inside these Soft Batch-Style Chocolate Chip Cookies Stuffed with Chocolate makes them extra delicious.
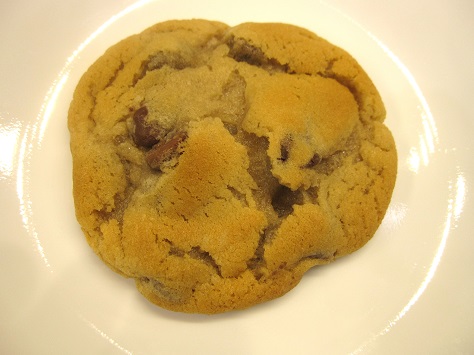
Fun fact up front: this is a modification of my most reliable, most-baked cookie recipe. The differences: add another cup of chocolate chips, and remove the chocolate discs. These Soft Batch-esque cookies are the ones I make whenever I go home to California. I usually have a round or two frozen in case of urgent cookie needs at home, too.
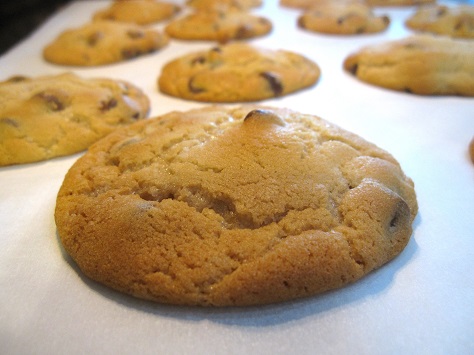
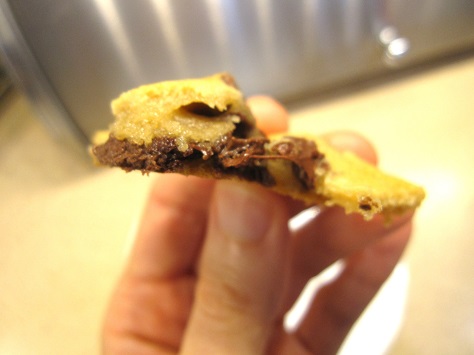
This new take on my old favorite adds a luscious chocolate layer right in the middle. If you can’t find the Ghirardelli version of these discs, seek out another one, or even use a pinch of chocolate chips! A Hershey’s Kiss or Reese’s Peanut Butter Cup would work, too, though you might need to add some extra dough to seal them inside.
Even better, these cookies will keep for weeks, if you have the fortitude to make them last. That makes these great for gift-giving, cookie exchanges, and mailing (if you’re not someplace hellishly hot).
Bready or Not: Soft Batch-Style Chocolate Chip Cookies Stuffed with Chocolate
Equipment
- tablespoon scoop
- cookie sheet
Ingredients
- 1 cup unsalted butter (2 sticks) room temperature
- 1 1/2 cups brown sugar packed
- 1/2 cup white sugar
- 2 large eggs room temperature
- 1 teaspoon vanilla extract
- 3 cups all-purpose flour
- 4 teaspoons cornstarch
- 2 teaspoons baking soda
- 1 teaspoon kosher salt
- 2 cups chocolate chips
- 10- ounces Ghirardelli Dark Melting Wafers
- flaked salt or coarse sugar to sprinkle on top, optional
Instructions
- Cream butter and sugars together until light and fluffy, which takes several minutes in a mixer. Add eggs and vanilla. Mix in flour, cornstarch, baking soda, and salt. Fold in the chocolate chips.
- The cookies can be made right away, but texture is thicker if the dough is chilled for several hours or overnight. Cover with plastic wrap if it will be in for a while.
- When it’s time to bake, preheat oven at 350-degrees. Use a tablespoon scoop to form a ball of dough. Make a deep imprint and shove a chocolate wafer inside. Fold and press the dough to completely encase. Repeat, spacing them out to allow for spread on the pan. If desired, sprinkle some flaked salt or coarse sugar atop each to provide extra texture and flavor.
- Bake for 11 to 13 minutes, until the cookies look golden and set. Let them continue to rest on pan for 5 to 10 minutes before moving them to a cooling rack.
- Store in a sealed container at room temperature. These cookies can keep for weeks.
OM NOM NOM!
Bready or Not: Almond Olive Oil Bundt Cake
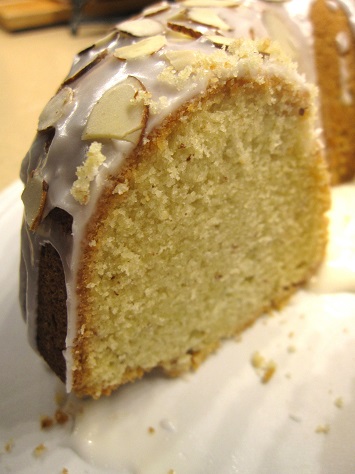
The second week of 2023, and we’re beginning in proper form with a cake. An Almond Olive Oil Bundt Cake.
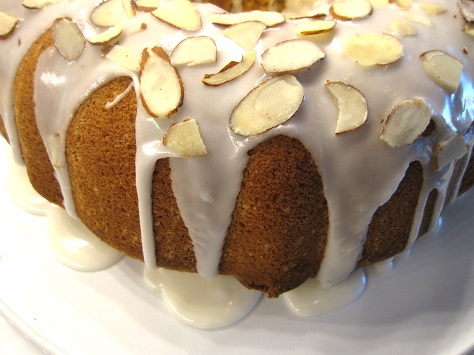
This cake isn’t as super-sweet as many. Instead, the olive oil and almonds are what comes through beautifully in the crumb. The glaze finishes things off, and the crunch of slices almonds adds a nice textural contrast.
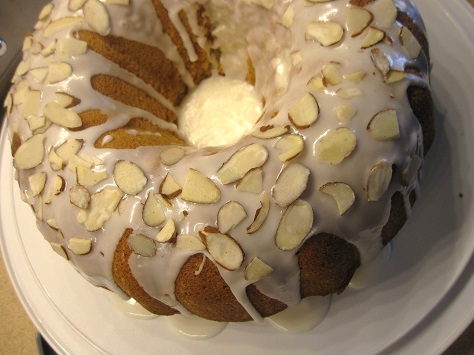
This is the kind of bundt cake that works well for breakfast, brunch, snack, or dessert. It also works for any season of the year.
Modified from a Pompeiian Olive Oil ad.
Bready or Not: Almond Olive Oil Bundt Cake
Equipment
- 10 or 12 cup bundt pan
- cooking spray with flour
- cooling rack
Ingredients
Cake
- 2 1/2 cups all-purpose flour
- 3/4 cup almond flour sifted
- 1 1/2 teaspoons baking powder
- 1/2 teaspoon salt
- 1 3/4 cups white sugar
- 4 large eggs room temperature
- 1 cup extra virgin olive oil
- 1 teaspoon pure vanilla extract
- 1/2 teaspoon pure almond extract
- 1/2 cup unsweetened vanilla almond milk or plain almond milk
Glaze
- 1 1/2 cups confectioners’ sugar
- 2 to 3 Tablespoons milk or half & half
- sliced almonds optional
Instructions
- Preheat oven at 325-degrees. Apply baking spray with flour on the interior of the bundt pan.
- In a small bowl, combine flour, almond flour, baking powder, and salt. Set aside.
- In a big mixing bowl, beat together sugar and eggs until they are thick and yellow, about three minutes. Slowly mix in olive oil until smooth, followed by vanilla and almond extracts. Mix in the dry ingredients alternatively with the almond milk, making sure to scrape the bottom of the bowl.
- Pour the batter into the pan and smooth out the top. Bake until the middle passes the toothpick test, about 50 to 60 minutes.
- Transfer to a rack to cool for 15 minutes, then invert cake onto the rack to completely cool.
- Make the glaze. Beat together the confectioners' sugar and milk to make a thick glaze. Drizzle over the top so it oozes down the sides. If desired, top with a sprinkle of sliced almonds. Let glaze set for about 20 minutes. Slice in and enjoy!
OM NOM NOM!
Bready or Not Original: Khachapuri
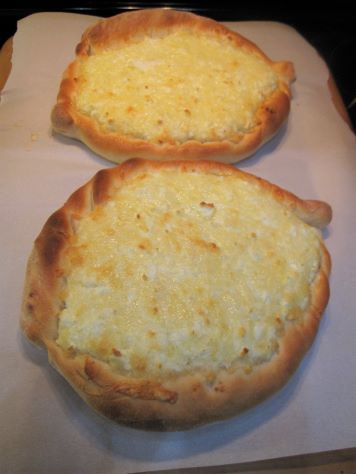
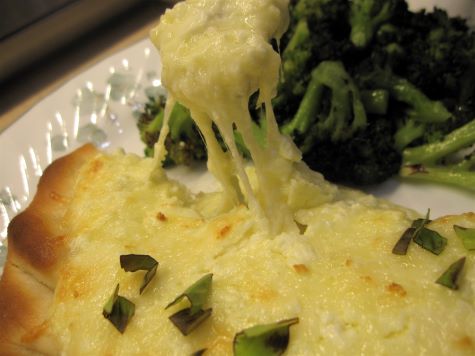
Let’s start the new year in cheesy fashion! Here’s my take on khachapuri, aka Georgian cheese bread. It’s pretty much the ultimate dish if you like bread and cheese.
This is an original recipe, which I made from studying about four other recipes. I have no way of knowing if this, or the recipes I pull from, are authentic. Really, they can’t be. Those of us in the US likely can’t get the real-deal cheeses, but I did try to go more authentic than some of the other recipe suggestions.
Butterkäse is carried by some supermarkets in the US, especially the Roth brand out of Wisconsin. If you can’t find that, go for a good melter like mozzarella or havarti.
Bulgarian feta is moister than typical domestic fetas and also doesn’t have as strong of a salty flavor. I’ve found that it is regularly carried in Grocery Outlets in California and in larger Asian/European grocery stores. Can’t find it? Go for another moist feta.
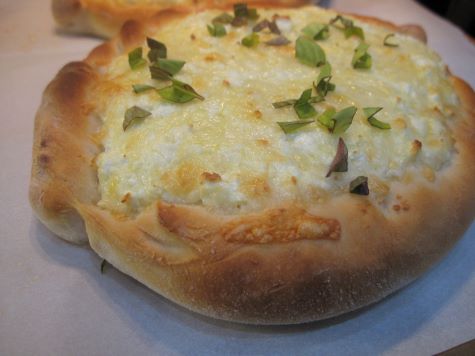
Traditional Khachapuri is topped with an egg. Mine is not, because my husband hates eggs. I knew he wouldn’t even want to see a runny egg on my portion!
I include advice on reheating leftovers as well. I can testify that this dish reheats beautifully in the oven.
Bready or Not Original: Khachapuri (Georgian Cheese Bread)
Equipment
- food scale
- parchment paper
- pizza stone
Ingredients
Dough
- 1/4 cup milk
- 1/2 cup water
- pinch sugar
- 1 teaspoon active dry yeast
- 1 3/4 cups all-purpose flour plus more for dusting
- 1 1/4 teaspoon kosher salt
Filling
- 9 ounces butterkäse also known as butter cheese, shredded (substitute mozzarella or havarti)
- 7 ounces Bulgarian feta broken apart with fork (substitute other moist feta)
- 1 large egg room temperature
- 2 large eggs for topping, optional
- fresh basil or other chopped herbs or red pepper flakes for topping, optional
Instructions
To make the dough
- Warm the milk and water together, in the microwave or on the stove, to about 110-degrees. Transfer it to a large mixing bowl. Stir in sugar and yeast. Let stand about 10 minutes to start bubbling; if the room is cold, cover the bowl with plastic wrap or a towel to encourage warmth.
- Add the flour and salt to the bowl. Beat using a dough hook for about five minutes, or longer if by hand, to form a soft dough. Move to a larger greased bowl and cover, letting rise for an hour to an hour and a half.
Shape and fill the khachapuri
- Combine the two cheeses in a bowl. Mash in the egg to completely incorporate.
- Lightly flour a work surface. Turn out the dough onto the surface, dividing in half. Form each into a round; set one aside. Use a rolling pin to extend a piece of dough to be about ten inches across. Lift it onto parchment paper. Repeat with the other piece of dough, either fitting onto the same parchment or a second piece.
- Spoon half the cheese mixture into the middle of a bread sheet, spreading out to about an inch from the edge. Fold the bare edge over to meet the cheese, shaping it into a cheese canoe, pinching the ends together and twisting to seal. Repeat with the second half.
- Preheat oven at 450-degrees and place pizza stone in oven to heat up. Let khachapuri rise for 30 minutes.
- Carefully pull out the pizza stone. Use parchment to lift khachapuris onto the stone. Bake for 12 minutes. If adding the traditional cracked egg to top each piece, then do so now. In any case, turn around khachapuri and bake for another 4 minutes. Crust should be browned with cheese fully melted.
- Let set for 10 minutes. If desired, add chopped basil, red pepper flakes, or other herbs. Serve!
