


Bready or Not Original: Chicken and Rice Soup
Chicken and Rice Soup is the ultimate classic, home-cooking, feel-better-soon kind of meal. I’m stunned I haven’t featured it on Bready or Not before, but here it is now: my take on the old favorite.

I’ve tweaked this over the years to get the balance of liquids and seasonings just right. I make this a couple times a year. It’s my stand-by if my husband is sick–it’s hearty, hot, sits well in the stomach, and the sheer amount made means the leftovers can last for days (which is nice if I come down sick next, too).

Bready or Not Original: Chicken and Rice Soup
Equipment
- stock pot or other large pot with lid
Ingredients
- 1 cup baby carrots chopped
- 2 Tablespoons dried celery flakes
- 1 Tablespoon dried onion flakes
- 1 teaspoon garlic powder
- 64 oz reduced sodium chicken broth 2 boxes or 4 cans
- 3 Tablespoons flour
- 1/2 cup short grain white rice such as sushi rice
- 1 teaspoon dried thyme
- 1 teaspoon dried rosemary or 1 freshly-cut sprig
- 2 bay leaves
- 2 to 3 cups shredded rotisserie chicken or cooked turkey
- 1 1/2 cups half & half
Instructions
- Place carrots, celery flakes, dried onion, and garlic powder in a large pot along with 1 can of chicken broth (if using a box of broth, just pour in about 1/2 of one; no need to be exact). Sauté on medium heat for 10 minutes, until carrots are tender. Sprinkle in flour and stir for another few minutes.
- Add rest of broth along with the rice, thyme, rosemary, and bay leaf. Bring pot to boil.
- Reduce heat to medium-low and cover pot. Cook for 25 to 30 minutes. When the rice is tender, add the chicken or turkey. Cook for 10 minutes. Stir in half & half and cook for another 10 minutes.
- Remove both bay leaves. Add salt and pepper to preference. Serve hot. Leftovers can keep in the fridge or days or can be frozen.
OM NOM NOM!
Bready or Not Original: No-Bake Almond Granola Bars
These No-Bake Almond Granola Bars are fast to make and contain wholesome, basic ingredients. Plus, they are delicious.
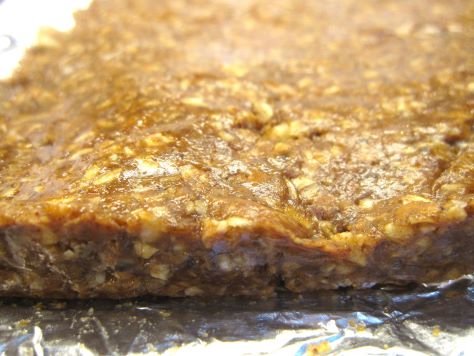
I made this recipe several times to find the right balance of ingredients. Too many almonds and oats, and nothing sticks together. You think it’s solid until you try to cut the chilled bars. (I speak from experience.)
I find it fun to make little swaps with the ingredients, too. Use cashew butter or another kind of nut butter! Try different varieties of honey. You could even use pumpkin spice mix or other spices to give it a different vibe.
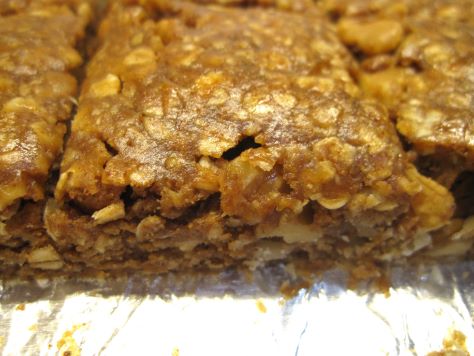
The end result will keep for a week or two in the fridge, and even longer in the freezer!
Bready or Not Original: No-Bake Almond Granola Bars
Equipment
- 9×9 pan
- aluminum foil
- nonstick spray
- food processor
- waxed paper
- heavy glass
Ingredients
- 1 cups almonds or buy pre-chopped almonds
- 2 cups quick-cooking oats
- 2 teaspoons ground cinnamon
- 1/2 teaspoon fine sea salt reduce if using regular table salt or salted nut butter
- 1 1/2 cups creamy almond butter
- 1/2 cup maple syrup or honey
- 2 teaspoons vanilla extract
Instructions
- Line a 9×9 square pan with foil and apply nonstick spray.
- If the almonds are whole, give them a rough chop in food processor, just a few pulses.
- In a large mixing bowl, combine the oats, cinnamon, and salt, and stir to blend. If the almond butter is stiff, measure it into a separate microwave-safe bowl and heat it for 20-30 seconds to soften it. Add almond butter, maple syrup or honey, and vanilla extract to the big bowl with the dry ingredients. Stir together until it forms a cohesive mass. If it seems too liquid, add more oats; if it’s too dry, add more almond butter. Stir in the chopped almonds to distribute them throughout.
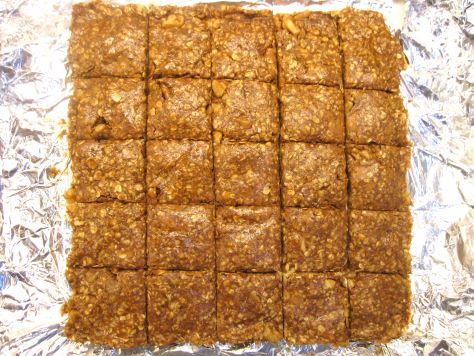
- Dump the mixture into the prepared pan. Even out some, then use a pan-size piece of wax paper and a heavy glass to compress the dough evenly.
- Stash the pan in the fridge for at least an hour, or until the next day. Slice into bars of desired size. Store between stacked waxed paper layers in the fridge, or freeze for later enjoyment.
OM NOM NOM!
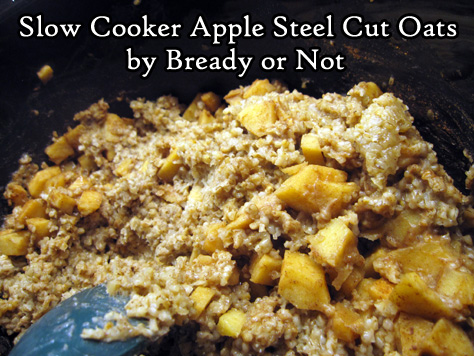
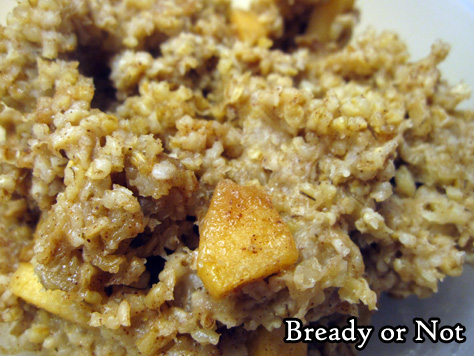
Bready or Not Original: Slow Cooker Apple Steel Cut Oats
These Slow Cooker Apple Steel Cut Oats are not the most photogenic of foods, but they are delicious, healthy, and good, and probably one of the most convenient meals in my cooking repertoire.
I’ve been cooking this recipe for over five years now, tweaking it here and there, making it better. What I present here is really a foundation. This recipe can be customized all kinds of ways–either when the food is being assembled, by adding in different spices or apples, or by tweaking it at serving time.
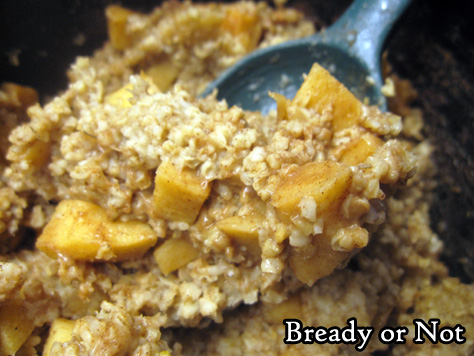
I love using Gala, Honeycrisp, or Pink Lady apples, but go for any good baking-type apple or a variety thereof. You don’t want the apples to go to mush. Or maybe you do? That might not be a terrible thing here.

I typically use unsweetened vanilla almond milk or cashew milk, but any plain or vanilla nut, soy, or oat milks would work, or you can opt for dairy milk.
This isn’t an overnight slow cooker oats recipe. I’ve tried that. Even on low and warm settings, the oats just plain overcooked for my preference. The consistency goes brick-like and the pot requires some intense scraping if you don’t use a removable liner. I prefer to make this during the day, and then portion out the oats to go in the fridge and freezer. They reheat beautifully.
Bready or Not Original: Slow Cooker Apple Steel Cut Oats
Equipment
- large slow cooker
Ingredients
- 2 cups steel cut oats no substitutes
- 2 cups nut milk or oat milk, regular or vanilla, sweetened or unsweetened
- 2 cups water
- 2 medium apples peeled and chopped
- 1/4 cup brown sugar packed
- 1/4 cup pure maple syrup
- 2 teaspoons ground cinnamon
- 1/4 teaspoon sea salt
- 2 teaspoons vanilla extract
Instructions
- Place all ingredients in slow cooker and stir to distribute. Place lid on pot and put heat level to LOW. Cook for 3 hours before lifting lid again. Stir and taste to test doneness. Continue to cook for 30 minutes to an hour more, dependent on the desired texture for the oats. The longer it cooks, the thicker it will be.
- Serve oats fresh, or stash in fridge to reheat in microwave over the next week. These oats are great to portion out and freeze for later. If desired, add more spices, fresh fruit, or extra milk when serving–the customization possibilities are endless!
*OM NOM NOM!*
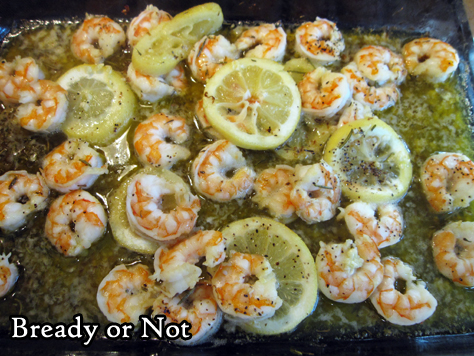
Bready or Not Original: Roasted Lemon Garlic Shrimp
This Roasted Lemon Garlic Shrimp recipe makes for a delicious supper! It’s super-easy and healthy, too.

I’ve made this recipe for about, gosh, ten years now. I make it every month or so. I like to buy 2-pound bags of frozen shrimp of Costco and divide it to make this dish.
One of the great things about this dish is that you can pair it with different foods depending on your own individual needs. Eat it on rice or egg noodles, or go gluten-free and low-calorie with some zoodles or cauliflower rice. The seasoned oil in this recipe makes everything taste good!

On the side, I usually serve steamed broccoli or green beans. Whatever is in season and on sale!

In all the years I’ve made this, we’ve never had leftovers.
Bready or Not Original: Roasted Lemon Garlic Shrimp
Equipment
- 13x9 pan
Ingredients
- 1 medium lemon
- 1/2 cup olive oil or avocado oil
- 1 teaspoon dried thyme
- 1 sprig fresh rosemary or one teaspoon dry
- 1 pound medium-sized shrimp cooked and deveined
- 5 garlic cloves
- salt and pepper
Instructions
- Preheat oven at 400-degrees. Wash and dry the lemon, then zest it; set aside lemon. If using fresh rosemary, shear leaves from the stem. Place zest in 13x9 pan along with olive oil, thyme, and rosemary. Bake pan in oven for 12 minutes.
- While the zest is infusing the oil, thinly slice the lemon and remove seeds. If desired, remove tails from shrimp.
- Pull out pan. Add shrimp and lemon slices--be wary, oil may pop from the dish! Mince garlic cloves into the pan; gently stir everything. Place back in oven to cook for another 8 to 10 minutes, until shrimp is heated through. Add sprinkle of salt and pepper.
- Serve atop pasta, rice, zoodles, cauliflower rice, etcetera. The hot lemon oil is also great for dipping bread.
OM NOM NOM!
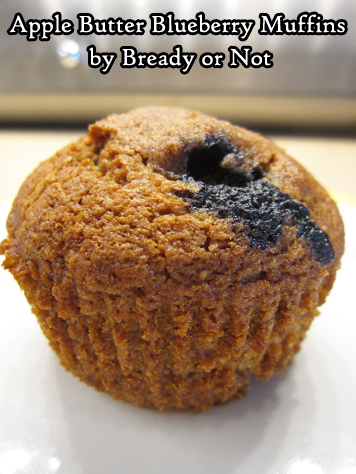
Bready or Not Original: Apple Butter Blueberry Muffins
Apple Butter Blueberry Muffins! Fruity flavors combine in a delicious way in this original recipe.
I love apple butter. It’s delicious, versatile stuff. I’ve found it can work as a substitute in recipes that call for things like applesauce, bananas, and pumpkin puree.
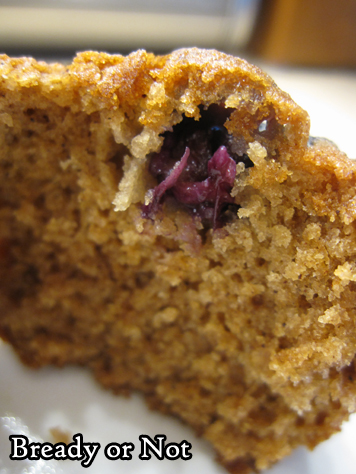
Here, the inherent spiciness in apple butter adds a lot of flavor without the need to measure out extra spices–and the thick texture creates a cakey, moist crumb.
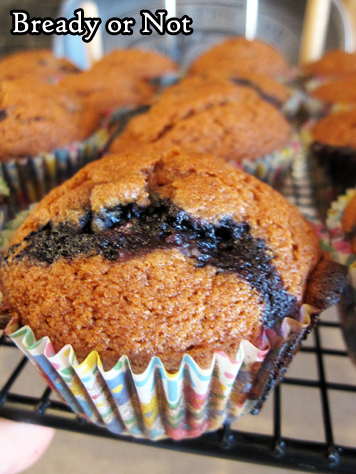
The fresh blueberries throughout are like flavor bombs, introducing a different kind of sweetness in contrast.

Do note that this recipe makes 24 muffins. It saves a lot of time if you have two pans, but this recipe could certainly be done with one. Make sure you have paper liners, though. There’s no sadness like my-muffin-is-stuck-in-the-pan sadness.
Bready or Not Original: Apple Butter Blueberry Muffins
Equipment
- muffin liners
- 2 muffin pans
Ingredients
- 1 cup fresh blueberries
- 2 cups all-purpose flour plus extra
- 1 cup white sugar
- 1/2 cup light brown sugar packed
- 1 teaspoon baking powder
- 1 teaspoon baking soda
- 1/2 teaspoon salt
- 1 teaspoon cinnamon heaping
- 2 eggs room temperature
- 2 teaspoons vanilla extract
- 1 1/2 cups apple butter
- 3/4 cup coconut oil liquid
Instructions
- Preheat oven at 425-degrees. Place muffin liners in two 12-count pans and apply a heavy dose of nonstick spray. Set aside.
- Wash and sort through blueberries, picking out stems or mushy berries. Pat dry. Place in a bowl. Add a tablespoon or so of flour and gently stir to coat berries. This will prevent them from sinking in the batter.
- In a medium bowl, combine the flour, white sugar, brown sugar, baking powder, baking soda, salt, and cinnamon. Set aside.
- In a big mixing bowl, beat together the eggs, vanilla, apple butter, and coconut oil. Gradually pour in the dry ingredients, scraping bottom several times, until everything is just incorporated. Carefully fold in the blueberries.
- Scoop batter into prepared liners, filling each no more than 3/4 full.
- Bake for 5 minutes at 425-degrees. Don't open oven door. Lower temperature to 375-degrees and bake for an additional 16 to 18 minutes, until middle muffins pass the toothpick test.
- Remove pans from oven. Immediately (and carefully) use a fork to pry out each muffin. Keeping them in liners, set on rack to completely cool.
- Once cooled, pack in sealed containers. If freezing muffins, remove liners first.
OM NOM NOM!
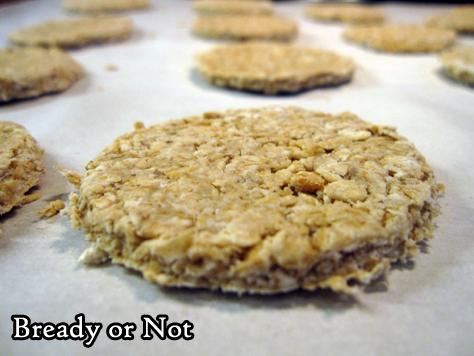
Bready or Not Original: Scottish Oatcakes
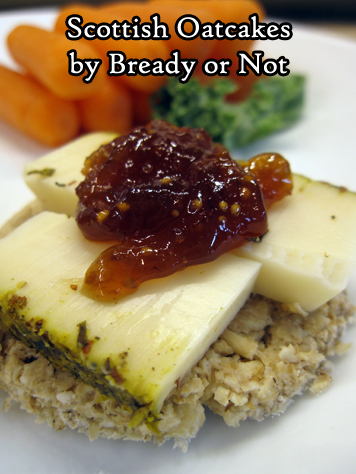
These Scottish Oatcakes are like a thick, wholesome, chewy cracker, and they are the perfect platform for cheese and charcuterie.
When I was on my UK trip last year, I made a pilgrimage to the Victoria Street location of I.J. Mellis Cheesemongers. Oh, bliss! I bought stuff for a personal picnic: cheeses I could never find in America, plus port chutney and Scottish oatcakes.
I loved everything. The oatcakes, basic as they were, really impressed me. They were oaty and fresh with a tiny hint of salt, and were ideal platforms for the cheese and chutney.
Upon getting home, I found no acceptable imported options for oatcakes, so I resolved to make them myself. I didn’t want to use processed flour or sugar. In the end, I ended up finagling my own recipe.
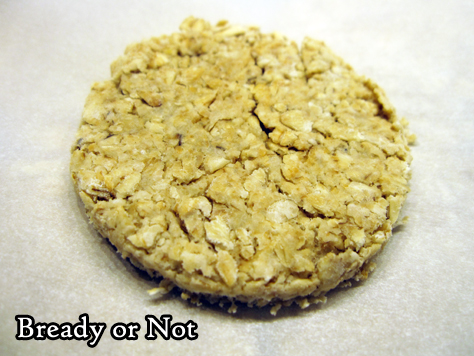
These oatcakes are basic and wholesome, and delicious in their simplicity. Get the consistency right, and these oatcakes are durable enough to handle smears of a soft-ripened cheese or cream cheese, and won’t crumble when you bite in.
Store these oatcakes for days at room temperature, or freeze them for ages. By ages, I mean as long as six months. That’s right, I forget I had some tucked in my freezer, and lo and behold they were fine half a year later.
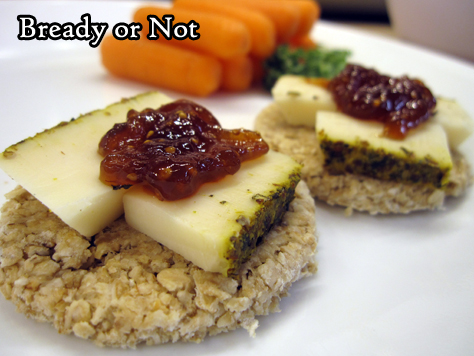
Pair oatcakes with cheese, sausage, and mayhap a nip of scotch.
Bready or Not Original: Scottish Oatcakes
Equipment
- food processor
- large cookie sheet
- cookie cutter
Ingredients
- 2 1/2 cups old fashioned oats
- 2 Tablespoons unsalted butter
- 1 teaspoon sea salt
- 1/2 cup hot water
Instructions
- Preheat oven at 375-degrees. Line a large baking sheet with parchment paper.
- Place oats in a food processor and chop on HIGH for about 15 seconds, long enough to make them slightly less coarse.
- Melt butter in a large bowl. Pour oats into the bowl. Stir to coat. Sprinkle salt over the top, then pour in water. Stir again to form a stiff dough that is just cohesive. If the mix won't come together, add more water in small increments.
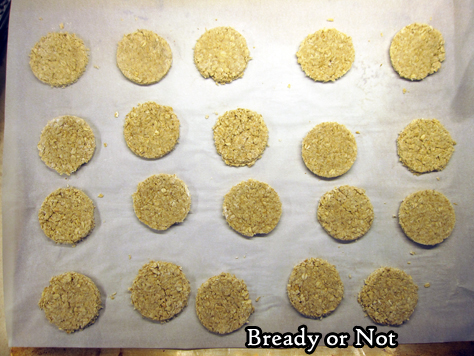
- Sprinkle flour (gluten-free flour, if necessary) on an even stretch of counter. Use palms of hands or a rolling pins to press oats into a flat, cohesive layer. Note that the oatcakes will not expand or grow when baking. Use a round cookie cutter to slice into discs.
- Bake for 10 minutes. Use a spatula to gently flip them over. Bake for another 7 to 10 minutes. Let cool, then pack into sealed container.
- Store at room temperature. Oatcakes can also be frozen, with wax paper or parchment between the layers, for as long as six months, and thaw quickly.
OM NOM NOM!
Follow me


