


Bready or Not Original: Easy Flatbread Crackers
These Easy Flatbread Crackers are delicious, much better than anything you find in stores, and they are quick to make, too.

Anyone who knows me can figure out how I used these crackers: as a base for cheese. I need crackers to go with all kinds of cheese, so I don’t go heavy on savory flavors. The light seasonings here make for versatility. That versatility also makes these useful for dips, soups, or just eating straight.

A quick note on the cheese, too: whatever kind of Parmigiano-Reggiano or similar hard cheese you use inside these crackers, don’t get the pre-shredded kind if you can help it. Those shreds are coated with preservative, anti-stick stuff. That said, if you need to get shredded cheese for accessibility reasons, I understand–but be aware it can throw off recipes sometimes.

Bready or Not Original: Easy Flatbread Crackers
Equipment
- baking sheet
- parchment paper
- Rolling Pin
- pizza cutter or knife
Ingredients
- 1 1/2 cups bread flour plus flour for surface
- 1 1/2 teaspoons kosher salt
- 1 teaspoon white sugar
- 1/2 cup Parmigiano-Reggiano or a quality domestic version, freshly grated
- 1 teaspoon celery flakes
- 1/2 teaspoon dried thyme
- 1/2 cup cold water
- 3 Tablespoons extra virgin olive oil
- flaked sea salt to top
Instructions
- Preheat oven at 400 degrees. Line a baking sheet with parchment paper.
- In a medium bowl, toss together the flour, salt, sugar, and cheese. Add the herbs along with the olive oil and water, stirring until it just comes together as a dough. Add a touch more water if it’s too dry or flour if it is too wet.
- Transfer to a lightly floured surface and knead the dough briefly to smooth it out. It shouldn’t be sticky. Divide the dough in half.
- Roll out a portion on the floured surface. Use a pastry brush to lightly coat the top with water. Sprinkle with flaked sea salt. Use a pizza cutter or other blade to portion the dough into rectangles or other shapes a few inches in diameter. Transfer pieces to prepared parchment. Repeat process with remaining dough.
- Bake for 18 to 21 minutes, until lightly browned. Let harden and cool for at least an hour. Store in a sealed container for up to 3 days, or immediately freeze portions for later enjoyment.
OM NOM NOM!
Bready or Not: No-Bake Triple-Decker Toffee Bars
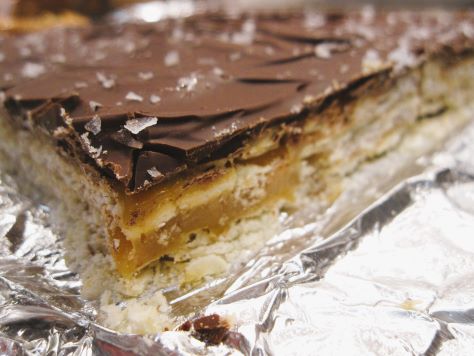
These No-Bake Triple-Decker Toffee Bars are a sweet summertime treat. No oven is required, and there’s only a brief time standing at the stove. The result is, essentially, a homemade candy bar made from simple ingredients.
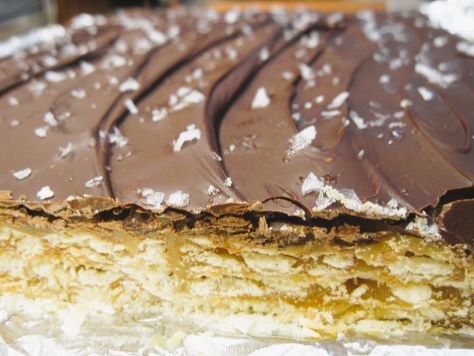
Saltine crackers form the basis for the three layers of these bars. They add intense crispiness that holds up to a deluge of toffee, but they also add salt. That salt really builds incredible flavor throughout the layers, and the flaky sea salt on top adds even more.
The homemade toffee in this recipe isn’t terrible to work with, but please, use caution. It can go from a simmer to a boil FAST, and you do not want that molten sugar on your skin. So, keep an eye on the temperature and bring it down as you need to, and keep stirring the toffee as the directions say. Once this gets going, don’t leave the pot unattended.
Modified from Southern Living December 2022 issue.
Bready or Not: No-Bake Triple-Decker Toffee Bars
Equipment
- 9×9 pan
- aluminum foil
- nonstick spray
- offset spatula
Ingredients
- 48 saltine crackers from a 16-ounce package, divided
- 3/4 cup light brown sugar packed
- 1/2 cup unsalted butter
- 14 ounces sweetened condensed milk one can
- 3 Tablespoons half & half
- 2 Tablespoons light corn syrup
- 1/4 teaspoon kosher salt
- 1/2 teaspoon vanilla extract
- 8 ounces chocolate chips or chocolate bark
- 1 teaspoon flaky sea salt
Instructions
- Line a 9×9 pan with foil, overlapping two long strips to cover all four side. Apply nonstick spray all over interior. Place 16 crackers in a single layer to form a base crust. On a plate, count out 32 more crackers to have ready to make the next layers quickly. Stage the uneven spatula nearby.
- In a saucepan on the stove, cook sugar and butter, stirring often, until the butter is melted and the sugar is dissolved. That will take about 5 minutes. Pour in the sweetened condensed milk, half & half, corn syrup, and salt. Increase the heat to medium to bring the contents to a simmer. Stir constantly. Continue stirring–bringing the heat down as needed to keep it at a simmer, not a full boil–for about 6 to 8 minutes, until it obtains a deep golden color. Remove the pan from heat and add the vanilla extract.
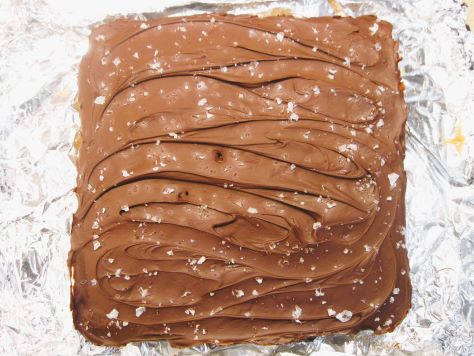
- Carefully pour about 1/3 of the toffee over the crackers. Set down pan and quickly use the spatula to spread the toffee into an even layer. Place 16 more crackers on top. Add another 1/3 of toffee. Place the last of the crackers, and then pour the rest of the toffee on top and even it out. Let cool for a few minutes. Clean the uneven spatula.
- Meanwhile, melt the chocolate using a microwave-safe bowl in the microwave or a pot on the stovetop. Slowly pour the chocolate over the top of the of the cracker-toffee stack and use the spatula to even it out. Let it cool about 5 minutes. Measure out the flaky sea salt and sprinkle it all over the top.
- Place the pan in the fridge to chill for at least 2 hours or overnight.
- Remove from fridge and let set at room temperature about 10 minutes, which will reduce the amount of crackling across the chocolate top. Use the foil to lift the contents onto a cutting board. Use a knife to cut off the very edges to form neat sides, and then cut the rest of it into small bars.
- Store bars in a sealed container in the fridge for up to a week.
OM NOM NOM!
Bready or Not Original: Paprika Cheddar Crackers
These Paprika Cheddar Crackers are a perfect snack or appetizer, and they even keep well for travel!
Use a good aged cheese here–or one labeled extra sharp. The cheese should be the main thing here, with the paprika and salt serving to heighten that flavor. Of course, you can mix in some other spices as well–or even use chipotle pepper for a zing.
I split up this batch and baked them months apart. One of the nice things about these tubes of dough is that they don’t take up much room in the freezer–or in the fridge when it’s time to thaw them.
I got 16 crackers out of each batch (so 32 total), and mind you, these are pretty thick, hearty crackers. These aren’t the kind you grab a handful of, maybe just a few at a time. They would be great at a fancier function, served with wine or champagne, but are good with pretty much any drink. Cheese is versatile like that.
Bready or Not Original: Paprika Cheddar Crackers
Equipment
- food scale
- plastic wrap
- parchment paper
- baking sheet
- knife
Ingredients
- 1/2 cup unsalted butter (1 stick) room temperature
- 8 ounces aged cheddar shredded
- 1 cup plus 2 Tablespoons all-purpose flour
- 1/2 teaspoon paprika
- 1 1/2 Tablespoons water
- 1 teaspoon kosher salt
- flaked sea salt
Instructions
- Mix together the butter, cheddar, flour, paprika, and salt. Add the water. Continue to mix together until it forms a cohesive dough; add a touch more flour if it’s too wet, or a dribble of water if it’s dry.
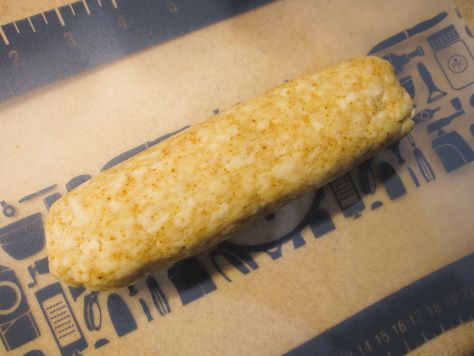
- Use a food scale to weigh the dough and divide it in half. Roll out the plastic wrap to about 10 inches. Place half the dough on the plastic and shape into a thick tube, then wrap it in plastic to compress it and make it into an even log about an inch in diameter. Completely seal in plastic wrap. Repeat with other half of dough.
- The dough can be kept in the fridge for up to 4 days, or frozen for several months.
- When ready to bake, preheat the oven at 350-degrees. Place parchment paper on baking sheet. Place a chilled (thawed) dough tube on a cutting board and slice about 1/4-inch thick. Place with minimal spacing on the parchment. Add a pinch of flaked sea salt onto each cracker and gently press it into the surface.
- Bake for 17 to 20 minutes, until edges are just starting to turn golden. Let set to cool on cookie sheet. Store in a sealed container. They are best eaten within 3 days.
OM NOM NOM!
Bready or Not: Homemade Cheese Crackers
Cheese is divine to eat straight-up, but it can also be baked into delicious things such as these Homemade Cheese Crackers.

These crackers can be as fancy as you want. Use an import cheese like Gruyere or Comte, or stick with a basic American cheddar.
Whatever cheese you choose, be sure you have a food processor to, well, process the dough. The cheese needs to be at one with the flour and spices.

The dough can be frozen, but do be aware that the finished crackers have a definite shelf life.

After about 3 days, the crackers become softer and crumblier. They still taste okay, but the structural integrity won’t be very good if you want to carry them in a baggy.

But then, these crackers are so good, you might have them inhaled so quickly that this is not a problem at all.
Modified from Around My French Table by Dorie Greenspan.
Bready or Not: Homemade Cheese Crackers
Equipment
- food processor
- baking sheet
- parchment paper
- 1-inch cookie cutter
Ingredients
- 1/2 cup unsalted butter 1 stick, cut into small pieces
- 4 ounces Comte grated, or Gruyere or Emmenthal or good old cheddar
- 1/2 teaspoon salt
- 1/8 teaspoon white pepper
- pinch cayenne pepper optional
- 1 cup plus 2 Tablespoons all-purpose flour
- Maldon sea salt or other flaky gourmet salt, optional
Instructions
- Place the butter, cheese, salt, white pepper, and cayenne (if using) in the food processor. Pulse until the butter is broken into uneven pieces and the mixture begins to form small curds. Add the flour and mix until it looks like larger curds. If the dough is stubborn, pulse a bit more to distribute ingredients.
- Dump dough onto a flat surface and gently knead with hands to make cohesive. Divvy dough in half, forming each piece into a flat disk, and wrap in plastic. Tuck into fridge to chill for at least an hour or a couple days; it can also be frozen at this stage.
- When time to bake, preheat oven at 350-degrees. Line a baking sheet with parchment or nonstick mats.
- Pull out a dough disk. Use two sheets of parchment to roll dough to about 1/4 inch thickness; if the dough is too hard to roll, let it rest at room temperature for a few minutes before trying again. Use a small cookie cutter (about 1-inch) to cut dough into crackers. Place them spaced out on parchment on pan. Gather the scraps to form more crackers, using a touch of water, if needed, to make it cohesive again.
- If desired, sprinkle some Maldon sea salt atop crackers; only a few flakes are needed to add extra flavor.
- Bake for about 10 minutes. Rotate pan. Bake for another 4 to 7 minutes, until crackers are lightly golden and firm to the touch. Let cool on pan or on a rack.
- Crackers are great warm or at room temperature. They are best eaten within 3 days. After that, they soften and become more crumbly, but they are still tasty.
OM NOM NOM!
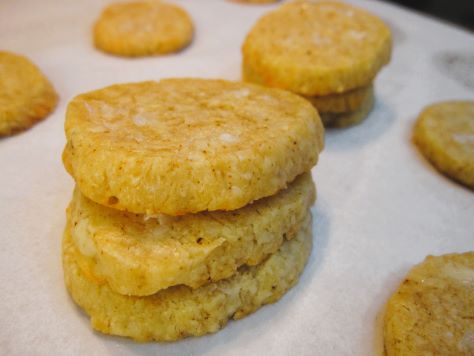
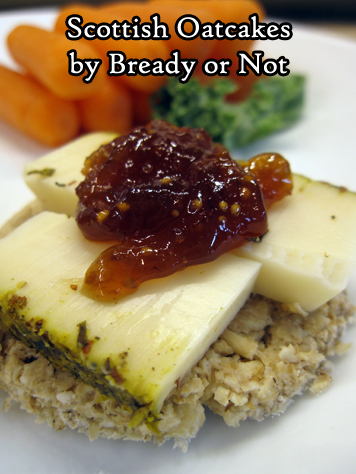
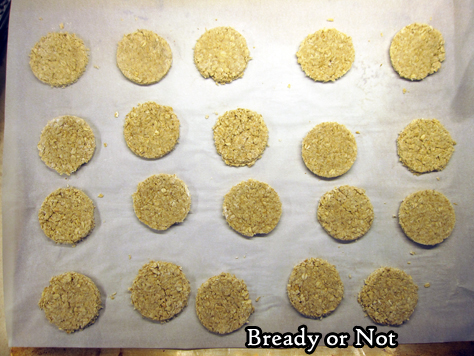
Bready or Not Original: Scottish Oatcakes
These Scottish Oatcakes are like a thick, wholesome, chewy cracker, and they are the perfect platform for cheese and charcuterie.
When I was on my UK trip last year, I made a pilgrimage to the Victoria Street location of I.J. Mellis Cheesemongers. Oh, bliss! I bought stuff for a personal picnic: cheeses I could never find in America, plus port chutney and Scottish oatcakes.
I loved everything. The oatcakes, basic as they were, really impressed me. They were oaty and fresh with a tiny hint of salt, and were ideal platforms for the cheese and chutney.
Upon getting home, I found no acceptable imported options for oatcakes, so I resolved to make them myself. I didn’t want to use processed flour or sugar. In the end, I ended up finagling my own recipe.
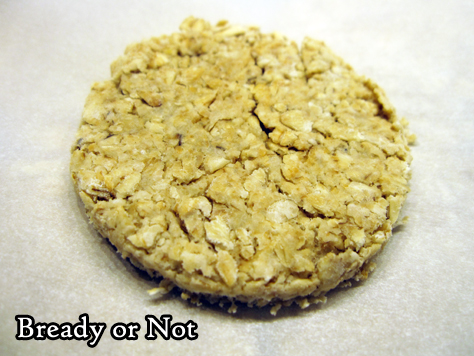
These oatcakes are basic and wholesome, and delicious in their simplicity. Get the consistency right, and these oatcakes are durable enough to handle smears of a soft-ripened cheese or cream cheese, and won’t crumble when you bite in.
Store these oatcakes for days at room temperature, or freeze them for ages. By ages, I mean as long as six months. That’s right, I forget I had some tucked in my freezer, and lo and behold they were fine half a year later.
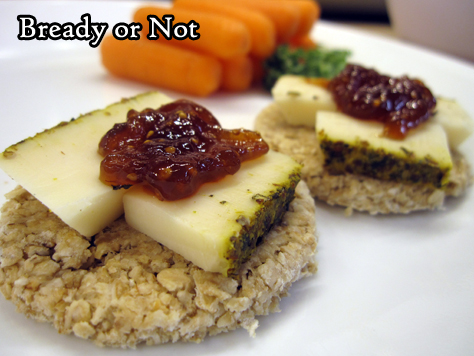
Pair oatcakes with cheese, sausage, and mayhap a nip of scotch.
Bready or Not Original: Scottish Oatcakes
Equipment
- food processor
- large cookie sheet
- cookie cutter
Ingredients
- 2 1/2 cups old fashioned oats
- 2 Tablespoons unsalted butter
- 1 teaspoon sea salt
- 1/2 cup hot water
Instructions
- Preheat oven at 375-degrees. Line a large baking sheet with parchment paper.
- Place oats in a food processor and chop on HIGH for about 15 seconds, long enough to make them slightly less coarse.
- Melt butter in a large bowl. Pour oats into the bowl. Stir to coat. Sprinkle salt over the top, then pour in water. Stir again to form a stiff dough that is just cohesive. If the mix won't come together, add more water in small increments.
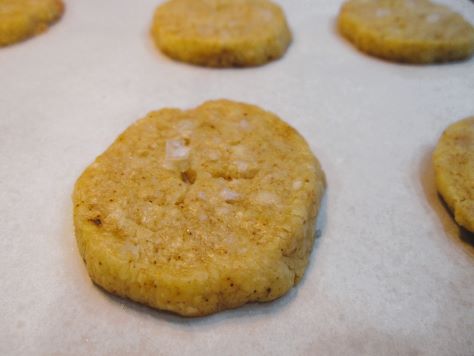
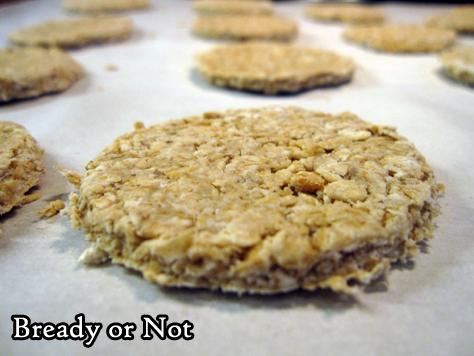
- Sprinkle flour (gluten-free flour, if necessary) on an even stretch of counter. Use palms of hands or a rolling pins to press oats into a flat, cohesive layer. Note that the oatcakes will not expand or grow when baking. Use a round cookie cutter to slice into discs.
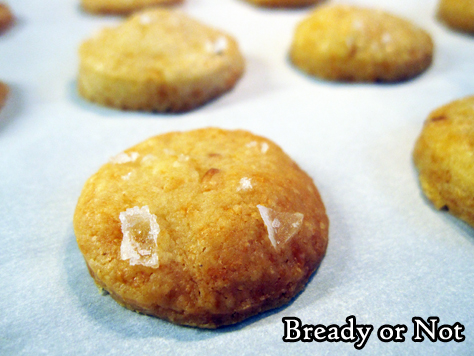
- Bake for 10 minutes. Use a spatula to gently flip them over. Bake for another 7 to 10 minutes. Let cool, then pack into sealed container.
- Store at room temperature. Oatcakes can also be frozen, with wax paper or parchment between the layers, for as long as six months, and thaw quickly.
