


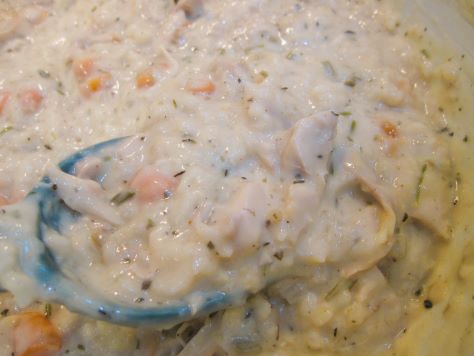
Bready or Not Original: Chicken and Rice Soup
Chicken and Rice Soup is the ultimate classic, home-cooking, feel-better-soon kind of meal. I’m stunned I haven’t featured it on Bready or Not before, but here it is now: my take on the old favorite.
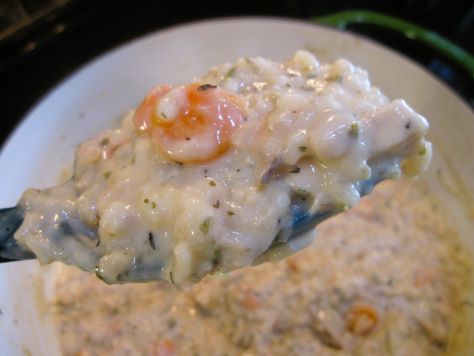
I’ve tweaked this over the years to get the balance of liquids and seasonings just right. I make this a couple times a year. It’s my stand-by if my husband is sick–it’s hearty, hot, sits well in the stomach, and the sheer amount made means the leftovers can last for days (which is nice if I come down sick next, too).
Bready or Not Original: Chicken and Rice Soup
Equipment
- stock pot or other large pot with lid
Ingredients
- 1 cup baby carrots chopped
- 2 Tablespoons dried celery flakes
- 1 Tablespoon dried onion flakes
- 1 teaspoon garlic powder
- 64 oz reduced sodium chicken broth 2 boxes or 4 cans
- 3 Tablespoons flour
- 1/2 cup short grain white rice such as sushi rice
- 1 teaspoon dried thyme
- 1 teaspoon dried rosemary or 1 freshly-cut sprig
- 2 bay leaves
- 2 to 3 cups shredded rotisserie chicken or cooked turkey
- 1 1/2 cups half & half
Instructions
- Place carrots, celery flakes, dried onion, and garlic powder in a large pot along with 1 can of chicken broth (if using a box of broth, just pour in about 1/2 of one; no need to be exact). Sauté on medium heat for 10 minutes, until carrots are tender. Sprinkle in flour and stir for another few minutes.
- Add rest of broth along with the rice, thyme, rosemary, and bay leaf. Bring pot to boil.
- Reduce heat to medium-low and cover pot. Cook for 25 to 30 minutes. When the rice is tender, add the chicken or turkey. Cook for 10 minutes. Stir in half & half and cook for another 10 minutes.
- Remove both bay leaves. Add salt and pepper to preference. Serve hot. Leftovers can keep in the fridge or days or can be frozen.
OM NOM NOM!
Bready or Not Original: Easy Italian Meatballs
Everyone probably has their own take on classic Italian Meatballs. This is mine!

What I love about the recipe is that it, 1) tastes good, and 2) is convenient. I can mix the meatballs up ahead of time and stash them in the fridge or even the freezer. They can be cooked straight from the freezer, too! Just cook them a little longer.

I always go with 93% lean ground beef, but use whatever kind you want–even do a meat of beef and pork or ground sausage. Consider this recipe a template. Mix it up, switch out or increase seasonings, whatever.
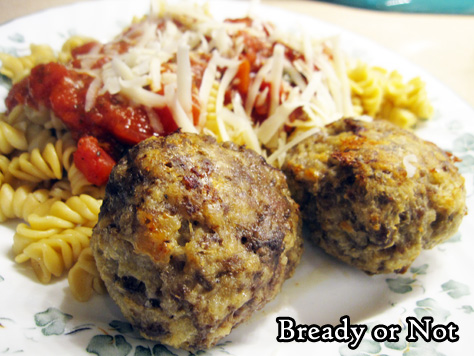
These are great with all kinds of dishes, too. Use them with the standard spaghetti or other Italian pasts, or on zoodles, or with sauce on some submarine sandwich bread. They are even good heated up, eaten by themselves!
Bready or Not Original: Easy Italian Meatballs
Equipment
- food scale
- 9×13 dish or large rimmed baking pan
Ingredients
- 2 Tablespoons extra-virgin olive oil plus extra for pan and hands
- 2 large eggs
- 1 1/2 cups panko
- 1/2 cup milk or water
- 3/4 teaspoon kosher salt
- 1/4 teaspoon black pepper
- 1/2 teaspoon dried Italian seasoning
- 1 teaspoon garlic powder
- 1 ounce Parmesan or Grana Padano, freshly grated, roughly 1/2 cup
- 1 pound ground beef
Instructions
- Move rack to top third of oven and start to preheat at 425-degrees. Rub or brush a 9×13 casserole pan or rimmed baking sheet with oil.
- In a large bowl, use a big spoon to mash together the 2 Tablespoons oil, eggs, panko, liquid, salt, pepper, seasoning, garlic powder, and cheese. The goal is to create a smooth paste. Add a handful of meat. Mix in, and gradually drop in the rest of the meat to thoroughly combine.
- Use a food scale to weigh the meat, then divide that total by 8 (or any other desired increment). With oiled hands, press together meatballs, weighing each to create ones of equal size.
- Bake meatballs for 20 minutes. Use a metal spatula to carefully flip over each for the browned-bottom is on top. Bake for another 6 to 10 minutes, until meatballs are fully browned. An instant read thermometer plunged into one should read over 160-degrees.
- Serve as desired. Leftovers are great to refrigerate or freeze.
OM NOM NOM!
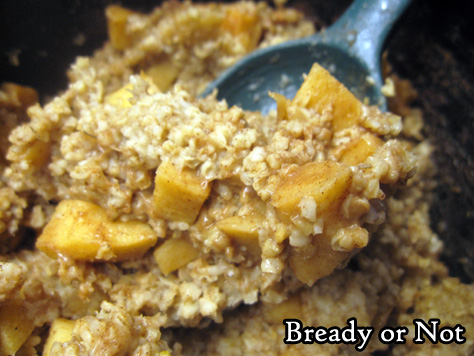
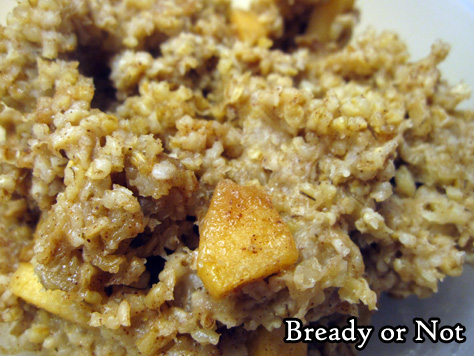
Bready or Not Original: Slow Cooker Apple Steel Cut Oats
These Slow Cooker Apple Steel Cut Oats are not the most photogenic of foods, but they are delicious, healthy, and good, and probably one of the most convenient meals in my cooking repertoire.
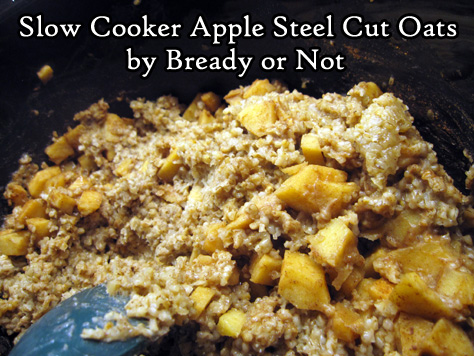
I’ve been cooking this recipe for over five years now, tweaking it here and there, making it better. What I present here is really a foundation. This recipe can be customized all kinds of ways–either when the food is being assembled, by adding in different spices or apples, or by tweaking it at serving time.
I love using Gala, Honeycrisp, or Pink Lady apples, but go for any good baking-type apple or a variety thereof. You don’t want the apples to go to mush. Or maybe you do? That might not be a terrible thing here.

I typically use unsweetened vanilla almond milk or cashew milk, but any plain or vanilla nut, soy, or oat milks would work, or you can opt for dairy milk.
This isn’t an overnight slow cooker oats recipe. I’ve tried that. Even on low and warm settings, the oats just plain overcooked for my preference. The consistency goes brick-like and the pot requires some intense scraping if you don’t use a removable liner. I prefer to make this during the day, and then portion out the oats to go in the fridge and freezer. They reheat beautifully.
Bready or Not Original: Slow Cooker Apple Steel Cut Oats
Equipment
- large slow cooker
Ingredients
- 2 cups steel cut oats no substitutes
- 2 cups nut milk or oat milk, regular or vanilla, sweetened or unsweetened
- 2 cups water
- 2 medium apples peeled and chopped
- 1/4 cup brown sugar packed
- 1/4 cup pure maple syrup
- 2 teaspoons ground cinnamon
- 1/4 teaspoon sea salt
- 2 teaspoons vanilla extract
Instructions
- Place all ingredients in slow cooker and stir to distribute. Place lid on pot and put heat level to LOW. Cook for 3 hours before lifting lid again. Stir and taste to test doneness. Continue to cook for 30 minutes to an hour more, dependent on the desired texture for the oats. The longer it cooks, the thicker it will be.
- Serve oats fresh, or stash in fridge to reheat in microwave over the next week. These oats are great to portion out and freeze for later. If desired, add more spices, fresh fruit, or extra milk when serving–the customization possibilities are endless!
*OM NOM NOM!*
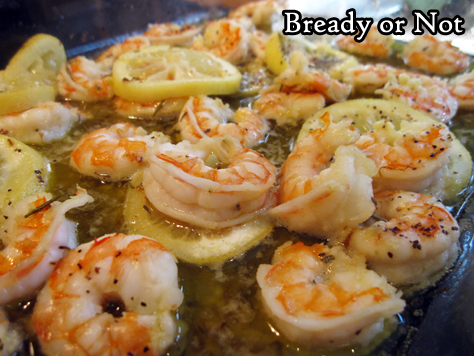
Bready or Not Original: Roasted Lemon Garlic Shrimp
This Roasted Lemon Garlic Shrimp recipe makes for a delicious supper! It’s super-easy and healthy, too.

I’ve made this recipe for about, gosh, ten years now. I make it every month or so. I like to buy 2-pound bags of frozen shrimp of Costco and divide it to make this dish.
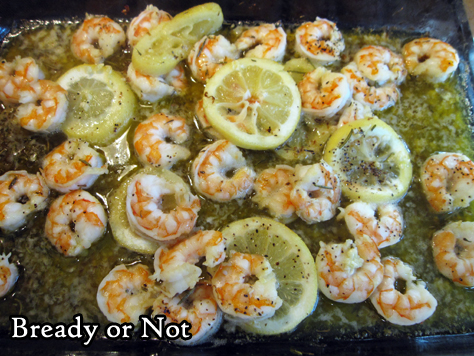
One of the great things about this dish is that you can pair it with different foods depending on your own individual needs. Eat it on rice or egg noodles, or go gluten-free and low-calorie with some zoodles or cauliflower rice. The seasoned oil in this recipe makes everything taste good!
On the side, I usually serve steamed broccoli or green beans. Whatever is in season and on sale!

In all the years I’ve made this, we’ve never had leftovers.
Bready or Not Original: Roasted Lemon Garlic Shrimp
Equipment
- 13x9 pan
Ingredients
- 1 medium lemon
- 1/2 cup olive oil or avocado oil
- 1 teaspoon dried thyme
- 1 sprig fresh rosemary or one teaspoon dry
- 1 pound medium-sized shrimp cooked and deveined
- 5 garlic cloves
- salt and pepper
Instructions
- Preheat oven at 400-degrees. Wash and dry the lemon, then zest it; set aside lemon. If using fresh rosemary, shear leaves from the stem. Place zest in 13x9 pan along with olive oil, thyme, and rosemary. Bake pan in oven for 12 minutes.
- While the zest is infusing the oil, thinly slice the lemon and remove seeds. If desired, remove tails from shrimp.
- Pull out pan. Add shrimp and lemon slices--be wary, oil may pop from the dish! Mince garlic cloves into the pan; gently stir everything. Place back in oven to cook for another 8 to 10 minutes, until shrimp is heated through. Add sprinkle of salt and pepper.
- Serve atop pasta, rice, zoodles, cauliflower rice, etcetera. The hot lemon oil is also great for dipping bread.
OM NOM NOM!
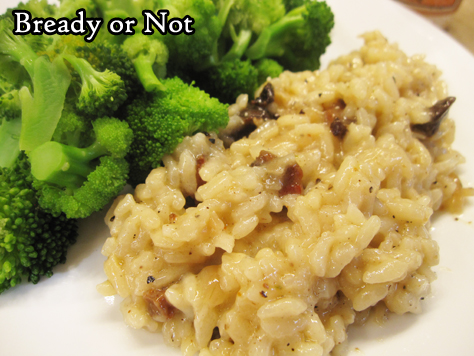
Bready or Not Original: Pancetta Risotto
This Pancetta Risotto is a fantastic meal for two people, or a delicious side for a group. It’s time-consuming but very straightforward to make.
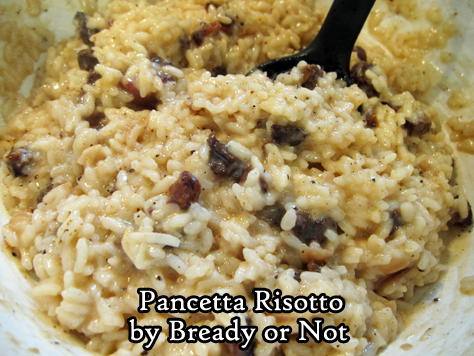
I confess, I spent years being intimidated by the very idea of a risotto. I would see it done on cooking shows. So much stirring! When I finally got up the gumption to give it a try, I found risotto wasn’t hard at all. It really is about lots of stirring.
This recipe here is my fancy occasion recipe, especially when I have some good pancetta on hand, such as the kind carried by Smoking Goose Meatery out of Indianapolis.

As for the wine, I’ve tried this with fancier Sauvignon Blanc from Total Wine (Cloudy Bay from New Zealand) as well as a $6 Trader Joe’s Coastal Sauvignon Blanc. Both versions turned out great! You don’t need to go all-out, but get something that is (hopefully) drinkable with the finished meal.
Bready or Not Original: Pancetta Risotto
Equipment
- large stock pot
- medium saucepan
Ingredients
- 8 oz pancetta diced
- 1 Tablespoon dried shallots or fresh shallot, finely minced
- 3 cloves garlic minced
- 1 1/4 cups Arborio rice
- 1 cup dry white wine Sauvignon Blanc works well
- 4 cups chicken broth or chicken stock, equal to a 32 oz box or 2 cans
- 1/2 cup shredded Parmesan or Pecorino Romano or Grana Padano, plus more to top rice
- salt and pepper to taste
Instructions
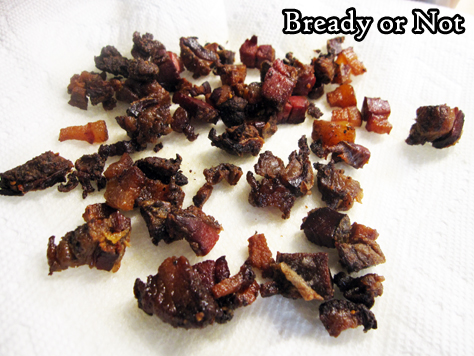
- In a large stock pot, cook the pancetta for 10 to 12 minutes, until it starts to turn brown and crispy. At the same time, on another stove burner, use a medium sauce pan to bring the chicken broth to a very low simmer.
- Use a slotted spoon to transfer pancetta to a paper towel-lined plate; set aside. Add dry shallots and garlic to the fat in the big pot. Sauté for two minutes. Add the Arborio rice and a pinch of salt. Sauté another 2 minutes, until the rice looks glossy with translucent edges.
- Add the white wine and stir until it is absorbed. Add chicken broth in 1/2 cup increments, stirring well after each addition until it is absorbed. After about 12 to 15 minutes, when most of the broth has been added, begin to taste the rice. The goal is a chewy, al dente consistency. Add more broth as needed, and remember to turn off the burner for the broth pot when it is empty.
- When the rice is creamy and al dente, stir in the pancetta and cheese. Taste the risotto again, adding more salt and pepper as needed. Serve with the remaining white wine.
OM NOM NOM!
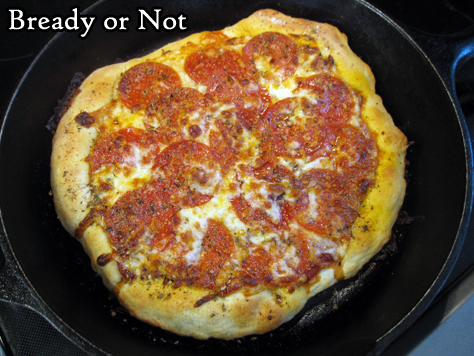
Bready or Not: 5 Minute Artisan Pizza Dough and Cast Iron Pan Pizzas
Today’s Bready or Not is a 2-for-1 deal: a recipe for fast and easy pizza dough, followed by the process I use for divvying up that dough to make small but thick cast iron pan pizzas.

The basic dough recipe is modified from the great book Artisan Bread in 5 Minutes a Day. [Affiliate link] Yes, this dough really comes together in 5 minutes. It also keeps for up to 2 weeks AND can be frozen.

The method for making mini pizzas in a skillet is one I practiced a few times several years ago, then made a LOT during 2020 as my husband was working from home more often. I perfected it to the point where I had to write it down–and share here.

The pan pizza recipe is pretty much an outline to show the timing on the shaping, rise, and crust-cooking, but the ingredients are all up to you!
Bready or Not: 5 Minute Artisan Pizza Dough
Ingredients
- 1 1/3 cups warm water
- 2 Tablespoons olive oil
- 1/2 Tablespoon white sugar
- 3 1/4 cups all-purpose flour
- 3/4 Tablespoon kosher salt
- 2 teaspoons pizza seasoning or Italian seasoning, optional
- 2 1/4 teaspoons active yeast or one packet store-bought active yeast
Instructions
- Place the water, olive oil, and sugar in a big mixing bowl, stand mixer, or food processor. Add the flour, salt, and seasoning, if using. Start mixing together, then sprinkle in the yeast. Mix until just combined.
- Keep in same bowl, if desired, or transfer to another bowl that is greased. Loosely cover top with plastic wrap or towel and let dough rise at room temperature until it flattens out on top, about two hours.
- Dough can be used now but is much easier to handle when cold. Refrigerate in a non-airtight container and use within two weeks. Dough can also be frozen in freezer bags, for up to a month, and defrosted later in the fridge.
OM NOM NOM!
Bready or Not Original: Cast Iron Pan Pizzas
Equipment
- 10-inch cast iron skillet
Ingredients
- handful pizza dough
- olive oil
- desired toppings and seasonings
Instructions
- Preheat oven at 450-degrees. Add about a tablespoon of olive oil to a cast iron skillet and place the pan in the oven to heat up.
- Grab a good handful of pizza dough, or as much as desired to bake today. Oil a small space of counter or table as well as hands, and gently stretch and press out the dough to a rough circle. If it tears, patch with other pieces of dough as best possible. Let dough rest for about 20 minutes.
- By this time, the oven should have preheated. Use a potholder to pull out the skillet. Carefully swirl the hot oil in the pan to coat the bottom and set pan down on a safe surface. Carefully, again, place the dough in the pan.
- Bake crust for 6 to 10 minutes, until it is set. Pull out of oven and add desired toppings.
- Put pizza in oven for another 6 to 10 minutes, until crust is golden and toppings are cooked to desired level. Let pizza cool for about 10 minutes, then slide onto a plate or other surface to slice and eat.
- OM NOM NOM!
Follow me


