


French bread is one of the best things in the world and it is super-easy to make. All you need are four ingredients and some time.
The time element is not that much of an issue, though, because this takes all of five minutes to mix up. After an initial rise, the dough can then be tucked away in the fridge for up to two weeks.
If this technique looks familiar, it’s because it’s similar to the recipe I shared in February for my favorite pizza dough. They are both modified from the book Artisan Bread in Five Minutes a Day.
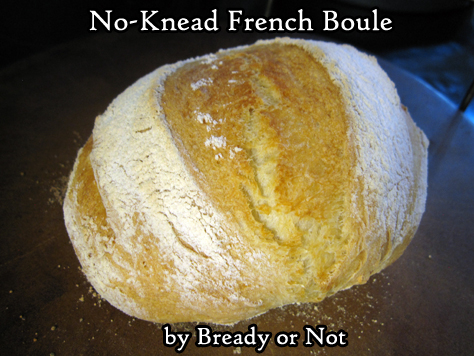
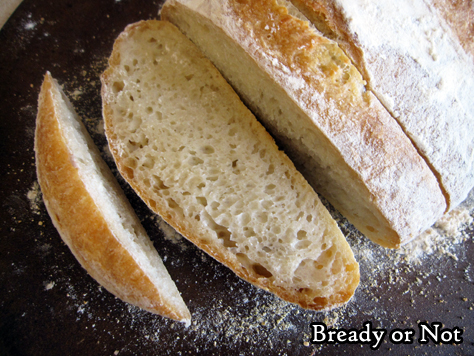
The boule, or bread round, is the most traditional form of French bread. The baguette is actually an innovation from the 1920s. The boule was first, and is, arguably, the best.
This bread is perfect to slice up, butter, and toast. It’s great for sandwiches. For charcuterie and cheese. To make French toast. Any way you can eat bread, really.
It’s also great to freeze and thaw for later enjoyment! This is really a recipe that is all about convenience, before and after baking.
Bready or Not: No-Knead French Boule (French Bread Round)
Equipment
- baking stone or baking steel
- small metal cake or casserole pan
Ingredients
- 1 1/2 cups lukewarm water
- 2 1/4 teaspoons active yeast or one store packet
- 3 1/4 cups all-purpose flour
- 2 1/4 teaspoons kosher salt
Instructions
- Warm the water to just above body heat, about 100-degrees. Pour it into a large bowl. Add the yeast, flour, and salt. Stir until everything is uniformly moist, no dry patches to be found.
- Loosely cover the bowl with plastic wrap, waxed paper, or an off-kilter lid, and set in a warm spot in the kitchen.
- After about 2 hours, it should double in size and flatten out on the top; a colder kitchen may need as long as 5 hours, which is fine.
- The dough can be used now, but is very sticky. It's easier to work with if it has chilled in the fridge for at least 2 hours, but can idle in there overnight or for as long as 2 weeks. Keep loosely covered so that it doesn't dry out.
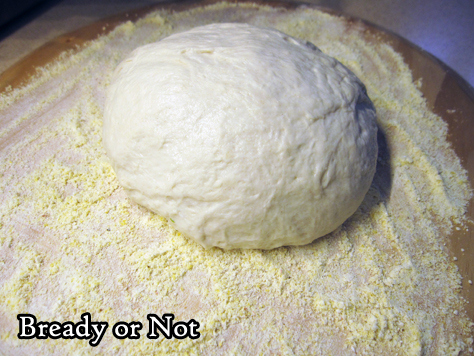
- Prepare a piece of parchment with a dusting or flour, semolina, or fine cornmeal. To shape the dough into a round, dust hands with flour then gently shape dough into a ball, tucking and smoothing rough bits into what will become the bottom. Set dough on prepared parchment. Let rise for 20 to 30 minutes. It may not rise a lot, but should puff a bit.
- Start preheating oven at 450-degrees. Place baking stone or steel in the middle rack of the oven. Place the empty metal cake or casserole pan beneath it. Let the oven heat for 20 minutes.
- Measure out 1 cup of water.
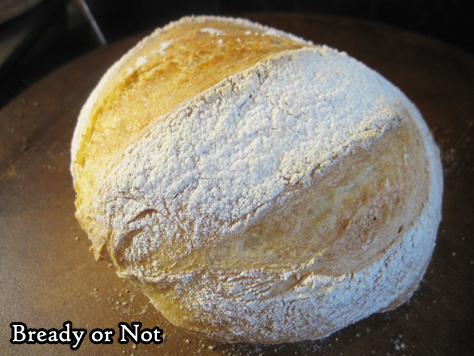
- After the bread has risen for about 40 minutes, lightly dust the top of the dough with flour. Use a lame or serrated knife to slash lines across the top.
- Pull the hot stone or steel from the oven. Use the parchment to carefully transfer the dough onto the hot surface. Set baking sheet into oven. Pull out the heated pan on the shelf below. With care, pour the water into the pan; do not overfill! Gingerly push the shelf back into place and close the oven so that the steaming water can work its magic on the baking bread.
- Bake for about 30 minutes. Do NOT open the oven until the end of that time! The bread should look crusty and golden over the top. Pull out the pan and let the bread cool. It may emit a crackling sound as it cools down. If the bottom is carefully thumped, the bread should sound hollow.
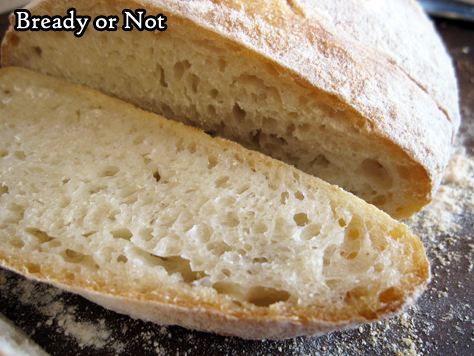
- Let cool about 20 or 30 minutes before cutting into the bowl. Store in a sealed bag for up to 2 days. If freezing portions of the bread, do so within the first day so they will be as fresh as possible.
OM NOM NOM!
Follow me


