


Bready or Not: Berry Butter Cake
Cake is good. This Berry Butter Cake, loaded with fruit, is very good.
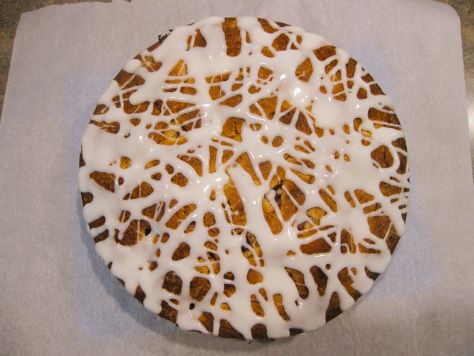
This cake features a tender, moist crumb that provides a delicious cushion for things like strawberries, raspberries, or blueberries. It’s not fancy.
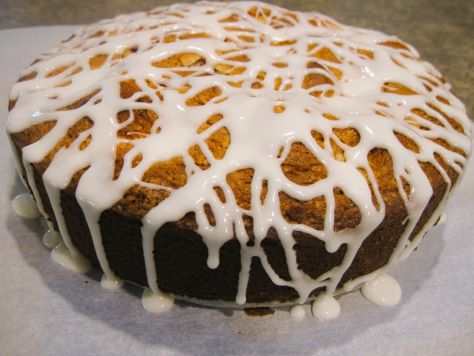
I modified this a lot from Bake from Scratch Magazine, adjusting some ingredients and other directions. The bake time was way too long, for starters. I was also perturbed that they call for vanilla extract in the glaze, but obviously used clear vanilla extract for their picture, because using regular extract muddies the glaze.
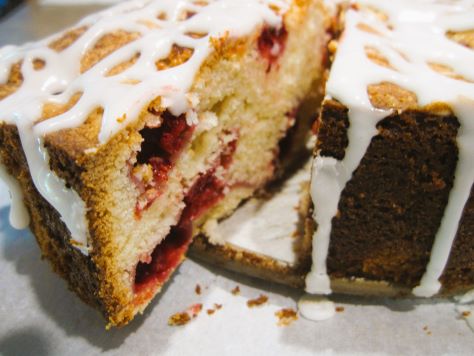
This cake is great to freeze and thaw later, even weeks later. It stores beautifully sealed up in the fridge or at room temperature.
Bready or Not: Berry Butter Cake
Equipment
- 9-inch springform pan
- parchment paper
- nonstick spray
Ingredients
Cake:
- 3/4 cup unsalted butter softened
- 1 cup white sugar
- 1/2 cup brown sugar packed
- 2 large eggs room temperature
- 2 teaspoons vanilla extract or vanilla bean paste
- 2 cups all-purpose flour
- 1 1/2 teaspoons baking powder
- 3/4 teaspoon kosher salt
- 1/4 teaspoon baking soda
- 3/4 cup buttermilk or soured milk, see note
Fruit:
- 1 3/4 cups fresh or frozen berries such as raspberries, strawberries, or blueberries (210 grams)
- 2 Tablespoons all-purpose flour
Vanilla Glaze:
- 3/4 cup confectioners' sugar plus more if needed
- 1 Tablespoon milk or half & half, plus more if needed
- 1/2 teaspoon clear vanilla extract
Instructions
- Preheat oven at 350-degrees. Prepare springform pan by cutting a piece of parchment paper to fit inside. Use nonstick spray on interior of pan, then place cut parchment inside and spray again.
- Beat together butter and both sugars until they are light and fluffy. Add eggs one at a time, followed by the vanilla.
- In a separate bowl, stir together flour, baking powder, salt, and baking soda. Gradually add the dry ingredients to the butter bowl alternatively with the buttermilk/soured milk. Scrape the bottom of the bowl a few times.
- In another bowl, stir the flour into the fruit to coat it. Reserving 1/4 cup of fruit, fold most of it into the batter. Spread batter into prepared pan. Sprinkle the reserved fruit over the top.
- Bake for 1 hour to 1 hour 10 minutes, until the cake looks golden brown and the middle passes the toothpick test. Let it cool in the pan for 20 minutes, then pop open the springform ring to remove it. Let cake cool completely on rack.
- Combine glaze ingredients in a bowl until they are smooth. Add more confectioners’ sugar or milk, if necessary, to achieve a thick but good consistency for drizzling. Immediately drizzle across the top of the cake. Let set at least 20 minutes before slicing in.
- Cake keeps well in sealed container at room temperature for up to 3 days. It can also be frozen in individual slices for weeks or kept in fridge.
OM NOM NOM!
Notes
Bready or Not Original: Berry Scones
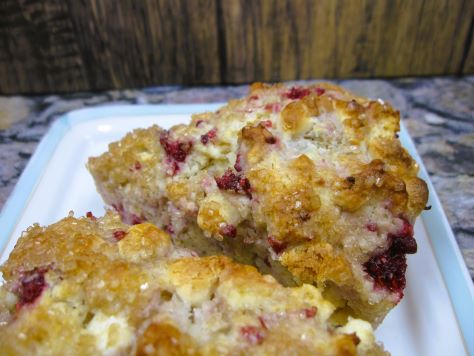
These Berry Scones are a delicious way to use fresh or frozen fruit to create a batch of baked goods for breakfast.
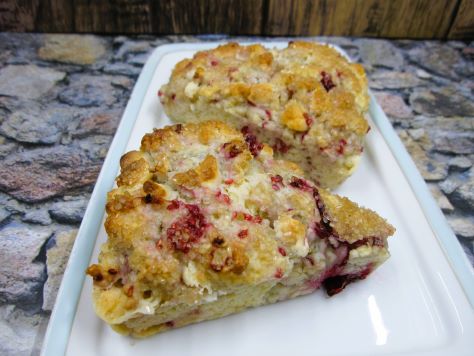
I love scones but I hadn’t made this recipe in over 10 years. Arizona is not a good place to get locally grown fresh fruit like strawberries and raspberries. Soon after we moved to Minnesota, fresh strawberries came into season AND I won a gallon-sized bag of frozen raspberries in my first horticultural club meeting.
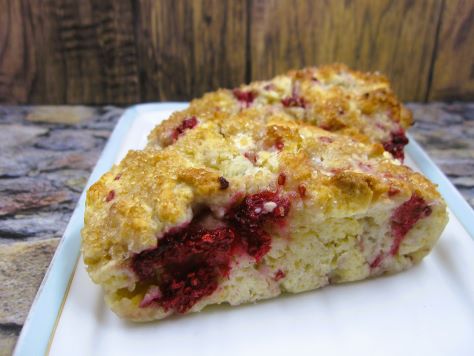
I needed ways to utilize my new bounty. I reworked this old recipe, reducing the fruit amount and adding white chocolate chips. That extra sweet kick really elevates the fruit!
Bready or Not Original: Berry Scones
Equipment
- cookie sheet or scone pan
- nonstick spray
Ingredients
Scones:
- 1/2 cup strawberries or raspberries (fresh or frozen) about 3oz
- 3 Tablespoons white sugar separated
- 2 cups all-purpose flour
- 2 teaspoons baking powder
- 1/4 teaspoon salt
- 6 Tablespoons unsalted butter
- 2/3 cup milk or almond milk
- 1/2 cup white chocolate chips
Topping:
- 1 Tablespoon coarse or white sugar optional
Instructions
- Preheat oven at 400 degrees. Lightly grease a cookie sheet or line with parchment paper, or use a scone pan.
- Use kitchen shears or a knife to cut the fruit into bite-sized pieces. Sprinkle fruit with 1/2 tablespoon sugar; set aside to macerate.
- Combine remaining sugar with flour, baking powder and salt. Add butter, using a pastry cutter or a fork to cut it in. Don’t completely mix in butter, but leave some pea-sized pieces throughout. Stir in milk. Fold in the white chocolate chips followed by the berries.
- Flour hands to coat. Gently knead and turn the dough to incorporate the dry bits from the bottom of the bowl. Sprinkle dough with extra flour if it’s too sticky to work with.
- If using a cookie sheet for baking, pat the dough into a circle 3/4 inch thick. If any berries peek out, push them into dough. Cut circle into 6-8 wedges (or smaller), then transfer wedges to the cookie sheet, leaving at least 1/2 inch of space between them; they will spread. Alternatively, press handfuls of dough into a scone pan, filling each empty space to the end to create even pieces. Sprinkle the tops with coarse or white sugar, if desired.
- Bake 20 to 25 minutes or until the tops are beginning to brown. Remove them from pan. Scones can be eaten immediately, or will keep in a sealed container at room temperature for up to 2 days. Freeze them to enjoy later.
OM NOM NOM!
Bready or Not: Cherry-Almond Bakewell Tart
Bakewell Tarts are classic British pastries. This version, modified from Bake from Scratch Magazine, uses store-bought preserves (I used Bonne Maman) with everything else from scratch.
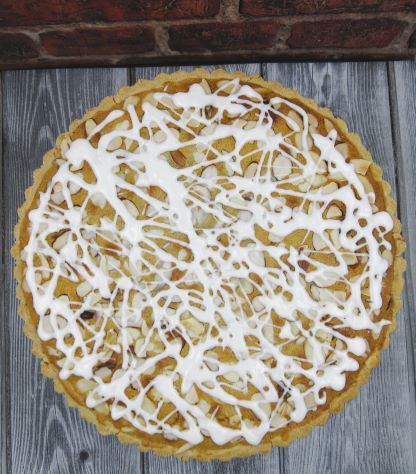
If you’re in America, you’re not likely to find a Bakewell Tart unless you’re near a big city bakery; as for me, I’ve never found it for sale in the US, and I’d probably scream in delight if I came across it. I made a pointed effort to get slices more than once during my 2019 trip to the UK.
Not gonna lie, this is a dessert that takes some work. The pâte sucrée, the crust, can be done ahead of time, and that helps to space out the labor. The filling, which is a frangipane, needs to not only be mixed, but piped into the crust to help it form a consistent layer.
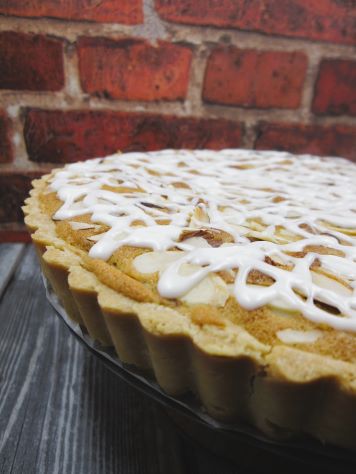
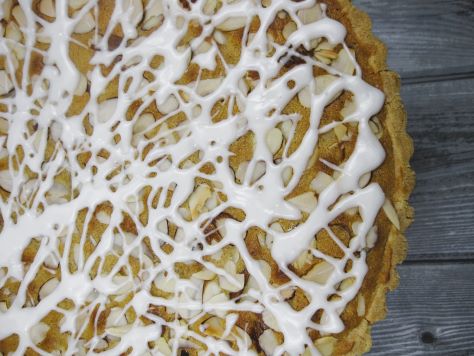
And of course, at the end, the tart needs a nice sweet drizzle that looks gorgeous and amps up the flavor, too. This is really the ultimate special occasion breakfast or dessert.
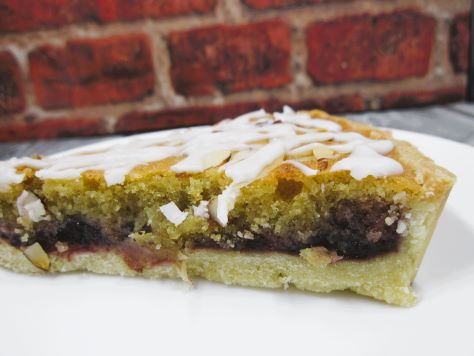
There are two recipes included here: the pâte sucrée and the full assemblage of the Bakewell Tart.
Bready or Not: Pâte Sucrée
Ingredients
- 1/2 cup unsalted butter (1 stick) softened
- 1/3 cup confectioners’ sugar
- 1/2 teaspoon kosher salt
- 1 large egg room temperature
- 2 cups all-purpose flour
Instructions
- In a stand mixer or by hand. beat together butter, sugar, and salt until they are pale and creamy. Add the egg. Gradually beat in the flour until just combined, scraping the bottom of the bowl a few times.
- Shape the dough into a flat disk and encase in plastic wrap. Place in the fridge for an least an hour, but overnight is preferred. Dough can be refrigerated for up to a week or can be frozen for up to 2 months. If frozen, thaw in fridge before using.
Bready or Not: Cherry-Almond Bakewell Tart
Equipment
- Rolling Pin
- parchment paper
- 9-inch tart pan with removable plate
- pie weights
- pastry brush
- pastry bag or freezer quart bag
- uneven spatula
Ingredients
Tart
- 1 pâte sucrée
- 1 large egg white lightly beaten
- 1/2 cup unsalted butter (1 stick) room temperature
- 1/2 cup white sugar
- 2 large eggs room temperature
- 2 teaspoons vanilla extract or vanilla bean paste
- 1/2 teaspoon kosher salt
- 1/4 teaspoon almond extract
- 1 cup almond flour sifted to remove clumps
- 2 Tablespoons all-purpose flour
- 3/4 cup cherry preserves
Topping
- 1/4 cup sliced almonds
- 1/2 cup confectioners’ sugar
- 1 Tablespoon milk or half & half
Instructions
Form the crust
- If the pâte sucrée is quite firm from chilling, let it set at room temperature for about 20 minutes to make it more pliable. Use a rolling pin to roll it into a 12-inch circle, about 1/8-inch thick.
- Remove the base of the tart pan and trace the shape onto parchment paper. Cut paper to fit in bottom of pan and apply baking spray. Carefully transfer dough to pan, but if it falls apart, that’s okay–press it into an even layer across the bottom of the pan and up the fluted sides. Use a knife to cut excess dough from the top edge. Use a fork to dock the bottom of the pan, stabbing it here and there across the whole surface. Chill until firm, about 30 minutes.
Bake the crust
- Preheat oven at 325-degrees.
- Top the dough with a large piece of parchment paper, with ends extending over the sides. Add pie weights to fill the basin.
- Bake the crust for about 15 minutes. Carefully lift with the parchment and weights, setting on another pan to cool. Brush the bottom of the pan with the egg white. Continue baking for another 15 minutes; the base should look dry with the dough lightly browned. Set aside to cool completely as the filling is made. Increase oven temperature to 350-degrees.
Make the frangipane
- Beat the butter and white sugar until light and fluffy. Scrape the bottom of the bowl a few times to make sure everything is mixed. Add eggs, one at a time, followed by vanilla, salt, and almond extract. Scrape bottom and sides of bowl. Gradually mix in both flours until just combined.
- Spoon frangipane into a pastry bag or a freezer quart bag. Cut off the tip.
- Use an uneven spatula to spread the cherry preserves over the bottom crust. Pipe the frangipane over the preserves. Use a clean uneven spatula to smooth it into an even layer. Sprinkle sliced almonds on top.
- Bake until frangipane is set and golden, about 30 minutes. Let cool about 20 minutes before removing the outer ring of the pan. Let tart cool completely on rack.
Add drizzle
- In a small bowl, stir together confectioners’ sugar and milk. Spoon into a pastry bag or freezer quart bag and snip off a tiny corner. Pipe glaze back and forth over tart. Let glaze set, about 20 minutes, then dig in. Store wrapped up or in sealed container in fridge for up to 4 days.
OM NOM NOM!
Bready or Not: Southern Cream Cheese Pound Cake
This Southern Cream Cheese Pound Cake is simple but oh so good. Rich flavors of butter, vanilla, and cream cheese infuse the whole thing.
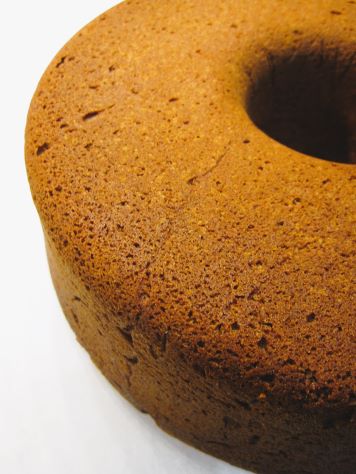
The middle features a velvety crumb while the crust is browned and crisp, creating a wonderful contrast. This has All the Textures.
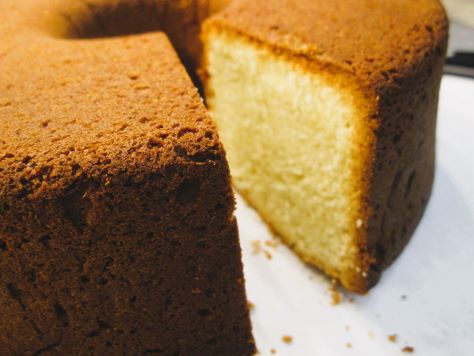
In full disclosure, this is a recipe that will test your mixer. My poor Kitchen Aid strained to handle this thick, massive quantity of batter. It kept tripping the circuit at the end!
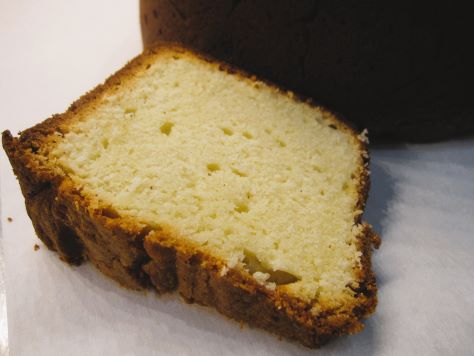
The annoyance was worthwhile, though. This cake is extraordinary. So basic in appearance, and then you take a bite and your mind is blown. Make this one for the holidays this year, and you’ll feed a crowd and awe them while you’re at it.
Modified a lot from Bake from Scratch: Cake 2019.
Bready or Not: Southern Cream Cheese Pound Cake
Equipment
- nonstick spray with flour
- large straight-sided tube pan or angel food cake pan
- stand mixer
Ingredients
- 1 1/2 cups unsalted butter (3 sticks) room temperature
- 8 ounces cream cheese (1 box) room temperature
- 3 cups white sugar
- 1 Tablespoon vanilla extract
- 1 1/2 teaspoons kosher salt
- 6 large eggs room temperature
- 3 cups cake flour
Instructions
- Preheat oven at 325-degrees. Generously coat the interior of the pan with nonstick spray with flour.
- In a stand mixer with a paddle attachment, beat together the butter, cream cheese, sugar, vanilla, and salt until they are fluffy and pale, about 8 minutes, scraping the bowl several times during the process. Add the eggs one at a time, making sure the recent addition is fully mixed in before adding the next. Scrape the bottom of the bowl again. Mix on medium-high for about 3 minutes, until everything is light and airy.
- Gradually add the flour. If the paddle attachment can't handle the load (and/or it is too messy), remove the paddle and use a spatula to incorporate the flour.
- Scoop the batter into the prepared pan. Level out the top. Bake for about 1 hour and 30 minutes to 1 hour and 40 minutes. When it is done, the top will be golden brown and the middle will pass the toothpick test. Let it cool in pan for about 20 minutes, then invert it onto a rack to cool completely.
- Slice into pieces. It is delicious by itself or can accompany fruit and/or ice cream. Store covered or in individually wrapped pieces at room temperature.
OM NOM NOM!
Notes
Bready or Not: Irish Coffee Blondies
This Irish Coffee Blondies recipe is a long-overdue revamp of a recipe I first shared over a decade ago on the first iteration of Bready or Not on LiveJournal. I made it a few times after that, only for the paper to be buried amid many other recipes.
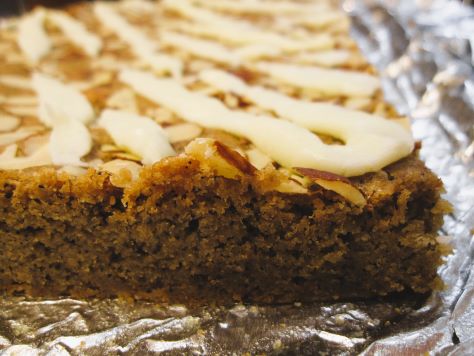
As I culled my recipe collection prior to moving, I rediscovered the print-out and knew I had to make it again soon because it’d help me use up some ingredients. Namely, sliced almonds and vanilla extract.
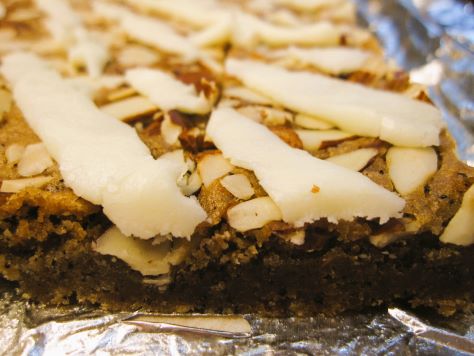
My husband now mostly uses k-cups for his coffee, a brewing method we didn’t have available back when I first baked this. I found that the 3 Tablespoons of ground coffee called for in this recipe were the exact contents of a Starbucks k-cup. I love when things work out like this!
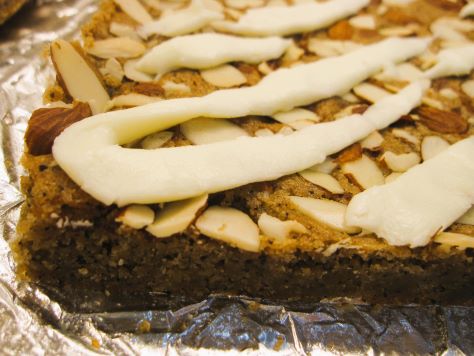
This recipe would make a great dessert, but really, with the flavors, it’s even better for a breakfast or brunch. It’ll go great with coffee or tea!
Bready or Not: Irish Coffee Blondies
Equipment
- 9×13 pan
- aluminum foil
- nonstick spray
- uneven spatula
Ingredients
Blondies:
- 2 cups all-purpose flour
- 1 teaspoon baking powder
- 1/4 teaspoon baking soda
- 1 cup unsalted butter (2 sticks) melted
- 2 cups brown sugar packed
- 3 Tablespoons ground coffee equals 1 K-cup
- 1 teaspoon salt
- 2 large eggs room temperature
- 2 teaspoon pure vanilla extract
- 1/2 cup sliced almonds
Glaze:
- 1 Tablespoon unsalted butter melted
- 1 teaspoon almond extract or vanilla extract
- 1 teaspoon water plus more if needed
- 3/4 cup confectioners' sugar
Instructions
Make the blondies
- Preheat oven to 350 degrees. Line a 9-by-13-inch baking pan with foil and apply nonstick spray.
- In a big bowl, whisk together flour, baking powder, and baking soda. Set aside.
- Place the melted butter into a mixing bowl. Add the brown sugar, ground coffee, and salt. Stir to combine.
- Add eggs one at a time followed by the vanilla extract. Stir in flour mixture until just combined. Pour batter into pan and level out; an uneven spatula makes that easy. Sprinkle with almonds.
- Bake 27 to 30 minutes, until the middle passes the toothpick test. Let cool completely.
To complete with glaze
- Mix together the melted tablespoon butter and extract. Gradually whisk in confectioners’ sugar. Add teaspoons of water, as needed, until the glaze is thick but can be drizzled. Place it in either a pastry bag fitted with a plain round tip or a sandwich bag of which a corner will be snipped off. Drizzle glaze over blondies in a rough crosshatch pattern. Let glaze set for 1 hour before cutting blondies into squares. Store in a sealed container at room temperature. If making these in a warm place, put waxed paper between the stacked layers of blondies.
OM NOM NOM!
Bready or Not Original: Blueberry Yogurt Bundt Cake
This Blueberry Yogurt Bundt Cake is really, really good, people. It has a soft, tender crumb and loads of fruit inside.
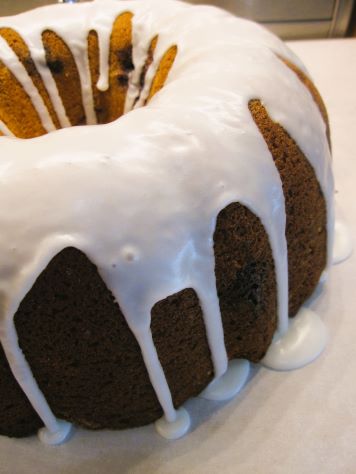
Plus, there’s some flexibility to the recipe. You can use Greek yogurt in vanilla or plain (you want it thick, not runny), or go with sour cream or crème fraiche.
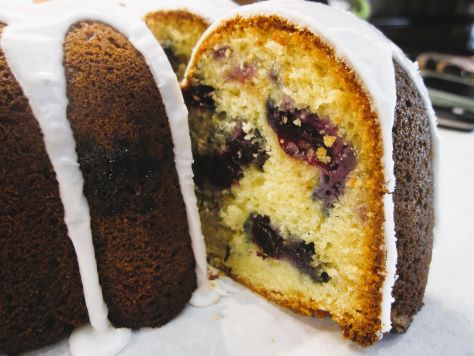
You can flex with the berries, too. I used a mixture of frozen (not thawed) and fresh berries. If you use fresh berries, make sure they are washed and thoroughly dry. I had the fresh and frozen mixed in both layers within the cake.
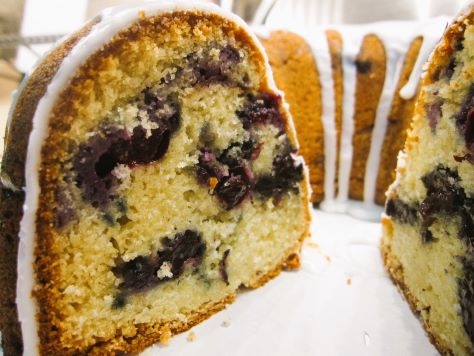
This is the kind of bundt that is nicely sweet, not heavily so. This would be a showstopper for a breakfast or brunch for company, but is also divine as a dessert.
Bready or Not Original: Blueberry Yogurt Bundt Cake
Equipment
- large bundt pan
- nonstick spray
Ingredients
Cake batter
- 3/4 cup unsalted butter (1 1/2 sticks) room temperature
- 1 1/2 cups white sugar
- 4 large eggs room temperature
- 2 teaspoons vanilla extract
- 3 cups all-purpose flour
- 1 1/2 teaspoons baking powder
- 3/4 teaspoon baking soda
- 1/4 teaspoon salt
- 1 cup vanilla Greek yogurt or plain yogurt or sour cream, or crème fraiche
Filling
- 1/4 cup brown sugar packed
- 1 Tablespoon all-purpose flour
- 1/2 teaspoon ground cinnamon
- 2 cups fresh or frozen blueberries or a mix
Glaze
- 1 cup confectioners' sugar plus more if needed
- 1 to 3 Tablespoons half & half or milk plus more if needed
Instructions
- Preheat oven at 350-degrees. Generously coat the interior of a large bundt pan with nonstick spray. If using fresh blueberries, wash them and gently pat them dry with paper towels, picking out any stems.
- In a large mixer bowl, beat the butter and sugar until light and fluffy, about 5 to 7 minutes. Add eggs one at a time followed by the vanilla.
- In another bowl, combine the flour, baking powder, baking soda, and salt. Add to the butter mixture alternatively with the yogurt. Scrape the bottom of the bowl a few times during the process.
- In a small bowl, mix together the dry ingredients for the filling: brown sugar, flour, and cinnamon.
- Spoon about a third of the batter into the bundt pan. Sprinkle about half the dry filling mix over the top. Sprinkle about half the berries over this layer.
- Repeat the process. Spoon about a third of the batter to cover the blueberries. Distribute the rest of the dry mix around the ring, followed by the blueberries. Top with the remaining batter. Use a spoon or uneven spatula to even it out across the top.
- Bake for 55 to 65 minutes, until a toothpick plunged into the middle of the cake comes out free of crumbs. Cool for 20 minutes in pan, then carefully invert onto a cooling rack. Cool completely to room temperature.
Mix the glaze
- Stir together the confectioners' sugar and 2 Tablespoons of half & half or milk. The glaze needs to be thick so that it doesn't all run off. Add more sugar or milk, as necessarily, to get a thick glaze that can just dribble. Spoon over the domed top of the cake. Let set at least 20 minutes or place in fridge. Slice and serve. Store cake under a cake dome, within plastic wrap, or in individual slices encased in plastic wrap. As individual slices, it can be frozen for later enjoyment.
OM NOM NOM!
Follow me


