Bready or Not: Cardamom-Espresso Chocolate Chip Cookies
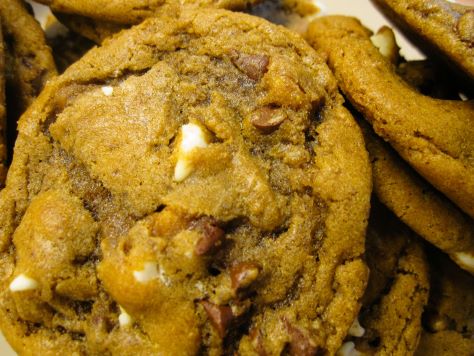
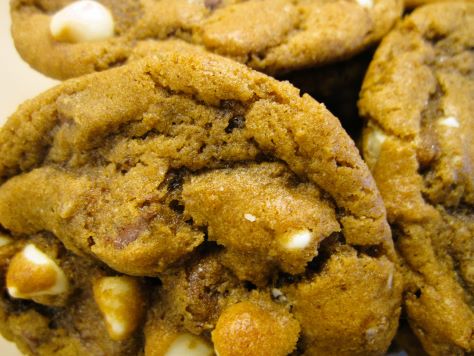
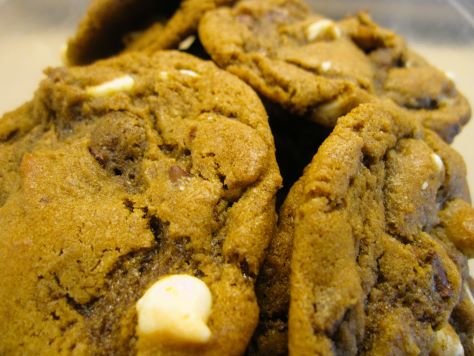
Let’s end the year with an outright dreamy cookie: Cardamom-Espresso Chocolate Chip Cookies.
Seriously, these things are amazing. The flavor of coffee hits the tongue first, followed by a warm kick of cardamom. The overall dough is buttery and rich.
The texture is chewy and luscious. Really, these are a pleasurable sensory bomb in the mouth.
Bready or Not: Cardamom-Espresso Chocolate Chip Cookies
Equipment
- plastic wrap
- baking sheet
- parchment paper
- tablespoon scoop or spoon
Ingredients
- 3 1/4 cups all-purpose flour
- 1 teaspoon baking powder
- 1 teaspoon baking soda
- 1 teaspoon ground cardamom
- 1/2 teaspoon salt
- 1 cup unsalted butter softened (2 sticks)
- 1 1/2 cups brown sugar packed
- 1/2 cup white sugar
- 2 large eggs room temperature
- 2 Tablespoons espresso powder
- 1 Tablespoon vanilla extract
- 12 ounces chocolate chips 1 bag, or mixed kinds to equal amount
Instructions
- Combine flour, baking powder, baking soda, cardamom, cinnamon, and salt in a bowl. Set aside.
- In a large mixing bowl, beat the butter until creamy. Add both sugars, beating until fluffy; scrape the bottom of the bowl a few times. Add eggs, one at a time, followed by the espresso powder and vanilla.
- Gradually add the dry ingredients to the butter mixture, until just combined. Fold in the chocolate chips. Wrap dough and chill in fridge for at least an hour, but as long as a day or two.
- Preheat oven at 350-degrees. Line a baking sheet with parchment paper.
- Use a tablespoon scoop or spoon to dole out balls of dough, spaced out, on the baking sheet. Bake for about 12 minutes. Cookies should look set. Let them rest on the baking sheet for about 5 minutes before transferring them to a cooling rack. Store cooled cookies in a sealed container at room temperature.
OM NOM NOM!
Bready or Not: Half and Half Cookies
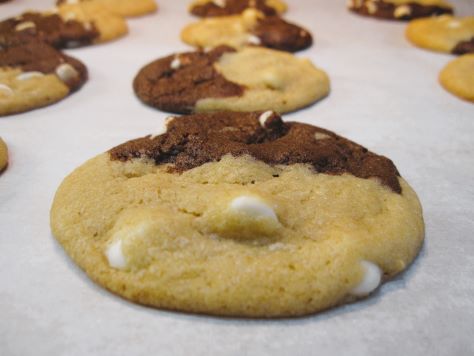
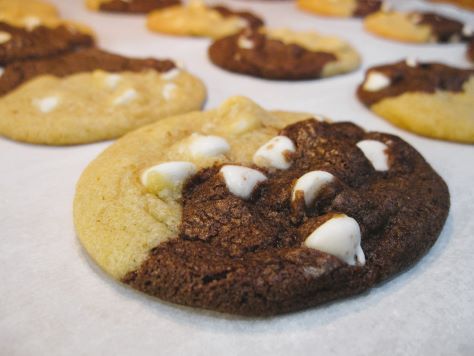
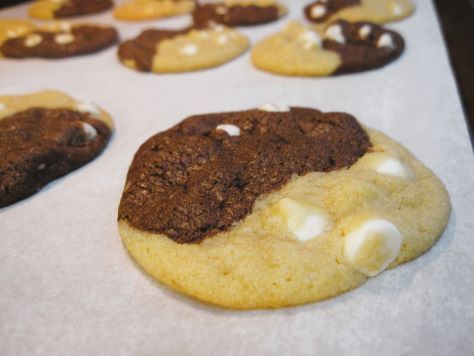
You don’t have to choose between chewy chocolate cookies and brownies with this delectable recipe for Half and Half Cookies. You can enjoy both, and in the same bite, if you want!
This recipe is wonderfully straightforward. The dough doesn’t even need to be chilled. You mix, bake, and enjoy.
Recipes like this are when a teaspoon scoop comes in handy for creating even portions of dough. The resulting cookie is fairly large because it’s essentially two mini cookies merged like Voltron to create something even more awesome.
Bready or Not: Half and Half Cookies
Equipment
- parchment paper
- food scale
- teaspoon scoop or spoon
Ingredients
Main dough
- 3 cups all-purpose flour
- 1/2 teaspoon baking soda
- pinch salt
- 1 cup unsalted butter room temperature (2 sticks)
- 1 cup brown sugar packed
- 1/2 cup white sugar
- 2 large eggs room temperature
- 2 teaspoons vanilla extract
- 11 ounces white chocolate chips 1 bag
Cocoa dough
- 1/4 cup white sugar
- 1/4 cup unsweetened cocoa powder sifted
Instructions
- Preheat oven to 350-degrees. Line a large cookie sheet with parchment paper.
- In a small bowl, sift together flour, baking soda, and salt. Set aside.
- In a large bowl, beat together butter, brown sugar, and white sugar until smooth, scraping the bottom of the bowl a few times to ensure everything is combined. Add eggs, one at a time, followed by the vanilla. Gradually beat in the flour mixture.
- Use a food scale to divine dough in half between two bowls. To one dough, add the extra sugar and cocoa, stirring until the color is consistent. Divide the white chocolate chips in half between the two doughs and fold in to incorporate.
- Use the teaspoon scoop to dole out one scoop of white dough, one scoop of cocoa dough and press together. Flatten slightly so that the half-and-half dough is visible. Set each combined dough ball spaced out on the baking sheet.
- Bake for 11 to 13 minutes, until cookies look set. Let them rest on the sheet for about 5 minutes before transferring to a cooling rack. Store them in an airtight container for up to 3 days at room temperature.
OM NOM NOM!
Bready or Not Original: “Coal” Double Chocolate Cookies
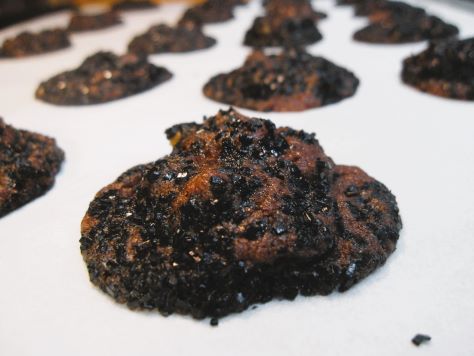
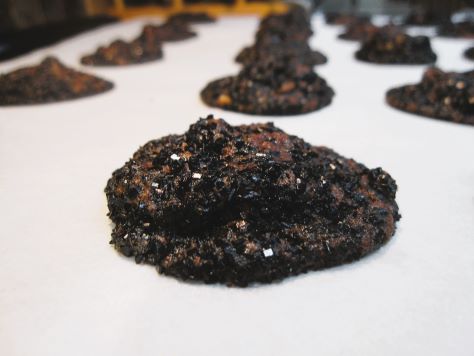
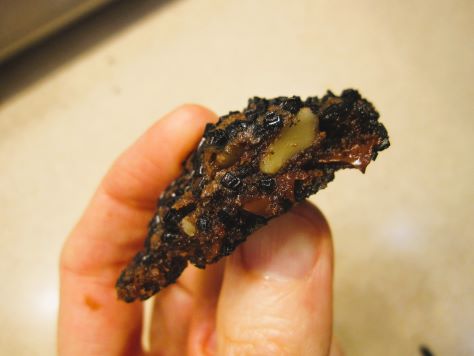
For about a decade, I had it in my head that I wanted to surprise my husband’s co-workers at the nuclear plant with coal cookies as a holiday surprise. I wasn’t sure how to go about it until I saw a brownie-style cookie recipe and decided evolve it with some modifications and a coating of sparkly black sugar. The result: “Coal” Double Chocolate Cookies.
These still taste like crunchy-chewy brownies. The black sugar adds a sweetly crisp outer layer… and in my case, it also turned tongues blue! I didn’t expect that, and it made the gag cookies even funnier to me. I don’t know if all black sugar brands will do that, so if you actually want that effect, you may need to do some testing.
These cookies were a hit at the nuclear plant, a delicious joke that everyone got. Do note that if you want to stick these in stockings, use small baggies–most of the sugar stays put, but some will come off. That’s the way the (coal) cookies crumble.
Bready or Not Original: “Coal” Double Chocolate Cookies
Equipment
- baking sheet
- parchment paper
- teaspoon scoop or spoon
Ingredients
- 1 cup unsalted butter room temperature
- 1 cup white sugar
- 1/2 cup brown sugar packed
- 1 teaspoon vanilla extract
- 1 large egg room temperature
- 1/3 cup baking cocoa sifted
- 1 teaspoon espresso powder optional, for deeper chocolate flavor
- 2 Tablespoons milk or half & half
- 1 3/4 cups all-purpose flour
- 1/2 teaspoon baking powder
- 1 cup walnuts chopped
- 1 cup chocolate chips
- 1 cup black sugar crystals for topping
Instructions
- Cream together butter, sugars, and vanilla. Beat in the egg. Add the cocoa, espresso powder (if using), and milk. Gradually add in the flour and baking powder, scraping the bottom of the bowl to incorporate everything. Fold in the walnuts and chocolate chips. Wrap dough with plastic wrap and set in fridge to firm up for 30 minutes.
- Preheat oven at 350-degrees. Line a baking sheet with parchment paper. Place black sugar in a small bowl.
- Use a teaspoon scoop or spoon to create a lump of dough. Roll it in black sugar to coat. Place spaced out on cookie sheet.
- Bake for 9 to 11 minutes. Watch for the cookies to look set; it will otherwise be difficult to gauge doneness because of the cookies’ dark color. Let sit on sheet a few minutes, then move to a cooling rack. Pack cooled cookies in a sealed container at room temperature.
OM NOM NOM
Bready or Not: Snickerdoodle Sables
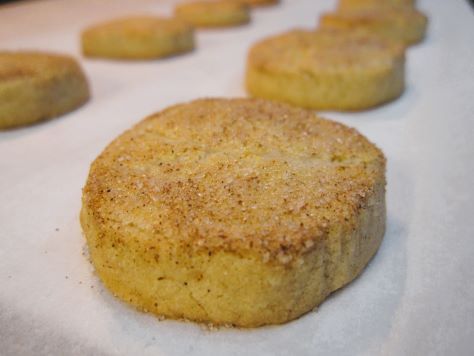
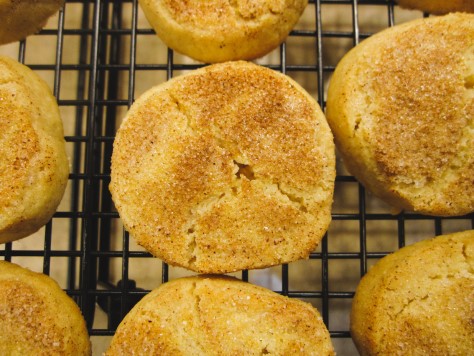
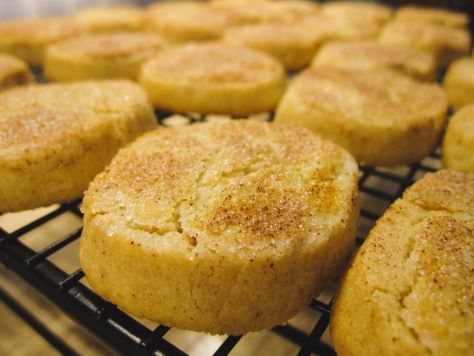
If you love Snickerdoodles but want a fresh take that feels a bit fancier, try these Snickerdoodle Sables.
Sables are, essentially, French shortbread cookies. They tend to be lighter in texture than the traditional British and Scottish versions, and also are usually cut from a log and hence are round in shape.
For these cookies, plan on making the dough ahead of time. It needs time to chill (don’t we all?). That ends up making the actual baking process so quickly. Slice, brush on some yolk, dip in cinnamon-sugar, set on pan, repeat.
I modified this from the Bake from Scratch July/August 2018 issue.
Bready or Not: Snickerdoodle Sables
Equipment
- plastic wrap
- pastry brush
Ingredients
- 2/3 cup white sugar
- 2 teaspoons ground cinnamon
- 1 cup unsalted butter (2 sticks) room temperature
- 1/3 cup confectioners’ sugar
- 1/2 teaspoon fine sea salt
- 1 large egg yolk
- 1 teaspoon vanilla extract
- 2 cups all-purpose flour
- 1 large egg yolk for brushing atop the cookies
Instructions
- Mix the white sugar and cinnamon in a small bowl. Set aside.
- In a large mixing bowl, beat butter until creamy. Add 1/3 cup of the cinnamon sugar mix followed by the confectioners’ sugar and salt. Beat to incorporate. Add 1 egg yolk along with the vanilla. Gradually add the flour, pausing to scrape the bottom of the bowl a few times.
- Using hands, knead the dough until it fully comes together. Lay out two long stretches of plastic wrap. Roughly divide the dough in half and form it into tube shapes of the same size on each sheet of plastic wrap. Encase the dough in plastic, rolling it to smooth the edges and compress the dough. Chill the dough in the fridge for least 4 hours or as long as a few days. Save the remaining cinnamon-sugar mix.
- Preheat oven at 350-degrees. Place the remaining egg yolk in a bowl. Line a baking sheet with parchment paper. Use a sharp knife or bench knife to slice the dough into 1/2-inch coins. Brush the top of each round with egg yolk, then dip coated surface into the cinnamon-sugar to coat. Place rounds spaced out on parchment.
- Bake for 16 to 18 minutes, until cookies are set. Let cool on pan a few minutes before moving them to a cooling rack. Store in a sealed container at room temperature.
OM NOM NOM!
Bready or Not Original: Lemon Butter Cookies
Let’s say you need a lot of cookies. They don’t need to be fancy. You just need something sweet and good that kids and adults will both like. Well, these Lemon Butter Cookies might be just about perfect.
Another thing to know about this recipe: it makes a lot. The entire batch produces over 100 cookies. The nice thing is, though, it’s also a great recipe to divvy up. It’s no problem to keep half the batch wrapped in the fridge to make a day or two later, while the other half is frozen.
Or make them all at once and pretend you can swim through piles of cookies like Scrooge McDuck through his money bin.
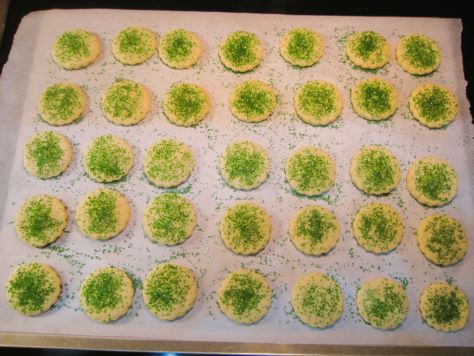
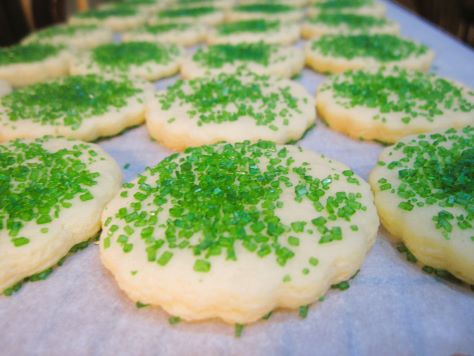
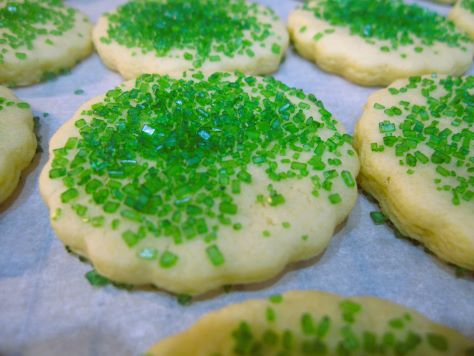
The lemon flavor may make some people think of spring and summer, but I’m of the opinion that good food is good all year long. Plus, you can use different colored sugars to customize it for sports teams or holidays.
Bready or Not Original: Lemon Butter Cookies
Equipment
- parchment paper
- cookie cutter
- cooling rack
Ingredients
- 1 cup unsalted butter (2 sticks) room temperature
- 2 cups white sugar
- 2 large eggs room temperature
- 1/4 cup milk or half & half
- 3 teaspoons lemon extract
- 1 teaspoon vanilla extract
- 4 1/2 cups all-purpose flour
- 2 teaspoons baking powder
- 1/2 teaspoon salt
- 1/4 teaspoon baking soda
- colored sugar for topping, optional
Instructions
- In a large bowl, cream together the butter and sugar until they are light and fluffy. Mix in the eggs one at a time followed by the milk and both extracts. Scrape the bottom of the bowl.
- In another bowl, stir together the flour, baking powder, salt, and baking soda. Gradually add to the wet mix to create a cohesive dough (and it makes a LOT of dough!).
- At this point, the dough can be divided to rest in the fridge or placed in the freezer for weeks. If the cookies will be made today, chill the dough, covered, for about 30 minutes. (Note that if the dough is chilled for a longer time, it will need to sit at room temperature for a bit to become soft enough to roll out.)
- Preheat oven at 350-degrees. Prepare a cookie sheet with parchment paper.
- Lightly flour a clean, flat surface. Roll out the dough to 1/8-inch thickness. Parcel out using a 2-inch inch cookie cutter. Place spaced out a bit on cookie sheet. If using colored sugar, sprinkle atop each cookie to coat. Bake for 8 to 9 minutes, until set. Let the cookies idle on the sheet for a few minutes, then transfer to a cooling rack. Repeat process to make more cookies. Store in a sealed container at room temperature.
- The full batch of cookies will make 100-120, dependent on the thickness.
OM NOM NOM!
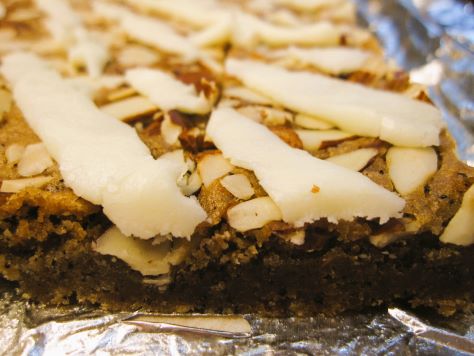
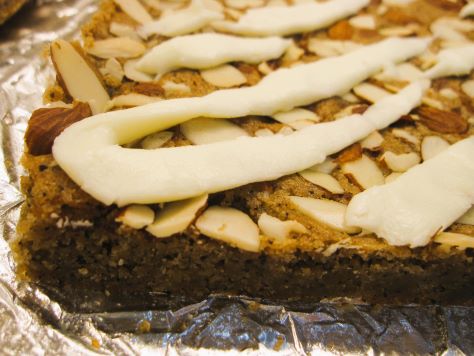
Bready or Not: Irish Coffee Blondies
This Irish Coffee Blondies recipe is a long-overdue revamp of a recipe I first shared over a decade ago on the first iteration of Bready or Not on LiveJournal. I made it a few times after that, only for the paper to be buried amid many other recipes.
As I culled my recipe collection prior to moving, I rediscovered the print-out and knew I had to make it again soon because it’d help me use up some ingredients. Namely, sliced almonds and vanilla extract.
My husband now mostly uses k-cups for his coffee, a brewing method we didn’t have available back when I first baked this. I found that the 3 Tablespoons of ground coffee called for in this recipe were the exact contents of a Starbucks k-cup. I love when things work out like this!
This recipe would make a great dessert, but really, with the flavors, it’s even better for a breakfast or brunch. It’ll go great with coffee or tea!
Bready or Not: Irish Coffee Blondies
Equipment
- 9×13 pan
- aluminum foil
- nonstick spray
- uneven spatula
Ingredients
Blondies:
- 2 cups all-purpose flour
- 1 teaspoon baking powder
- 1/4 teaspoon baking soda
- 1 cup unsalted butter (2 sticks) melted
- 2 cups brown sugar packed
- 3 Tablespoons ground coffee equals 1 K-cup
- 1 teaspoon salt
- 2 large eggs room temperature
- 2 teaspoon pure vanilla extract
- 1/2 cup sliced almonds
Glaze:
- 1 Tablespoon unsalted butter melted
- 1 teaspoon almond extract or vanilla extract
- 1 teaspoon water plus more if needed
- 3/4 cup confectioners' sugar
Instructions
Make the blondies
- Preheat oven to 350 degrees. Line a 9-by-13-inch baking pan with foil and apply nonstick spray.
- In a big bowl, whisk together flour, baking powder, and baking soda. Set aside.
- Place the melted butter into a mixing bowl. Add the brown sugar, ground coffee, and salt. Stir to combine.
- Add eggs one at a time followed by the vanilla extract. Stir in flour mixture until just combined. Pour batter into pan and level out; an uneven spatula makes that easy. Sprinkle with almonds.
- Bake 27 to 30 minutes, until the middle passes the toothpick test. Let cool completely.
To complete with glaze
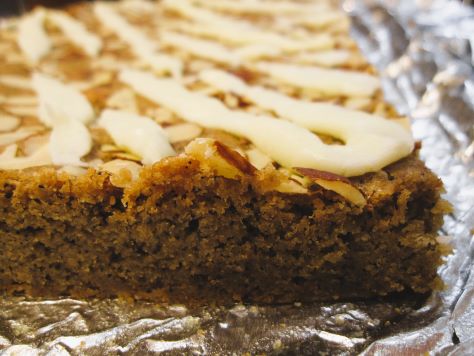
- Mix together the melted tablespoon butter and extract. Gradually whisk in confectioners’ sugar. Add teaspoons of water, as needed, until the glaze is thick but can be drizzled. Place it in either a pastry bag fitted with a plain round tip or a sandwich bag of which a corner will be snipped off. Drizzle glaze over blondies in a rough crosshatch pattern. Let glaze set for 1 hour before cutting blondies into squares. Store in a sealed container at room temperature. If making these in a warm place, put waxed paper between the stacked layers of blondies.


