


Bready or Not: Cookie Butter-Chocolate Chip Cookies
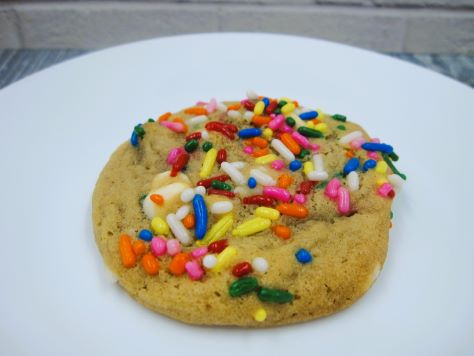
I like to say that cookie butter makes everything better. I would also add that rainbow sprinkles make everything better. These cookies feature both cookie butter AND rainbow sprinkles, and will absolutely blow your mind.
The recap, as there is always someone discovering cookie butter for the first time: it’s an addictive substance found near the peanut butter in most every grocery store in America; even my local Walmart has it in the main Biscoff brand or as a Walmart generic, and Trader Joe’s calls it Speculoos. It’s essentially pulverized cookies and oil. It has the exact same texture as peanut butter and can substitute for it in most any recipe. There is nothing healthy about it and it is incredibly delicious.

Cookie butter makes things taste like cookie dough. That’s outright magical when paired with chocolate. These cookies are especially pretty as they include white and brown chips along with the sprinkles.

Customize the sprinkles based on the season or reason. Red and green for Christmas, pink and/or red and/or white for Valentine’s, favorite sports team colors, whatever. Of course, basic rainbow sprinkles are always a great choice!
Modified from Food Network Magazine December 2022.
Bready or Not: Cookie Butter-Chocolate Chip Cookies
Equipment
- large cookie scoop
- baking sheet
- parchment paper
Ingredients
- 1 3/4 cups all-purpose flour
- 1/2 teaspoon baking soda
- 1/2 teaspoon salt
- 10 Tablespoons unsalted butter room temperature
- 1/2 cup smooth cookie butter such as Biscoff or Speculoos
- 1/2 cup brown sugar packed
- 1/4 cup white sugar
- 2 large eggs room temperature
- 1 teaspoon vanilla extract
- 3/4 cup white chocolate chips
- 3/4 cup milk chocolate chips
- 3 Tablespoons sprinkles plus more for topping
Instructions
- In a small bowl, combine flour, baking soda, and salt. Set aside.
- In a large bowl, beat together the butter, cookie butter, and both sugars until they are light and fluffy. Add the eggs one at a time. Add the vanilla.
- Gradually stir in the dry ingredients to form a cohesive dough. Fold in both kinds of chips along with the sprinkles. Cover the dough and chill in the fridge at least 2 hours, or up to a few days.
- Preheat oven at 350 degrees. Line a baking sheet with parchment paper. Pour some sprinkles into a bowl.
- Use a scoop or spoon to shape the dough. Dip the top into the sprinkles and compress to coat. Place spaced out a few inches on sheet–they will spread!
- Bake 11 to 12 minutes, until set and golden. Let them cool for about 5 minutes on the sheet, then transfer them to a cooling rack. Store them in a sealed container at room temperature.
OM NOM NOM!
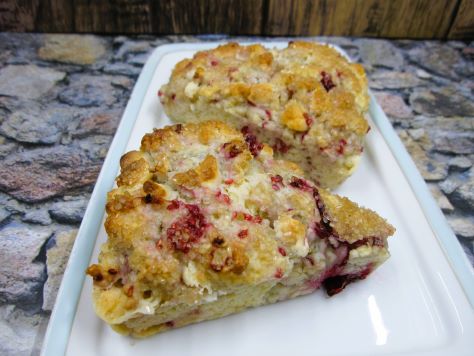
Bready or Not: Raspberry-Chocolate Chip Mini Loaves
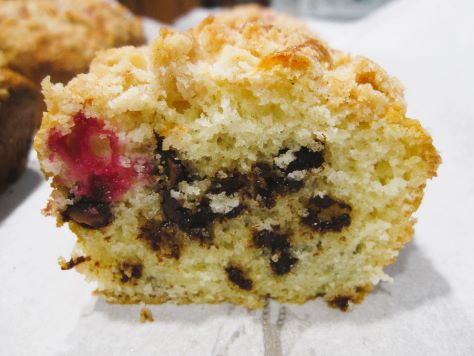
These Raspberry-Chocolate Chip Mini Loaves are an easy make-ahead breakfast, brunch, or dessert. Use fresh or frozen raspberries–I used frozen!
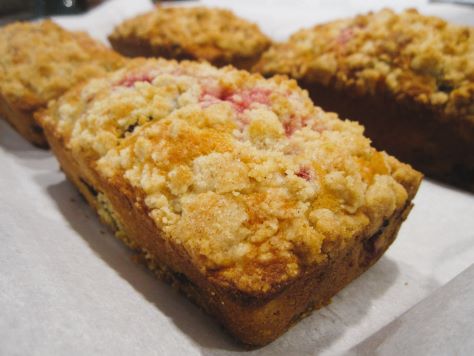
I have a Pampered Chef Stoneware loaf pan that I swore I’d use more often because I bothered to haul the big thing from Arizona. It has spaces for four small loaves. This recipe can be made with that kind of pan, or use 8 1/2 by 4 1/2-inch disposable pans. The individual pans, with a tasty baked treat inside, are great for gift-giving!
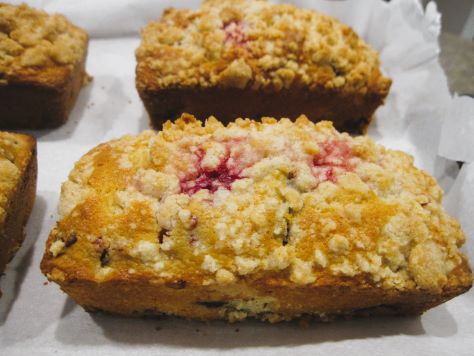
Use any kinds of chocolate chips with this recipe, or a mix. Flavor-wise, I’d prefer white chocolate here, but brown chips or chunks certainly look better for pictures.
Modified from a muffin recipe at King Arthur Flour.
Bready or Not: Raspberry-Chocolate Chip Mini Loaves
Equipment
- Mini loaf pan with four spaces or 4-count 8 1/2 by 4 1/2 disposable pans
- nonstick spray
Ingredients
Topping
- 1/2 cup all-purpose flour
- 1/4 cup white sugar
- 1/4 teaspoon cinnamon
- pinch salt
- 3 Tablespoons unsalted butter melted
- 1/4 teaspoon pure vanilla extract
Batter
- 8 Tablespoons unsalted butter melted
- 3/4 cup milk or half & half
- 2 large eggs
- 1 3/4 cups all-purpose flour
- 1 cup chocolate chips any kind
- 1 cup raspberries fresh or frozen
- 3/4 cup white sugar
- 1 Tablespoon baking powder
- 1/2 teaspoon salt
Instructions
- Preheat the oven to 375 degrees. Lightly grease the loaf pans.
Make the topping
- Mix the topping ingredients together until the mixture is very moist and crumbly. Set aside. If the kitchen is warm, place the bowl in the fridge.
Make the loaves
- In a large bowl, whisk together the melted butter, milk or half & half, and eggs.
- Measure the flour into a large bowl. Into separate bowls, place the chocolate chips and the raspberries. Add a generous scoop of flour to the chocolate chips and toss them to coat. Repeat with the raspberries. This coating will help them to resist sinking in the batter.
- To the remaining flour, add the sugar, baking powder, and salt. Gradually mix the wet ingredients into the dry. Fold in the chocolate chips, followed by the raspberries.
- Divide the batter evenly among the loaf pans. Sprinkle the topping over each loaf to cover, pressing it in slightly to help it adhere.
- Bake for 25 to 35 minutes; separated pans may cook faster. When done, they should be browned across the top and pass the toothpick test in the middle. Cool for 30 minutes. If using a large pan with four mini loaves inside it, run a sharp knife around the edges of each divot and then carefully tip the loaves onto a pan or counter. Set them on a rack to completely cool.
- Store loaves in a sealed container at room temperature or freeze soon after making. Eat at room temperature or warmed in the microwave.
OM NOM NOM!
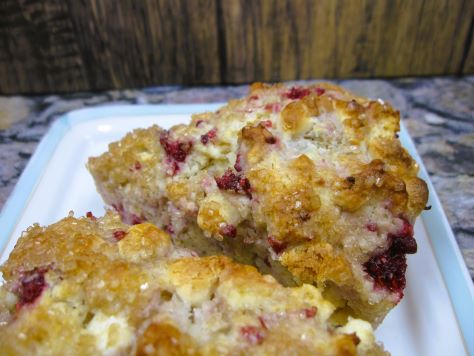
Bready or Not Original: Berry Scones
These Berry Scones are a delicious way to use fresh or frozen fruit to create a batch of baked goods for breakfast.
I love scones but I hadn’t made this recipe in over 10 years. Arizona is not a good place to get locally grown fresh fruit like strawberries and raspberries. Soon after we moved to Minnesota, fresh strawberries came into season AND I won a gallon-sized bag of frozen raspberries in my first horticultural club meeting.
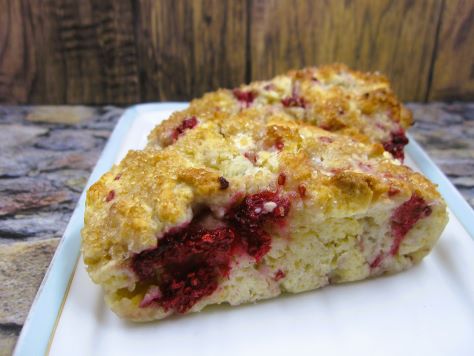
I needed ways to utilize my new bounty. I reworked this old recipe, reducing the fruit amount and adding white chocolate chips. That extra sweet kick really elevates the fruit!
Bready or Not Original: Berry Scones
Equipment
- cookie sheet or scone pan
- nonstick spray
Ingredients
Scones:
- 1/2 cup strawberries or raspberries (fresh or frozen) about 3oz
- 3 Tablespoons white sugar separated
- 2 cups all-purpose flour
- 2 teaspoons baking powder
- 1/4 teaspoon salt
- 6 Tablespoons unsalted butter
- 2/3 cup milk or almond milk
- 1/2 cup white chocolate chips
Topping:
- 1 Tablespoon coarse or white sugar optional
Instructions
- Preheat oven at 400 degrees. Lightly grease a cookie sheet or line with parchment paper, or use a scone pan.
- Use kitchen shears or a knife to cut the fruit into bite-sized pieces. Sprinkle fruit with 1/2 tablespoon sugar; set aside to macerate.
- Combine remaining sugar with flour, baking powder and salt. Add butter, using a pastry cutter or a fork to cut it in. Don’t completely mix in butter, but leave some pea-sized pieces throughout. Stir in milk. Fold in the white chocolate chips followed by the berries.
- Flour hands to coat. Gently knead and turn the dough to incorporate the dry bits from the bottom of the bowl. Sprinkle dough with extra flour if it’s too sticky to work with.
- If using a cookie sheet for baking, pat the dough into a circle 3/4 inch thick. If any berries peek out, push them into dough. Cut circle into 6-8 wedges (or smaller), then transfer wedges to the cookie sheet, leaving at least 1/2 inch of space between them; they will spread. Alternatively, press handfuls of dough into a scone pan, filling each empty space to the end to create even pieces. Sprinkle the tops with coarse or white sugar, if desired.
- Bake 20 to 25 minutes or until the tops are beginning to brown. Remove them from pan. Scones can be eaten immediately, or will keep in a sealed container at room temperature for up to 2 days. Freeze them to enjoy later.
OM NOM NOM!
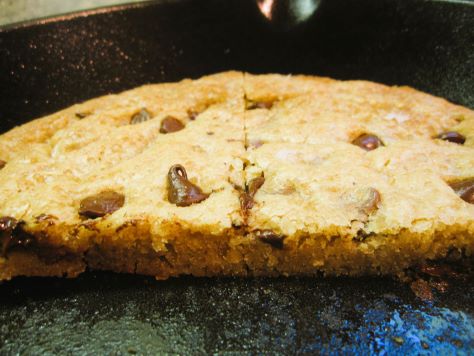
Bready or Not: Chocolate Chip Skillet Cookie
If you’re in need of a small-scale dessert for just a couple of people (hey, it is Valentine’s Day as I post this), this Chocolate Chip Skillet Cookie is perfect.
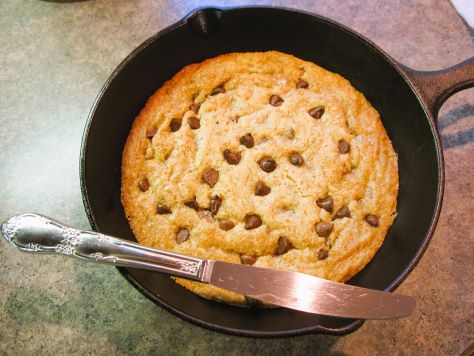
You’ll need a 6-inch cast iron skillet or cake pan for this recipe. I have the former.
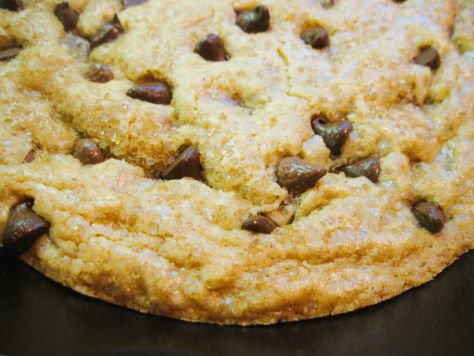
This is a treat best enjoyed while it’s warm. Therefore, let the big cookie cool enough so you won’t get burned, and then dig in. If you want to make this even more luxurious, add some scoops of ice cream in the middle and eat everything with spoons!
Modified from Bake from Scratch July/August 2023.
Bready or Not: Chocolate Chip Skillet Cookie
Equipment
- 6-inch cast iron skillet or 6-inch cake pan
- nonstick spray
- small saucepan
Ingredients
- 1/4 cup unsalted butter
- 2 Tablespoons white sugar
- 2 Tablespoons brown sugar packed
- 1 large egg yolk
- 1 Tablespoon milk or half& half
- 1/2 teaspoon vanilla bean paste or vanilla extract
- 1/2 cup all-purpose flour
- 1/2 teaspoon baking powder
- 1/4 teaspoon kosher salt
- 1/2 cup chocolate chips whatever kind you want
- flaked sea salt and coarse sugar for optional topping
Instructions
- Preheat oven at 350-degrees. Prepare the pan by using nonstick spray or some extra butter to coat.
- In a small saucepan, melt the butter on medium heat, stirring often. The butter will foam and then turn brown after 6 to 8 minutes. Set aside to cool for at least 10 minutes.
- In a mixing bowl, combine browned butter, both sugars, egg yolk, milk, and vanilla. Add the flour, baking powder, and kosher salt. Fold in the chocolate chips. If desired, add a sprinkle of flaked sea salt and coarse sugar on top.
- Bake until the edges are brown and the middle is no longer gooey, about 15 to 20 minutes. Let cool for 15 to 20 minutes before digging in, but it is ideally eaten while it's still warm.
OM NOM NOM!
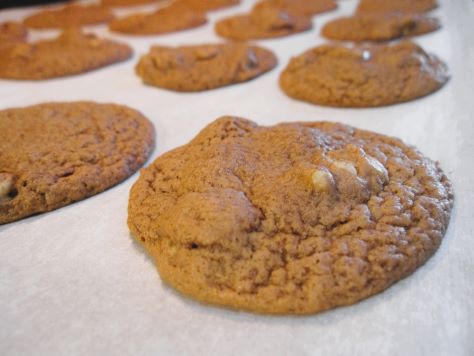
Bready or Not: Chewy Biscoff Chocolate Chip Cookies Redux
These Chewy Biscoff Chocolate Chip Cookies taste even more inherently cookie dough-like thanks to cookie butter mixed into the dough. They are chewy, sweet, and oh-so-good.

Because someone always asks, “What’s cookie butter?” The answer is: an addictive substance found near the peanut butter in most every grocery store in America; even my local Walmart has it in the main Biscoff brand or as a Walmart generic, and Trader Joe’s calls it Speculoos. It’s essentially pulverized cookies and oil. It has the exact same texture as peanut butter and can substitute for it in most any recipe. There is nothing healthy about it and it is incredibly delicious.

If you search for Biscoff/cookie butter recipes on Bready or Not, you’ll find a ton of recipes. It’s been one of my favorite ingredients for over ten years.

That’s how old this recipe is, too–so old that I originally posed it on the LiveJournal version of Bready or Not! It was high time it had a remake (or rebake).
Bready or Not: Chewy Biscoff Chocolate Chip Cookies Redux
Ingredients
- 1/2 cup unsalted butter room temperature
- 1/2 cup white sugar
- 1/2 cup brown sugar packed
- 1/4 cup Creamy Biscoff spread or other cookie butter
- 1 large egg room temperature
- 1 teaspoon vanilla
- 1 1/2 cups all-purpose flour
- 1 teaspoon baking soda
- 1/4 teaspoon salt
- 1 cup chocolate chips
- flaked sea salt optional, for top
Instructions
- Cream butter with both sugars until light and fluffy. Mix in the egg, vanilla, and cookie butter.
- In a separate bowl, combine the flour, baking soda, and salt. Gradually mix the dry ingredients into the wet. Fold in the chocolate chips.
- Wrap up dough and chill it in the fridge for a few hours or overnight.
- Preheat oven to 350-degrees.
- Drop the dough by large tablespoons onto baking sheet. If desired, press a pinch of flaked sea salt onto each round. Bake for 10 to 12 minutes. Let set on pan briefly and then transfer to a cooling rack. Store cookies in a sealed container at room temperature.
OM NOM NOM!
Bready or Not: Brownie Cookies
If ever you are experiencing a chocolate emergency (need chocolate NOW, don’t want to leave the house, don’t want to spend a long time making something), these Brownie Cookies will satisfy nicely.
These cookies mix up fast. They bake fast. They cool fast. They enter your stomach fast.

Plus, they are imbued with brownie goodness. The dough includes melted chocolate and chopped walnuts. Yes, you can replace the walnuts with a different nut–or leave out the nuts entirely, if you so choose. I really love the texture of a chewy cookie with a crunchy nut, though.

Actually, you could even replace the nuts with something like M&Ms. That’d make these easy to modify for holidays, too–green and red candies in December, the Valentine’s mix in February. Have fun with this recipe!
Bready or Not: Brownie Cookies
Equipment
- baking sheet
- parchment paper
- tablespoon scoop or spoon
Ingredients
- 1/3 cup unsalted butter softened
- 3/4 cup white sugar
- 1/3 cup light corn syrup
- 1 large egg room temperature
- 3 ounces semisweet chocolate melted
- 2 teaspoons vanilla extract
- 1 2/3 cups all-purpose flour
- 1/2 teaspoon baking powder
- 1/4 teaspoon salt
- 3/4 cup walnuts chopped
Instructions
- Preheat oven at 350-degrees. Line a baking sheet with parchment paper.
- In a large bowl, cream together butter and sugar until they are light and fluffy. Add the corn syrup and egg. Add the melted chocolate and vanilla.
- In another bowl, combine the flour, baking powder, and salt. Gradually mix this into the wet ingredients, scraping the bottom of the bowl to make sure everything is combined. Fold in the walnuts.
- Use a tablespoon scoop or spoon to dollop rounds of dough, spaced out, on baking sheet. Bake for 9 to 11 minutes, then let rest on sheet a few minutes before transferring them to a cooling rack. Store in a sealed container at room temperature.
OM NOM NOM!
Follow me


