Bready or Not: Fruit and Almond Crumble Bars
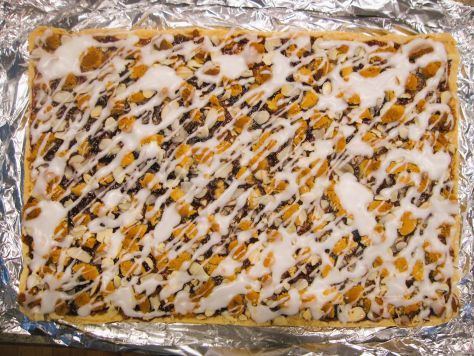
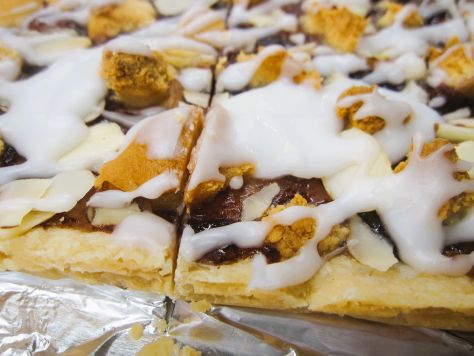
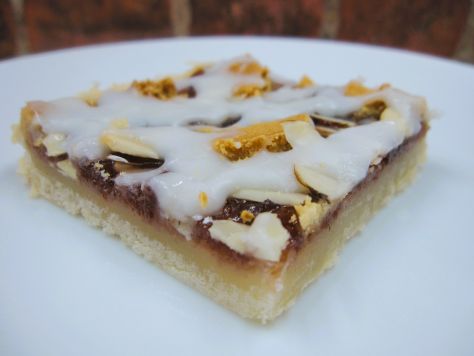
These Fruit and Almond Crumble Bars are SO GOOD, people. Fruity, almondy, chewy, crunchy, sweet. A lot of awesome adjectives.
These bars are cousins of the Dutch Letter Bars I recently shared. The amounts produced are quite different–note that this recipe calls for a 15×10 pan (aka a jelly roll pan). This is a recipe to feed a potluck, truly.
Use whatever fruit spread you want here. I went cheap and used a mixed berry variety I bought at Costco. Cherry would be a more traditional choice. I’d love to make these again using blueberry.
Modified from Better Homes & Gardens December 2023.
Bready or Not: Fruit and Almond Crumble Bars
Equipment
- 15x10x1-inch pan (jelly roll pan)
- aluminum foil
- nonstick spray or butter
- uneven spatula
Ingredients
Bars
- 1 1/4 cups unsalted butter softened
- 1 cup confectioners’ sugar
- 2/3 cup white sugar
- 1 teaspoon vanilla extract
- 1 teaspoon almond extract
- 2 2/3 cups all-purpose flour
- 1 1/2 cups fruit preserves
- 7 or 8 ounces almond paste
- 1/2 cup chopped almonds
Glaze
- 2/3 cup confectioners’ sugar
- 1 teaspoon almond extract
- 1 Tablespoon water
Instructions
- Preheat oven at 325 degrees. Line a 15x10x1 pan with a large piece of aluminum foil. Add nonstick spray or butter to coat.
- In a large bowl, beat butter to soften. Add both sugars to thoroughly combine. Add both extracts. Beat in flour until just combined, scraping the bottom of the bowl a few times. Press dough evenly into the base of the pan. Bake until set, 20 to 25 minutes.
- Use an uneven spatula to spread fruit preserves over top. Crumble up the almond paste and sprinkle over top. Sprinkle on almond pieces.
- Bake for another 35 to 40 minutes, until both the almond paste and nuts have browned. Cool on a wire rack for a few hours, stashing in fridge to chill faster.
- Mix glaze, adding more sugar or water as needed to create a thick yet drizzable texture. Drizzle on glaze. Let set again, at least 30 minutes, or in fridge.
- Use foil to lift contents onto cutting board to slice up. Store in an airtight container in the fridge for up to 3 days. The bars can also be frozen fully prepared.
OM NOM NOM!
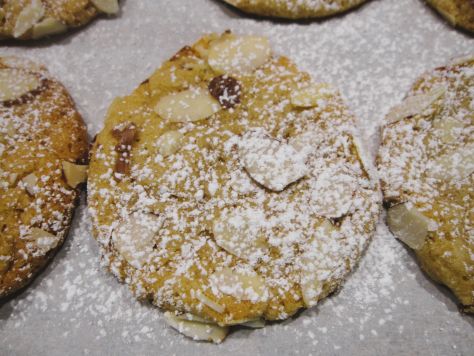
Bready or Not: Almond Frangipane Cookies
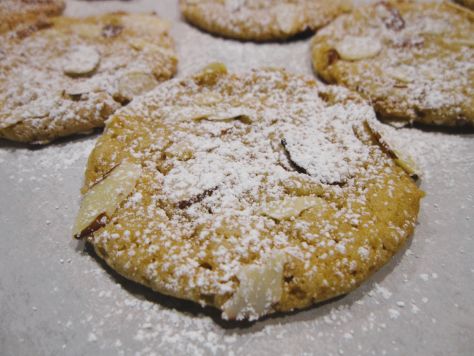
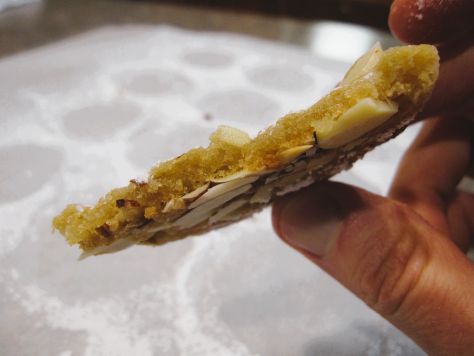
If you love frangipane like I do, you really must make these incredible Almond Frangipane Cookies. They are chewy and crunchy in all the best ways.
If you don’t know about the wonders of frangipane yet, oh boy, are you in for a treat! Frangipane is sweet almond custard used in a lot of French baked goods; it’s also in the glorious British Bakewell Tart.
Quite often, the croissants and other pastries that include frangipane tend to be fussy to make. Not so with these cookies. The dough is pretty simple. Just chill it a bit, and bake away!
Greatly modified from Bake from Scratch Magazine July/August 2024.
Bready or Not: Almond Frangipane Cookies
Equipment
- parchment paper
- large cookie scoop/tablespoon
- sifter
Ingredients
- 2 1/4 cups all-purpose flour
- 1 cup almond flour sifted
- 3/4 teaspoon baking powder
- 1/2 teaspoon kosher salt
- 1/4 teaspoon baking soda
- 1 1/4 cups brown sugar packed
- 3/4 cup white sugar
- 1 cup unsalted butter (2 sticks) melted and cooled a little
- 2 large eggs
- 2 teaspoons vanilla extract
- 1 teaspoon almond extract
- 2 1/2 cups sliced almonds topping
- confectioners’ sugar topping
Instructions
- In a medium bowl, combine flour, almond flour, baking powder, salt, and baking soda.
- In a mixing bowl, combine both sugars and butter. Mix in the eggs and extracts. Gradually beat in the dry ingredients until just combined.
- Put a large stretch of parchment paper on the counter. Place the sliced almonds in a bowl.
- Use a large cookie scoop to shape dough. Roll dough in almonds to completely coat. Place cookie balls in fridge to chill at least 2 hours or overnight, or place in freezer bag for later baking.
- Preheat oven at 350 degrees. Place parchment paper on baking sheet. Set dough balls on sheet, spaced out about 2 inches; they will spread. Bake for 14 to 16 minutes, until set.
- Move to rack to completely cool. Sift confectioners’ sugar over tops.
- Store in a sealed container. Cookies are best within 2 days but are okay after that.
OM NOM NOM!
Bready or Not Original: Sourdough Blondies
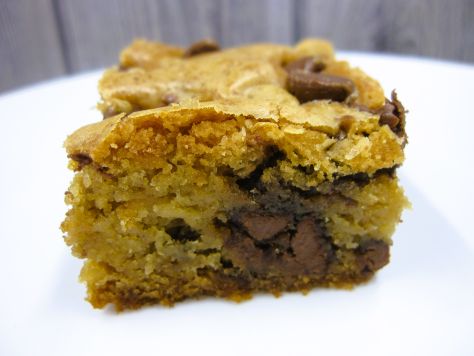
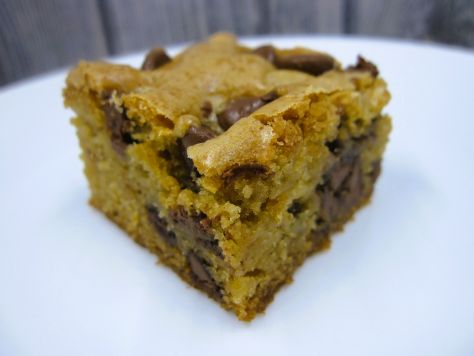
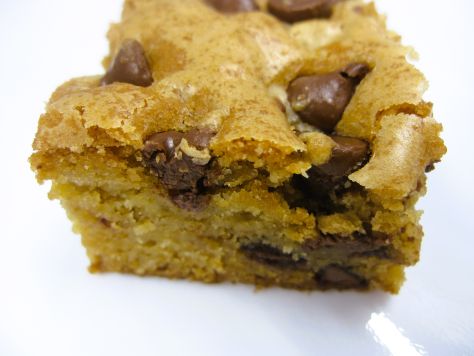
If you like the tang of sourdough, these special Sourdough Blondies are likely your kind of thing. They are also quick to make and delicious!
The overall texture of these bars impressed me. They are dense and sturdy, the kind of bar you could place in a little bag and pack with a lunch, but they are still soft and chewy to eat.
Why am I featuring so many sourdough recipes these days? Because, starting in early 2024, I began maintaining my own sourdough starter (named Mother) for book research reasons. That book, A House Between Sea and Sky, is out on October 1st! It features a sentient sourdough starter (also named Mother).
Bready or Not Original: Sourdough Blondies
Equipment
- 9×13 pan
- aluminum foil
- nonstick spray
- uneven spatula
Ingredients
- 1 cup unsalted butter (2 sticks)
- 1 cup white sugar
- 1 cup brown sugar packed
- 2 large eggs room temperature
- 3/4 cup sourdough discard (170 grams)
- 2 teaspoons vanilla extract
- 3 cups all-purpose flour
- 1 teaspoon baking soda
- 1/2 teaspoon baking powder
- 1 1/2 teaspoons salt
- 2 teaspoons cornstarch
- 11 ounces chocolate chips divided (1 bag)
Instructions
- Preheat oven at 350 degrees. Line a 13×9 pan with aluminum foil and coat with nonstick spray or extra butter.
- In a large microwave-safe bowl, melt the butter. Beat in the two sugars. Add the two eggs. Add the sourdough discard. Add vanilla.
- In a separate bowl, combine flour, baking soda, baking powder, salt, and cornstarch. Stir into the wet mixture, scraping the bottom of the bowl on occasion.
- Measure out 1 1/2 cups chocolate chips. Fold them into the dough.
- Scoop dough into prepared pan and even out with an uneven spatula. Sprinkle the remaining chocolate chips on top and press in.
- Bake for 40 to 45 minutes, until top is golden and set and the middle passes the toothpick test. Cool completely, speeding process in fridge, if desired.
- Use foil to lift contents onto a cutting board to slice into bars. Store in a sealed container at room temperature.
OM NOM NOM!
Bready or Not: Fig-Pecan Cookies
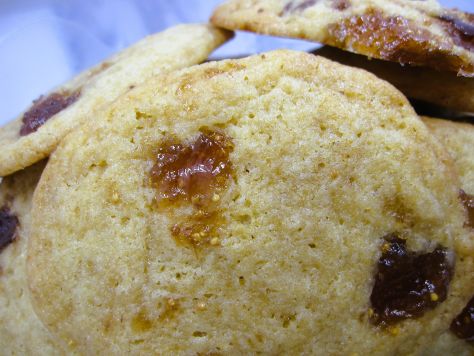
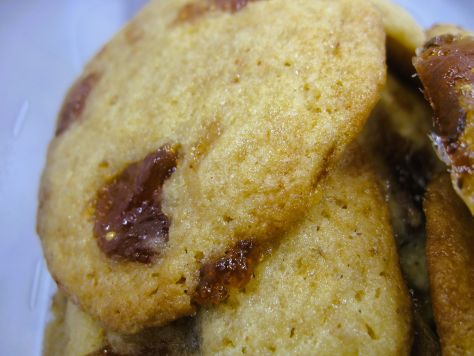
These Fig-Pecan Cookies deliver a unique combination with profound sweetness and a little crunch.
I love, love, love figs. I had a fig tree in Arizona I babied through the hot summers, and it’s one of the few things I miss from there. Fig preserves are, in my opinion, the best all-around fruit preserve to pair with cheeses of all kinds.
Fig preserves work well in these cookies, too. There is some in the dough, and more dabbed on top. The 8 ounces called for in this recipe will probably be most of a typical small jar.
Modified from Bake from Scratch November/December 2024.
Bready or Not: Fig-Pecan Cookies
Equipment
- waxed paper
- parchment paper
Ingredients
- 1 cup unsalted butter (2 sticks) softened
- 3/4 cup white sugar
- 3/4 cup brown sugar packed
- 2 large eggs room temperature
- 2 teaspoons vanilla extract
- 2 3/4 cups all-purpose flour
- 1 teaspoon kosher salt
- 3/4 teaspoon baking powder
- 1/4 teaspoon baking soda
- 1/2 cup pecans chopped and toasted
- 8 ounces fig preserves divided
Instructions
- Beat together butter and both sugars until fluffy. Add the eggs, one at a time, followed by the vanilla.
- In another bowl, stir together flour, kosher salt, baking powder, and baking soda. Gradually beat the dry ingredients into the butter mixture. Fold in the pecans. Gently fold in 1/2 cup of the fig preserves, trying to maintain some chunks and swirls.
- Set out a piece of waxed paper. Use a cookie scoop or spoon to dole out round of dough, then gently compress each. Add small dollops of fig preserves atop.
- Place dough balls on waxed paper in the fridge for at least two hours, or place in freezer to bake later. Note that after the dough is frozen, it can be placed in a freezer bag or other container for safekeeping. The fig preserves will still remain soft. When it is baking day, place dough in fridge to thaw for a few hours.
- Preheat oven at 350 degrees. Place parchment paper on a baking sheet.
- Set cookie dough balls, with the fig preserves up, spaced out a few inches on the baking sheet. The cold dough may still spread a lot as it bakes.
- Bake for 15-17 minutes. Let cookies rest on sheet about 10 minutes before moving them to a cooling rack. Store them in a sealed container at room temperature.
- These cookies are best the first day, but are still okay for a couple days.
OM NOM NOM!
Bready or Not: Sourdough Beer Bread
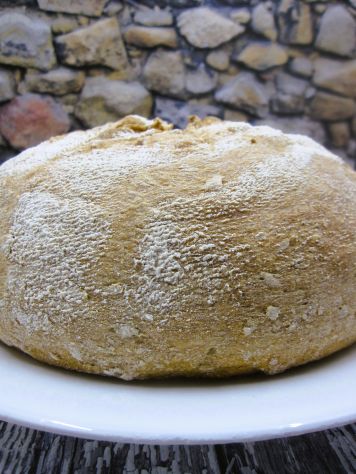
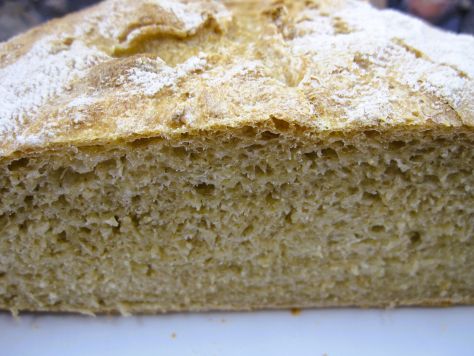
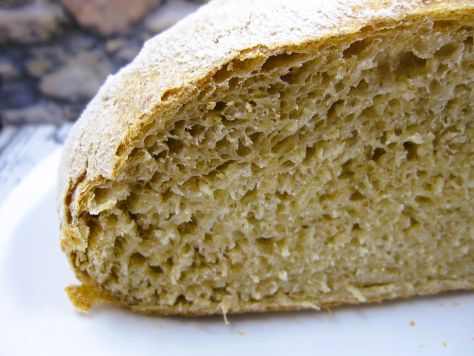
Not gonna lie: this Sourdough Beer Bread takes time, working in spurts over a day. It dirties many things. However, it also makes a big loaf of bread, so the effort can likely provide a delicious side for a few meals.
When I say this is an all day recipe, I point to my own experience. I started making this at 7:15AM, and it was done about 3PM.
A few other data points. I advise using a kitchen scale to measure the ingredients here. It’s very hard to reliably use a cup to measure sticky, goopy sourdough starter. The original recipe at King Arthur Flour had the instant yeast listed as optional, but for me, it wasn’t optional. I appreciate the extra oomph in the rise.
Find the original recipe here. I rewrote it quite a bit for clarification.
Also, a reminder that my book featuring a sentient sourdough starter character is out in about TWO MONTHS! Find out more about A House Between Sea and Sky on its page.
Bready or Not: Sourdough Beer Bread
Equipment
- kitchen scale
- parchment paper
- baking stone or cast iron skillet
Ingredients
Soaker
- 1 1/4 cups old-fashioned rolled oats (112g)
- 1/2 cup boiling water (113g)
Dough
- 1 cup ripe sourdough starter (227g)
- 1 cup plus 2 tablespoons beer (255g beer) such as an amber ale or dark ale, room temperature
- 3 1/2 cups bread flour (420g)
- 1 teaspoon instant yeast
- 1 Tablespoon honey (21g) add more flavor using a variety such as basswood honey
- 2 teaspoons table salt (12g)
Instructions
- To make the soaker: Place oats in a heatproof bowl and pour the boiling water over them. Stir. Allow to cool while you start to prepare the dough.
- Using a kitchen scale and weighing everything is highly recommended.
- Combine the sourdough starter, beer, flour, and yeast in a large bowl. Mix well, by hand or with a mixer, the dough forms a cohesive mass.
- Cover and let it rest (autolyse) for about 30 minutes.
- Add the soaked oats, honey, and salt to the dough, fully incorporating. By hand or with a mixer, knead dough until it’s smooth, though it will still be tacky.
- Cover dough and let it rise for 1 hour.
- Turn the dough out onto a floured surface. Fold it over itself and stretch gently several times. Return the dough to the bowl and cover.
- Let dough rise for another hour.
- Repeat the stretching and folding process one more time. Return dough to the bowl to rise for a third, final hour.
- At the end of the rise, turn the dough out onto a lightly floured surface. Cover with greased plastic wrap and let it rest for 20 minutes.
- Place a clean cotton towel to cover the interior of a large bowl (or use a brotform). Add a heavy dusting of flour.
- Shape the dough into a tighter round by tucking dough underneath to tighten the top. Place it seam-side up in the bowl.
- Cover and let proof for 2 1/2 to 3 hours in a warm place; if your house is cool, it may need 4 hours. An oven with a proofing mode can also be used. When the dough is ready, it will look puffy and will jiggle when gently shaken.
- When the rise time is nearing end, begin preheating oven at 450 degrees with a baking stone or cast iron pan inside (obviously, if the proof mode was being used, remove the bread to continue rising in a warm spot elsewhere). To use steam during the baking process, to create a crunchy crust, place another empty pan (such as a cast iron skillet or a cake pan) beneath the baking vessel.
- Gently tip the risen loaf onto a piece of parchment. Slash the loaf several times with a sharp knife or lame–this creates vents for steam inside so the bread doesn’t grossly split–then use the parchment as a sling to CAREFULLY place the loaf on the very hot stoneware or cast iron.
- While wearing thick oven mitts, pour 1 cup water into the empty pan on the lower rack, with the bread in the pan on the level above. Close oven and keep it closed as the bread bakes.
- Bake bread for 15 minutes at 450, then reduce temperature to 400 F. Bake for another 25 to 30 minutes, until the loaf is deeply browned and sounds hollow when tapped. Remove loaf from the oven and carefully transition to a cooling rack. Cool at least 30 minutes before slicing.
- Store leftover bread in a paper bag or loosely covered by plastic wrap for up to a few days. To preserve it longer, freeze and place in a freezer bags. Slicing the bread before freezing makes it easy to pull out portions to quickly defrost for later meals.


