


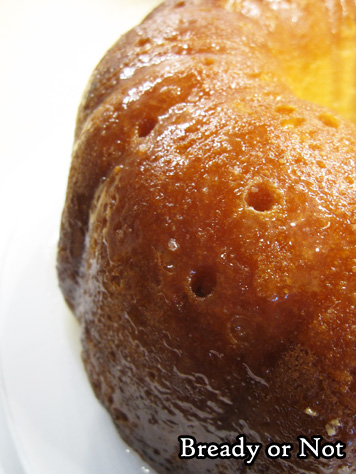
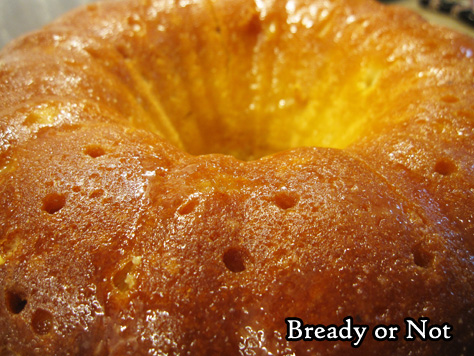
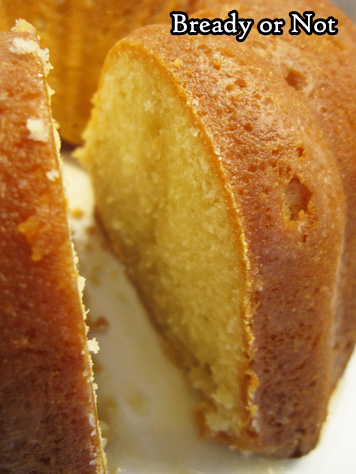
Bready or Not: Bourbon-Glazed Pound Cake (Tube/Bundt Cake)
Bourbon. Glazed. Pound. Cake. This thing is easy to make and tastes like a boozy version of a cruller.
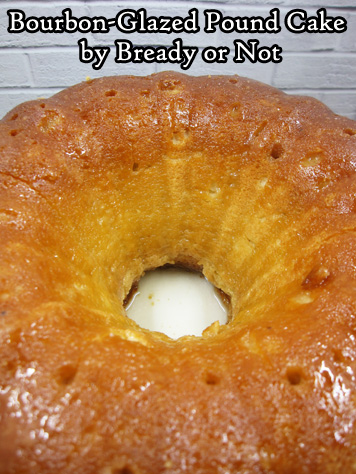
Yes, a cruller. Those yummy braided-style glazed donuts. Slathered in bourbon.
Do I have your attention now?
I based this recipe on one in Bake From Scratch Magazine (Holiday 2016) but I altered it a good bit, especially in regards to the glaze.
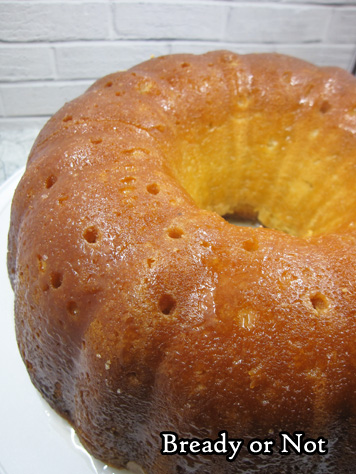
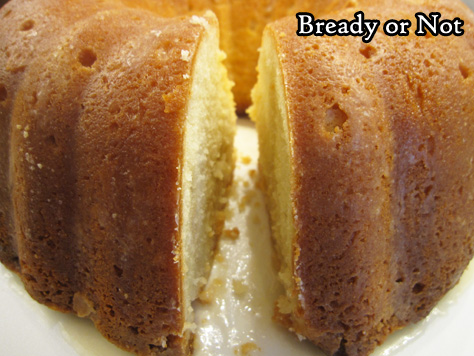
When I use a thin, sugary glaze on a bundt cake, I like to use a method I learned from the Great British Bake Off. I use the pan to help me make sure the glaze soaks into the entire cake.
I’ve had too many cakes where the bottom middle of the cake ends up devoid of glaze. Not so with this technique!
Yes, you can taste the bourbon in the end result. No, I have no substitutions to offer. I don’t know what this recipe would be without that particular reinforcement.

Bready or Not: Bourbon-Glazed Pound Cake (Tube/Bundt Cake)
Ingredients
Cake:
- 2 cups unsalted butter 4 sticks, softened
- 2 3/4 cup white sugar
- 6 large eggs room temperature
- 3 3/4 cups all-purpose flour
- 1/4 teaspoon ground nutmeg
- 1/8 teaspoon kosher salt
- 1/2 cup milk or half & half
- 1 lemon zested
- 1 teaspoon vanilla extract
Bourbon Glaze:
- 1 cup white sugar
- 1/2 cup bourbon
- 7 Tablespoons unsalted butter
Instructions
The Cake:
- Preheat oven at 325-degrees. Grease and flour a 10-inch-or-larger tube pan or bundt pan.
- In a large bowl, beat butter until creamy, about 2 minutes. Add sugar, and beat until fluffy and white, about 7 minutes. Add eggs, one at a time, beating well after each addition.
- In a separate bowl, sift together flour, nutmeg, and salt. Gradually add it to the butter mixture, alternating with the milk. Follow up with the zest and vanilla. Pour into the ready pan.
- Bake until it passes the toothpick test, about 1 hour to 1 hour 15 minutes. Let cool in pan for 15 minutes, then upend onto wire rack. Set aside the pan--don't wash it! Let the cake completely cool for a few hours.
The Glaze:
- Combine the sugar, bourbon, and butter in a small saucepan. Constantly whisk at a low heat until the butter melts and sugar dissolves. Take off heat. It will look like a lot of liquid, but the cake will soak it up.
- Place the cake back in the pan. Poke holes all over the base with a chopstick or skewer. Spoon about half the glaze over holes and sides of cake. Let sit a minute. Upend cake onto a serving platter or plate. Poke more holes all over top. Spoon rest of glaze into holes and over sides. Use a basting brush to mop up drippings and make sure cake is fully glazed.
- Store under a cake dome at room temperature or in fridge. Can also be cut into slices and individually frozen. Eat cold, at room temperature, or warmed in microwave.
- OM NOM NOM!
Chicken Soup for the Soul: The Power of Yes! out today & includes my story!

A new Chicken Soup for the Soul book is out today. The Power of Yes! includes my story “Wrestling with Imposter Syndrome,” and though it doesn’t name names, is about the wonderful but challenging time I had attending Cascade Writers Workshop in 2012 right as my agent was about to send The Clockwork Dagger on submission to editors. If you’re struggling right now (gosh, who isn’t?), maybe my story and the others in this anthology will provide a positive boost to help you along.
The book is available at Amazon, Barnes & Noble, and most everywhere else.
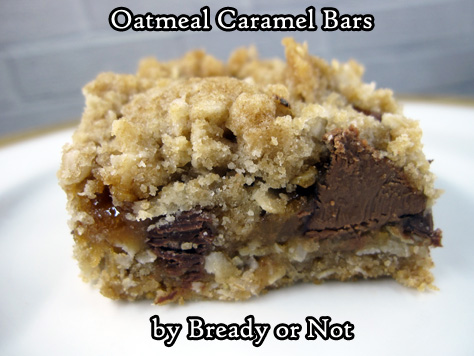
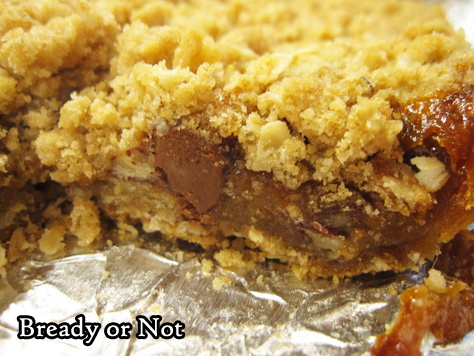
Read MoreBready or Not: Oatmeal Caramel Bars
I’d like to thank my past self for setting me up to re-discover this Oatmeal Caramel Bars recipe.
When I was home last Thanksgiving, my mom gave me a stack of her old recipes and food magazines to go through. A lot of the material dated to the 1970s and ’80s and went straight in the recycle pile.
Mixed in with everything else, though, I found some little food magazines I had bought back in 1999 as I looked toward getting married. One of them highlighted favorite recipes from the Pillsbury Bake-Off.
This recipe, originally titled Oatmeal Carmelitas, dated from the 1960s. I knew I had to make it.
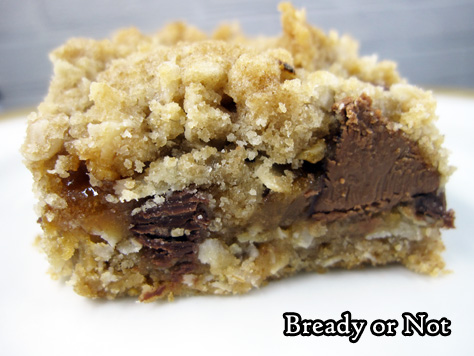
The recipe essentially makes a big, fat candy bar. Oatmeal forms the crust, while the middle consists of chocolate chips and gooey caramel.
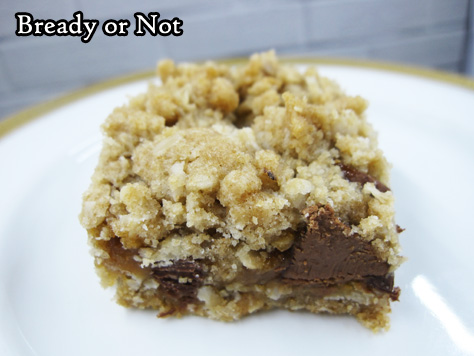
Yeah. This isn’t a health recipe, but wow, is it good. This was worth being published again in 1999–and again now, with some new tweaks.

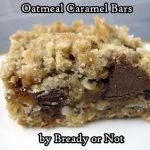
Bready or Not: Oatmeal Caramel Bars
Ingredients
Crust:
- 2 cups all-purpose flour
- 2 cups quick oats
- 1 1/2 cups brown sugar packed
- 1 teaspoon baking soda
- 1/2 teaspoon salt
- 1 1/4 cups unsalted butter 2 1/2 sticks, room temperature
Filling:
- 14 ounce caramel jar
- 4 Tablespoons all-purpose flour
- 1 cup semi-sweet chocolate chips
- 1/2 cup pecans chopped
Instructions
- Preheat oven at 350-degrees. Line a 13x9 pan with aluminum foil and apply nonstick spray.
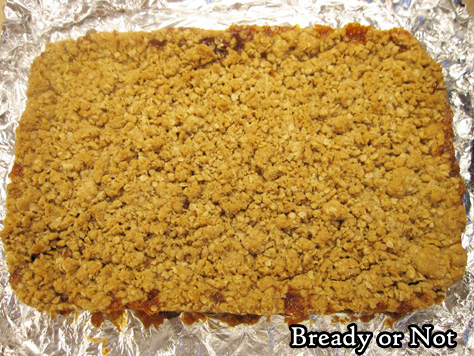
- In a large bowl, combine all crust ingredients until crumbly. Reserve half, about 3 cups, for the topping, and press the rest into the bottom of the pan. Bake for 10 minutes.
- Meanwhile, in a medium bowl, stir together the caramel and 4 Tablespoons of flour.
- When the crust is done baking, sprinkle chocolate chips and pecans over the top, then drizzle evenly with the caramel mixture. Add the reserved crumb mixture on top.
- Return to the oven for about 20 minutes, or until golden brown. Cool for an hour or so, then set in fridge to completely chill for several hours or overnight. To cut, use the foil to lift contents to a cutting board. Slice into bars.
- Store in sealed container in fridge with layers between pieces of parchment or wax paper. Bars will stay more cohesive if chilled; they are gooier at room temperature.
- OM NOM NOM!
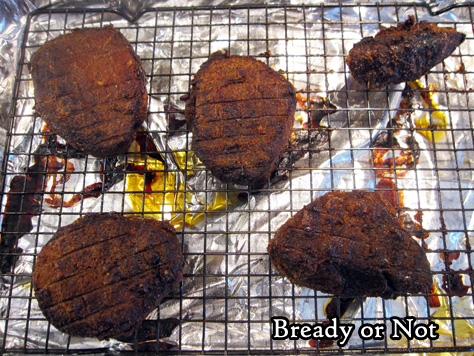
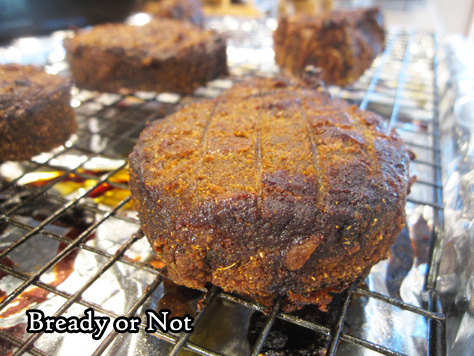
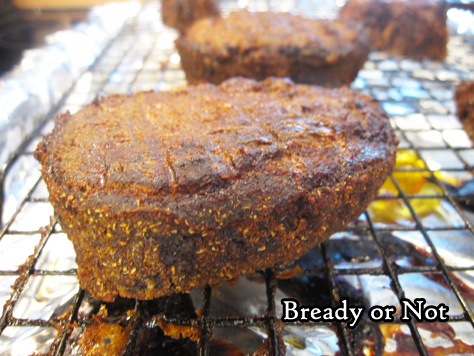
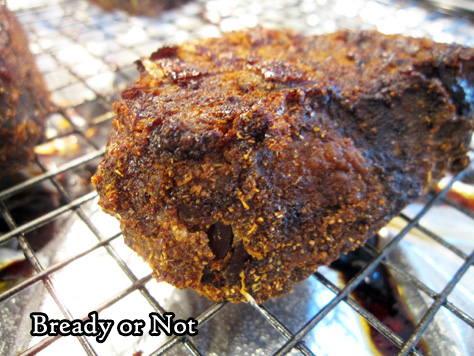
Bready or Not: Homemade Beef Jerky
Beef jerky is expensive to buy. If you can catch a good sale on an eye of round roast, this recipe makes cheap and delicious Homemade Beef Jerky.
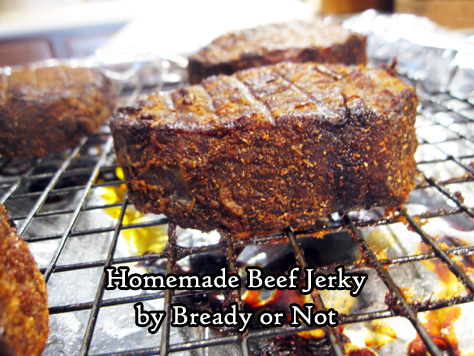
It’s really amazing how easy this recipe is. Cut up roast into chunks. Cover pieces in spices. Marinate for a day in the fridge. Bake for 6 to 7 hours. Done.
I’ve made this recipe a couple times now, and honestly, the weirdest thing is keeping the meat at room temperature after baking.
I mean, I’m used to doing that with store-bought jerky, but it feels weird to do that with home-cooked meat. However, I haven’t sickened or killed myself or various loved one with my homemade jerky, so I take that as a positive.
Most of the eye of round roasts I find on sale tend to be over 2 1/2 pounds. I just use more generous measures of spices for the rub. This isn’t a recipe where everything needs to be exact. Just make sure there’s enough rub to cover everything.
Also, the amount of cayenne looks like a lot, but the heat in this recipe is pleasant, not set-your-mouth-on-fire level. I can testify that myself and others who can’t stand spicy-hot have eaten this jerky without any issues.
And if you want more heat, by all means. Dump in more cayenne!
Modified from Michael Symon’s Beef Jerky recipe in Food Network Magazine, December 2017.

Bready or Not: Homemade Beef Jerky
Ingredients
- 2 - 2 1/2 pounds eye of round roast trimmed of fat
- 1 1/2 Tablespoons kosher salt
- 2 teaspoons white sugar
- 2 teaspoons garlic powder
- 1 teaspoon onion powder
- 1 teaspoon cayenne pepper
- 1 teaspoon chipotle chili powder
- 1/2 teaspoon coriander
- 1/2 teaspoon smoked paprika
Instructions
- Slice the beef against the grain into chunks roughly 1 inch by 3 inches long. If the pieces look large, that's fine; they'll shrink a lot as they cook.
- In a mixing bowl, combine all of the spices. Liberally cover the beef pieces, using the entire mix. Place beef in a gallon bag, and keep sealed in the fridge for 24 hours or so.
- Preheat oven at 250-degrees. Line a baking sheet with foil and place a metal rack on top; apply nonstick spray. Set the meat on the rack so that no pieces are touching.
- Bake for 6 to 7 hours, until quite dry. If you want pieces chewier, remove closer to 6 hour point.
- Let cool completely to finish drying. Store in sealed container at room temperature for up to several months.
- OM NOM NOM!
Sunday Quote has a beef jerky recipe up in a few days
Read More“Stories may well be lies, but they are good lies that say true things, and which can sometimes pay the rent.”
~ Neil Gaiman
