


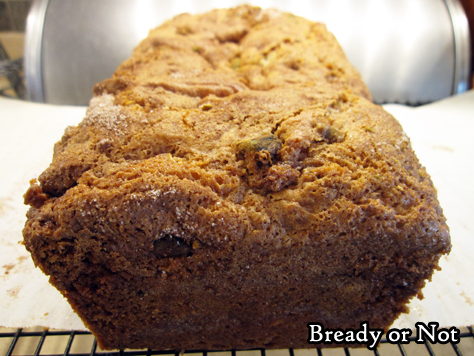
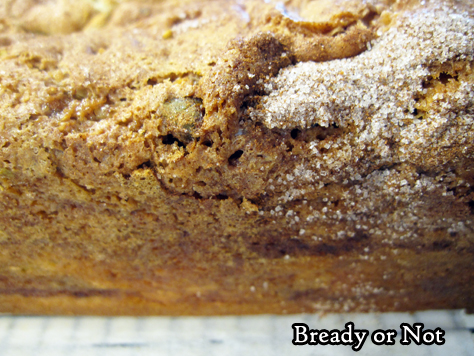
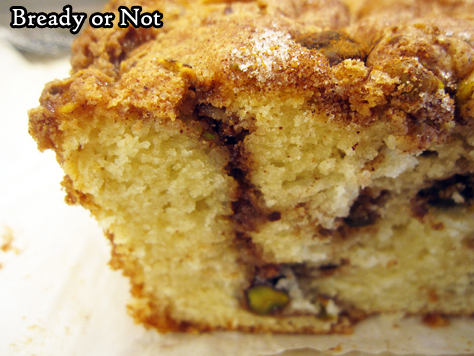
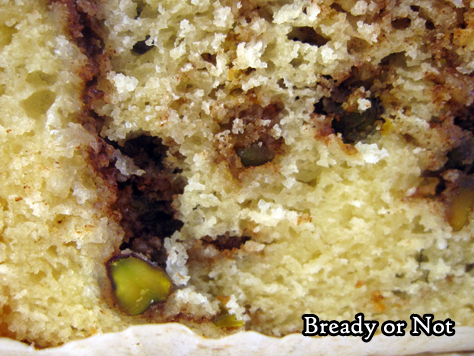
Bready or Not Original: Snickerdoodle Swirl Loaf
This Snickerdoodle Loaf Cake is proof, yet again, that snickerdoodles are awesome in any form.

I made this based on a recipe in Bake from Scratch and had to modify it significantly to make it more snickerdoodly (that is totally a word) and work overall.
The foremost issue on my first bake is that, despite the toothpick test, my loaf wasn’t fully baked. It ended up collapsing as it cooled. I had to gut the middle of the cake, but the majority of it was edible.
Not only was it edible, but my husband loved it. Therefore, he was happy when I baked it again, with more modifications–including a longer bake time.
This cake is a great keeper, too. It tasted great for a full five days. It might last even longer than that.
I guess I’d need to bake it again to test that theory. Oh darn.
Bready or Not Original: Snickerdoodle Swirl Loaf
Equipment
- 9x5 loaf pan
- parchment paper
Ingredients
- 2 cups all-purpose flour
- 3 teaspoons baking powder
- 1/2 teaspoon cream of tartar
- 1 1/2 cups white sugar divided
- 1 1/2 teaspoons kosher salt
- 1 cup whole milk or half & half
- 1 teaspoon vanilla extract
- 1/4 cup vegetable oil
- 1 large egg
- 1 Tablespoon ground cinnamon
- 1/2 cup pecans or pistachios, divided, optional
Instructions
- Preheat oven at 350-degrees. Cut parchment paper to fit long-ways in a loaf pan, sticking up on either side as a sling. Apply nonstick spray into pan, place paper, then spray again. Set aside.
- In a big bowl, stir together flour, baking powder, cream of tartar, 1 cup white sugar, and salt. Gradually mix in the milk, vanilla extract, oil, and egg, until just combined.
- In a small bowl, combine the remaining 1/2 cup sugar with the cinnamon.
- Spread about half the batter in the loaf pan. Sprinkle half the cinnamon-sugar on top, followed by about half the nuts (if using). Add rest of the batter. Use a knife to swirl batter, bringing the blade up and down a bit, to marble the layers together. Sprinkle rest of the cinnamon-sugar across the top followed by the nuts (if using). Swirl the batter again.
- Bake for 55 to 65 minutes, until a toothpick stuck deep in the middle comes out clean. About halfway through the bake, add foil over the top to prevent overbrowning.
- Let cool in pan for 10 minutes, then use parchment sling to lift loaf onto a rack to fully cool.
- Well-wrapped loaf keeps at room temperature as long as 5 days. Slices can also be frozen for later enjoyment.
OM NOM NOM!
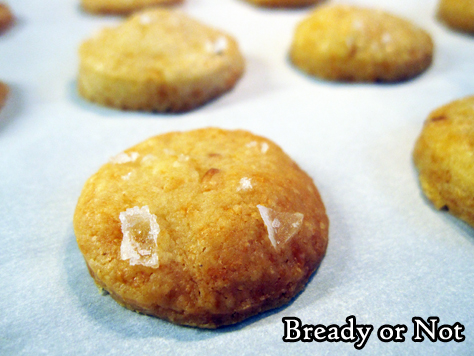
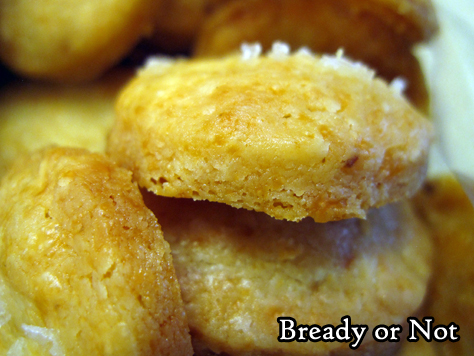
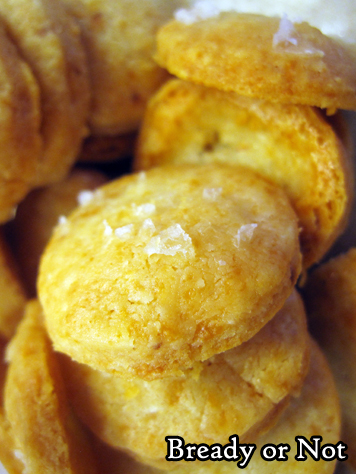
Bready or Not: Homemade Cheese Crackers
Cheese is divine to eat straight-up, but it can also be baked into delicious things such as these Homemade Cheese Crackers.

These crackers can be as fancy as you want. Use an import cheese like Gruyere or Comte, or stick with a basic American cheddar.
Whatever cheese you choose, be sure you have a food processor to, well, process the dough. The cheese needs to be at one with the flour and spices.
The dough can be frozen, but do be aware that the finished crackers have a definite shelf life.
After about 3 days, the crackers become softer and crumblier. They still taste okay, but the structural integrity won’t be very good if you want to carry them in a baggy.

But then, these crackers are so good, you might have them inhaled so quickly that this is not a problem at all.
Modified from Around My French Table by Dorie Greenspan.
Bready or Not: Homemade Cheese Crackers
Equipment
- food processor
- baking sheet
- parchment paper
- 1-inch cookie cutter
Ingredients
- 1/2 cup unsalted butter 1 stick, cut into small pieces
- 4 ounces Comte grated, or Gruyere or Emmenthal or good old cheddar
- 1/2 teaspoon salt
- 1/8 teaspoon white pepper
- pinch cayenne pepper optional
- 1 cup plus 2 Tablespoons all-purpose flour
- Maldon sea salt or other flaky gourmet salt, optional
Instructions
- Place the butter, cheese, salt, white pepper, and cayenne (if using) in the food processor. Pulse until the butter is broken into uneven pieces and the mixture begins to form small curds. Add the flour and mix until it looks like larger curds. If the dough is stubborn, pulse a bit more to distribute ingredients.
- Dump dough onto a flat surface and gently knead with hands to make cohesive. Divvy dough in half, forming each piece into a flat disk, and wrap in plastic. Tuck into fridge to chill for at least an hour or a couple days; it can also be frozen at this stage.
- When time to bake, preheat oven at 350-degrees. Line a baking sheet with parchment or nonstick mats.
- Pull out a dough disk. Use two sheets of parchment to roll dough to about 1/4 inch thickness; if the dough is too hard to roll, let it rest at room temperature for a few minutes before trying again. Use a small cookie cutter (about 1-inch) to cut dough into crackers. Place them spaced out on parchment on pan. Gather the scraps to form more crackers, using a touch of water, if needed, to make it cohesive again.
- If desired, sprinkle some Maldon sea salt atop crackers; only a few flakes are needed to add extra flavor.
- Bake for about 10 minutes. Rotate pan. Bake for another 4 to 7 minutes, until crackers are lightly golden and firm to the touch. Let cool on pan or on a rack.
- Crackers are great warm or at room temperature. They are best eaten within 3 days. After that, they soften and become more crumbly, but they are still tasty.
OM NOM NOM!
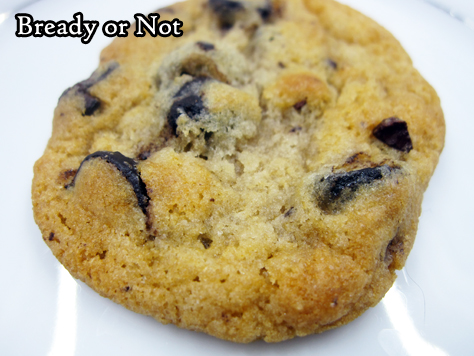
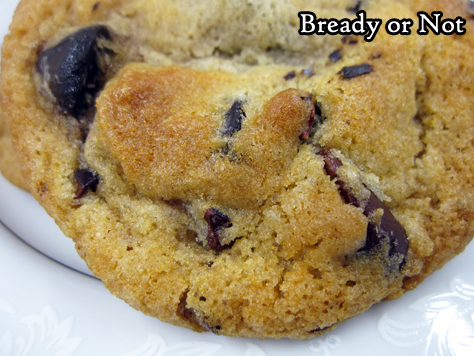
Bready or Not Original: Chewy Coffee-Cocoa Nib Cookies
Espresso-flavored chocolate chips are a new fad in American grocery stores, and I use them in this original recipe for Chewy Coffee-Cocoa Nib Cookies!
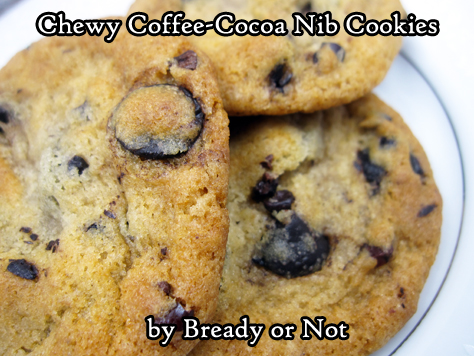
I’ve tried two kinds of espresso chocolate chips. My favorite of the two was Tollhouse, which had a nice, clean coffee flavor that stayed nice and strong in the baked cookies, too.
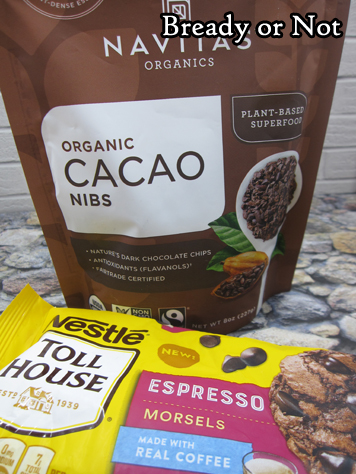
I also mixed in cocoa nibs. Nibs are VERY strong in flavor, so you don’t need much to add a boost of flavor and crunch.
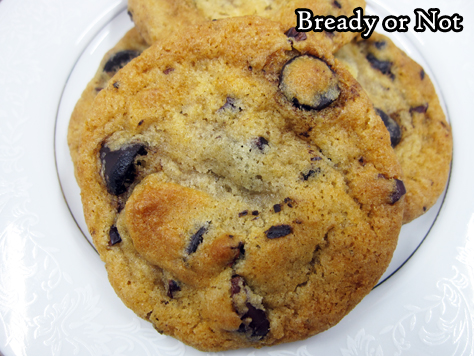
The flavor in these cookies is up-front when they are fresh from the oven, but after a day, I found the flavors deepened a good deal.
These make for a perfect snack paired with coffee or tea, and remember, they contain some caffeine! Perhaps eat them for breakfast rather than as a midnight snack.
Bready or Not Original: Chewy Coffee-Cocoa Nib Cookies
Ingredients
- 3/4 cup unsalted butter 1 1/2 sticks, softened
- 1/2 cup light brown sugar packed
- 1/2 cup white sugar
- 2 Tablespoons honey
- 1 large egg room temperature
- 1 Tablespoon vanilla extract
- 1 cup bread flour
- 1 cup all-purpose flour
- 2 teaspoons cornstarch
- 1 teaspoon baking soda
- 1/2 teaspoon salt
- 1 cup espresso-flavored chocolate chips Tollhouse recommended
- 1/3 cup cocoa nibs
Instructions
- In a large bowl, beat the butter until smooth. Add the sugar and honey and beat until creamy and fluffy, about 3 minutes. Scrape down the sides of the bowl and then mix in the egg and vanilla extract.
- In a separate bowl, combine the dry ingredients: bread flour, all-purpose flour, cornstarch, baking soda, and salt. Sift together.
- Slowly stir together the wet ingredients and flour mix until just combined. Sprinkle in the chocolate chips and nibs. Wrap the dough in plastic wrap and stash in the fridge for several hours or days; dough can also be frozen at this stage.
- When ready to bake, preheat the oven at 350-degrees. Use greased stoneware, parchment paper, or silpat mats. The cookie dough, even straight from the fridge, has a soft Play-Doh-like consistency, and will spread when it bakes; keep this in mind when spacing cookie dough.
- Teaspoon-sized cookies need to bake 9 to 12 minutes; Tablespoon-sized take 11 to 13 minutes. Let set on cookie sheets for 10 to 15 minutes before moving to a rack to cool completely.
- Store cookies will keep in a sealed container, between waxed paper or parchment layers. Coffee and chocolate flavors will likely deepen after a day,.
OM NOM NOM!
West Valley View piece on my newest Chicken Soup for the Soul story
My local paper the West Valley View did a story about my nonfiction tale in the new release Chicken Soup for the Soul: The Magic of Cats. Read that here!

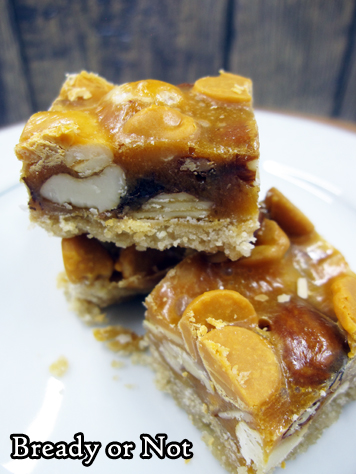
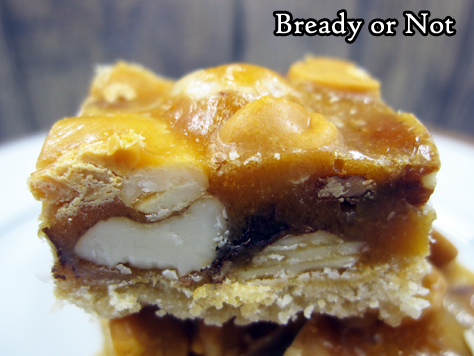
Bready or Not Original: Mixed Nut Bars
This has been a nutty year. Time to make it nutty in a delicious way with these Mixed Nut Bars.
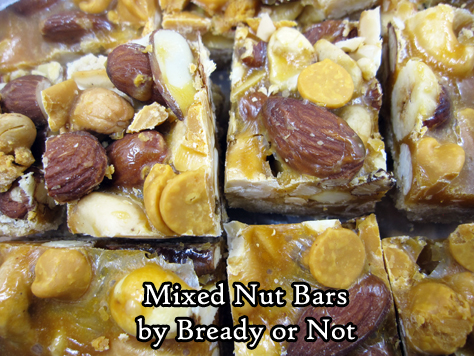
The amount of nuts here is the equivalent of the can size found in many American stores, but I buy my nuts in bulk. (I’m cheap like that.)
Use whatever combination of nuts you like. I would recommend having at least two kinds mixed in, to make it fun. Really, throw in what you like.
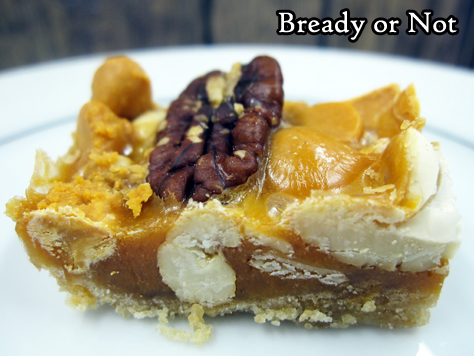
If you’ve followed Bready or Not for a while, you know I love caramel chips. They are awesome in this recipe! They make these bars sweet without it being overkill.
Make this to share with numerous folks. You essentially end up with a 13×9 pan of little candy bars. I imagine that they will keep well for days or even a week, but I can’t testify as to how long. When my husband took these to his work (in those halcyon days when that was allowed), they were gone in hours.
Bready or Not Original: Mixed Nut Bars
Equipment
- 13x9 pan
Ingredients
Dough
- 1 1/2 cups all-purpose flour
- 3/4 cup brown sugar packed
- 1/4 teaspoon salt
- 1/2 cup unsalted butter 1 stick
Nutty layer
- 11 1/2 ounces mixed nuts
- 1 cup caramel chips plus extra 1/2 cup for top, optional
- 2 Tablespoons unsalted butter
- 1/2 cup light corn syrup
- 1/2 teaspoon vanilla extract
Instructions
- Preheat oven at 350-degrees. Line a 13x9 pan with aluminum foil and apply nonstick spray.
- In a small bowl, stir together flour, sugar, and salt. Cut in the cube of butter until it resembles coarse crumbs. Dump into prepared pan and compress into an even layer; a strip of waxed paper and a heavy glass make this easier.
- Bake base layer for 10 to 12 minutes, until it looks set. Sprinkle nuts over the baked dough.
- In the microwave, melt 1 cup caramel chips with the 2 Tablespoons butter by cooking for 20 second increments and stirring well between each pass, until smooth. Stir in corn syrup and vanilla extract. Pour over the nuts to cover as much as possible.
- Bake for 12 minutes. If adding extra caramel chips, do so now, covering any thinner areas atop crust. Bake another 5 minutes.
- Cool completely at room temperature. Use foil sling to lift contents onto a large cutting board. Slice into bars.
- Store at room temperature in sealed containers.
