


These Portuguese Sweet Rolls come together fast thanks to a bread machine. The resulting bread is sweet, flaky, and perfect to go with any meal–though as a born Central Californian, I have to recommend serving alongside tri-tip!

I grew up surrounded by a vibrant Portuguese community. That meant a lot of awesome food, like linguica on Me-N-Eds pizza, and rounds of sweet bread on the counter at Boston Pizza. We didn’t have a lot of money, so when we could grab that bread loaf, it was a real treat!
As with most any bread, these rolls are great to freeze and eat later. The fresher they are when you freeze them, the fresher they’ll still taste when you warm them up later!

Bready or Not Original: Portuguese Sweet Bread Rolls in the Bread Machine
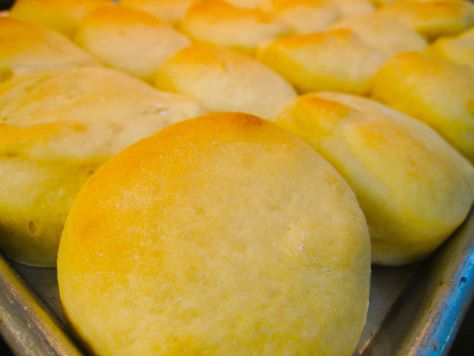
The convenient sweet rolls are the perfect accompaniment for many meals!
Servings: 23 rolls
Equipment
- bread machine
- 2 1/2-inch cutter
- rimmed baking sheet
- plastic wrap
Ingredients
- 1 cup half & half
- 1/2 cup water
- 1/3 cup melted butter 80 ml
- 1/2 cup white sugar
- 2 large eggs
- 1 1/2 teaspoons sea salt
- 4 cups white bread flour plus more
- 2 teaspoons instant dry yeast or bread machine yeast
Instructions
- Place the half & half and water in a liquid measuring cup and gently warm in a microwave-safe cup in microwave to reach 100-110 degrees.
- Follow bread machine directions for loading ingredients into the bucket; for most, that means liquids first. Stir together the half & half, water, butter, and sugar. That should lower the temperature enough to make it safe to add the eggs (you don’t want them scrambled!); stir those in to break the yolks. Add the salt, flour, and yeast. Start the machine on the DOUGH cycle.
- Check on it once it starts mixing. If the mixture looks runny, add spoonfuls of flour until it comes together; if it’s too thick, add a touch of warm water. Let the cycle finish.
- Grease a rimmed baking sheet with nonstick spray or butter.
- Lightly flour a flat surface. Pat out the dough to be about 1/2-inch thick. Use cutter to slice dough into rounds; place rounds spaced out just a touch on the greased pan. Press dough scraps together as much as possible, and bring together into more rounds. Loosely cover baking sheet with plastic wrap and set in a warm place to rise for about 45 minutes.
- Near the end of the second rise, as the rolls begin to look puffy, preheat oven at 350-degrees. Discard plastic wrap.
- Bake rolls for 17 to 20 minutes, until they are golden across the top. Let cool a few minutes before pulling apart to enjoy.
- Rolls may be eaten fresh, or will keep in a sealed bag at room temperature for a day or two. They can also be frozen right after initially cooling, and thawed later for later enjoyment. They can be eaten at room temperature but are even better warmed up.
