Bready or Not Original: Raspberry Brownies
So, that Roasted Cherry Brownies recipe I posted back in March? This Raspberry Brownies recipe is based on that. It uses different berries (obviously) and has no roasting involved, and if you are like me and have/had a solid chunk of raspberries in your freezer, this will give you a delicious way to use them up.
Raspberries and chocolate are such a good combo. I feel like that really doesn’t get as much attention as pairings with strawberries or cherries. The fruit amount is pretty high here, and that also means a long bake time because of the moisture involved.
On that note, if you’re using fresh raspberries, the bake time will likely be less, so please, adapt the recipe to keep your brownies and yourself safe!
Bready or Not Original: Raspberry Brownies
Equipment
- 9×13 dish
- aluminum foil
- uneven spatula
Ingredients
- 2 cups frozen raspberries
- 3/4 cup unsalted butter (1 1/2 sticks)
- 8 ounces dark chocolate
- 1 1/2 cups all-purpose flour
- 1/2 cup cocoa powder sifted
- 1/2 teaspoon salt
- 2 cups white sugar
- 6 large eggs room temperature
- 1 1/2 cups semisweet chocolate chips or milk chocolate chips or a mix
Instructions
- Preheat oven at 325. Break apart the frozen raspberries into pieces of various size using a tool such as kitchen shears. Place the berries back inside the freezer for now.
- In a large microwave-safe bowl or in a pot on the stovetop, melt together the butter and dark chocolate until smooth. Set aside to cool slightly.
- Line a 9×13 pan with foil and apply nonstick spray or butter. In a small bowl, combine the flour, cocoa powder, and salt.
- Return to the large container with the melted butter and chocolate. Stir in the white sugar until no pale streaks remain. Beat in the eggs one at a time. Gradually fold in the dry ingredients until no white is visible. Fold in 1 cup of chocolate chips and most of frozen raspberries.
- Pour batter into the prepared dish. Use an uneven spatula to spread it into an even layer. Sprinkle the remaining 1/2 cup chocolate and remaining raspberries over the top.
- Bake for 70 to 80 minutes, until the middle passes the toothpick test; the raspberries release a lot of moisture, hence a long baking time. Set on a rack to cool for at least an hour, speeding process in fridge if desired. Use foil to lift contents onto a cutting board to slice up. Store in a sealed container at room temperature. Keeps for at least 3 days.
OM NOM NOM!
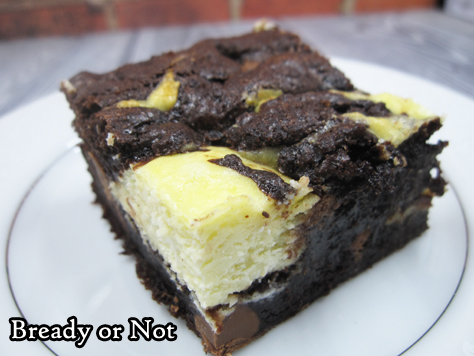
Bready or Not EXTRA CHEESY: Swirled Goat Cheese Brownies
Welcome to a special month of Bready or Not. My cheese-centric cozy mystery Cheddar Luck Next Time will be released on April 8–next Tuesday–so we’re celebrating with a month of cheesy recipes from the Bready or Not archives. These recipes haven’t been featured for years and are well worth a revisit.
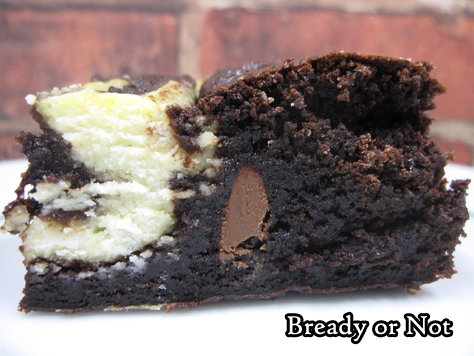
We’re starting with a luscious and indulgent recipe for Swirled Goat Cheese Brownies.
This recipe makes a small pan of brownies, 8×8 or 9×9, but it’s heavy on the cheese. A plain goat cheese log from Costco or Sam’s Club is especially cost efficient here, or get a couple of small logs from Aldi, if you’re so fortunate as to have one nearby. There’s a good dose of chocolate flavor here as well through both cocoa powder and chocolate chips.
These brownies are thick and rich, perfect alongside some tea or coffee–and a good book.
Please grab a copy of Cheddar Luck Next Time, which features an autistic (like me!) lead character with a passion for cheese (like me!).
Amazon: paperback | ebook (affiliate links)
Barnes & Noble: paperback & ebook
Bookshop: paperback
Bready or Not Original: Swirled Goat Cheese Brownies
Ingredients
Goat Cheese Swirl
- 10 1/2 ounces goat cheese room temperature
- 2 Tablespoons confectioners’ sugar
- 2 Tablespoons all-purpose flour
- 2 large eggs room temperature
Brownie Base
- 2/3 cup Dutch process cocoa powder sifted
- 1 cup white sugar
- 1/2 cup brown sugar packed
- 1/2 cup confectioners’ sugar
- 3/4 teaspoon sea salt
- 1 cup all-purpose flour
- 1 cup semisweet chocolate chips or milk chocolate chips
- 3 large eggs room temperature
- 1/2 cup canola oil
- 1 teaspoon vanilla extract
Instructions
- Preheat oven to 350-degrees. Line an 8×8 or 9×9-inch square pan with aluminum foil and apply nonstick spray or butter.
- Mix goat cheese swirl ingredients. Set aside.
- Make the brownie base by whisking together the cocoa, sugars, salt, flour, and chips in a big mixing bowl. Add the eggs, oil, and water and vanilla extract until everything is just combined.
- Spoon half the brownie batter into the prepared pan. Dollop the cheese mixture atop it, then add the remaining brownie batter into the open spots. Use a knife to swirl the two layers together while still keeping them a bit distinct.
- Bake the brownies for 35 to 45 minutes, depending on the pan size. Use the toothpick test to check for doneness. The center should be set with the consistency still moist and fudgy. Cool to room temperature, then place in fridge to chill an hour or two prior to cutting.
- Use foil to lift brownies onto cutting board for easy slicing. Store in a sealed container in fridge, with parchment or waxed paper between the layers.
- OM NOM NOM!
Bready or Not Original: Cadbury Egg Brownies 13×9 Size (Redux)
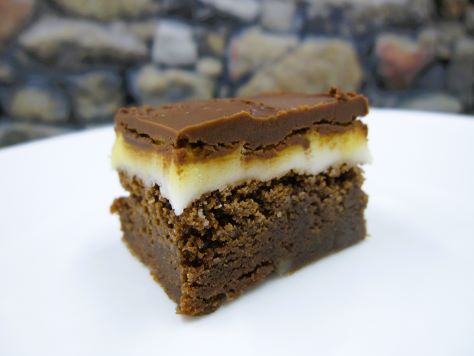
Eight years have passed since I shared one of my signature recipes: it is time to revisit Cadbury Egg Brownies.
These homemade brownies taste like the Cadbury Eggs I was obsessed with as a kid. If you’re not familiar with this candy, it features a hollow chocolate egg the size of a real large chicken egg. Inside is a gooey super-sweet filling that is white and yellow to simulate the white and yolk of a real egg.
These special brownies are not hard to make; if you can make brownies from scratch, you can do this recipe. There is some extra planning involved, though, as the layers must be worked on in spurts, with chilling time in between.
Truly, these Cadbury Egg Brownies are a showstopper recipe. They look cool. They taste amazing. Keep in mind that this recipe makes a lot, so do make sure you’re sharing these with a crowd.
Bready or Not: Cadbury Egg Brownies
Equipment
- 9×13 pan
- aluminum foil or parchment paper
- uneven spatula
- microwave safe bowl or double boiler
Ingredients
For Brownies:
- 1 1/3 cup all-purpose flour
- 1/4 cup cocoa powder sifted
- 1 teaspoon salt
- 1 teaspoon espresso powder optional
- 12 ounces milk chocolate chopped
- 1 cup unsalted butter (2 sticks) cut into cubes
- 1/2 cup white sugar
- 1 cup light brown sugar packed
- 4 large eggs room temperature, lightly beaten
- 2 teaspoons vanilla extract
For Cream Filling:
- 1/2 cup light corn syrup
- 4 tablespoons unsalted butter (half stick) room temperature
- 1 teaspoon vanilla extract
- 1/4 teaspoon salt
- 3 cups confectioners' sugar sifted
- yellow food coloring gel
For Glaze:
- 8 ounces milk chocolate chopped
- 4 Tablespoons unsalted butter half stick, cut into cubes
Instructions
Brownie stage
- Preheat oven to 350-degrees. Line the bottom and sides of a 9×13-inch pan with aluminum foil or parchment paper, making sure to overlap the sides to create handles. Cover with nonstick spray.
- Sift together flour, cocoa, and salt (and espresso powder, if using) in a small bowl and set aside.
- Melt chocolate and butter together in a double boiler or in slow increments in microwave. Stir until smooth. Whisk in sugars and stir until dissolved and mixture has cooled slightly, then add eggs and vanilla extract until just combined.
- Fold together the chocolate and flour mixes until just incorporated. Pour into prepared pan.
- Bake for 25 to 30 minutes or until toothpick inserted into the middle comes out clean. Transfer pan to a wire rack and allow to cool completely.
Cream filling stage
- Beat together corn syrup, butter, vanilla, and salt on medium-high speed until smooth. Add powdered sugar, a little bit at a time, mixing until creamy.
- Dump 3/4 of the cream mixture on top of cooled brownies and spread into an even layer. Add a drop of yellow food coloring gel to remaining cream mixture and stir until evenly colored. Drop dollops of yellow cream on top of white layer, and then swirl gently with a spatula. Refrigerate for at least 2 hours or until set.
Glaze stage
- Slowly melt the chocolate and butter together in a double boiler or microwave bowl. Stir until smooth. Pour over cream filling, carefully spreading into a thin, even layer.
- Chill in the fridge long enough for the chocolate to not quite harden, 15-20 minutes, OR let it chill for several hours and then let set at room temperature for about 15 minutes. The chocolate needs to be soft enough to cut through without cracking, but not soft enough to smear with each cut.
- Use the foil/paper to lift the entire block out of the pan and onto a cutting board. Using a large sharp knife, cut into 2-inch squares. Keep in sealed container in fridge; brownies will keep upward of a week.
OM NOM NOM!
Bready or Not Original: Roasted Cherry Brownies
These Roasted Cherry Brownies are thick, soft, and cakey, the strong chocolate flavor complemented by cherries in most every bite.
I looked to two older recipes of mine for inspiration as I came up with a new recipe: Fudgy Chocolate Chunk Brownies and a Roasted Cherry Brownies version I did on the original LiveJournal Bready or Not.
The result of this combo? Lush brownies that are the perfect melding of chocolate and cherry. This may become your new favorite brownie recipe.
Bready or Not Original: Roasted Cherry Brownies
Equipment
- rimmed cookie sheet
- cherry pitter
- 9×13 dish
- aluminum foil
- uneven spatula
Ingredients
Cherries
- 2 cups fresh red cherries
- 3 Tablespoons white sugar
Brownie Batter
- 3/4 cup unsalted butter (1 1/2 sticks)
- 8 ounces dark chocolate
- 1 1/2 cups all-purpose flour
- 1/2 cup cocoa powder sifted
- 1/2 teaspoon salt
- 2 cups white sugar
- 6 large eggs room temperature
- 1 1/2 cups semisweet chocolate chips or milk chocolate chips or a mix
Instructions
- Preheat oven at 400 degrees. Wash and pit cherries, then cut them in half. Place on rimmed cookie sheet. Sprinkle with sugar and stir. Roast for 10 minutes then remove from oven. Reduce oven temperature to 325.
- In a large microwave-safe bowl or in a pot on the stovetop, melt together the butter and dark chocolate until smooth. Set aside to cool slightly.
- Line a 9×13 pan with foil and apply nonstick spray or butter. In a small bowl, combine the flour, cocoa powder, and salt.
- Return to the large container with the melted butter and chocolate. Stir in the white sugar until no pale streaks remain. Beat in the eggs one at a time. Gradually fold in the dry ingredients until no white is visible. Fold in 1 cup of chocolate chips and most of the cherries.
- Pour batter into the prepared dish. Use an uneven spatula to spread it into an even layer. Sprinkle the remaining 1/2 cup chocolate and cherries over the top.
- Bake for 55 minutes to 1 hour, until the middle passes the toothpick test. Set on a rack to cool for at least an hour, speeding process in fridge if desired. Use foil to lift contents onto a cutting board to slice up. Store in a sealed container at room temperature. Keeps for at least 3 days.
OM NOM NOM!
Bready or Not Original: Red Velvet Brownies in Two Sizes
I really think the pictures do justice to how incredible these Red Velvet Brownies are. They are beautiful to the eyes and delicious to the tongue.
I’m offering up this recipe in two sizes, too: a version for a smaller pan (8×8 or 9×9) and another for a full 9×13 pan. Note that even the small pan makes a lot of brownies. These are rich enough that they feel indulgent if you have a square about the size of a fudge serving.
Another nice thing: these keep for at least a week in a sealed container. I suppose further testing is in order to see if they keep beyond that!
Bready or Not Original: Red Velvet Brownies (8×8 or 9×9 size)
Equipment
- 8×8 or 9×9 pan
- aluminum foil
- nonstick spray or extra butter
Ingredients
- 1 1/4 cup all-purpose flour
- 3 Tablespoons cocoa powder sifted
- 1 Tablespoon cornstarch
- 1/4 teaspoon salt
- 3/4 cup unsalted butter (1 1/2 sticks) melted and cooled slightly
- 1 1/4 cups white sugar
- 2 large eggs room temperature
- 1 teaspoon vanilla extract
- gel red food coloring
- 1 teaspoon white vinegar
- 1 cup white chocolate chips
Instructions
- Preheat oven to 350 degrees. Line the pan with foil going up the sides. Apply nonstick spray or butter.
- In a small bowl, stir together flour, cocoa, cornstarch, and salt.
- In a large mixing bowl, beat together the melted butter and sugar. Add the eggs. Drip in the red food coloring, mixing it in, adding enough to reach the desired color. Add vanilla extract and vinegar. Gradually work in the dry ingredients, scraping the bottom of the bowl a few times. Fold in the white chocolate chips.
- Dollop batter into the pan. Use an uneven spatula to level out the surface. Bake for 28 to 30 minutes, until the middle passes the toothpick test.
- Let cool completely, speeding process in the fridge if desired. Use the foil to lift it onto a cutting board to cut into small bars.
- Store in a sealed container at room temperature. They keep for at least a week.
OM NOM NOM!
Bready or Not Original: Red Velvet Brownies (9×13 size)
Equipment
- 9×13 pan
- aluminum foil
- nonstick spray or extra butter
Ingredients
- 2 1/2 cups all-purpose flour
- 6 Tablespoons cocoa powder sifted
- 2 Tablespoons cornstarch
- 1/2 teaspoon salt
- 1 1/2 cups unsalted butter (3 sticks) melted and cooled slightly
- 2 1/2 cups white sugar
- 4 large eggs room temperature
- 2 teaspoons vanilla extract
- gel red food coloring
- 2 teaspoons white vinegar
- 11 ounces white chocolate chips 1 bag
Instructions
- Preheat oven to 350 degrees. Line the pan with foil going up the sides. Apply nonstick spray or butter.
- In a small bowl, stir together flour, cocoa, cornstarch, and salt.
- In a large mixing bowl, beat together the melted butter and sugar. Add the eggs. Drip in the red food coloring, mixing it in, adding enough to reach the desired color. Add vanilla extract and vinegar. Gradually work in the dry ingredients, scraping the bottom of the bowl a few times. Fold in the white chocolate chips.
- Dollop batter into the pan. Use an uneven spatula to level out the surface. Bake for 30 to 33 minutes, until the middle passes the toothpick test.
- Let cool completely, speeding process in the fridge if desired. Use the foil to lift it onto a cutting board to cut into small bars.
- Store in a sealed container at room temperature. They keep for at least a week.
OM NOM NOM!
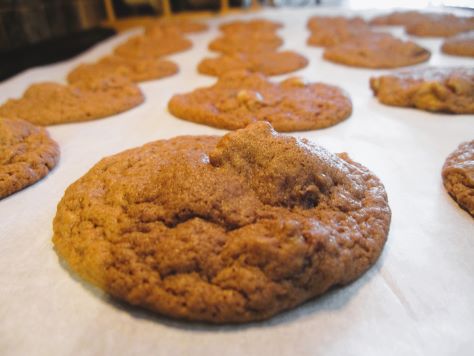
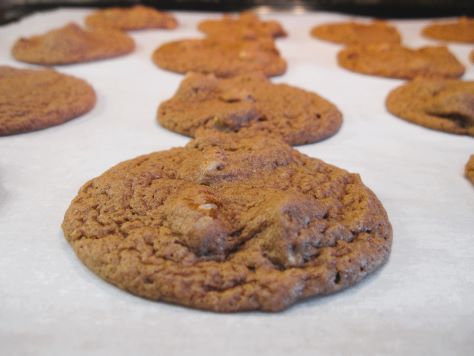
Bready or Not: Brownie Cookies
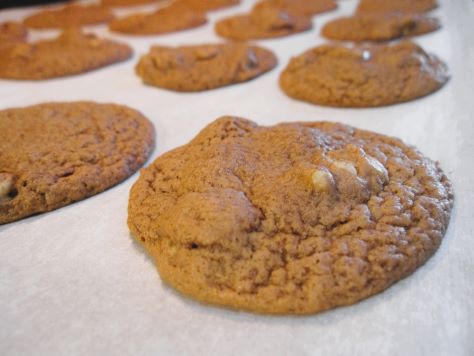
If ever you are experiencing a chocolate emergency (need chocolate NOW, don’t want to leave the house, don’t want to spend a long time making something), these Brownie Cookies will satisfy nicely.
These cookies mix up fast. They bake fast. They cool fast. They enter your stomach fast.
Plus, they are imbued with brownie goodness. The dough includes melted chocolate and chopped walnuts. Yes, you can replace the walnuts with a different nut–or leave out the nuts entirely, if you so choose. I really love the texture of a chewy cookie with a crunchy nut, though.
Actually, you could even replace the nuts with something like M&Ms. That’d make these easy to modify for holidays, too–green and red candies in December, the Valentine’s mix in February. Have fun with this recipe!
Bready or Not: Brownie Cookies
Equipment
- baking sheet
- parchment paper
- tablespoon scoop or spoon
Ingredients
- 1/3 cup unsalted butter softened
- 3/4 cup white sugar
- 1/3 cup light corn syrup
- 1 large egg room temperature
- 3 ounces semisweet chocolate melted
- 2 teaspoons vanilla extract
- 1 2/3 cups all-purpose flour
- 1/2 teaspoon baking powder
- 1/4 teaspoon salt
- 3/4 cup walnuts chopped
Instructions
- Preheat oven at 350-degrees. Line a baking sheet with parchment paper.
- In a large bowl, cream together butter and sugar until they are light and fluffy. Add the corn syrup and egg. Add the melted chocolate and vanilla.
- In another bowl, combine the flour, baking powder, and salt. Gradually mix this into the wet ingredients, scraping the bottom of the bowl to make sure everything is combined. Fold in the walnuts.
- Use a tablespoon scoop or spoon to dollop rounds of dough, spaced out, on baking sheet. Bake for 9 to 11 minutes, then let rest on sheet a few minutes before transferring them to a cooling rack. Store in a sealed container at room temperature.


