


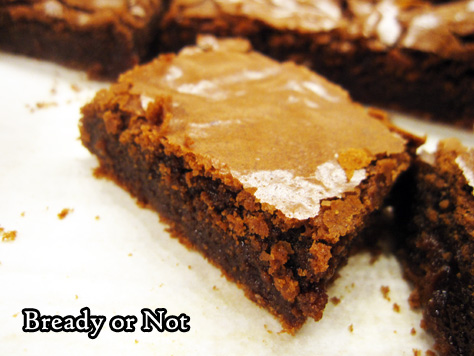
Bready or Not: Chewy Brownies
These are some seriously amazing brownies.

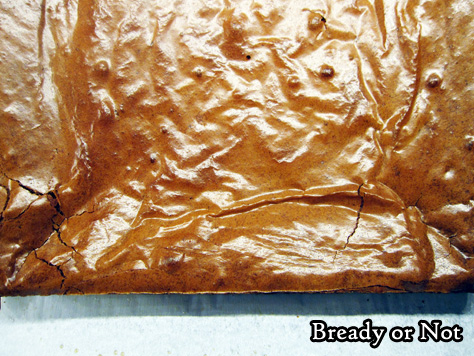
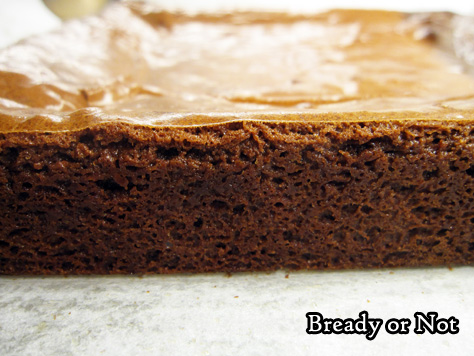
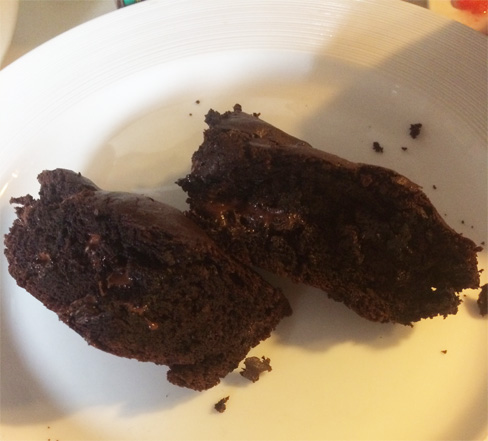
Chewy, fudgy, chocolaty, the type that makes you moan the second that flavor hits your tongue. Yeah.
I had to do a brownie recipe for Valentine’s Day. This recipe comes together super-fast, so maybe you have time to whip it up today instead of buying some overpriced not-so-good version at the store.
Because these brownies?
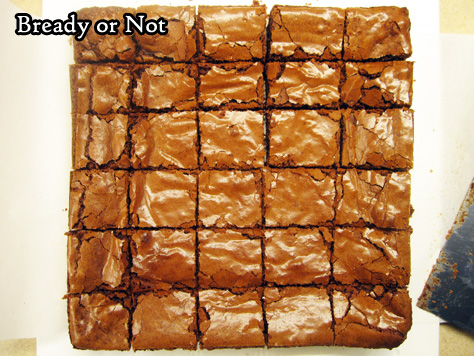
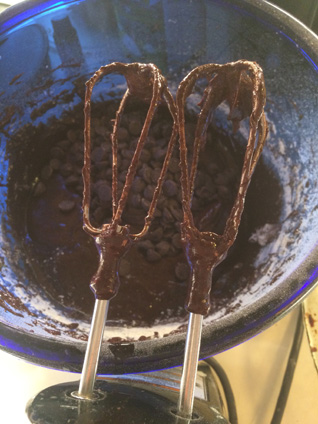
LOOK AT THEM.
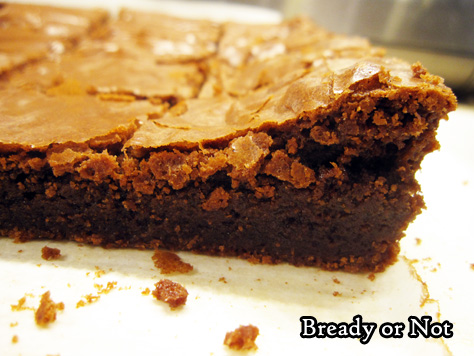
LOOOOK.
I don’t think I need to say anything else.
Modified from Chewy Brownies in Martha Stewart Living, November 2016.

Bready or Not: Chewy Brownies
Ingredients
- 3/4 cup plus 2 Tablespoons all-purpose flour
- 1/4 teaspoon baking powder
- 1/2 teaspoon kosher salt
- 3/4 teaspoon espresso powder optional
- 7 Tablespoons unsalted butter room temperature
- 7 ounces unsweetened chocolate chips or semisweet
- 3 Tablespoons coconut oil
- 1 cup white sugar
- 1 cup brown sugar packed
- 3 large eggs room temperature
Instructions
- Preheat oven at 350-degrees. Line an 8x8 or 9x9 baking pan with parchment paper and apply nonstick spray.
- In a medium bowl, combine the flour, baking powder, salt, and espresso powder (if using). Set aside.
- Place the butter, chocolate, and oil in a large microwave-safe bowl. Heat in short bursts, stirring well between each, until the chocolate is melted. Add both sugars and stir together. Whisk in the eggs until the batter is glossy and smooth.
- Pour in the dry ingredients and mix until just combined. Pour batter into the prepared pan and smooth out the top.
- Bake until the brownies pass the toothpick test in the middle, about 35 to 40 minutes. Let cool in pan for about 30 minutes, then lift the block out by the parchment to completely cool on a rack. Slice into bars. Keep stored in an airtight container.
- OM NOM NOM!
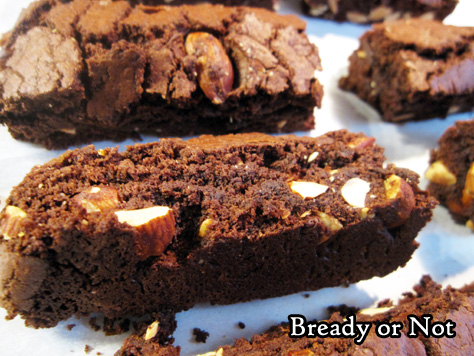
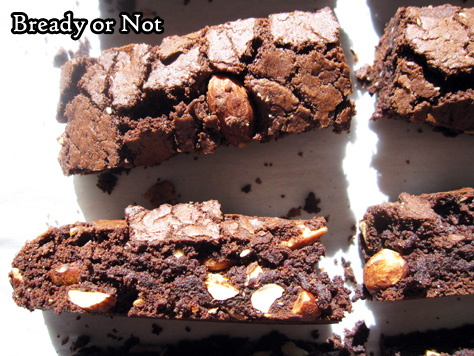
Bready or Not: Chocolate Almond Biscotti
Continuing the breakfast theme for the month, we now venture into the realm of chocolaty goodness with these Chocolate Almond Biscotti.
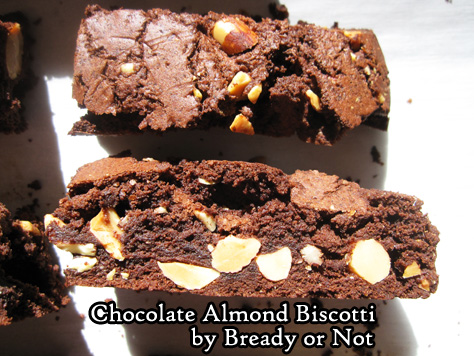
These taste like brownies… brownies that are firm enough to dip into coffee or hot chocolate or tea or your waiting mouth.
Almonds go wonderfully with chocolate–a lot of candy bars are proof of that–though they do complicate this recipe in one way. They get stuck on the knife blade when the biscotti are chopped apart.
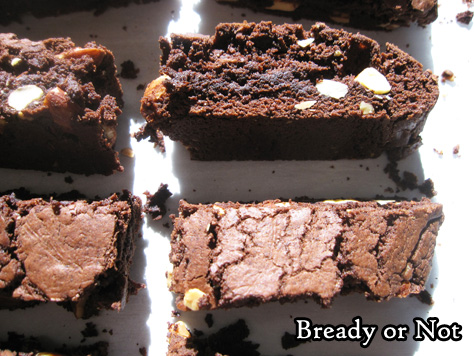
The good news is, the biscotti at still kind of soft then, so you can press them back together a bit–just don’t burn your fingers!

I can’t say I mind that some chocolate crumbles and almond bits are left on the cookie sheet, either. Oh darn. Can’t let those go to waste.
Do check out other biscotti featured on Bready or Not: Maple Walnut White Chocolate Biscotti and Snickerdoodle Biscotti.
This new recipe was modified from the original at McCormick.

Bready or Not: Chocolate Almond Biscotti
Ingredients
- 1 3/4 cups all-purpose flour
- 3/4 cup unsweetened cocoa powder sifted
- 1 teaspoon baking powder
- 1/4 teaspoon salt
- 4 ounces semi-sweet chocolate
- 1/2 cup unsalted butter 1 stick, softened
- 1 1/4 cups white sugar
- 2 eggs room temperature
- 1 teaspoon almond extract
- 1 cup almonds coarsely chopped
Instructions
- Preheat oven to 325-degrees. Prepare a large baking sheet with parchment paper. In a medium bowl, mix the flour, cocoa powder, baking powder, and salt; set aside.
- Melt the chocolate in the microwave, using short, careful bursts. Once it is melted, set aside to cool for a few minutes.
- In a large bowl, beat the butter and sugar until light and fluffy. Add the eggs followed by almond extract. Scrape in the melted chocolate. Gradually mix in the dry ingredients, and add the almonds last.
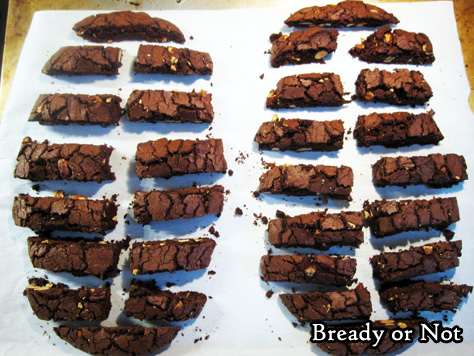
- Divide the dough in half. Drop each half onto the ready cookie sheet with lots of space between them. Use a spatula to shape them into logs roughly four inches across, eight inches long, and about an inch high.
- Bake 35 minutes, until the logs spring back when gently touched.
- Cool on stove top for 10 minutes. Use a sharp, serrated knife to chop the logs into 1/2-inch thick slices. The almonds will likely get stuck on the blade and cause the biscotti to crumble some; the biscotti is still somewhat soft, so try to wedge almonds back in and reshape the sticks. Do take care, as they are hot!
- Place the slices upright, if they will stay, or lay them on their sides. Bake for another 20 minutes, flipping them halfway, if necessary.
- Allow the biscotti to cool and dry out for several hours before placing them into sealed containers.
- OM NOM NOM!
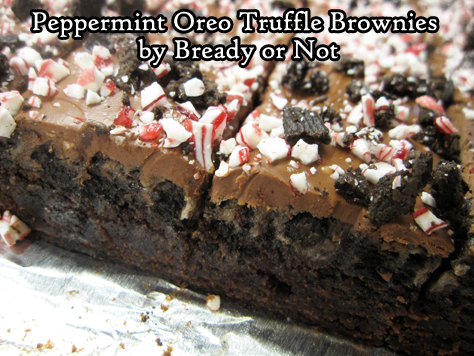
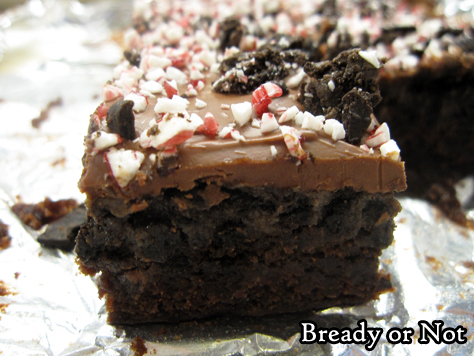
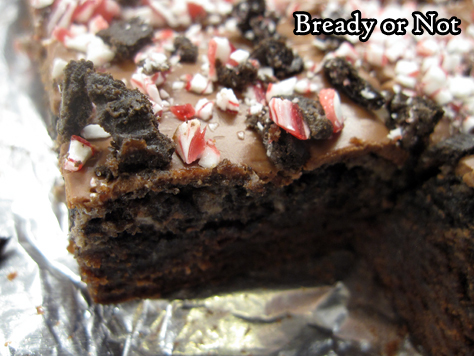
Bready or Not Original: Peppermint Oreo Truffle Brownies
If you’ve ever had Oreo Truffles–those luscious bon-bons of pulverized Oreo encased in chocolate–you’ll love my original take, which is a heck of a lot easier and prettier, too.
The original Oreo Truffles always irritate me because I can never get a nice, smooth chocolate covering on the balls. You’ll see what I mean next month when I feature a different take on such truffles.
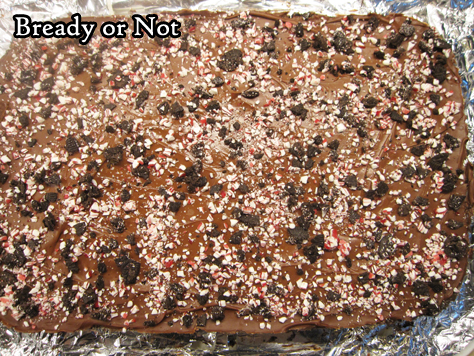
Therefore, I removed the balls from the equation. This recipe has a brownie base, topped with an Oreo-cream cheese mix, then topped with a ganache. Oreo crumbs and peppermint bits give it a showy finish.

No dipping balls in chocolate for an hour. No mess everywhere. This recipe is easy-peasy.
Plus, the cut-up bars will keep for as long as a week if they are sealed in the fridge. That makes them convenient to make-ahead for holiday gatherings… and lets you finish them off at your leisure afterward.
You can use a number of different kinds of Oreos here, too. Mint Oreos are great, but regular Oreos are fine if you add some extra peppermint extract. You can use all-chocolate kinds of Oreos–even the new Thin Oreo version–but I don’t advise using Double Stuf. You do want a lot of cookie crumbs.
Bready or Not Original: Peppermint Oreo Truffle Brownies
Ingredients
brownie base
- 1 cup unsalted butter 2 sticks, softened
- 2 cups white sugar
- 4 eggs room temperature
- 1 tsp vanilla extract
- 1/2 tsp peppermint extract
- 1/2 tsp salt
- 1/2 cup unsweetened cocoa sifted
- 1/2 tsp espresso powder optional but awesome
- 1 1/3 cups all-purpose flour
Oreo layer
- 1 package Cool Mint Oreos* or Peppermint Oreos
- 8 ounces cream cheese 1 block, softened
topping
- 10 - 12 ounces chocolate chips mint, semi-sweet, dark, or milk; add more peppermint extract if desired
- 1/4 cup crushed peppermint bits
Instructions
- Preheat oven at 350-degrees. Line a 9x13 pan with aluminum foil and coat with nonstick spray or butter well.
- In a mixing bowl, cream together the butter and sugar. Add eggs, followed by the two extracts, salt, cocoa, and flour. Don't overbeat.
- Pour batter into the prepared pan. Bake for 22 to 27 minutes. Cool completely.
- While the brownies are cooling, make the Oreo truffle layer. Crush Oreos in a food processor or by putting them in a sealed gallon bag and smashing them with a rolling pin until rendered to crumbs.
- Reserve 1/4 cup of Oreo crumbs for topping. Place the rest of the crumbs in a large bowl, and use a big spoon to mash the Oreos into the softened cream cheese until the color is consistently black.
- Smooth the Oreo-cream cheese mix atop the cooled brownies, using an offset spatula to get right to the edges.
- To finish off the truffles, melt the chocolate either on the stovetop or in the microwave, and pour it over the Oreo layer. Smooth it out evenly. Immediately top with the reserved Oreo crumbs and peppermint bits.
- Refrigerate until set, about 15 to 20 minutes. If it's too soft, and it will smear when cut; too hard, and it will crack. Use the foil to lift the brownies onto a cutting board, then slice into bars.
- Store in a sealed container in the fridge, with waxed paper between the stacked layers. Keeps for at least a week.
- OM NOM NOM!
Read More
Bready or Not Guest: Spencer Ellsworth with Un-Ruinable Gluten Free Brownies
I’m happy to welcome Spencer Ellsworth with a Bready or Not guest post! His debut novel is out today. I was lucky enough to read A Red Peace a few months ago, and blurbed it: “This is space opera candy!” Seriously, if you love space opera, GET THIS. It’s fresh and fun, mixing up cozy tropes in fantastic new ways.
Which is pretty much what Spencer does with this recipe today, too. He shares a recipe for gluten-free brownies that look absolutely delicious. I bet they’d be perfect to eat in accompaniment with a brand new space opera novel…
I’m Spencer, and I have two big things in common with Beth: we both like to write a good swashbuckling adventure (here’s mine) and we both like to bake.
Unlike Beth, I have celiac disease, which means, although I bake all the time, I use gluten-free flours. I was diagnosed way back in the dark ages of 1985. I did all of elementary school in the 1980s gluten free. Let us all turn and salute my mother, who had to bake “special cupcakes” every time someone else in the class had a birthday and brought in gluten cupcakes.
*Salutes Mom*
Ahem.
Celiac disease is, like Crohn’s, arthritis and lupus, an autoimmune disease. Our immune systems, upon consumption of gluten, attack and inflame our intestinal lining, preventing the absorption of any food. Because autoimmune disease is on a spectrum, people often have reactions to gluten that are tricky to diagnose without an endoscopy or colonoscopy.
There are two great lies about gluten-free food
1) you can just substitute GF flour mix in most recipes
2) gluten-free food just doesn’t taste as good
1 isn’t true because different proteins act differently in different grains. Gluten-free flours are not sticky like wheat. You don’t need to knead any gluten-free bread product; you just need to mix the dough and let it rise. You may find certain GF flours, like sorghum or millet or brown rice, less palatable than wheat. But most celiacs can find a preferred flour mix.
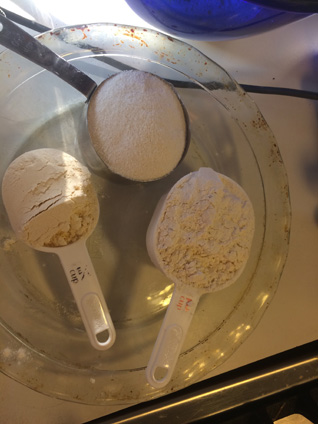
This picture shows plain rice flour (the fine-textured flour), a gluten-free mix, and a gluten-free pancake mix (the one with dark specks).
However, that leads me to…
2 isn’t true because there are a LOT of celiacs out there making a LOT of amazing food. But you do have to do some baking on your own. The best gluten-free food is made at home, with patience. Commercial kitchens can’t take the time and ingredients necessary.
So if you’re new to GF baking, here’s an un-ruinable recipe to start. Peruse Gluten-Free & More (formerly known as Living Without) for anything else you need, or just contact me through my website.
Un-Ruinable Gluten Free Brownies
These are totally un-ruinable because they can be made with just about any gluten-free flour, flour mix, or pancake mix. They will have a slightly different consistency depending on the flour, but they work with anything from plain rice flour to Pamela’s pancake mix.
Your celiac friends will appreciate the attempt to make real brownies, rather than those flourless peanut butter cookies or rice krispie treats we ALWAYS get.
Make sure to clean ALL your work surfaces very well first. All counters and bowls should be scrubbed clear of any trace of gluten. Use non-porous materials like Teflon or glass. Make sure they are scrubbed completely clean of every last scrap of anything that ever contained gluten. (Even better, use the excuse to treat yourself to a new dish and new mixing bowl.)
4 eggs
1 cup sugar (add more to taste, especially if not using chocolate chips)
1 tsp vanilla extract
2/3 cup cocoa powder (I much prefer the darker, richer Ghiradelli’s over the chalky Hershey’s)
1/2 cup butter, margarine or coconut oil
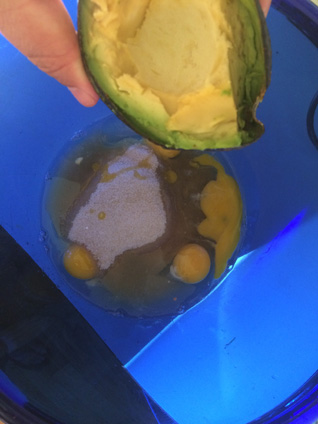
1/2 mushy avocado (this is weird, but it makes the whole endeavor much fluffier)
1 cup of any gluten-free flour, baking mix or pancake mix
2 tsp baking powder (if not already included in your mix)
Chocolate chips & nuts to taste
Set oven to 350.
Beat the eggs with the sugar and avocados.
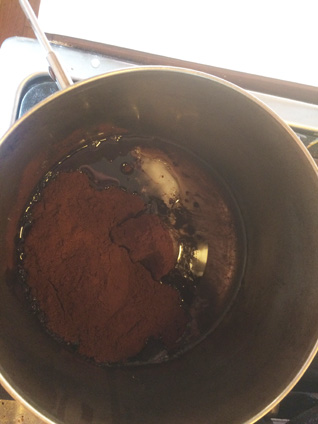
Melt the butter or oil in a saucepan or microwave-safe dish, and add the cocoa powder and beat until smooth.
Allow the butter/cocoa powder mix to cool a bit, then mix into eggs, sugar and avocado.
Mix your flour in with the rest. Add baking powder if you simply have a basic flour mix.
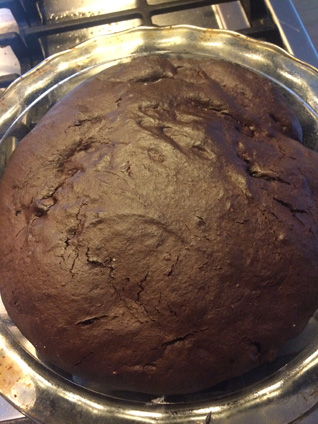
Pour into a greased baking dish and bake for 30-40 minutes on 350.
Bready or Not Guest: Spencer Ellsworth's Un-Ruinable Gluten Free Brownies
Ingredients
- 4 eggs
- 1 cup white sugar add more to taste, especially if not using chocolate chips
- 1 tsp vanilla extract
- 2/3 cup cocoa powder I much prefer the darker, richer Ghiradelli’s over the chalky Hershey’s
- 1/2 cup butter or margarine or coconut oil
- 1/2 mushy avocado this is weird, but it makes the whole endeavor much fluffier
- 1 cup of any gluten-free flour or baking mix or pancake mix
- 2 tsp baking powder if not already included in your mix
- Chocolate chips & nuts to taste
Instructions
- Set oven to 350.
- Beat the eggs with the sugar and avocado.
- Melt the butter or oil in a saucepan or microwave-safe dish, and add the cocoa powder and beat until smooth.
- Allow the butter/cocoa powder mix to cool a bit, then mix into eggs, sugar and avocado.
- Mix your flour in with the rest. Add baking powder if you simply have a basic flour mix.
- Pour into a greased baking dish and bake for 30-40 minutes on 350.

Amazon | Barnes & Noble | Kobo
A Red Peace, first in Spencer Ellsworth’s Starfire trilogy, is an action-packed space opera in a universe where the oppressed half-Jorian crosses have risen up to supplant humanity and dominate the galaxy.
Half-human star navigator Jaqi, working the edges of human-settled space on contract to whoever will hire her, stumbles into possession of an artifact that the leader of the Rebellion wants desperately enough to send his personal guard after. An interstellar empire and the fate of the remnant of humanity hang in the balance.
Spencer Ellsworth has written a classic space opera, with space battles between giant bugs, sun-sized spiders, planets of cyborgs and a heroine with enough grit to bring down the galaxy’s newest warlord.

Read More
Bready or Not: Cadbury Egg Brownies
Three years ago, I shared my recipe for Cadbury Egg Brownies. Today we revisit that glorious recipe–and double it.

Because it obviously didn’t deliver enough sweetness the first time around, right?
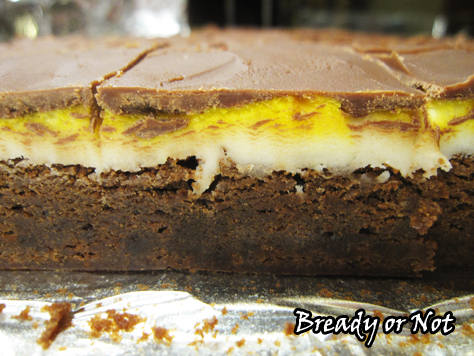
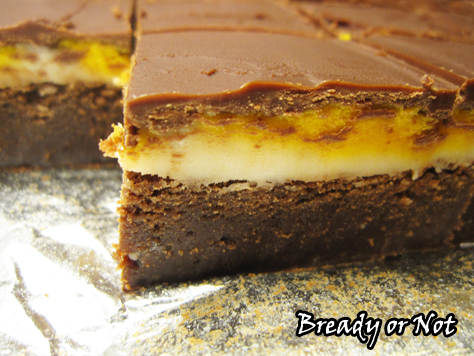
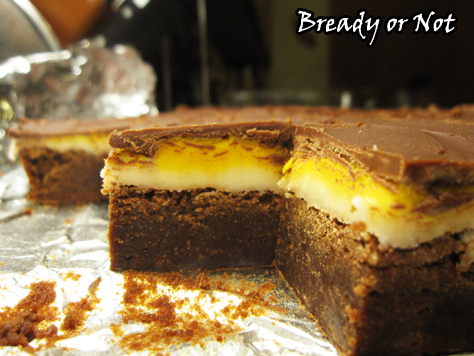
Here’s the thing about these brownies: they taste like Cadbury Eggs, but BETTER. That’s because they aren’t as cloying sweet. The brownie layer balances things out in a magical way.
This is a time-consuming recipe because of the layers and the refrigeration time involved, but it’s not hard. The first stage is the only one that requires baking.
I will forever be amazed at how the cream filling layer turns out, too. It’s eerily like the non-runny portion of the Cadbury Egg filling. But you make it yourself. It boggles the mind.
Even better, these brownies will keep as long as a week if sealed and kept in the fridge. Trust me, there is NOTHING healthy about these. You want to make these to share with a crowd!
I’ve modified this a good bit, but I must give credit to the original recipe from Love and Oil. They shared something amazing.

Bready or Not: Cadbury Egg Brownies
Ingredients
For Brownies:
- 1 1/3 cup all-purpose flour
- 1/4 cup cocoa powder
- 1 teaspoon salt
- 1 teaspoon espresso powder optional
- 12 ounces milk chocolate chopped
- 1 cup unsalted butter 2 sticks, cut into cubes
- 1/2 cup white sugar
- 1 cup light brown sugar packed
- 4 large eggs room temperature, lightly beaten
- 2 teaspoons vanilla extract
For Cream Filling:
- 1/2 cup light corn syrup
- 4 tablespoons unsalted butter half stick, room temperature
- 1 teaspoon vanilla extract
- 1/4 teaspoon salt
- 3 cups confectioners' sugar sifted
- yellow food coloring
For Glaze:
- 8 ounces milk chocolate chopped
- 4 Tablespoons unsalted butter half stick, cut into cubes
Instructions
Brownie stage
- Preheat oven to 350-degrees. Line the bottom and sides of a 9x13-inch pan with aluminum foil or parchment paper, making sure to overlap the sides to create handles. Cover with nonstick spray.
- Sift together flour, cocoa, and salt (and espresso powder, if using) in a small bowl and set aside.
- Melt chocolate and butter together in a double boiler or in slow increments in microwave. Stir until smooth. Whisk in sugars and stir until dissolved and mixture has cooled slightly, then add eggs and vanilla extract until just combined.
- Fold together the chocolate and flour mixes until just incorporated. Pour into prepared pan.
- Bake for 25 to 30 minutes or until toothpick inserted into the middle comes out clean. Transfer pan to a wire rack and allow to cool completely.
Cream filling stage
- Beat together corn syrup, butter, vanilla, and salt on medium-high speed until smooth. Add powdered sugar, a little bit at a time, mixing until creamy.
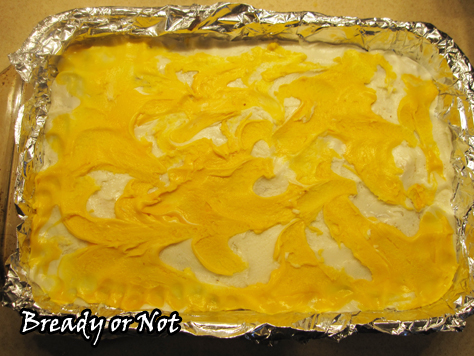
- Dump 3/4 of the cream mixture on top of cooled brownies and spread into an even layer. Add a drop of yellow food coloring to remaining cream mixture and stir until evenly colored. Drop dollops of yellow cream on top of white layer, and then swirl gently with a spatula. Refrigerate for at least 2 hours or until set.
Glaze stage
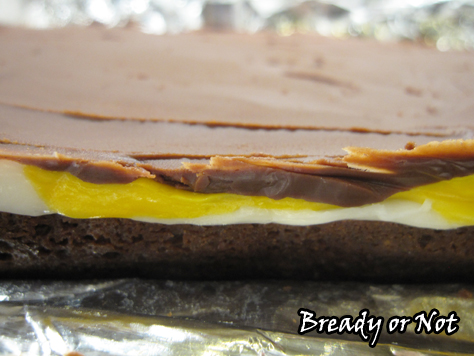
- Slowly melt the chocolate and butter together in a double boiler or microwave bowl. Stir until smooth. Pour over cream filling, carefully spreading into a thin, even layer.
- Chill in the fridge long enough for the chocolate to not quite harden, 15-20 minutes, OR let it chill for several hours and then let set at room temperature for about 15 minutes. The chocolate needs to be soft enough to cut through without cracking, but not soft enough to smear with each cut.
- Use the foil/paper to lift the entire block out of the pan and onto a cutting board. Using a large sharp knife, cut into 2-inch squares. Keep in sealed container in fridge; brownies will keep upward of a week.
- OM NOM NOM!
Read More
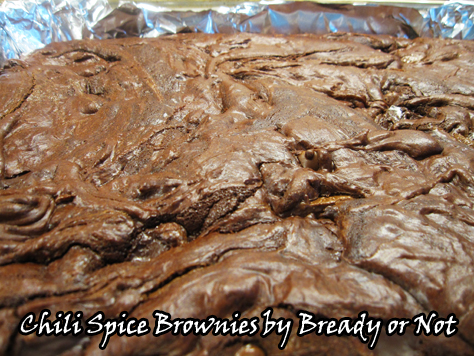
Bready or Not: Chili Spice Chocolate Brownies
This recipe, originally posted at the Holy Taco Church, adds a kick to regular ol’ brownies.
If you’ve browsed the candy aisles of late, you noticed that gourmet chocolate bars are all the rage. Take advantage of this when it comes to baked goods. Flavored chocolate adds an extra level of nuance to brownies and cookies.
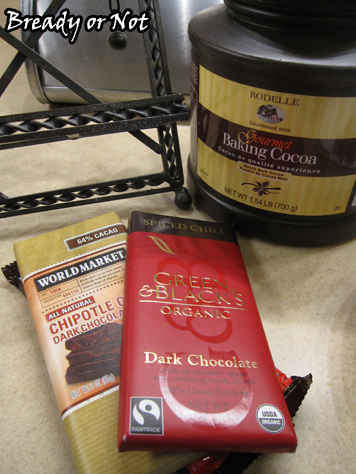
For these Chili Spice Chocolate Brownies, I chopped up a combo of Green & Black Spiced Chili Chocolate and World Market’s Dark Chocolate Chipotle, but any type of amped-up chocolate will work here.
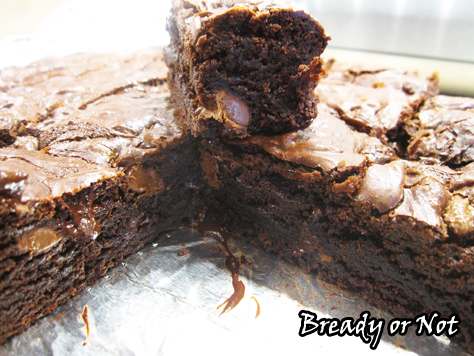
Note that I can’t handle really hot stuff–hello, burning skin and inability to breathe and feeling like a taun-taun kicked me in the intestines–but these brownies aren’t spicy in THAT way. There’s an occasional zing of chili here and there, but the main flavor is of the cinnamon and the milder chocolate.
Modified from Cinnamon-Spiced Chocolate Brownies at King Arthur Flour.

Bready or Not: Chili Spice Chocolate Brownies
Ingredients
- 1 cup unsalted butter two sticks, melted
- 2 1/4 cups white sugar
- 1 1/4 cups baking cocoa or Dutch-process cocoa, sifted
- 1 teaspoon salt
- 1 teaspoon baking powder
- 1 teaspoon espresso powder
- 1 tablespoon ground cinnamon
- 1 tablespoon vanilla extract
- 4 large eggs room temperature
- 1 1/2 cups all-purpose flour
- 2 bars spiced chocolate bars 3 ounces, such as chipotle or chili, chopped
- 6 ounces milk chocolate chips or semi-sweet
[toggle the chocolates to be more or less spicy based on your tastes, but equal 12 ounces total]
Instructions
- Preheat the oven to 350-degrees. Line a 9x13 pan with parchment paper or aluminum foil and grease the surface.
- In a medium-sized saucepan set over low heat, melt the butter, then add the sugar. Stir to combine. Heat the mixture briefly, just until it's hot throughout; it'll become shiny as you stir it. Set on a cool burner or trivet.
- Stir in the cocoa, salt, baking powder, espresso powder, cinnamon, and vanilla.
- Whisk in the eggs, stirring until smooth. Add the flour, again stirring until smooth. Fold in the chopped spicy chocolate and mild chocolate.
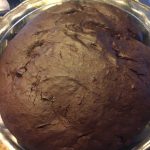
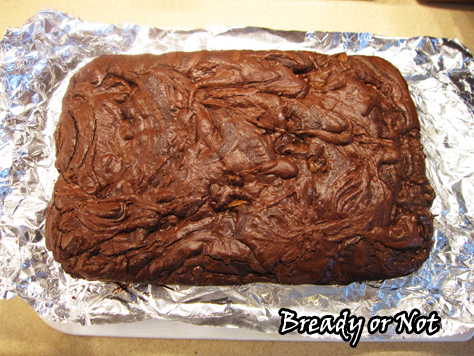
- Spoon the batter into the pan, spreading it to the edges. It will be extremely thick and lava-like.
- Bake the brownies for 34 to 36 minutes, until a cake tester inserted into the center comes out clean. The brownies should feel set on the edges, and just barely set in the center.
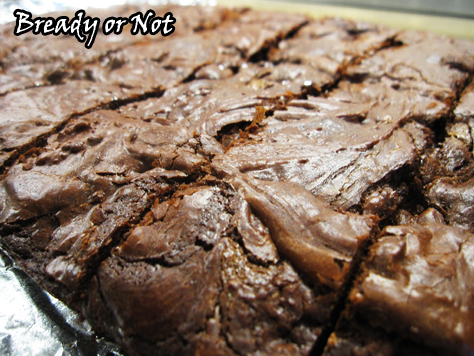
- Remove from the oven. Allow to cool completely in the pan before cutting.
- OM NOM NOM!
Read More
Follow me


