


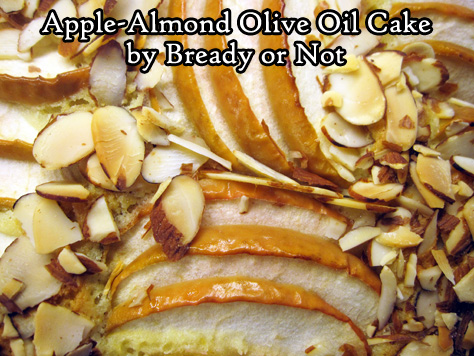
Bready or Not Original: Apple-Almond Olive Oil Cake
This Apple-Almond Cake is an absolute showstopper of a cake, and it’s not difficult to make!
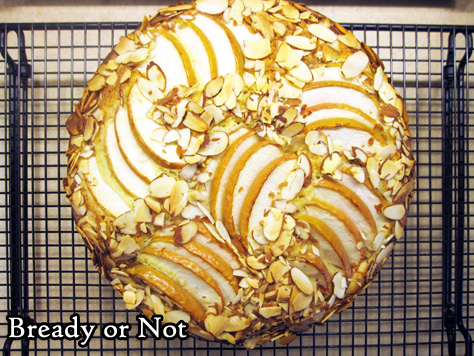
Really, I found cutting the apple into thin, mostly-equal pieces and placing them on the cake to be the most piddly part of the whole process. However, it was all well worth the effort!
The taste of the cake isn’t super-sweet. The cake really tastes of lemon and almond, a fabulous pairing, with the apple providing a touch of flavor and sweetness.
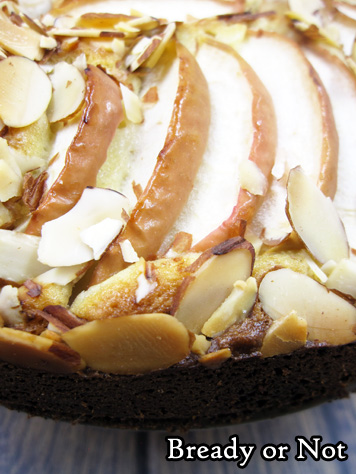
It’s not a thick or heavy cake, either. This would be fantastic to serve for a breakfast, brunch, or dessert–it can really do all the things!

I modified this recipe greatly from one that was in Bake from Scratch’s September-October 2020 issue, which used a pear instead of an apple. It’s a fantastic issue–you’ll see my takes on several other recipes in the future!
Bready or Not Original: Apple-Almond Olive Oil Cake
Equipment
- 9-inch springform pan
- parchment paper
Ingredients
- 2 large eggs room temperature
- 1 cup white sugar
- 1/2 cup extra-virgin olive oil
- 2/3 cup almond flour sifted to remove clumps
- 1/3 cup half & half or milk
- 1 lemon zested and juiced
- 1 teaspoon vanilla extract
- 1/4 teaspoon almond extract
- 1 1/3 cup all-purpose flour
- 1 1/2 teaspoons baking powder
- 3/4 teaspoon kosher salt
- 1 large Pink Lady apple or other firm baking apple
- 1/2 cup sliced almonds
Instructions
- Preheat oven at 350-degrees. Cut parchment paper to fit the bottom of a 9-inch springform pan. Apply nonstick spray to pan; place parchment round inside, then spray to coat that as well.
- In a stand mixer with a whisk attachment. whip the eggs at high speed until they are foamy, about a minute. Reduce the speed to medium to add the white sugar. Continue to beat until it becomes thick and pale, about 2 minutes.
- With the mixer going, pour in olive oil. Pause to scrape sides of bowl. Add the almond flour, half & half, all of the lemon zest, and both extracts, mixing until combined.
- In another bowl, stir together flour, baking powder, and salt. Fold the dry ingredients into the moist mix. Pour batter into the prepared pan.
- Prep the apple. Core it, leaving the peel intact. Cut into thin slices of equal size. Pour reserved lemon juice over the apples, tossing them to coat.
- Place apple slices on top of batter in fanned-out groups of about five, having them face different angles all around the top. NOTE: as the batter is very sticky, the apples will be nigh impossible to move after they are placed, so make careful decisions. Sprinkle the sliced almonds around the edges and in the gaps between the apples.
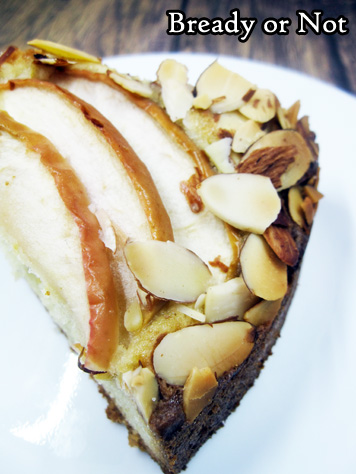
- Bake for about 50 minutes, until the middle passes the toothpick test. Set on rack for 15 minutes before removing the ring from the pan. Serve warm, or cool completely, keeping the cake on the round base. When slicing the cake, be aware that the peel is pretty but may resist the blade–it’s easier to snip through with a pair of kitchen shears.
- Cake can be sliced and frozen for later, but it will taste best at room temperature or warmed.
OM NOM NOM!
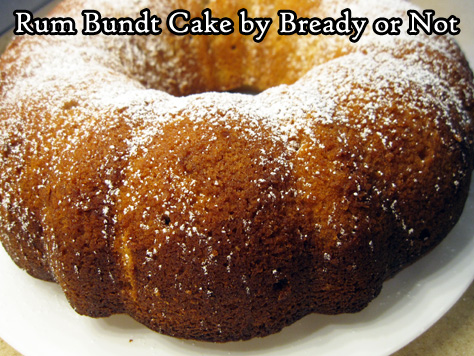
Bready or Not Original: Rum Bundt Cake
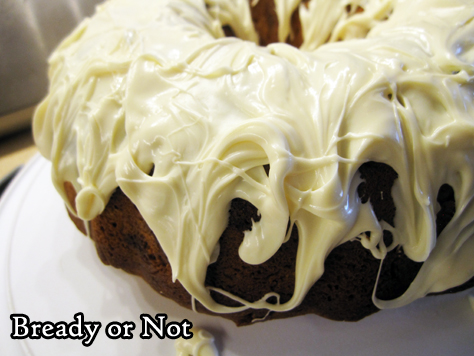
This Rum Bundt Cake is luscious–soft and moist, with rum baked-in and soaked-in. It’s perfect for an indulgent New Year’s Eve treat, or make it any time of year!
The most basic form of this recipe came to me on a postcard sent by my mother-in-law’s husband. He travels a lot, and sent me a card from the Virgin Islands that included a rum bundt cake recipe on the front.
The thing was, the recipe was squeezed into limited space and quite basic. The baking temperature was low and strange, too–no way was an enriched bundt cake baking at 300-degrees in 45 minutes.
So, I rewrote the recipe. I also added more rum. I used the return-to-pan soaking method I learned from Bake Off years ago to make sure this baby was really rummy. That liquid gold shouldn’t drip off. No, it needs to be used to bathe a cake.
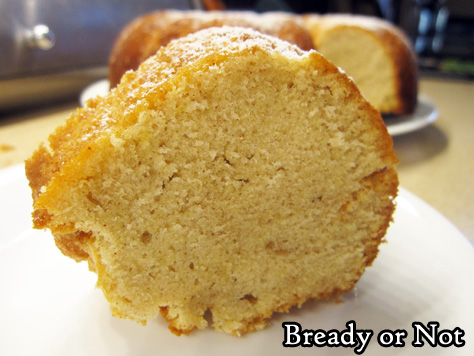
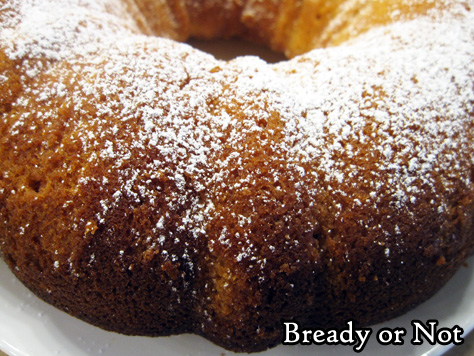
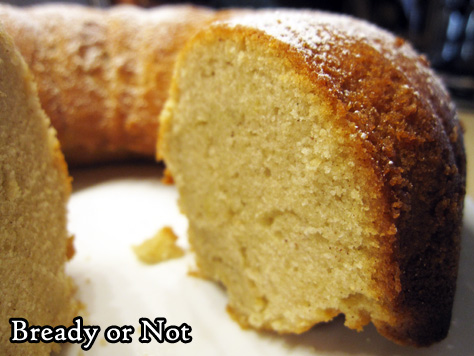
The end result is fragrant with rum. The outside is crisp while the crumb is tender and moist without being soggy. It’s not a super-sweet cake, either, but it is definitely lush.
Modified greatly from a souvenir postcard.
Bready or Not Original: Rum Bundt Cake
Equipment
- large bundt pan
- pastry brush
- chopstick
Ingredients
Cake
- 1 cup unsalted butter 2 sticks, room temperature
- 2 cups white sugar
- 6 large eggs room temperature
- 2 cups all-purpose flour
- 1 teaspoon cinnamon
- 2 teaspoons vanilla extract
- pinch salt
- 1/4 cup rum
Rum soak:
- 1/4 cup rum divided
- confectioners’ sugar
Instructions
- Preheat oven at 350-degrees. Heavily grease or use nonstick spray in a large bundt pan.
- In a mixer, blend together butter and sugar. Add eggs one at a time. Follow up with the flour, cinnamon, vanilla, salt, and rum.
- Pour batter into pan. Bake for about 45 minutes, until the middle passes the toothpick test. Let cool for about 20 minutes, then invert cake onto a cooling rack. Don’t wash the pan!
- After the cake is completely cool, tip it back into the pan. Stab the top (the future base) all over with a chopstick or similar tool. Drizzle 2 Tablespoons of rum over the surface. Let it sit a few minutes. Invert the cake onto a plate. Again, stab the surface all over with something like a chopstick. Brush the remaining 2 Tablespoons rum over the top and sides, mopping up any droplets to brush on again. Let set a few minutes.
- Before serving, sprinkle on confectioners’ sugar. Slice and enjoy! Keep covered in fridge or at room temperature. Cake can be frozen in individual slices for later enjoyment, too.
OM NOM NOM!
Bready or Not: White Chocolate Peppermint Bundt Cake
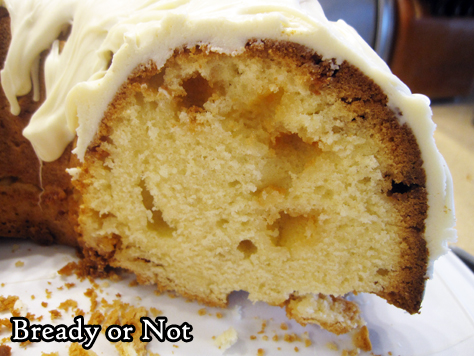
This White Chocolate Peppermint Bundt Cake features a light, refreshing peppermint flavor and a lot of white chocolate. Seriously, it’s a snow-capped mountain of a cake.

Don’t look for health food here. This thing is sweet. Lush. The middle is moist and dense, with a base (the former top) wonderfully crunchy in contrast.
White chocolate is melted into the batter, with chips also mixed in. See the golden dapples throughout the crumb? Those are the chips. They are like sweet explosions in the mouth.
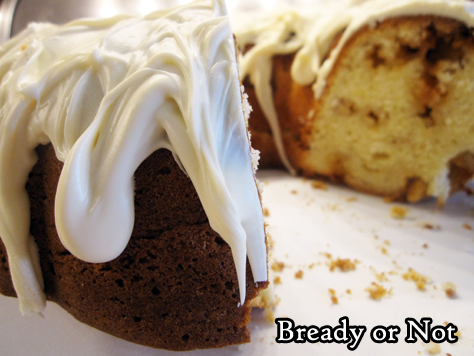
And yes, there’s that snow cap: a thick blanket of melted-down chocolate wafers. It ends up firm, but ready to melt again once it meets the warmth of a mouth. It’s perfect along with that tender cake.
This will be great for any December gathering, but it’s so delicious, you’ll want to make it year-long!
Bready or Not: White Chocolate Peppermint Bundt Cake
Equipment
- 10-cup bundt cake
- nonstick spray with flour
- microwave-safe bowls
Ingredients
Cake:
- 3/4 cup unsalted butter 1 and a half sticks, softened
- 1 1/2 cups white sugar
- 3 large eggs room temperature
- 2 teaspoons vanilla extract
- 1/2 teaspoon peppermint extract
- 3 cups all-purpose flour
- 1 1/2 teaspoons baking powder
- 1/2 teaspoon kosher salt
- 1/2 cup half & half or milk
- 8 ounces white chocolate chips divided
- 1/2 cup sour cream
Topping:
- 8- ounces white chocolate melting wafers melted
- 5 peppermint candies crushed, optional
Instructions
- Preheat oven at 325-degrees. Apply nonstick spray with flour to coat the interior of the bundt pan.
- In a big bowl, beat the butter and sugar until fluffy. Add eggs one at a time, followed by the extracts.
- In a separate bowl, stir together flour, baking powder, and salt. Gradually mix the dry ingredients into the big bowl alternatively with the half & half, beating until they are just combined.
- In a microwave-safe bowl, heat 2 ounces of white chocolate chips in 30 second bursts, stirring well between each zap, until it’s melted and smooth; keep an eye on the white chocolate, as it can burn fast! Add the melted chocolate into the cake batter. Follow that with the sour cream and the remaining white chocolate chips. Pour batter into the prepared pan.
- Bake for about 1 hour 15 minutes; the middle should pass the toothpick test. If it’s getting overly brown near the end, cover the top with foil.
- Let cake cool in pan for 20 minutes, then upend onto a cooling rack. Cool completely, speeding process in fridge if desired.
- Melt chocolate wafers in microwave or on stovetop. Drizzle atop cake to form a thick snowcap. If desired, top with peppermints.
OM NOM NOM!
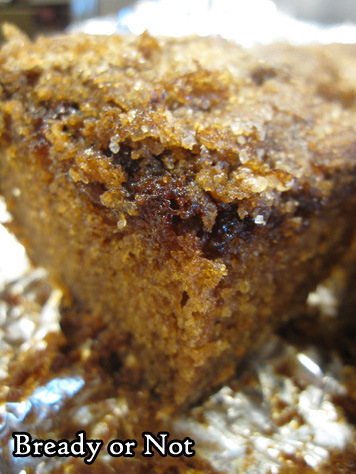
Bready or Not Original: Sugar-Crusted Pumpkin Cake
This Sugar-Crusted Pumpkin Cake is moist, delicious, and packed with autumnal flavors!

There is a definite pumpkin pie-like vibe to this thing. The white chocolate chips melted along the bottom (hence the direction to grease the foil well) and formed a sort of scrumptious crust, too.
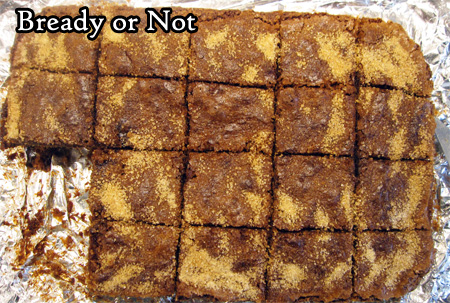
This thing is even pretty. I like using turbinado sugar as a top crust because it’s pretty, texturally delightful, and tastes darn good!

This cake will keep for at least 3 days, covered and chilled, and maybe longer. It also freezes like a champ.
Since this makes a 13×9 pan, it’s probably a good thing it can be portioned out over days and weeks!
Bready or Not Original: Sugar-Crusted Pumpkin Cake
Equipment
- 13×9 pan
Ingredients
Cake
- 4 large eggs room temperature
- 2 cups white sugar
- 1 cup vegetable oil
- 1/2 cup applesauce
- 2 cups cake flour
- 2 teaspoons baking soda
- 2 teaspoons pumpkin spice
- 1 teaspoon salt
- 1 teaspoon vanilla extract
- 1/2 cup pumpkin puree
- 1 cup white chocolate chips
Topping
- 1/2 cup turbinado or other coarse sugar
- 1/2 teaspoon pumpkin spice
Instructions
- Line a 13×9 pan with foil and apply generous nonstick spray or butter. Preheat oven at 350-degrees.
- Mix together the eggs, white sugar, vegetable oil, and applesauce. Add the cake flour, baking soda, pumpkin spice, and salt. Follow up with the vanilla extract and pumpkin puree. Fold in the white chocolate chips.
- Pour batter into the pan and level out. Mix together the two topping ingredients and sprinkle over the cake.
- Bake for 1 hour, or until the middle passes the toothpick test. Let cool at room temperature, then store in fridge. Cake will keep for at least 3 days in the fridge, but can also be sliced and frozen for later enjoyment.
OM NOM NOM!
Bready or Not: French Apple Cake in a Springform Pan
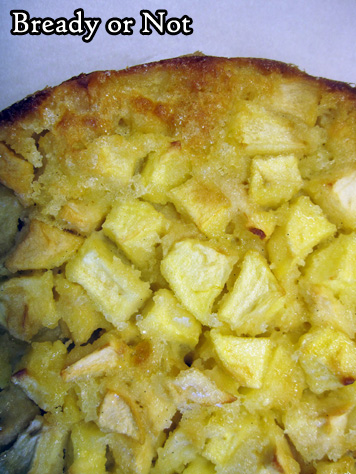
This French Apple Cake is thick with apples, not cake. There’s actually just enough batter to adhere everything together.
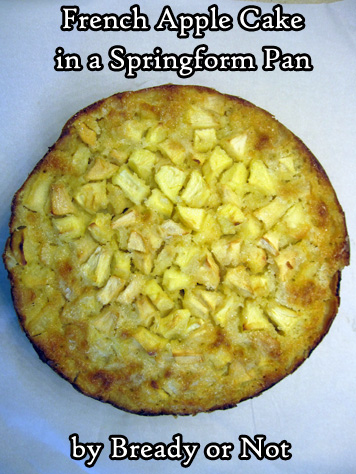
The apples are the star, so get good ones. I recommend doing about half Honeycrisp and Pink Ladies, but go for a combo of two good kinds of baking apples. (Not sure which ones are best for baking? Google has lots of recs!)
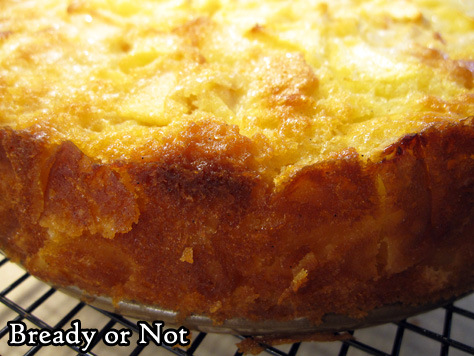
I’ve had a springform pan for years, but I’ve never used it like I did in 2020. That particular pan makes this cake extra good, too, because it creates a high cake with nicely browned edges.
One thing I’ve noticed about French and Irish apple cakes is that they really emphasize the fruit. American cakes and pies add a lot more spice. As much as I love loading on the cinnamon, it’s refreshing to do a take like this sometimes.

Let the fruit taste… well, fruity. Here, the addition of Calvados or another apple brandy brings that out even more. You don’t end up with an alcohol taste in the final result, but it does draw out more of the apple flavor.
This cake is a great one to slice up and freeze for later, too. Make the goodness last even longer!
Modified from Bake from Scratch September/October 2020 issue.
Bready or Not: French Apple Cake in a Springform Pan
Equipment
- 9-inch springform pan
- uneven spatula
- parchment paper
Ingredients
- 8 large baking apples totaling about 800 grams mix of Honeycrisp and Pink Lady recommended
- 2 teaspoons lemon juice
- 3 large eggs room temperature
- 3/4 cup white sugar
- 3 Tablespoons apple brandy use Calvados to make it especially French
- 1 teaspoon vanilla bean paste or substitute vanilla extract
- 1 cup all-purpose flour
- 1 1/2 teaspoons baking powder
- 1 teaspoon kosher salt
- 2/3 cup unsalted butter melted and cooled
- 1 Tablespoon sparkling sugar
- Confectioners' sugar for serving
Instructions
- Preheat oven at 350-degrees. Prepare a 9-inch springform pan by cutting a piece of parchment to fit the base. Apple nonstick spray to the pan, then add the parchment, and spray it as well. In addition, tear a piece of aluminum foil to cup the bottom of the pan to catch any drips.
- Peel the apples and chop into 1-inch pieces. Toss with lemon juice. Set aside.
- In a big bowl, beat eggs until they are pale and foamy. Add the white sugar, apple brandy, and vanilla.
- In a separate bowl, sift together the flour, baking powder, and salt. Gradually mix the dry ingredients into the big egg-sugar bowl along with the melted butter. Scrape the bowl as needed, stirring everything until just combined. Don’t expect a huge amount of batter–it’s there to act like delicious glue for all of the apple pieces!
- Reserve 1 heaping cup of the apple chunks. Fold the rest of the apples into the batter, coating them. Dump the mix into the prepared pan and even out with an uneven spatula. Arrange the remaining apples on top, pushing them into the batter and smoothing them out as much as possible.
- Bake for 20 minutes. Add sparkling sugar over the top. Bake another 20 minutes and check on the cake. It is done with apples in middle are tender and a digital thermometer plunged into the center reads at least 200-degrees. If needed, cook longer; if it’s browning too much, cover with foil.
- Let cake cool in pan for 15 minutes on a cooling rack. Carefully release the springform ring to let it completely cool for at least an hour; place in fridge to speed the chilling process, if desired.
- Slice into wedges. Enjoy cold, at room temperature, or warmed, with confectioners' sugar sprinkled over the top. Pieces can also be individually wrapped and frozen for later.
OM NOM NOM!
Bready or Not Original: Thin Mint Cake
Oh hey, it’s time for cake. A Thin Mint Cake that is neither too big or too small, something that keeps well stashed in the fridge, and looks as amazing as it tastes.
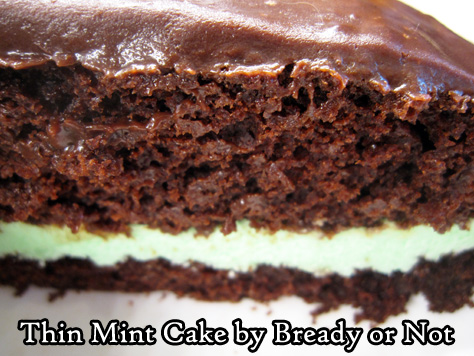
If you love chocolate and mint, this is the cake for you. The cake is loaded with chocolate flavor, and a ganache adds a shiny finishing touch.
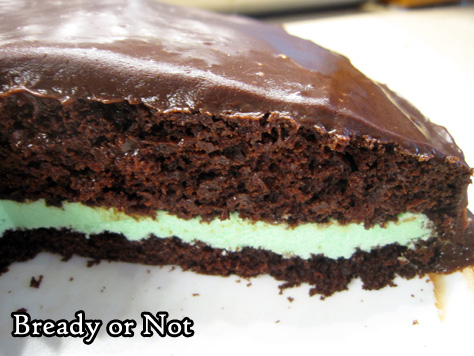
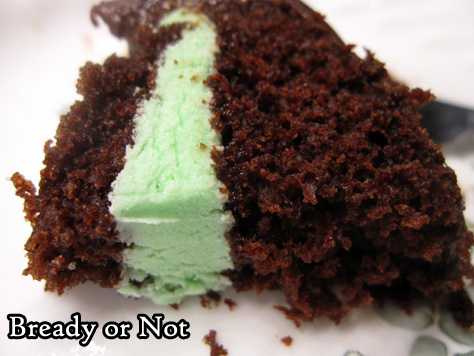
The middle layer of the cake is essentially a peppermint or mint-flavored buttercream. Sweet but not too sweet, it gives good contrast to balance the prevalent chocolate flavor.

I used this cake to try out a technique I’ve only read about and seen on TV before–I used four toothpicks to measure the halfway point on the sides of the cake, then tugged a piece of floss to cut the cake evenly in half! It worked out well.

Of course, you can still use a knife to cut through. The toothpicks will still be a helpful guide.
This is an ideal birthday or special occasion cake for a small group!
Greatly modified from Eating Well Magazine May 2020.
Bready or Not Original: Thin Mint Cake
Equipment
- 9-inch cake pan
- ruler
- toothpicks
- unwaxed floss
- parchment paper
Ingredients
Cake
- 1 cup all-purpose flour
- 1/2 cup white whole-wheat flour
- 3/4 cup white sugar
- 1/4 cup unsweetened cocoa powder sifted
- 1 teaspoon baking soda
- 1/2 teaspoon salt
- 1 cup water
- 1/3 cup canola oil
- 1 Tablespoon apple cider vinegar or other cider vinegar
- 1/2 teaspoon almond extract
- 1/2 teaspoon vanilla extract
Mint Filling
- 1/2 cup unsalted butter (1 stick), room temperature
- 1 1/2 cups confectioners' sugar sifted, more as needed for consistency
- 1/4 teaspoon peppermint extract or mint extract
- 1/4 teaspoon vanilla extract
- 1/4 teaspoon salt
- 1-2 drops green food coloring
- 2 Tablespoons half and half or milk
Glaze
- 1/2 cup half and half
- 1 1/4 cups semisweet chocolate chips
- pinch salt
Instructions
To prepare the cake
- Preheat an oven at 350-degrees. Cut a piece of parchment paper to fit inside a 9-inch cake pan. Apply nonstick spray inside pan, place parchment inside, and spray it again.
- Stir together all-purpose flour, white whole wheat flour, sugar, cocoa, baking soda, and salt.
- In another bowl, whisk together water, oil, vinegar, and both extracts. Gradually mix the wet ingredients into the dry until the batter is smooth. Pour into the prepared pan. Tap and thump it gently on the counter to knock out as many bubbles as possible.
- Bake 25 to 30 minutes, until a toothpick in the middle emerges with few crumbs attached. Let the pan cool on a rack for 10 minutes, then invert cake onto the rack to cool completely.
Make the filling
- Beat the butter until it is creamy and light. Add the confectioners' sugar, 1/2 cup at a time, to fully incorporate; if the mixture is still too soft and loose, add more sugar. Add mint and vanilla extract, followed by the salt. Add a few drops of food coloring to achieve the desired tint. Add the half and half and beat to make the filling fluffy and light.
Slice the cake and fill
- Stick a toothpick into the halfway point at each side of the cake; four toothpick markers work well. Use a knife to barely slice into the cake above each toothpick. Continue to use a long-bladed knife to slice all the way through, or use a long piece of unwaxed floss with the toothpicks as a guide to divide the cake evenly in half.
- Place the base of the cake on a serving plate. Spread the filling over the cake. Place the top of the cake over it, cut side down.
Make the glaze
- Microwave the half & half in a microwave-safe bowl for about a minute, until hot. Stir in the chocolate chips and salt. Stir, stir, stir until the chocolate is smooth and glossy. Let cool about 5 minutes to thicken, then slowly pour and spread glaze over the cake. Let sit at room temperature or in fridge to set, then slice in and enjoy!
- Store cake in fridge. Exposed sides of the cake will dry out more, but it will still be tasty. Keeps for at least 4 days.
