


Bready or Not: Soft Breadsticks from the Bread Machine
Soft Breadsticks are so very cozy and comforting. They are even better when they are easy to make from-scratch at home, thanks to a bread machine.
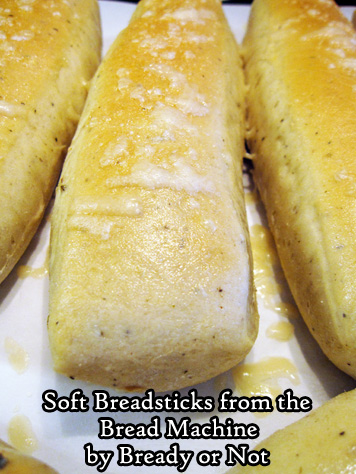
These are truly classic breadsticks. Doughy. Buttery. Just a touch of cheese on top.
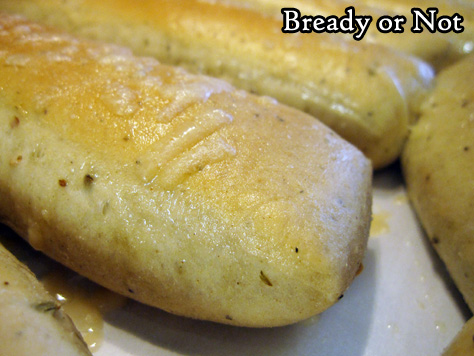
Season these however you want. Italian seasoning is great; I have Penzey’s pizza seasoning around, and I found it delicious in this recipe.
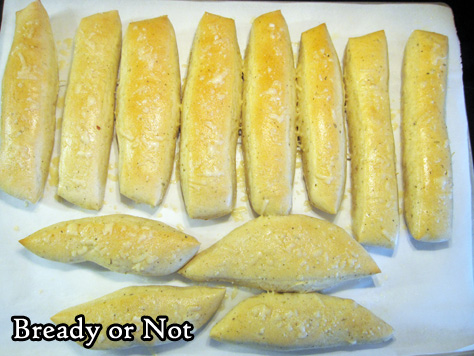
Sometimes I try to be precise with bread recipes when it comes to the baking stage–I pull out my food scale and weigh each round to get equal rolls. Not so here. I just wanted things that were, generally, in stick form.
If you have any leftovers, the sticks do keep well for two days at room temp, or you can freeze them for later. Just wrap them in foil to reheat in an oven or toaster oven.
Modified from the fantastic cookbook Making Artisan Breads in the Bread Machine by Michelle Anderson, available at Amazon, Bookshop, and other stores. [affiliate links]
Bready or Not: Soft Breadsticks from the Bread Machine
Equipment
- large baking sheet
- parchment paper
- pastry brush
Ingredients
- 1 1/4 cups lukewarm water (100-110 F degrees)
- 2 Tablespoons olive oil
- 1 Tablespoon white sugar
- 1 Tablespoon dry Italian seasoning or pizza seasoning
- 1 1/2 teaspoons sea salt
- 3 3/4 cups bread flour plus more for the work surface
- 2 1/4 teaspoons instant dry yeast
- 2 Tablespoons melted butter
- 1/4 cup grated Parmesan cheese or Grana Padano
Instructions
- Follow ingredient order for your bread machine; for most, that means liquids first. Place water, oil, sugar, seasoning, and salt in the bread machine bucket. Add the flour and the yeast. Start the machine on DOUGH cycle.
- Check on the dough as it mixes, if possible, and add a touch more liquid or flour as necessary. Dough should be soft and plush.
- Prepare a large baking sheet with parchment paper. Once the dough cycle is done, transfer the dough to a clean, floured work surface. If equal breadsticks are desired, use a food scale to weigh the dough and divide–or simply pat out the dough and use a pizza cutter or bench knife to slice the bread into stick form. Transfer them to the baking sheet. Cover them with plastic wrap or a towel and let them rise for another 45 minutes to an hour, until nicely puffed.
- Preheat oven at 350-degrees.
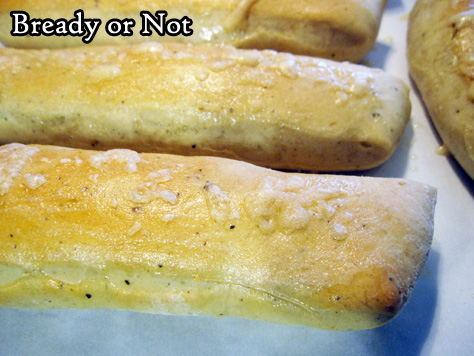
- Bake time will vary dependent on their size. If about 12 breadsticks are on the sheet, bake for about 12 minutes. Pull out of oven briefly to brush on melted butter. Sprinkle cheese all over top. Place breadsticks back in oven to bake for another 3 to 5 minutes, until sticks are more golden and cheese is melted.
- Eat breadsticks warm. Store any leftovers in a sealed plastic bag at room temperature for up to 2 days. They can also be frozen for later enjoyment.
OM NOM NOM!
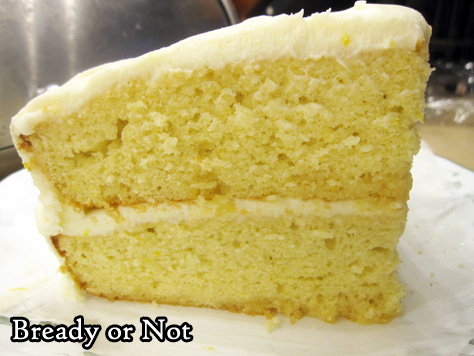
Bready or Not: Lemon Cake with Cream Cheese Frosting
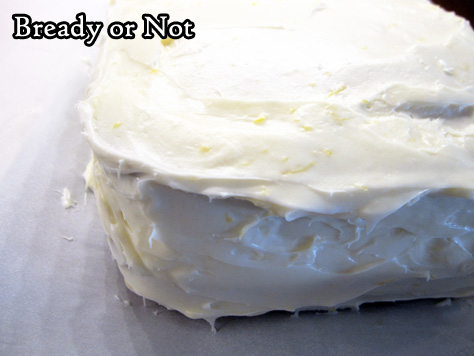
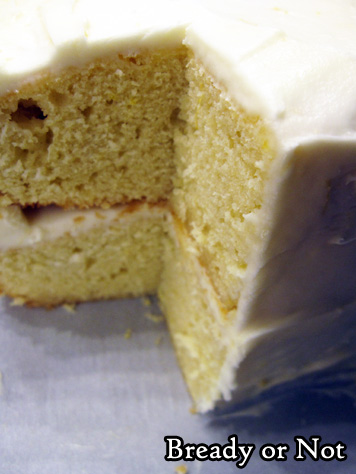
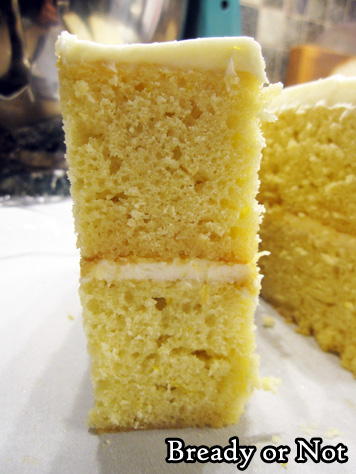
This Lemon Cake with Cream Cheese Frosting isn’t fancy. It’s a 9×13 cake cut in half and stacked. It has curves and straight edges. It also tastes amazing.
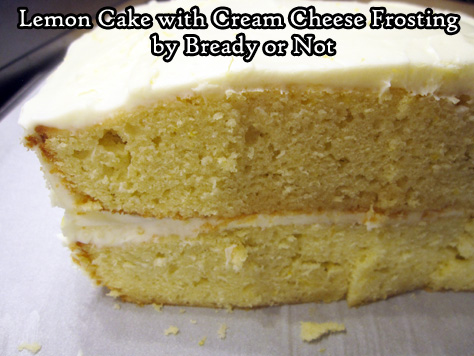
This is also an ideal cake for lemon-lovers. Two lemons are zested and juiced, their flavor infusing both the batter and frosting.
The cream cheese frosting here is an absolute classic, too. This is a recipe where you definitely want to lick the beaters and the bowl afterward!
I actually debated whether or not to post the cake on Bready or Not because it is so basic. After a lot of thought, though, I realized that simplicity is one of the perks.
It may not win awards for looks, sure. But does it taste good? YES.
Modified from Food & Wine Magazine January 2021.
Bready or Not: Lemon Cake with Cream Cheese Frosting
Equipment
- 9×13 pan
- uneven spatula
- cooling rack
- chopstick or skewer
- hand mixer
- parchment paper
Ingredients
Lemon Cake
- 1 3/4 cups white sugar
- 2 large lemons zested and juiced, to use for cake and frosting
- 3/4 cup extra virgin olive oil
- 4 large eggs room temperature
- 1 cup milk
- 1 teaspoon vanilla extract
- 3/4 teaspoon fine sea salt
- 3 cups all-purpose flour
- 1 1/2 teaspoons baking powder
- 3 Tablespoons honey
Cream Cheese Frosting
- 8 ounces cream cheese (1 box) softened
- pinch fine sea salt
- 1/2 cup unsalted butter (half stick) softened
- 3 cups confectioners’ sugar
Instructions
Make the lemon cake
- Preheat oven at 350-degrees. Line a 9×13 pan with foil and apply nonstick spray.
- Mix together the white sugar and 1 Tablespoon of the lemon zest; reserve remaining zest for the frosting. Using fingertips, for about a minute rub zest into sugar to deploy the inherent oils. Whisk in the olive oil followed by the eggs. Add the milk, vanilla, and salt. Keep beating until the sugar is dissolved.
- Beat in the flour and baking powder until just combined, making sure to scrape the bottom of the bowl. Pour batter into the cake pan.
- Bake for 30 to 35 minutes, until the middle passes the toothpick test. Let cake cool in pan about 10 minutes. In a small bowl, whisk together the honey and 3 Tablespoons of the lemon juice until smooth.
- Invert the cake onto a large cooling rack. Stab cake all over with chopstick or skewer. Set a cookie sheet beneath the rack. Drizzle or brush the honey-lemon mix all over the cake. Let cool for about an hour.
Frosting
- Combine cream cheese, salt, the rest of the lemon zest, and a Tablespoon of lemon juice; use rest of juice otherwise. With a hand mixer, beat on medium-high until smooth, about 30 seconds. Add the butter and beat until pale and fluffy, about a minute.
- Reduce the speed and gradually add the confectioners’ sugar. Once it’s all in, increase the speed to high and beat until fluffy, about 2 minutes.
- Transfer the cake to a parchment paper-lined cookie sheet. Use an uneven spatula to spread 1 1/2 cups frosting all over the top of the cake. Place cake in fridge to chill for 15-30 minutes. Once frosting has hardened. Slice in half crosswise and stack the halves. Spread the remaining frosting on the top and sides of cake, getting all of the odd angles, nooks, and crannies.
- Refrigerate cake, uncovered, at least 30 minutes before serving. For longer than that, cover with plastic wrap; it’ll keep well in the fridge for up to 3 days, and can also be frozen in individual slices. Serve cake right from fridge.
OM NOM NOM!
Bready or Not Original: Comte Pull-Apart Rolls
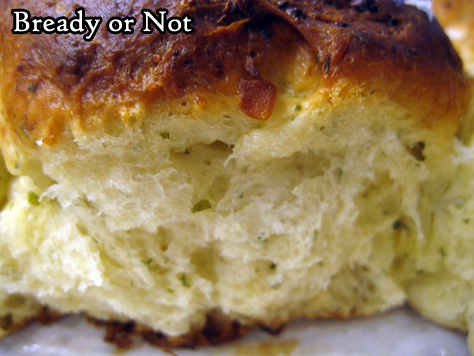
Bread is awesome. Cheese is awesome. Combine them to achieve a special kind of awesome, especially in the case of these Comte Pull-Apart Rolls.
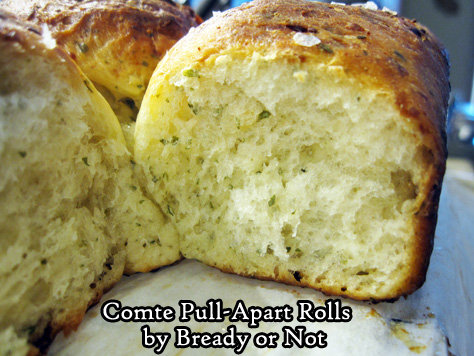
These rolls are tender, soft, and inherently savory. They are perfect to go along with roasts.
First of all, the cheese. If you live in a cheese-deprived area as I do, Comte may not be available (or is only available at Christmas, sigh) or is prohibitively expensive. Really, you can use any cheese you like here, but I advise using one with a savory note. Another alpine cheese or a bandage-wrapped cheddar would do the trick.

My recipe is based on one featured in the Nov/Dec 2018 issue of Bake from Scratch. I made significant modifications, the foremost being that I halved the recipe so that it would only produce 12 rolls.
This recipe isn’t as fussy as some homemade rolls, but it still takes some time and effort. I was very worried because my first rise was so low, but my rolls rose beautifully once they were formed. That’s the rise that really matters!
If you want to give your second rise a boost, use this trick: preheat your oven at 200-degrees. Shape your rolls or bread. Stick the dough in the oven without any plastic wrap or cover. Immediately turn the oven OFF. Set a timer for 30 to 40 minutes or longer; this will depend on the oven, so experiment. Once the bread has nicely puffed from the heat, remove it from the oven, then preheat it again for the full bake.
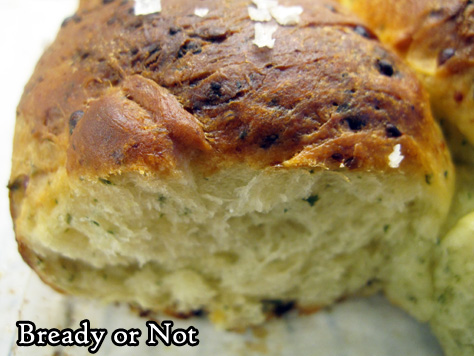
These rolls can be eaten at room temperature or warm, but for me, they really are far better hot. I want them to melt butter!
Bready or Not Original: Comte Pull-Apart Rolls
Equipment
- 9×9 pan
- parchment paper
- kitchen scale
- pastry brush
Ingredients
- 1/2 cup warm milk (105-110 degrees F), can substitute half & half
- 1/2 cup warm water (105-110 degrees F)
- 1/2 Tablespoon active dry yeast
- 1 large egg room temperature
- 2 Tablespoons white sugar
- 1/4 cup unsalted butter melted and divided
- 1/2 Tablespoon kosher salt
- 2 3/4 cup bread flour
- 2 Tablespoons dried parsley or other dried herbs
- 4 ounces grated Comte cheese 100 grams
- flaked salt for garnish, optional
Instructions
- In a stand mixer, place the warm liquids and yeast. Let stand for about 10 minutes, until the yeast is nice and foamy. Add the eggs, sugar, 2 Tablespoons of melted butter, and salt. Gradually beat in the flour, cheese, and parsley, until everything is well combined.
- Cover the bowl to let the dough rise for about an hour.
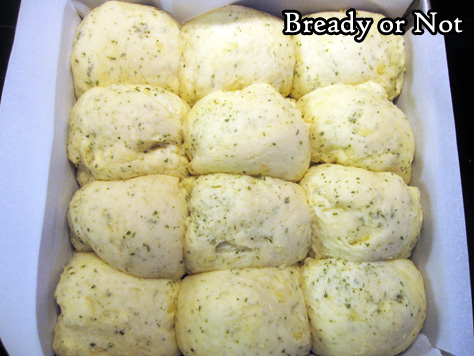
- Line a 9×9 pan with parchment paper cut to crisscross and extend up all four sides. Apply nonstick spray.
- Lightly flour a surface. Turn out the dough onto it. Use the kitchen scale to weigh the dough. Divide it into 12 equal portions, forming each into a tidy ball. Place in rows within the prepared pan, each roll touching. Cover the pan to let rolls rise for another 40 minutes to an hour.
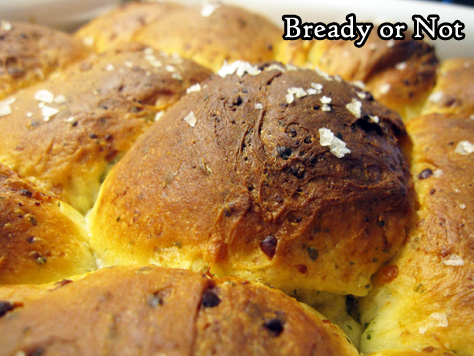
- Preheat oven at 375-degrees. Brush rolls with remaining 2 Tablespoons butter and add a sprinkle of flaked salt, if desired.
- Bake rolls for 13 minutes. Check them. If they are getting quite brown, cover the pan with foil. Bake for another 13 to 15 minutes.
- Serve rolls at room temperature or warm.
OM NOM NOM!
Bready or Not: Cheddar Bay Biscuits
Let’s state a truth up front: a visit to Red Lobster isn’t about the seafood. It’s about those Cheddar Bay Biscuits they bring out as an appetizer.

I’ve used this recipe for about 10 years now. I posted it on my LiveJournal in the earlier iteration of Bready or Not, but now it’s time to share again with new photos and an easy-to-print format.

These biscuits are incredible. Cheesy, crisp, tender. Buttery. I mean, you baste them in butter and seasonings for the final step. You know they will be good.

Plus, these keep well in the fridge for days! In a pinch, you can heat them in the microwave, but they are far better warmed in an oven or toaster oven. That way the outside stays crisp and the interior texture stays just right.

I bet if you give these a try, they’ll be a reliable side dish bread in your recipe repertoire, too!
Bready or Not: Cheddar Bay Biscuits
Equipment
- parchment paper
- pastry brush
Ingredients
Biscuits
- 2 cups all-purpose flour
- 2 teaspoons baking powder
- 1/2 teaspoon baking soda
- 1 teaspoon white sugar
- 1/2 teaspoon garlic powder
- 1/4 teaspoon cayenne pepper
- 6 ounces sharp cheddar cheese shredded
- 1 cup buttermilk or soured milk*
- 1/2 cup unsalted butter 1 stick, melted and cooled
Topping
- 3 Tablespoons unsalted butter melted
- 1/2 teaspoon garlic powder
- 1/4 teaspoon dried parsley
Instructions
- Preheat oven at 475-degrees. Line a big baking sheet with parchment.
- In a big bowl, combine the flour, baking powder, baking soda, sugar, salt, garlic powder, and cayenne. Fold in the cheddar cheese.
- Fold the buttermilk into the dry ingredients, followed by the melted butter, scraping the bottom of the bowl well to make sure everything is mixed in. Grease a 1/3 cup and use that to scoop up portions of dough to place spaced out on the baking sheet.
- As the biscuits bake for 11 to 13 minutes, until golden brown, prepare the topping. Melt the butter and stir in the garlic powder and parsley. As soon as the biscuits are out of the oven, brush on the topping to cover the nooks and crannies of every biscuit on the pan.
- Eat right away. Leftovers will keep in a sealed container in the fridge for days. They can be microwaved, but are best warmed in an oven or toaster oven.
OM NOM NOM!
Notes
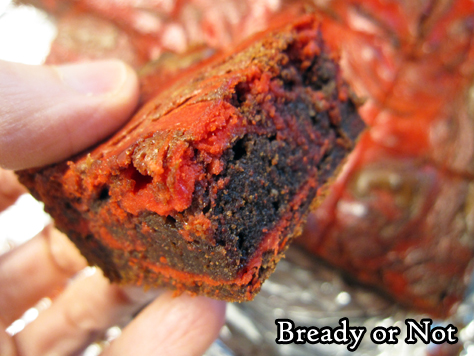
Bready or Not: Peppermint Cheesecake Swirl Brownies
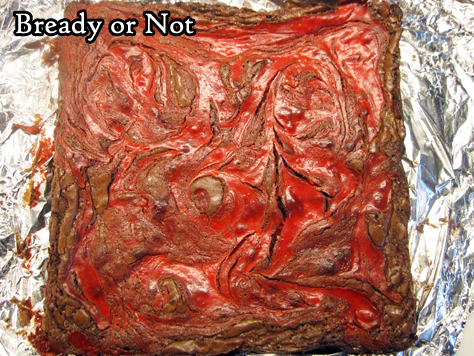
These Peppermint Cheesecake Swirl Brownies will dirty a lot of bowls and tools, but to gorgeous, delicious results.

These are an incredibly holiday-appropriate brownie. I colored the cheesecake layer in red, but really, you could do green, or even mix two small, separate bowls with green and red!
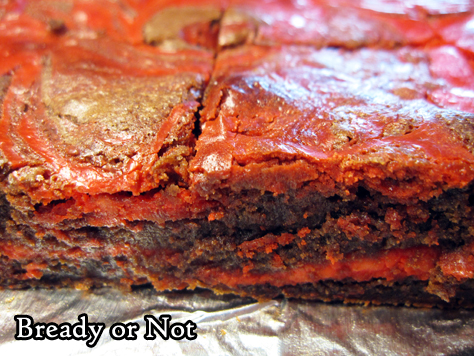
Then there’s the peppermint. It’s not overwhelming in this recipe; to me, it was mild and refreshing against the deep chocolate flavor.
I’m not a fan of cheesecake alone, but I do love that cheesecake flavor and texture when mixed with brownies or other great mix-ins. Be sure to check out some past Bready or Not recipes in the same family!
- Snickerdoodle Cheesecake Bars
- Cheesecake Brownies
- Cream Cheese-Stuffed Lemon Bundt Cake
- Swirled Goat Cheese Brownies
- Lemon Cheesecake Bars
- Earl Grey Cheesecake Bars
- Matcha Cheesecake Cookies
- Matcha Cheesecake Bars
Peppermint Cheesecake Swirl Brownies modified from the original recipe in Bake from Scratch Holiday Cookies 2019.
Bready or Not: Peppermint Cheesecake Swirl Brownies
Ingredients
Cream cheese swirl
- 8 ounces cream cheese (one block) softened
- 1/4 cup white sugar
- 1 large egg room temperature
- 1/2 teaspoon peppermint extract
- red gel food coloring
Brownie layer
- 4 ounces dark chocolate chips or chopped chocolate bar
- 3/4 cup unsalted butter 1 1/2 sticks
- 1 cup white sugar
- 1/2 cup brown sugar light or dark, packed
- 2 teaspoons vanilla extract
- 1 teaspoon kosher salt
- 3 large eggs room temperature
- 1/2 cup all-purpose flour
- 1/4 cup unsweetened cocoa powder sifted
Instructions
- Beat cream cheese until it is smooth and creamy. Add white sugar to fully incorporate. Mix in egg and peppermint extract. Stir in droplets of food color to reach desired tint. Set bowl aside.
- Prepare a 9×9 pan by lining it with foil and applying nonstick spray or butter to grease it. Preheat oven at 350-degrees.
- Using a microwave-safe bowl, in brief bursts heat the butter and dark chocolate, stirring well between each pass, until both are melted and smooth. Set aside to cool for a few minutes.
- In the large bowl of a stand mixer, use the whisk attachment to beat together both sugars, the vanilla, and salt. Add the eggs one at a time, and continue to beat at a high speed for 10 minutes. With the mixer on low, pour in the butter-chocolate. Use a spatula to fold in the flour and cocoa until just combined. Batter will be thick.
- Pour half the brownie batter into the prepared pan; use an offset spatula to even it out. Add about half the cheesecake mix in dollops. Repeat twice more, adding brownie and cheesecake in alternate dolloped layers. Use a butter knife to swirl everything together to create a marbled effect.
- Bake for about 45 minutes, until the middle passes the toothpick test. Cool to room temperature then cut into pieces.
OM NOM NOM!
Bready or Not Original: Bread Machine Cheesy Soft Dinner Rolls
I upgraded my original Soft Dinner Roll recipe in the most Beth Cato way possible: I added loads of cheese!

I don’t simply mix cheese into the dough like with a standard cheesy roll or biscuit recipe. Nah, that’s too mundane. I tried a take on lamination–the French technique wherein butter is layered to create flaky layers in pastry. But with cheese.

It worked out, in a beautiful way. In these pictures, you see a fine Vermont Cheddar. I highly recommend using an orange cheese (Cheddar, or if you are blessed, something like Red Leicester) because the finished rolls look amazing. White Cheddar would be great for flavor, too, though it would blend in more.

I wrote this recipe for bread machines, but it would be easy to modify to make by hand. Just let the dough have an initial rise for about an hour, mix the first portion of cheese in, then let it rise again before the lamination stage.

Bready or Not Original: Bread Machine Cheesy Soft Dinner Rolls
Equipment
- bread machine
- jelly roll pan or baking sheet
Ingredients
- 1 cup warm water about 110 degrees
- 1/4 cup vegetable oil
- 2 Tablespoons white sugar
- 3 cups bread flour
- 1 teaspoon kosher salt
- 2 1/4 teaspoons instant yeast or 1 packet instant yeast
- 6 ounces cheddar cheese shredded
Instructions
- Add ingredients EXCEPT cheese into the bread machine. That often means the liquids first. Set the machine on dough cycle and start; this should run for about 2 hours. Once the dough starts mixing, sprinkle in about half the cheese. If necessary–and if safely possible, dependent on the machine–use a spatula to press cheese into the dough. Let dough cycle continue until done.
- Prepare a cookie sheet or jelly roll pan by greasing with butter or nonstick spray.
- Pat out dough on an even lightly-greased surface. It’s time to add the rest of the cheese using a process roughly like French butter lamination.
- Sprinkle a handful of cheese over the lower portion of dough. Fold top part over it, then fold dough the other way, creating a fat dough ball. Pat out dough again. Repeat process again one or two more times, until only a handful of cheese is left.
- Pat out dough again. Use a small round cutter to slice out portions of dough. Place them in the prepared pan, spaced so they don’t quite touch. Sprinkle the remaining cheese on top. Cover pan with plastic wrap or a light towel and let rise again in a warm spot for 30 minutes to 1 hour, until rolls become puffy and double in size.
- Preheat oven at 350-degrees.
- Bake rolls for 15 to 22 minutes. If they begin to brown too much, cover with foil halfway through. Let rolls cool a few minutes before serving.
- Completely cooled rolls can be frozen in gallon freezer bags for several months. Sealed rolls will keep well at room temperature for at least 6 days. They are good eaten at room temperature, but are best briefly warmed in the oven.
*OM NOM NOM!*
Follow me


