


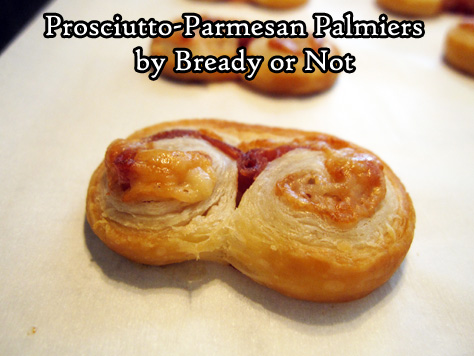
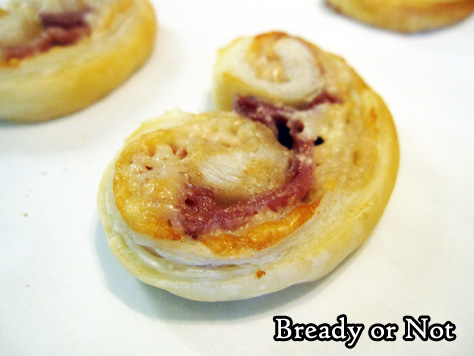
Bready or Not Original: Prosciutto-Parmesan Palmiers
The holiday season is nigh, and these Prosciutto-Parmesan Palmiers are the perfect appetizer for a couple or an entire gang!
These really have three ingredients, plus some flour for dusting a counter. They take minutes to assemble. Stash them in the freezer for hours or days. They bake up fast. They make bellies happy.
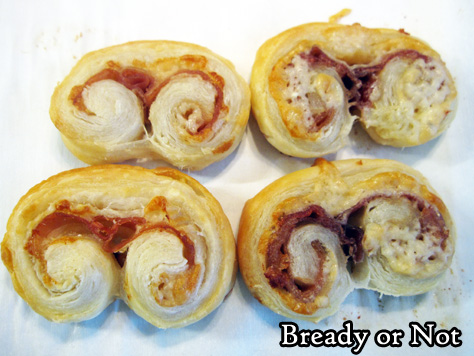
Plus, I daresay, they are downright pretty. I love the layers in puff pastry! Here, those crisp buttery layers are fantastic along with shredded cheese and thin slices of prosciutto.
Honestly, these are dangerous. It’s hard to eat just one.
However, if you can exercise restraint, the leftovers are delicious. They can be eaten cold (the prosciutto is the prominent flavor then), but are better with a brief warm-up in the oven.
Make these your go-to game day, holiday event, or date night treat!
Bready or Not Original: Prosciutto-Parmesan Palmiers
Equipment
- parchment paper
- knife
Ingredients
- flour to dust surface
- 1 sheet puff pastry (half a box) thawed in fridge
- 1/2 cup shredded Parmesan packed
- 2 to 3 ounces sliced prosciutto
Instructions
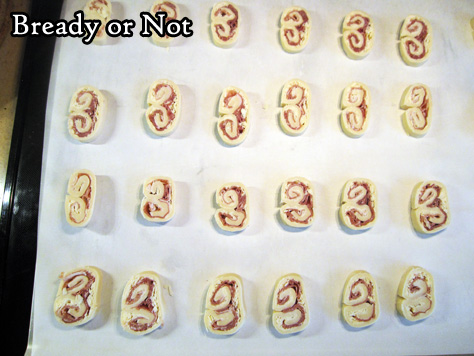
- Hours or days before baking day: Sprinkle flour on a flat, clean surface. Roll out the puff pastry to make a 12-inch square. Cut in half. Sprinkle cheese over both halves. Place prosciutto slices to completely cover cheese; if there is extra meat, layer on the additional pieces. Roll the short sides of each piece of pastry together to meet in the middle–from the end, it will look rather like a number 3. Repeat this with the other half.
- Encase both logs in plastic wrap and freeze until firm, at least an hour, but as long as several days.
- Preheat oven at 400-degrees. Prepare a large baking sheet with parchment paper.
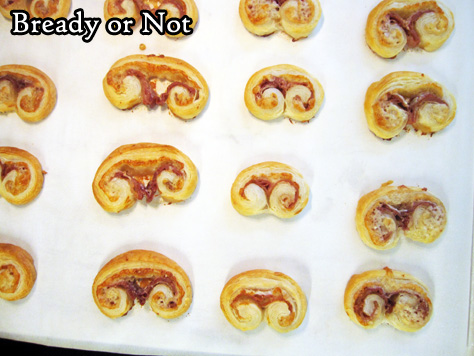
- Pull out frozen logs to thaw for just a few minutes. While it is still mostly frozen, slice into 1/4-inch pieces and place spaced out on parchment. (Note that the end pieces may be sparse on filling and not presentable for company, but still worth baking up for private enjoyment.)
- Bake for 12 to 15 minutes until palmiers are golden brown and puffed. They are best eaten fresh, but leftovers can be refrigerated. They are okay cold, but better toasted briefly again in the oven.
OM NOM NOM!
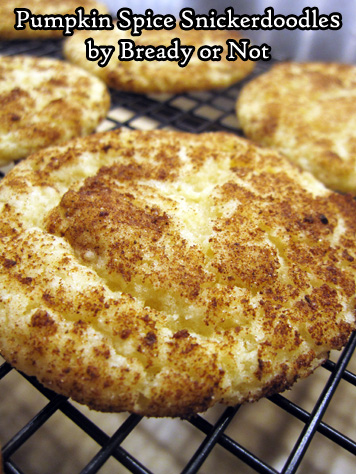
Bready or Not Original: Pumpkin Spice Snickerdoodles
A necessary clarification first thing: these Pumpkin Spice Snickerdoodles are named thusly because they include pumpkin spice, not pumpkin.
If you do want Snickerdoodles with pumpkin, I can help with that, too. Even in bar form.

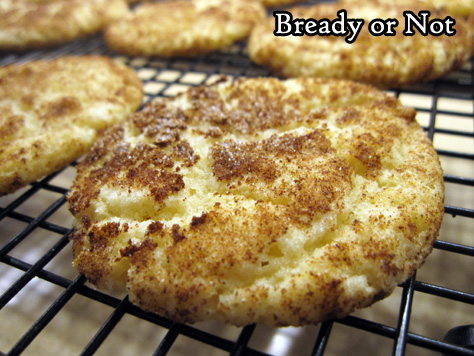
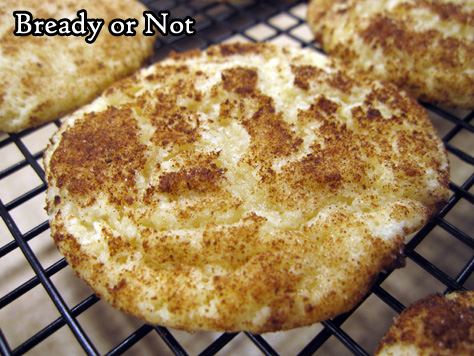
These cookies look like normal Snickerdoodles with crackled tops, but the flavor is much more complex thanks to that spice mix. These really taste and smell like autumn.
However, these are so good, they are fantastic year-round. As I’ve said before, the things you enjoy–be it food or music or décor–shouldn’t be confined to one season. If you like it, like it whenever you want!
This recipe makes a decent batch, about 50 cookies using a teaspoon scoop, and will be best if eaten within 3 days. Therefore, make them to share with a crowd, or you may experience a Snickerdoodle overdose.
Bready or Not Original: Pumpkin Spice Snickerdoodles
Equipment
- parchment paper
- teaspoon scoop
Ingredients
Topping
- 3 Tablespoons pumpkin spice
- 1 Tablespoon ground cardamom
- 1/3 cup white sugar
Dough
- 2 3/4 cups all-purpose flour
- 2 teaspoons cream of tartar
- 1 teaspoon baking powder
- 3/4 teaspoon kosher salt
- 1 cup unsalted butter (2 cubes) room temperature
- 1 1/2 cup white sugar
- 2 large eggs
- 2 teaspoons vanilla extract
Instructions
- Preheat an oven at 350-degrees. Line a large baking sheet with parchment paper. In a small bowl, mix together the three topping ingredients. Set aside.
- In another bowl, combined the flour, cream of tartar, baking powder, and salt. Set aside.
- In a large bowl, beat together the butter and sugar until they are light and fluffy. Add the eggs, one at a time, followed by the vanilla extract. Gradually work in the flour mixture until it’s just combined.
- Use a teaspoon scoop to form small bowls of dough. Roll the dough in the topping spices, one at a time, and place spaced out on the baking sheet.
- Bake for 8 to 10 minutes, until the tops are crackled and just set, but not browning. Let them cool at the sheet for a few minutes, then transfer them to a rack to fully cool.
- Store cookies in a sealed container at room temperature for up to 3 days.
OM NOM NOM!
Bready or Not Original: Sugar-Crusted Pumpkin Cake
This Sugar-Crusted Pumpkin Cake is moist, delicious, and packed with autumnal flavors!

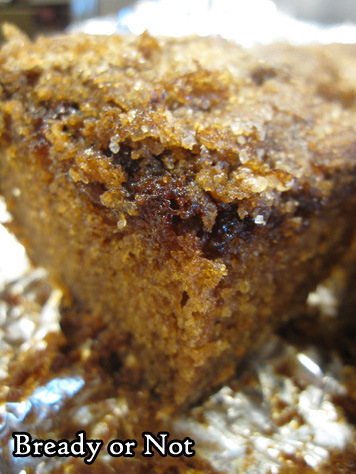
There is a definite pumpkin pie-like vibe to this thing. The white chocolate chips melted along the bottom (hence the direction to grease the foil well) and formed a sort of scrumptious crust, too.
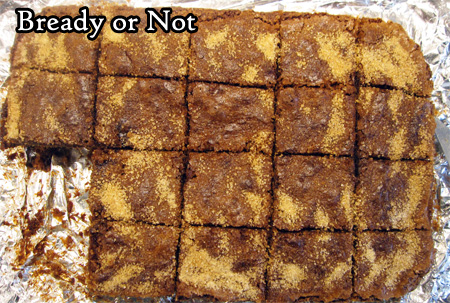
This thing is even pretty. I like using turbinado sugar as a top crust because it’s pretty, texturally delightful, and tastes darn good!

This cake will keep for at least 3 days, covered and chilled, and maybe longer. It also freezes like a champ.
Since this makes a 13×9 pan, it’s probably a good thing it can be portioned out over days and weeks!
Bready or Not Original: Sugar-Crusted Pumpkin Cake
Equipment
- 13×9 pan
Ingredients
Cake
- 4 large eggs room temperature
- 2 cups white sugar
- 1 cup vegetable oil
- 1/2 cup applesauce
- 2 cups cake flour
- 2 teaspoons baking soda
- 2 teaspoons pumpkin spice
- 1 teaspoon salt
- 1 teaspoon vanilla extract
- 1/2 cup pumpkin puree
- 1 cup white chocolate chips
Topping
- 1/2 cup turbinado or other coarse sugar
- 1/2 teaspoon pumpkin spice
Instructions
- Line a 13×9 pan with foil and apply generous nonstick spray or butter. Preheat oven at 350-degrees.
- Mix together the eggs, white sugar, vegetable oil, and applesauce. Add the cake flour, baking soda, pumpkin spice, and salt. Follow up with the vanilla extract and pumpkin puree. Fold in the white chocolate chips.
- Pour batter into the pan and level out. Mix together the two topping ingredients and sprinkle over the cake.
- Bake for 1 hour, or until the middle passes the toothpick test. Let cool at room temperature, then store in fridge. Cake will keep for at least 3 days in the fridge, but can also be sliced and frozen for later enjoyment.
OM NOM NOM!
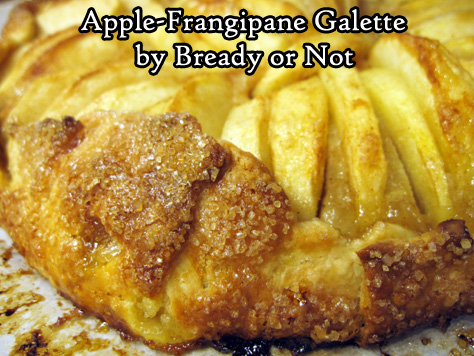
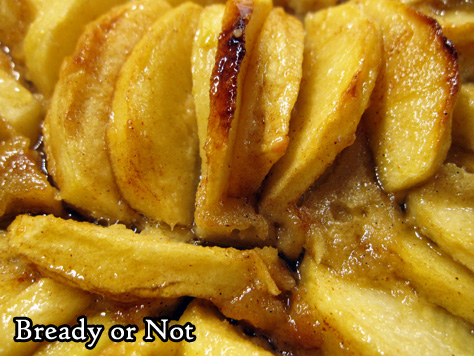
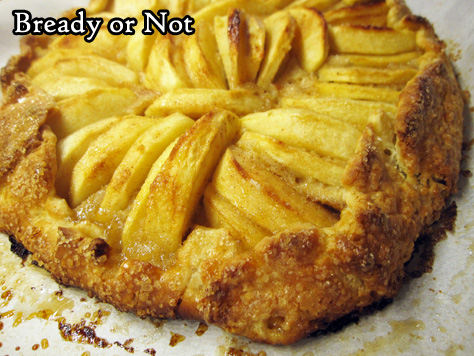
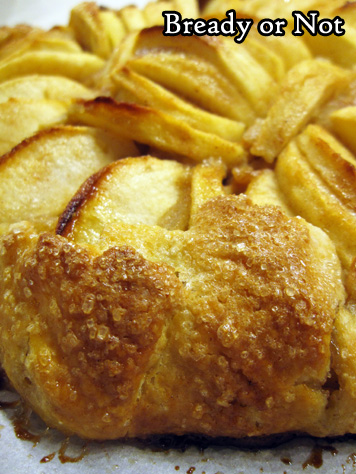
Bready or Not Original: Apple-Frangipane Galette
This Apple-Frangipane Galette is like a leaner apple pie. It’s the way to enjoy a sweet treat without going full overkill.
This recipe has a lot of ingredients and steps, but they can be spread out over a few days, if you want. The actual recipe is pretty straightforward!
I’ve been doing a number of recipes that use frangipane, and I get asked almost every time: “what is frangipane?”
To quote Wikipedia, it’s: “a sweet almond-flavored custard used in a variety of ways including cakes and… pastries. …Today it is normally made of butter, sugar, eggs, and ground almonds.”
In other words, it’s a spreadable, sweet, nutty layer of goodness. It acts as the perfect complement to apples in this recipe.
Do note that this is best enjoyed the day it is made. It’s fine, though, to freeze slices of it right away. When you thaw them later, enjoy the pieces that same day!
Bready or Not Original: Apple-Frangipane Galette
Equipment
- parchment paper
- food processor
- pastry brush
Ingredients
Crust:
- 1 cup all-purpose flour plus more for dusting
- 4 teaspoons white sugar
- 1/2 teaspoon salt
- 6 Tablespoons cold unsalted butter cut into small pieces
- 1 large egg
Frangipane:
- 2/3 cup almond flour sifted to remove lumps
- 1/4 cup white sugar
- 1 Tablespoon all-purpose flour
- 1 Tablespoon unsalted butter room temperature
- 1 large egg
- 1 Tablespoon apple brandy such as Calvados (optional)
- 1 teaspoon pure vanilla extract
- 1/2 teaspoon apple pie spice
- pinch salt
Apple filling:
- 2 medium apples such as Honeycrisp or Golden Delicious
- 1 Tablespoon brown sugar packed
- 1 Tablespoon white sugar
- 1 teaspoon lemon juice
- 1/4 teaspoon apple pie spice
- 1 large egg beaten
- turbinado or other coarse sugar
Glaze:
- 2 Tablespoons honey
- 2 teaspoons apple brandy such as Calvados
Instructions
Make the crust:
- In a food processor, pulse together the flour, sugar, and salt. Add the butter and chop until it’s pea-sized. Add the egg and pulse until it comes together; if it doesn’t, add tiny drizzles of water until it does–just make sure the dough ends up cohesive, not wet. Turn out the dough onto a big piece of plastic wrap and compress the dough to form a disc. Wrap it up and chill it in fridge for a few hours, minimum, or a few days.
Make the frangipane:
- Use a rubber spatula to combine the almond flour, sugar, flour, butter, egg, apple brandy, vanilla, pie spice and salt, making it smooth. Stash it in the fridge until ready to use.
Assembling the galette:
- Preheat oven at 400-degrees. Prepare a big cookie sheet with a piece of parchment. Bring out the dough to warm for a few minutes, then lightly flour a surface and roll it out to about a 12-inch round. Move it to the parchment paper.
- Spread the frangipane over the dough, leaving a blank 1 1/2-inch border. Set the baking sheet in the fridge while preparing the apples.
Prepare the apples:
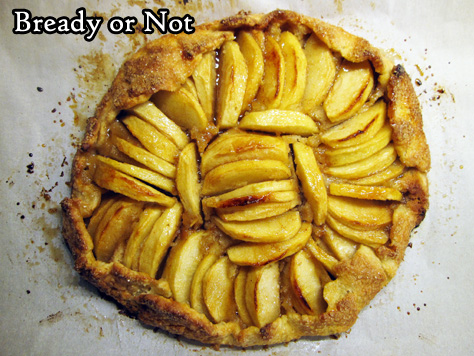
- Peel the apples and slice to 1/4-inch thickness. In another bowl, stir together the brown sugar, sugar, lemon juice, and pie spice. Add this to the apples, and toss them to coat. Bring out the galette dough. Arrange the apples on the frangipane starting from the middle, spiraling them outward while slightly overlapping them. Fold the blank edge over the apples to form a thin, pleated crust. Brush the beaten egg over the crust, then sprinkle it with coarse sugar.
- Bake galette for 35 to 40 minutes. Apples in middle should be fork-tender when done. Cool for about 30 minutes.
Make the glaze:
- In a small saucepan on the stovetop or in a microwave-safe bowl in the microwave, warm the honey and brandy until it is loose and spreadable. Using a clean pastry brush, brush glaze over the apples.
- Let galette cool another 30 minutes, minimum, before cutting it–a pizza slicer is great for this. The galette is best eaten the day it is made, or promptly frozen in slices to be eaten soon after it thaws.
OM NOM NOM!
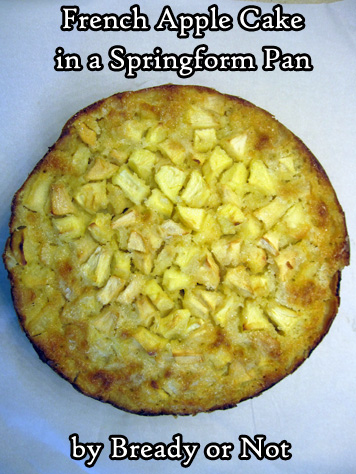
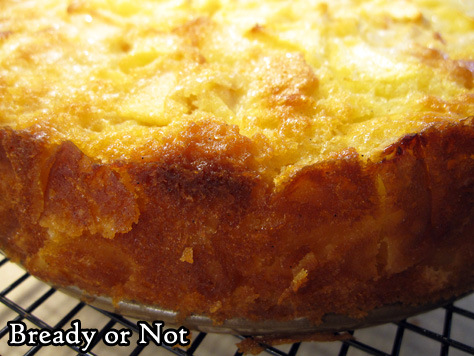
Bready or Not: French Apple Cake in a Springform Pan
This French Apple Cake is thick with apples, not cake. There’s actually just enough batter to adhere everything together.
The apples are the star, so get good ones. I recommend doing about half Honeycrisp and Pink Ladies, but go for a combo of two good kinds of baking apples. (Not sure which ones are best for baking? Google has lots of recs!)
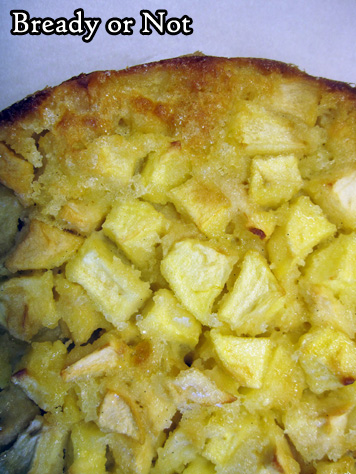
I’ve had a springform pan for years, but I’ve never used it like I did in 2020. That particular pan makes this cake extra good, too, because it creates a high cake with nicely browned edges.
One thing I’ve noticed about French and Irish apple cakes is that they really emphasize the fruit. American cakes and pies add a lot more spice. As much as I love loading on the cinnamon, it’s refreshing to do a take like this sometimes.

Let the fruit taste… well, fruity. Here, the addition of Calvados or another apple brandy brings that out even more. You don’t end up with an alcohol taste in the final result, but it does draw out more of the apple flavor.
This cake is a great one to slice up and freeze for later, too. Make the goodness last even longer!
Modified from Bake from Scratch September/October 2020 issue.
Bready or Not: French Apple Cake in a Springform Pan
Equipment
- 9-inch springform pan
- uneven spatula
- parchment paper
Ingredients
- 8 large baking apples totaling about 800 grams mix of Honeycrisp and Pink Lady recommended
- 2 teaspoons lemon juice
- 3 large eggs room temperature
- 3/4 cup white sugar
- 3 Tablespoons apple brandy use Calvados to make it especially French
- 1 teaspoon vanilla bean paste or substitute vanilla extract
- 1 cup all-purpose flour
- 1 1/2 teaspoons baking powder
- 1 teaspoon kosher salt
- 2/3 cup unsalted butter melted and cooled
- 1 Tablespoon sparkling sugar
- Confectioners' sugar for serving
Instructions
- Preheat oven at 350-degrees. Prepare a 9-inch springform pan by cutting a piece of parchment to fit the base. Apple nonstick spray to the pan, then add the parchment, and spray it as well. In addition, tear a piece of aluminum foil to cup the bottom of the pan to catch any drips.
- Peel the apples and chop into 1-inch pieces. Toss with lemon juice. Set aside.
- In a big bowl, beat eggs until they are pale and foamy. Add the white sugar, apple brandy, and vanilla.
- In a separate bowl, sift together the flour, baking powder, and salt. Gradually mix the dry ingredients into the big egg-sugar bowl along with the melted butter. Scrape the bowl as needed, stirring everything until just combined. Don’t expect a huge amount of batter–it’s there to act like delicious glue for all of the apple pieces!
- Reserve 1 heaping cup of the apple chunks. Fold the rest of the apples into the batter, coating them. Dump the mix into the prepared pan and even out with an uneven spatula. Arrange the remaining apples on top, pushing them into the batter and smoothing them out as much as possible.
- Bake for 20 minutes. Add sparkling sugar over the top. Bake another 20 minutes and check on the cake. It is done with apples in middle are tender and a digital thermometer plunged into the center reads at least 200-degrees. If needed, cook longer; if it’s browning too much, cover with foil.
- Let cake cool in pan for 15 minutes on a cooling rack. Carefully release the springform ring to let it completely cool for at least an hour; place in fridge to speed the chilling process, if desired.
- Slice into wedges. Enjoy cold, at room temperature, or warmed, with confectioners' sugar sprinkled over the top. Pieces can also be individually wrapped and frozen for later.
OM NOM NOM!
Bready or Not Original: Thin Mint Cake
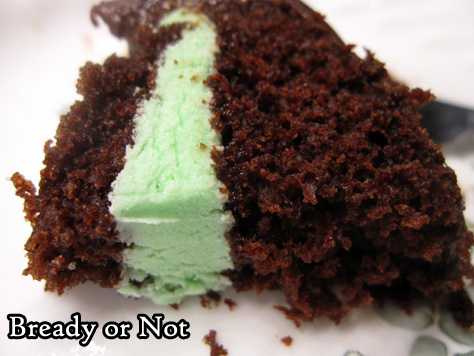
Oh hey, it’s time for cake. A Thin Mint Cake that is neither too big or too small, something that keeps well stashed in the fridge, and looks as amazing as it tastes.
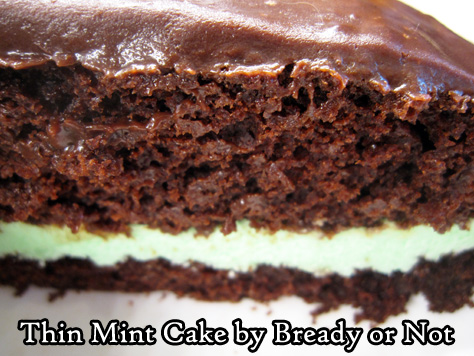
If you love chocolate and mint, this is the cake for you. The cake is loaded with chocolate flavor, and a ganache adds a shiny finishing touch.
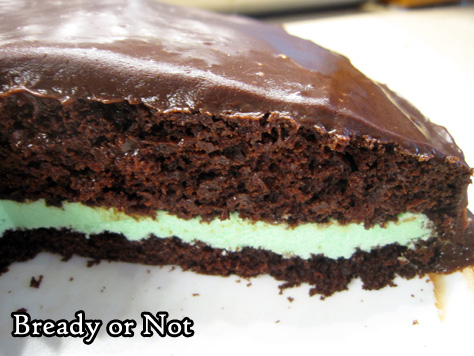
The middle layer of the cake is essentially a peppermint or mint-flavored buttercream. Sweet but not too sweet, it gives good contrast to balance the prevalent chocolate flavor.

I used this cake to try out a technique I’ve only read about and seen on TV before–I used four toothpicks to measure the halfway point on the sides of the cake, then tugged a piece of floss to cut the cake evenly in half! It worked out well.

Of course, you can still use a knife to cut through. The toothpicks will still be a helpful guide.
This is an ideal birthday or special occasion cake for a small group!
Greatly modified from Eating Well Magazine May 2020.
Bready or Not Original: Thin Mint Cake
Equipment
- 9-inch cake pan
- ruler
- toothpicks
- unwaxed floss
- parchment paper
Ingredients
Cake
- 1 cup all-purpose flour
- 1/2 cup white whole-wheat flour
- 3/4 cup white sugar
- 1/4 cup unsweetened cocoa powder sifted
- 1 teaspoon baking soda
- 1/2 teaspoon salt
- 1 cup water
- 1/3 cup canola oil
- 1 Tablespoon apple cider vinegar or other cider vinegar
- 1/2 teaspoon almond extract
- 1/2 teaspoon vanilla extract
Mint Filling
- 1/2 cup unsalted butter (1 stick), room temperature
- 1 1/2 cups confectioners' sugar sifted, more as needed for consistency
- 1/4 teaspoon peppermint extract or mint extract
- 1/4 teaspoon vanilla extract
- 1/4 teaspoon salt
- 1-2 drops green food coloring
- 2 Tablespoons half and half or milk
Glaze
- 1/2 cup half and half
- 1 1/4 cups semisweet chocolate chips
- pinch salt
Instructions
To prepare the cake
- Preheat an oven at 350-degrees. Cut a piece of parchment paper to fit inside a 9-inch cake pan. Apply nonstick spray inside pan, place parchment inside, and spray it again.
- Stir together all-purpose flour, white whole wheat flour, sugar, cocoa, baking soda, and salt.
- In another bowl, whisk together water, oil, vinegar, and both extracts. Gradually mix the wet ingredients into the dry until the batter is smooth. Pour into the prepared pan. Tap and thump it gently on the counter to knock out as many bubbles as possible.
- Bake 25 to 30 minutes, until a toothpick in the middle emerges with few crumbs attached. Let the pan cool on a rack for 10 minutes, then invert cake onto the rack to cool completely.
Make the filling
- Beat the butter until it is creamy and light. Add the confectioners' sugar, 1/2 cup at a time, to fully incorporate; if the mixture is still too soft and loose, add more sugar. Add mint and vanilla extract, followed by the salt. Add a few drops of food coloring to achieve the desired tint. Add the half and half and beat to make the filling fluffy and light.
Slice the cake and fill
- Stick a toothpick into the halfway point at each side of the cake; four toothpick markers work well. Use a knife to barely slice into the cake above each toothpick. Continue to use a long-bladed knife to slice all the way through, or use a long piece of unwaxed floss with the toothpicks as a guide to divide the cake evenly in half.
- Place the base of the cake on a serving plate. Spread the filling over the cake. Place the top of the cake over it, cut side down.
Make the glaze
- Microwave the half & half in a microwave-safe bowl for about a minute, until hot. Stir in the chocolate chips and salt. Stir, stir, stir until the chocolate is smooth and glossy. Let cool about 5 minutes to thicken, then slowly pour and spread glaze over the cake. Let sit at room temperature or in fridge to set, then slice in and enjoy!
- Store cake in fridge. Exposed sides of the cake will dry out more, but it will still be tasty. Keeps for at least 4 days.
