Bready or Not: Swedish-Style Cardamom Buns
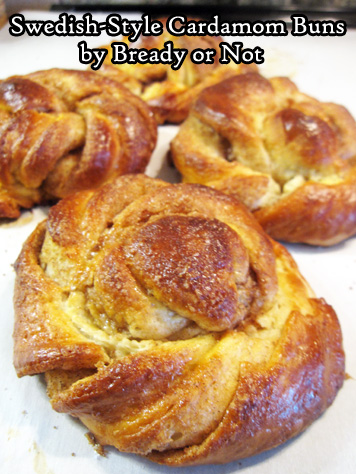
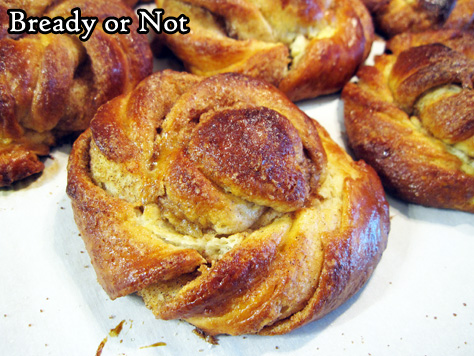
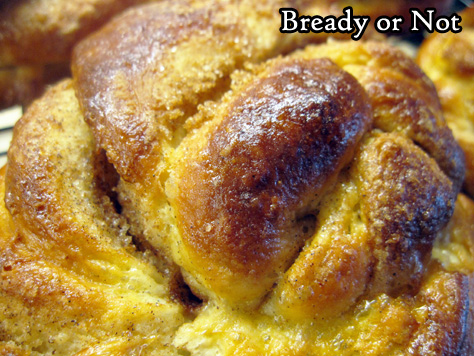
These Swedish-Style Cardamom Buns are as delicious as they are beautiful, and that’s saying a lot.
This enriched dough is light and luscious, and almost melts in the mouth. It’s also somewhat tricky to work with as the dough warms quickly as the rolls are formed. I was dismayed as the dough became tacky as I did the final rolls, but you know what?
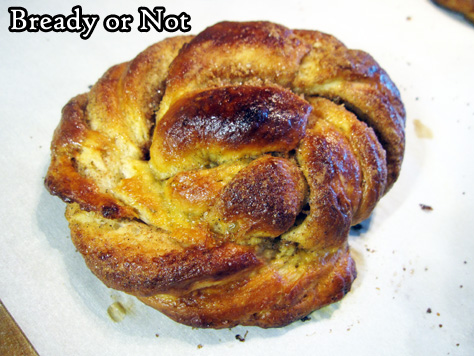
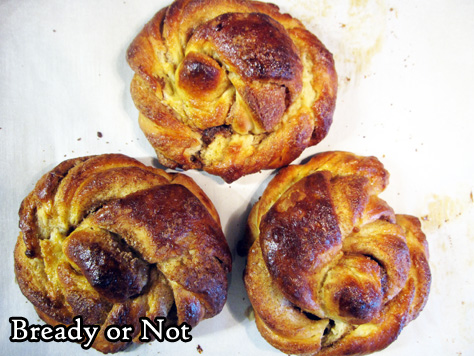
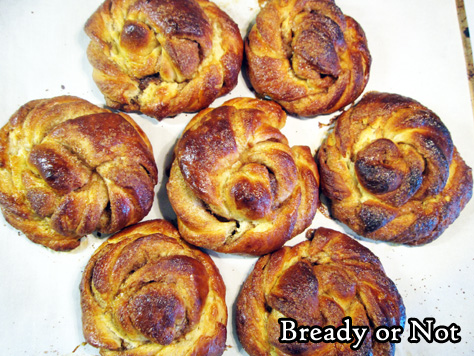
These rolls are beautiful as they are. Sure, Paul Hollywood would criticize them for not all being the exact same, but I’m not on Great British Bake Off–and neither are you. Embrace the wabi-sabi of these rolls, the perfection in imperfection.
Plus, when it comes down to it, the flavor and texture are fantastic. The buttery crumb is perfect with a likewise buttery center swirl that’s packed with cardamom and cinnamon.
These buns taste best when slightly warm. Eat them fresh, and after that, give them a quick toast in the oven to wake up the flavor.
The buns will keep for up to 3 days at room temperature, but be sure they are in a sealed container. They can also be frozen and thawed later, no problem.
Make these buns to really impress guests–and yourself. Like me, I bet you’ll find this recipe to be a keeper.
Modified from Saveur Magazine Volume 4 2018.
Bready or Not: Swedish-Style Cardamom Buns
Equipment
- stand mixer
- parchment paper
- kitchen brush
Ingredients
Dough
- 1/2 cup cold milk or half & half
- 1 Tablespoon instant yeast
- 3 large eggs room temperature
- 1 teaspoon pure vanilla extract or vanilla bean paste
- 3 1/4 cups all-purpose flour plus more as needed
- 1/4 cup white sugar
- 1 1/4 teaspoons kosher salt
- 2 sticks unsalted butter (16 Tablespoons) cold, cut into cubes
Filling
- 1/4 cup white sugar
- 1/4 cup light brown sugar packed
- 1 Tablespoon ground cardamom
- 1 teaspoon ground cinnamon
- 1/2 stick unsalted butter (4 Tablespoons) softened
Instructions
- In a small bowl, whisk together the milk, 2 of the eggs, and the vanilla. Set aside.
- In the bowl of a stand mixer with a paddle attachment affixed, mix together the flour, sugar, and salt. Mix in the chilled butter cubes until they are broken down to the size of peas, which will take a minute or two. Keep the mixer running as the milk mixture is drizzled in. Everything should come together as dough.
- Turn out dough onto a lightly floured surface. Knead it into a ball and wrap it tightly in plastic wrap. Chill it in fridge for at least 6 hours, or a full day.
- About 2 1/2 hours before the buns are to be served, prepare to shape them. Line 2 baking sheets with parchment paper. In a small bowl, mix together the filling’s two sugars, cardamom, and cinnamon. In another bowl, beat the remaining egg with a splash of water and set it aside.
- Lightly flour a large, clean work surface and a rolling pin. [Note for bakers who have hot kitchens: you may need to move fast here, as high-butter content dough can be finicky as it warms.] Roll out the dough into a 12×16 rectangle. Use an uneven spatula or the back of a spoon to evenly spread the softened butter over the surface, leaving a 1-inch border along the top and bottom edges.
- Sprinkle the sugar and spice mixture over the butter. Brush the edges with the beaten egg; set aside the egg to use again for a wash in a short while. Fold the dough in half so that the two egg-washed edges meet. Then use a knife, pizza cutter, or bench knife to make ten even slices perpendicular to the fold.
- One at a time, pick up a strip at the two short ends and twist them each in opposite directions while pulling and stretching gently. Coil the strand to make a bun, tucking the outermost end underneath the round. Set on prepared sheet and continue to form more with several inches of space between them.
- Cover formed buns with plastic wrap and set aside to rise until puffed, about 1 1/2 hours.
- Preheat oven at 400-degrees and situate racks inside to have five inches of space between them.
- Remove the plastic wrap and brush the buns with the remaining egg wash. Bake for 12 minutes, then swap the pan positions in the oven, then bake another 8 to 12 minutes. Buns should be a consistent brown, and a digital thermometer discreetly plunged into a center roll should be over 190-degrees.
- Let rolls cool slightly before indulging. Rolls will keep for up to 3 days in a sealed container at room temperature, and will taste best warmed slightly in an oven or toaster oven. Rolls can also be frozen for later enjoyment.
OM NOM NOM!
Bready or Not Original: Easy Italian Meatballs
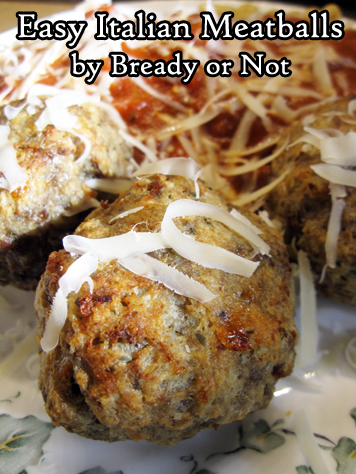
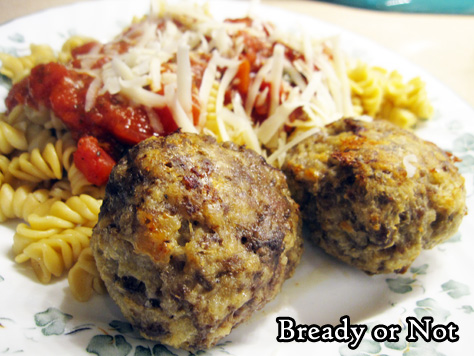
Everyone probably has their own take on classic Italian Meatballs. This is mine!
What I love about the recipe is that it, 1) tastes good, and 2) is convenient. I can mix the meatballs up ahead of time and stash them in the fridge or even the freezer. They can be cooked straight from the freezer, too! Just cook them a little longer.
I always go with 93% lean ground beef, but use whatever kind you want–even do a meat of beef and pork or ground sausage. Consider this recipe a template. Mix it up, switch out or increase seasonings, whatever.
These are great with all kinds of dishes, too. Use them with the standard spaghetti or other Italian pasts, or on zoodles, or with sauce on some submarine sandwich bread. They are even good heated up, eaten by themselves!
Bready or Not Original: Easy Italian Meatballs
Equipment
- food scale
- 9×13 dish or large rimmed baking pan
Ingredients
- 2 Tablespoons extra-virgin olive oil plus extra for pan and hands
- 2 large eggs
- 1 1/2 cups panko
- 1/2 cup milk or water
- 3/4 teaspoon kosher salt
- 1/4 teaspoon black pepper
- 1/2 teaspoon dried Italian seasoning
- 1 teaspoon garlic powder
- 1 ounce Parmesan or Grana Padano, freshly grated, roughly 1/2 cup
- 1 pound ground beef
Instructions
- Move rack to top third of oven and start to preheat at 425-degrees. Rub or brush a 9×13 casserole pan or rimmed baking sheet with oil.
- In a large bowl, use a big spoon to mash together the 2 Tablespoons oil, eggs, panko, liquid, salt, pepper, seasoning, garlic powder, and cheese. The goal is to create a smooth paste. Add a handful of meat. Mix in, and gradually drop in the rest of the meat to thoroughly combine.
- Use a food scale to weigh the meat, then divide that total by 8 (or any other desired increment). With oiled hands, press together meatballs, weighing each to create ones of equal size.
- Bake meatballs for 20 minutes. Use a metal spatula to carefully flip over each for the browned-bottom is on top. Bake for another 6 to 10 minutes, until meatballs are fully browned. An instant read thermometer plunged into one should read over 160-degrees.
- Serve as desired. Leftovers are great to refrigerate or freeze.
OM NOM NOM!
Bready or Not Original: Chewy Cookie Butter Chocolate Chip Cookies
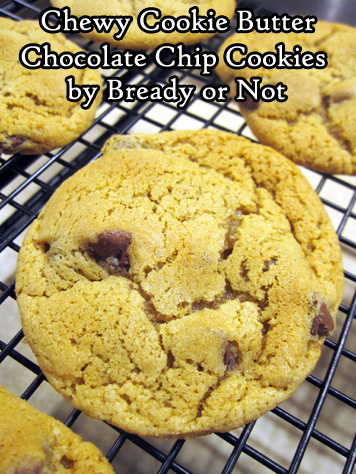
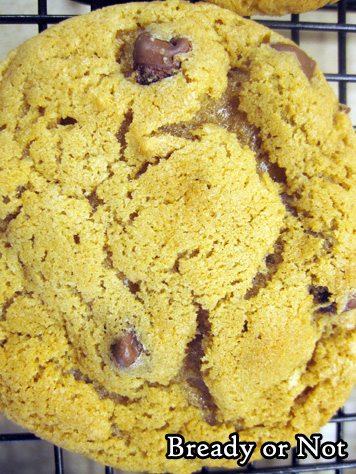
These Chewy Cookie Butter Chocolate Chip Cookies are embodied with extra cookie dough flavor thanks to the miracle of cookie butter.
It always seems someone is always discovering cookie butter for the first time, so I shall repeat: this stuff is basically ground-down cookies blended with oil, giving it the same consistency as peanut butter, but without the health benefits. And oh yeah, it’s delicious.
Ccookie butter can be found under the Biscoff brand at many grocery stores (and sometimes in a store generic brand) and at Trader Joe’s as Speculoos. You can use it just as you would peanut butter for sandwiches or for baked goods.
It’s fantastic stuff paired with chocolate, as in this recipe. It makes cookies taste more… cookie. Once you try it, you’ll know what I mean.
This recipe makes a nice, big batch of crispy, chewy cookies. Use any kind of chocolate chips that you want–or use a mix! It’ll all be good.
Bready or Not Original: Chewy Cookie Butter Chocolate Chip Cookies
Equipment
- tablespoon scoop
Ingredients
- 2 1/2 cups all-purpose flour
- 1 teaspoon baking soda
- 1/2 teaspoon salt
- 1/2 cup unsalted butter (1 cube), room temperature
- 1/2 cup creamy cookie butter
- 1 cup brown sugar packed
- 1/2 cup white sugar
- 2 eggs room temperature
- 2 Tablespoons light corn syrup
- 2 Tablespoons water
- 3 teaspoons vanilla extract
- 1 bag milk chocolate chips or semisweet chips, about 1 3/4 cups
Instructions
- Preheat oven at 375-degrees.
- In a medium bowl, sift together flour, baking soda, and salt. Set aside.
- In a big mixing bowl, beat butter and cookie butter until completely blended. Add the two sugars. Beat in the eggs, one at a time, followed by the corn syrup, water, and vanilla. Gradually mix in the dry ingredients. Fold in the chocolate chips.
- Use a tablespoon scoop to dole out dough onto a cookie sheet, giving each one room to spread while baking. Bake for 10 to 11 minutes, until golden, then let them sit on the sheet another 5 to 10 minutes to set. Transfer to rack to completely cool.
- Store in a sealed container at room temperature. They will keep well for up to 3 days.
*OM NOM NOM!*
Bready or Not Original: Food Processor Brioche Rolls
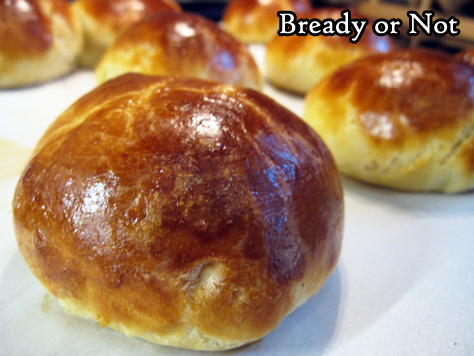
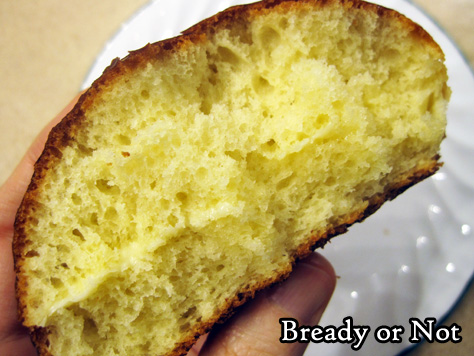
My no-fuss Food Processor Brioche Rolls recipe will dazzle your mind because they are SO EASY. Enriched doughs like this have a reputation (that is well-earned) to be time-consuming and aggravating. Not anymore.
The food processor is what makes this easy-peasey. It mixes the dough in no-time, and aerates the butter and eggs into the flour and develops that all-important gluten.
These rolls are good for any variety of uses, as they can be eaten with things sweet and savory. As the bread is nice and durable, we found they worked well for shredded pork sandwiches, with barbecue sauce and all.
Once these are baked-up, they are fantastic to freeze and thaw, too. They really are best eaten within a day–I suppose they still had to be fussy in at least one way!
Bready or Not Original: Food Processor Brioche Rolls
Equipment
- food processor
- food scale
Ingredients
1-lb batch
- 1/4 cup warm water no hotter than 130-degrees
- 2 1/4 teaspoon dry yeast 1 packet
- 1 3/4 cups all-purpose flour
- 3 Tablespoons white sugar
- 1/4 teaspoon salt
- 2 large eggs room temperature
- 6 Tablespoons unsalted butter melted
2-lb batch
- 1/2 cup warm water no hotter than 130-degrees
- 4 1/2 teaspoons dry yeast 2 packets
- 3 1/2 cups all-purpose flour
- 6 Tablespoons white sugar
- 1/2 teaspoon salt
- 4 large eggs room temperature
- 12 Tablespoons unsalted butter melted (1 1/2 sticks)
For egg wash
- 1 large egg room temperature
- 1 Tablespoon milk or half & half
Instructions
Follow these same directions, regardless of the batch size.
- Affix steel S-blade inside food processor.
- In a cup, stir together the dry yeast and water. Place the flour in the work bowl, followed by the yeast-water, sugar, and salt. Pulse a few times. Add the eggs and spin until they are mixed in, no more than 10 or 15 seconds.
- Start the processor on low and pour in the melted butter in a solid stream. Stop mixing after about 20 seconds. The dough will be very sticky and fluid.
- Apply nonstick spray or butter in a big mixing bowl. Pour in the dough. Cover with plastic wrap and let the dough rise at room temperature until it has tripled in size, no more than 3 hours. Keep an eye on it, because it can expand fast.
- Flour hands and punch down dough.
- Cover bowl with plastic wrap again, and stash the bowl in the fridge. Keep it there overnight, at minimum, or up to a day. It will rise a bit but nowhere near as much as the initial rise.
- To make rolls, prepare a baking sheet with parchment or nonstick spray.
- Prepare egg wash. Crack egg into a bowl. Beat in milk. In addition, add water to a small saucer and set it within reach.
- Grab small handfuls of dough. To get amounts even, use a kitchen scale to measure out 4-ounces worth. Working fast, pat into a ball. Dip fingers in water then stroke dough to smooth out rough spots. Set rounds on prepared sheet, spaced out. If the dough gets too sticky to work with, place in fridge briefly to chill again.
- Once rolls are formed, brush them with the egg wash. Let them rise for an hour, until nicely puffed.
- Preheat oven at 400-degrees.
- Gently brush on more egg wash. Place in oven and bake for 12 to 15 minutes, until browned and set. Doneness can be double-checked by jabbing a thermometer into a subtle spot along the bottom to ensure the middle is over 190-degrees.
- Rolls are best eaten within a day, but they keep very well frozen. Eat them warm or at room temperature.
OM NOM NOM!
Bready or Not Original: Slow Cooker Apple Steel Cut Oats
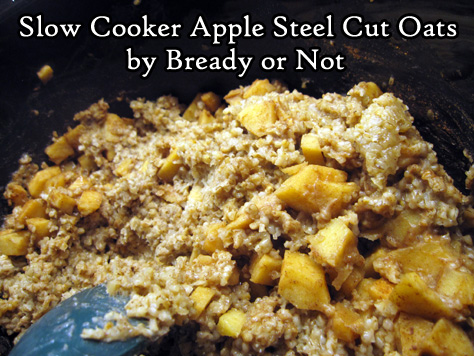
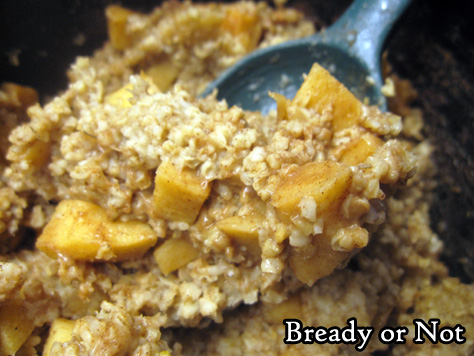
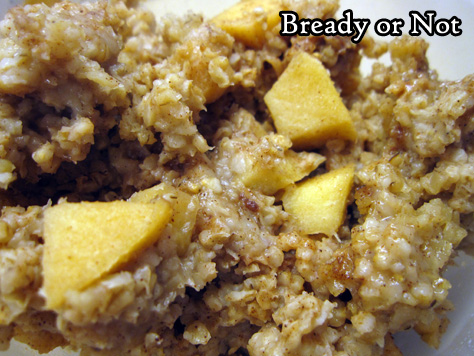
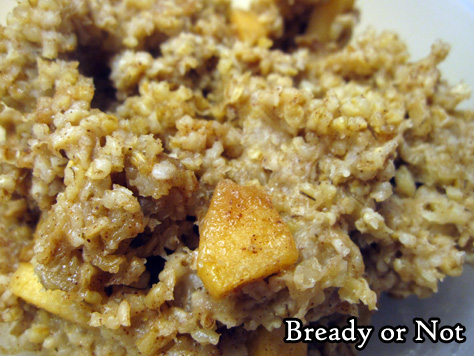
These Slow Cooker Apple Steel Cut Oats are not the most photogenic of foods, but they are delicious, healthy, and good, and probably one of the most convenient meals in my cooking repertoire.
I’ve been cooking this recipe for over five years now, tweaking it here and there, making it better. What I present here is really a foundation. This recipe can be customized all kinds of ways–either when the food is being assembled, by adding in different spices or apples, or by tweaking it at serving time.
I love using Gala, Honeycrisp, or Pink Lady apples, but go for any good baking-type apple or a variety thereof. You don’t want the apples to go to mush. Or maybe you do? That might not be a terrible thing here.
I typically use unsweetened vanilla almond milk or cashew milk, but any plain or vanilla nut, soy, or oat milks would work, or you can opt for dairy milk.
This isn’t an overnight slow cooker oats recipe. I’ve tried that. Even on low and warm settings, the oats just plain overcooked for my preference. The consistency goes brick-like and the pot requires some intense scraping if you don’t use a removable liner. I prefer to make this during the day, and then portion out the oats to go in the fridge and freezer. They reheat beautifully.
Bready or Not Original: Slow Cooker Apple Steel Cut Oats
Equipment
- large slow cooker
Ingredients
- 2 cups steel cut oats no substitutes
- 2 cups nut milk or oat milk, regular or vanilla, sweetened or unsweetened
- 2 cups water
- 2 medium apples peeled and chopped
- 1/4 cup brown sugar packed
- 1/4 cup pure maple syrup
- 2 teaspoons ground cinnamon
- 1/4 teaspoon sea salt
- 2 teaspoons vanilla extract
Instructions
- Place all ingredients in slow cooker and stir to distribute. Place lid on pot and put heat level to LOW. Cook for 3 hours before lifting lid again. Stir and taste to test doneness. Continue to cook for 30 minutes to an hour more, dependent on the desired texture for the oats. The longer it cooks, the thicker it will be.
- Serve oats fresh, or stash in fridge to reheat in microwave over the next week. These oats are great to portion out and freeze for later. If desired, add more spices, fresh fruit, or extra milk when serving–the customization possibilities are endless!
*OM NOM NOM!*
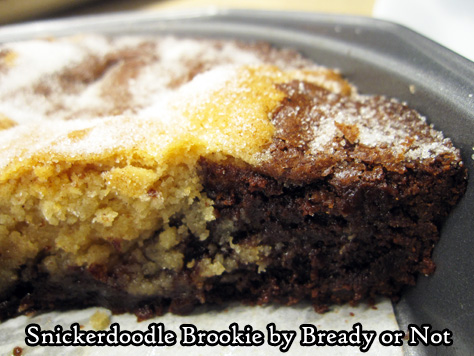
Bready or Not: Snickerdoodle Brookie
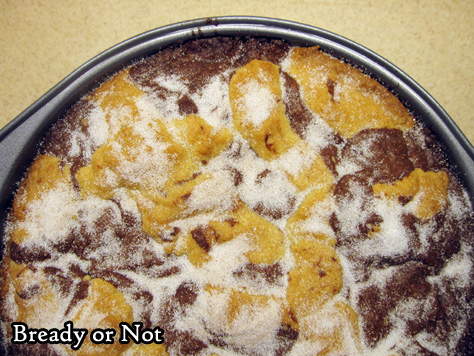
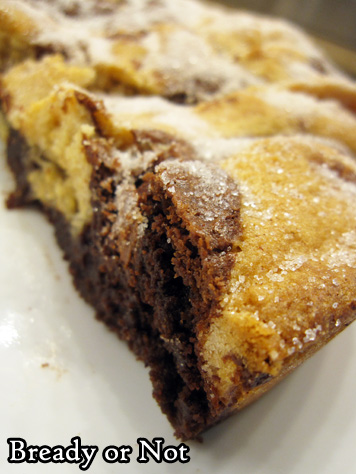
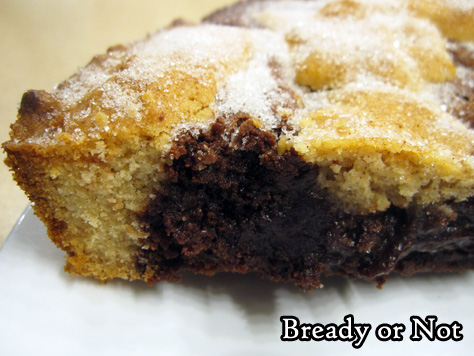
Don’t struggle to choose between Snickerdoodles and Brownies. Have them both at the same time in this extraordinary Snickerdoodle Brookie!
This is essentially like a massive cookie-cake hybrid. It looks impressive, and the flavor is impressive, too. If the layers work out right, you get a bit of everything in every bite.
If you eat the brookie warm, the chocolate flavor is quite strong. I actually liked this best at room temperature. The flavors play together better then.
I mean, it’d be a shame to not get to enjoy the Snickerdoodle side of things. A travesty.
I modified this from the original in my favorite food magazine, Bake from Scratch. I tried to make it easier by using the microwave, prepping the pan with parchment, and clarifying the steps throughout.
I can also testify that this is a great recipe to portion out and freeze. Pieces don’t take long to thaw and the brookie is dense enough to be pretty portable, too, though the dusting of cinnamon and sugar on top can sometimes be messy.
Modified from the March/April 2020 issue of Bake from Scratch Magazine.
Bready or Not: Snickerdoodle Brookie
Equipment
- 9-inch round cake pan
- parchment paper
Ingredients
Brownie batter:
- 6 ounces semisweet chocolate chips or bittersweet (170 grams)
- 1/2 cup unsalted butter 1 cube
- 1 cup white sugar
- 2 large eggs
- 1 teaspoon vanilla extract
- 3/4 cup all-purpose flour
- 1/4 cup Dutch process cocoa powder sifted
- 1/2 teaspoon kosher salt
Snickerdoodle dough:
- 1/3 cup unsalted butter softened
- 1/2 cup white sugar
- 1 large egg
- 1/2 teaspoon vanilla extract
- 1 cup all-purpose flour
- 1/2 teaspoon cream of tartar
- 1/2 teaspoon kosher salt
- 1/2 teaspoon ground cinnamon
- 1/4 teaspoon baking powder
Topping:
- 1 tablespoon white sugar
- 1/8 teaspoon ground cinnamon
Instructions
- Preheat oven to 350-degrees. Cut a piece of parchment to fit inside a 9-inch round cake pan. Apply nonstick spray in pan, place parchment, then spray parchment as well. Set aside.
Make brownie batter
- Melt together the chocolate and butter either in a double boiler on the stove or in the microwave in a microwave-safe bowl. Stir until everything is mixed and smooth. Stir in sugar. Set aside to cool for a few minutes before mixing in the eggs and vanilla.
- In a medium bowl, stir together flour, cocoa, and salt. Fold the dry ingredients into chocolate mixture just until combined. Set aside.
Make snickerdoodle dough
- Beat together the butter and sugar until they are fluffy; in a stand mixer, this will be at about 3 to 4 minutes. Scrape the sides of the bowl a few times. Add the egg and vanilla.
- In a separate bowl, stir together flour, cream of tartar, salt, cinnamon, and baking powder. Gradually mix the dry ingredients into butter mixture. Dough will be quite thick.
Assemble the cake
- Spoon large dollops (about 3 tablespoons each) of brownie batter into bottom of the prepared pan, leaving space between each lump. Crumble dollops of snickerdoodle dough in between brownie batter. Top with any more scoops of brownie batter and snickerdoodle dough. Gently use fingers to even out top.
- Bake until the middle passes the toothpick test, 33 to 40 minutes.
Make topping
- Stir together cinnamon and sugar. As soon as the cake is removed from the oven, sprinkle the mixture across the top.
- Let cool at least 15 minutes before cutting in. Cake can be served warm or at room temperature. It can also be frozen in slices and thawed for later enjoyment.


