


Worldcon Seattle next week!
I’m traveling to Seattle next week to attend Worldcon August 14 through 16th. My schedule is jam-packed, with loads of volunteering on Friday and then panels on Saturday. Find me early on while I still have cookies, and you can get a wrapped cookie AND a special “I ate Beth Cato’s cookies” badge ribbon. I’ll be wearing a black mask in crowds.
Follow me on social media for updates throughout the con! (The links are on the right side of this very page if you’re on the web version.)

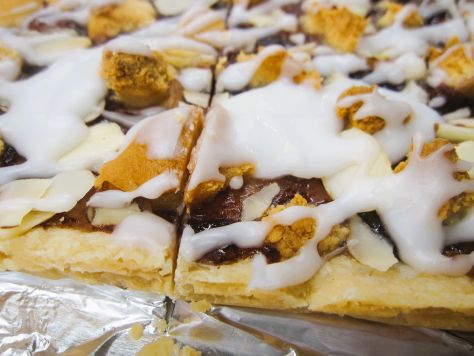
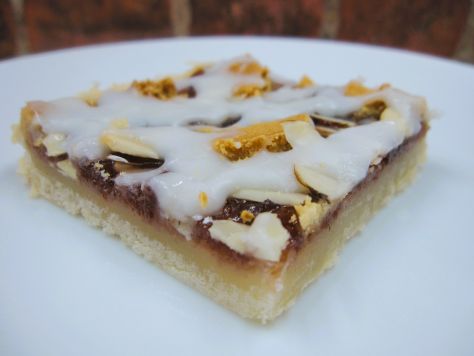
Bready or Not: Fruit and Almond Crumble Bars
These Fruit and Almond Crumble Bars are SO GOOD, people. Fruity, almondy, chewy, crunchy, sweet. A lot of awesome adjectives.
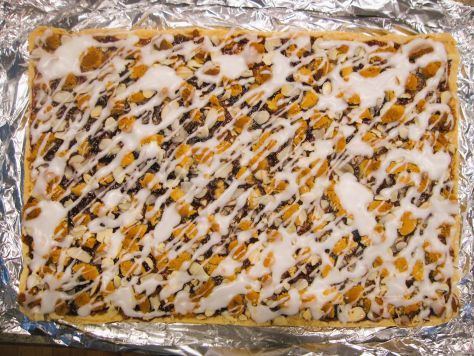
These bars are cousins of the Dutch Letter Bars I recently shared. The amounts produced are quite different–note that this recipe calls for a 15×10 pan (aka a jelly roll pan). This is a recipe to feed a potluck, truly.
Use whatever fruit spread you want here. I went cheap and used a mixed berry variety I bought at Costco. Cherry would be a more traditional choice. I’d love to make these again using blueberry.
Modified from Better Homes & Gardens December 2023.
Bready or Not: Fruit and Almond Crumble Bars
Equipment
- 15x10x1-inch pan (jelly roll pan)
- aluminum foil
- nonstick spray or butter
- uneven spatula
Ingredients
Bars
- 1 1/4 cups unsalted butter softened
- 1 cup confectioners’ sugar
- 2/3 cup white sugar
- 1 teaspoon vanilla extract
- 1 teaspoon almond extract
- 2 2/3 cups all-purpose flour
- 1 1/2 cups fruit preserves
- 7 or 8 ounces almond paste
- 1/2 cup chopped almonds
Glaze
- 2/3 cup confectioners’ sugar
- 1 teaspoon almond extract
- 1 Tablespoon water
Instructions
- Preheat oven at 325 degrees. Line a 15x10x1 pan with a large piece of aluminum foil. Add nonstick spray or butter to coat.
- In a large bowl, beat butter to soften. Add both sugars to thoroughly combine. Add both extracts. Beat in flour until just combined, scraping the bottom of the bowl a few times. Press dough evenly into the base of the pan. Bake until set, 20 to 25 minutes.
- Use an uneven spatula to spread fruit preserves over top. Crumble up the almond paste and sprinkle over top. Sprinkle on almond pieces.
- Bake for another 35 to 40 minutes, until both the almond paste and nuts have browned. Cool on a wire rack for a few hours, stashing in fridge to chill faster.
- Mix glaze, adding more sugar or water as needed to create a thick yet drizzable texture. Drizzle on glaze. Let set again, at least 30 minutes, or in fridge.
- Use foil to lift contents onto cutting board to slice up. Store in an airtight container in the fridge for up to 3 days. The bars can also be frozen fully prepared.
OM NOM NOM!
Bready or Not: Almond Frangipane Cookies
If you love frangipane like I do, you really must make these incredible Almond Frangipane Cookies. They are chewy and crunchy in all the best ways.

If you don’t know about the wonders of frangipane yet, oh boy, are you in for a treat! Frangipane is sweet almond custard used in a lot of French baked goods; it’s also in the glorious British Bakewell Tart.

Quite often, the croissants and other pastries that include frangipane tend to be fussy to make. Not so with these cookies. The dough is pretty simple. Just chill it a bit, and bake away!

Greatly modified from Bake from Scratch Magazine July/August 2024.
Bready or Not: Almond Frangipane Cookies
Equipment
- parchment paper
- large cookie scoop/tablespoon
- sifter
Ingredients
- 2 1/4 cups all-purpose flour
- 1 cup almond flour sifted
- 3/4 teaspoon baking powder
- 1/2 teaspoon kosher salt
- 1/4 teaspoon baking soda
- 1 1/4 cups brown sugar packed
- 3/4 cup white sugar
- 1 cup unsalted butter (2 sticks) melted and cooled a little
- 2 large eggs
- 2 teaspoons vanilla extract
- 1 teaspoon almond extract
- 2 1/2 cups sliced almonds topping
- confectioners’ sugar topping
Instructions
- In a medium bowl, combine flour, almond flour, baking powder, salt, and baking soda.
- In a mixing bowl, combine both sugars and butter. Mix in the eggs and extracts. Gradually beat in the dry ingredients until just combined.
- Put a large stretch of parchment paper on the counter. Place the sliced almonds in a bowl.
- Use a large cookie scoop to shape dough. Roll dough in almonds to completely coat. Place cookie balls in fridge to chill at least 2 hours or overnight, or place in freezer bag for later baking.
- Preheat oven at 350 degrees. Place parchment paper on baking sheet. Set dough balls on sheet, spaced out about 2 inches; they will spread. Bake for 14 to 16 minutes, until set.
- Move to rack to completely cool. Sift confectioners’ sugar over tops.
- Store in a sealed container. Cookies are best within 2 days but are okay after that.
OM NOM NOM!
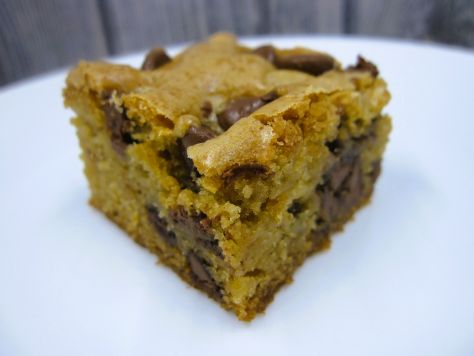
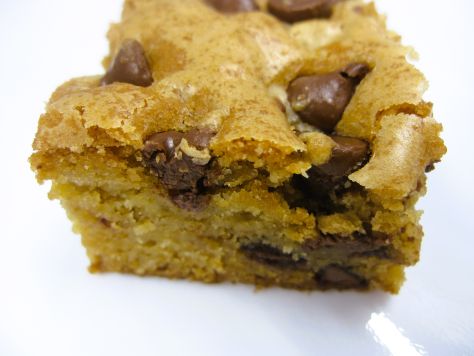
Bready or Not Original: Sourdough Blondies
If you like the tang of sourdough, these special Sourdough Blondies are likely your kind of thing. They are also quick to make and delicious!
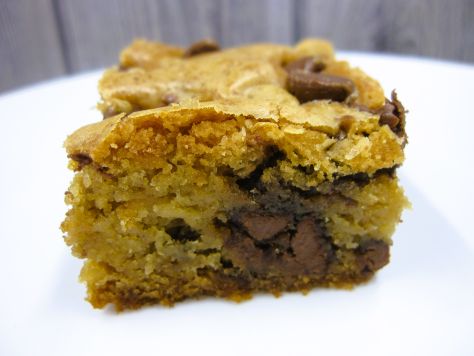
The overall texture of these bars impressed me. They are dense and sturdy, the kind of bar you could place in a little bag and pack with a lunch, but they are still soft and chewy to eat.
Why am I featuring so many sourdough recipes these days? Because, starting in early 2024, I began maintaining my own sourdough starter (named Mother) for book research reasons. That book, A House Between Sea and Sky, is out on October 1st! It features a sentient sourdough starter (also named Mother).
Bready or Not Original: Sourdough Blondies
Equipment
- 9×13 pan
- aluminum foil
- nonstick spray
- uneven spatula
Ingredients
- 1 cup unsalted butter (2 sticks)
- 1 cup white sugar
- 1 cup brown sugar packed
- 2 large eggs room temperature
- 3/4 cup sourdough discard (170 grams)
- 2 teaspoons vanilla extract
- 3 cups all-purpose flour
- 1 teaspoon baking soda
- 1/2 teaspoon baking powder
- 1 1/2 teaspoons salt
- 2 teaspoons cornstarch
- 11 ounces chocolate chips divided (1 bag)
Instructions
- Preheat oven at 350 degrees. Line a 13×9 pan with aluminum foil and coat with nonstick spray or extra butter.
- In a large microwave-safe bowl, melt the butter. Beat in the two sugars. Add the two eggs. Add the sourdough discard. Add vanilla.
- In a separate bowl, combine flour, baking soda, baking powder, salt, and cornstarch. Stir into the wet mixture, scraping the bottom of the bowl on occasion.
- Measure out 1 1/2 cups chocolate chips. Fold them into the dough.
- Scoop dough into prepared pan and even out with an uneven spatula. Sprinkle the remaining chocolate chips on top and press in.
- Bake for 40 to 45 minutes, until top is golden and set and the middle passes the toothpick test. Cool completely, speeding process in fridge, if desired.
- Use foil to lift contents onto a cutting board to slice into bars. Store in a sealed container at room temperature.
