


Bready or Not: St. Louis Gooey Butter Cake
A disclaimer straight up: there are many variations on this recipe, and mine is based on a version published in Bake from Scratch Magazine. I can’t say how it compares to others out there, but I can say with confidence that my recipe here is DELICIOUS.
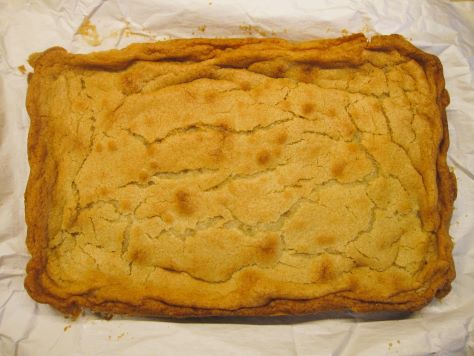
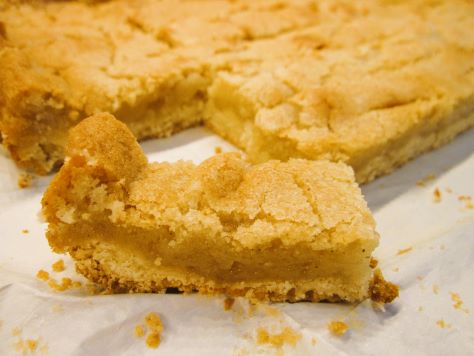
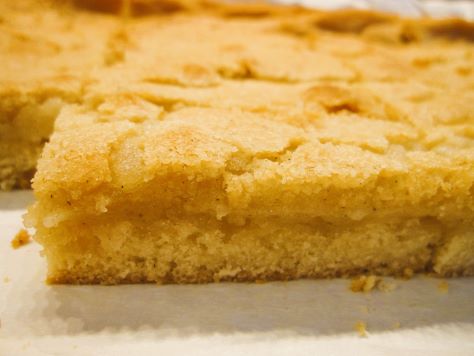
There are a lot of steps here but the progression is straightforward. In the old European style, this consists of a yeast cake base with a varied top. Both layers are sweet, soft, and chewy, but in distinct ways. You can see that in the pictures.
This cake is also rich. Not the kind of thing you need a big slice of. I recommend cutting it into finger-sized portions, as some shortbreads are also cut.
Bready or Not: St. Louis Gooey Butter Cake
Equipment
- stove pot
- 13×9 pan
- aluminum foil
- nonstick spray or butter
- stand mixer
- uneven spatula
Ingredients
Browned butter:
- 3/4 cup unsalted butter
Base dough:
- 5 Tablespoons whole milk or half & half, warmed to 105-110-degrees F
- 2 teaspoons active dry yeast
- 1/4 teaspoon white sugar yes this is a tiny amount to feed the yeast
- 3 Tablespoons white sugar
- 1 teaspoon kosher salt
- 6 Tablespoons unsalted butter room temperature
- 1 3/4 cups all-purpose flour
- 1 egg room temperature
- 1/2 teaspoon vanilla extract or vanilla bean paste
Topping:
- 1 1/2 cups white sugar
- 1/2 teaspoon kosher salt
- 1 egg room temperature
- 3 Tablespoons light corn syrup
- 2 Tablespoons water
- 3 teaspoons vanilla extract or vanilla bean paste
- 1 1/4 cups all-purpose flour
Instructions
Brown the butter:
- In a stove pot, heat the 3/4 cup butter on medium, stirring often. Cook until the butter is medium-brown with a nutty aroma, which takes about 7 to 10 minutes. Set aside to bring to room temperature.
Make the dough:
- Line a 13×9 pan with foil and apply nonstick spray or a coating of butter.
- In a small bowl, mix together warm milk, yeast, and 1/4 teaspoon sugar. Let stand about 5 minutes. It should become foamy.
- In a stand mixer with a paddle attachment, mix more base dough ingredients: white sugar, kosher salt, and remaining butter, beating for about 3 to 4 minutes until they become creamy. Stop and scrape the bowl as needed. To that, add the yeast mixture, flour, egg, and vanilla. Raise the speed to medium and beat until everything is combined and elastic, about 4 to 5 minutes, scraping the bowl on occasion. The dough should be tacky but shouldn’t stick to hands.
- Press the dough into the prepared pan in a thin layer. Cover loosely with plastic wrap and let it rise in a warm spot in the kitchen until it doubled in size, about 2 hours. In the meantime, clean the mixer bowl and paddle attachment.
Make the topping:
- Preheat oven at 350 degrees.
- To the mixer bowl, add the browned butter, white sugar, and salt, beating to combine, then raising the rhythm to medium to beat until fluffy, about 4 to 5 minutes. Beat in the egg.
- In a separate small bowl, whisk together the corn syrup, water, and vanilla. With the mixer on low, add the flour to the butter mixture alternatively with the corn syrup mix. Scrape the bowl as needed. Use an uneven spatula to spread the topping over the risen dough.
- Bake until the top is set and the edges are golden brown, anywhere from 25 to 35 minutes. The center can still be a touch soft and jiggly. Let cool completely in pan, chilling in fridge if desired. To cut, use the foil to lift the contents onto a cutting board. Slice into finger sized (1×4) portions.
OM NOM NOM!
Bready or Not: Cornish Fairings Cookies
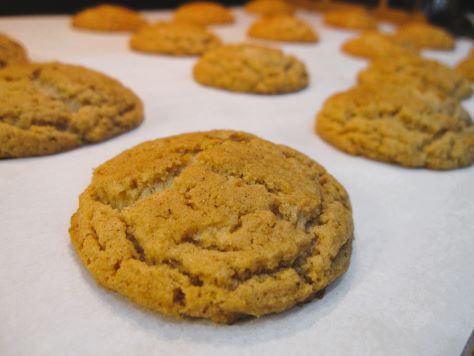
Cornish Fairings Cookies (to use the American wording, as these would be Corning Fairings Biscuits at their point of origin in Cornwall) are light, delicious cookies that use golden syrup for flavor and sweetness.
Golden Syrup is a delicious ingredient out of the UK. Some recipes call for using a half and half mix of light corn syrup and honey to replace it in American recipes, but I’ve found that’s not a good replacement for the flavor. If you’re in the US, look for Lyle’s Golden Syrup in the British section of a grocery store or at World Market.
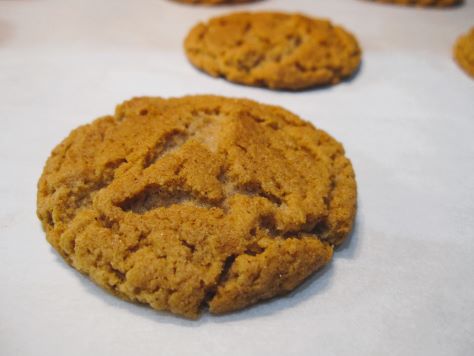
Ginger gives these cookies a pleasant warming element, but I should note that these aren’t heavy like most gingerbreads. This is something different, light and chewy.

Do note that I found these cookies got stiffer in texture after a day, but they were still delicious.
Adapted from Bigger Bolder Baking by Gemma Stafford.
Bready or Not: Cornish Fairings Cookies
Equipment
- parchment paper
- baking sheet
- food processor
- teaspoon scoop
Ingredients
- 1/2 cup unsalted butter 1 stick
- 1 1/2 cups all-purpose flour
- 1/2 cup light brown sugar packed
- 2 teaspoons ground ginger
- 2 teaspoons baking powder
- 1 teaspoon baking soda
- 1 teaspoon ground cinnamon
- 1/2 teaspoon salt
- 6 Tablespoons golden syrup
Instructions
- Preheat oven to 400-degrees. Line a baking sheet with parchment paper.
- Using a food processor, dice up butter. Add flour, brown sugar, ginger, baking powder, baking soda, cinnamon, and salt, and pulse to mix, scraping the blades clean as needed. Add golden syrup and pulse to incorporate.
- Use a teaspoon scoop to dole out dough, spaced out, on parchment paper. Bake for 7 to 9 minutes, until cookies are set and crackled across the top. Cool on sheet for a few minutes, then transfer to a rack to completely cool. Store in an airtight container at room temperature; they will get stiffer in texture after a day, but the flavor is still wonderful.
OM NOM NOM!
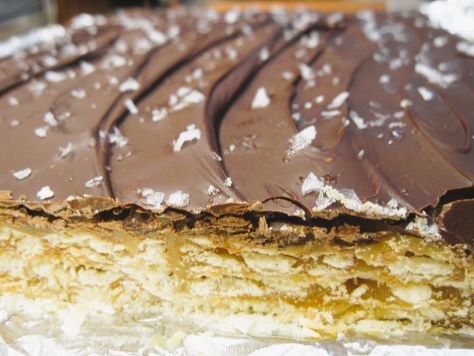
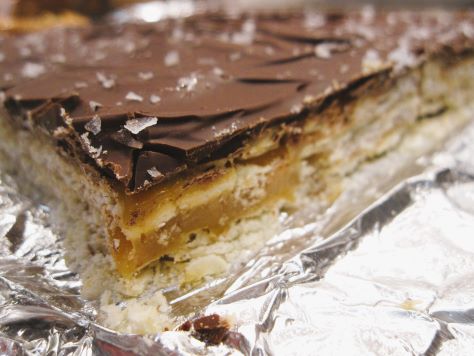
Bready or Not: No-Bake Triple-Decker Toffee Bars
These No-Bake Triple-Decker Toffee Bars are a sweet summertime treat. No oven is required, and there’s only a brief time standing at the stove. The result is, essentially, a homemade candy bar made from simple ingredients.
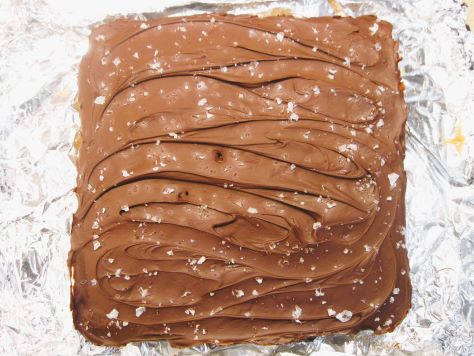
Saltine crackers form the basis for the three layers of these bars. They add intense crispiness that holds up to a deluge of toffee, but they also add salt. That salt really builds incredible flavor throughout the layers, and the flaky sea salt on top adds even more.
The homemade toffee in this recipe isn’t terrible to work with, but please, use caution. It can go from a simmer to a boil FAST, and you do not want that molten sugar on your skin. So, keep an eye on the temperature and bring it down as you need to, and keep stirring the toffee as the directions say. Once this gets going, don’t leave the pot unattended.
Modified from Southern Living December 2022 issue.
Bready or Not: No-Bake Triple-Decker Toffee Bars
Equipment
- 9×9 pan
- aluminum foil
- nonstick spray
- offset spatula
Ingredients
- 48 saltine crackers from a 16-ounce package, divided
- 3/4 cup light brown sugar packed
- 1/2 cup unsalted butter
- 14 ounces sweetened condensed milk one can
- 3 Tablespoons half & half
- 2 Tablespoons light corn syrup
- 1/4 teaspoon kosher salt
- 1/2 teaspoon vanilla extract
- 8 ounces chocolate chips or chocolate bark
- 1 teaspoon flaky sea salt
Instructions
- Line a 9×9 pan with foil, overlapping two long strips to cover all four side. Apply nonstick spray all over interior. Place 16 crackers in a single layer to form a base crust. On a plate, count out 32 more crackers to have ready to make the next layers quickly. Stage the uneven spatula nearby.
- In a saucepan on the stove, cook sugar and butter, stirring often, until the butter is melted and the sugar is dissolved. That will take about 5 minutes. Pour in the sweetened condensed milk, half & half, corn syrup, and salt. Increase the heat to medium to bring the contents to a simmer. Stir constantly. Continue stirring–bringing the heat down as needed to keep it at a simmer, not a full boil–for about 6 to 8 minutes, until it obtains a deep golden color. Remove the pan from heat and add the vanilla extract.
- Carefully pour about 1/3 of the toffee over the crackers. Set down pan and quickly use the spatula to spread the toffee into an even layer. Place 16 more crackers on top. Add another 1/3 of toffee. Place the last of the crackers, and then pour the rest of the toffee on top and even it out. Let cool for a few minutes. Clean the uneven spatula.
- Meanwhile, melt the chocolate using a microwave-safe bowl in the microwave or a pot on the stovetop. Slowly pour the chocolate over the top of the of the cracker-toffee stack and use the spatula to even it out. Let it cool about 5 minutes. Measure out the flaky sea salt and sprinkle it all over the top.
- Place the pan in the fridge to chill for at least 2 hours or overnight.
- Remove from fridge and let set at room temperature about 10 minutes, which will reduce the amount of crackling across the chocolate top. Use the foil to lift the contents onto a cutting board. Use a knife to cut off the very edges to form neat sides, and then cut the rest of it into small bars.
- Store bars in a sealed container in the fridge for up to a week.
OM NOM NOM!
Bready or Not Original: Paprika Cheddar Crackers
These Paprika Cheddar Crackers are a perfect snack or appetizer, and they even keep well for travel!
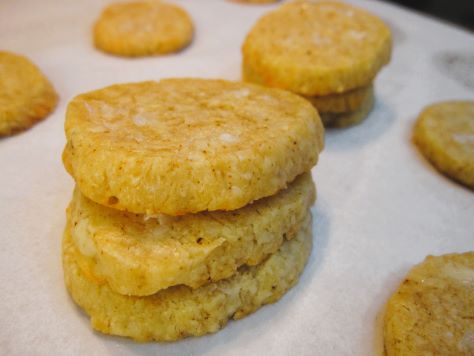
Use a good aged cheese here–or one labeled extra sharp. The cheese should be the main thing here, with the paprika and salt serving to heighten that flavor. Of course, you can mix in some other spices as well–or even use chipotle pepper for a zing.
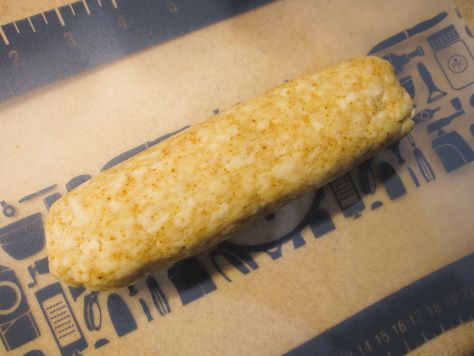
I split up this batch and baked them months apart. One of the nice things about these tubes of dough is that they don’t take up much room in the freezer–or in the fridge when it’s time to thaw them.
I got 16 crackers out of each batch (so 32 total), and mind you, these are pretty thick, hearty crackers. These aren’t the kind you grab a handful of, maybe just a few at a time. They would be great at a fancier function, served with wine or champagne, but are good with pretty much any drink. Cheese is versatile like that.
Bready or Not Original: Paprika Cheddar Crackers
Equipment
- food scale
- plastic wrap
- parchment paper
- baking sheet
- knife
Ingredients
- 1/2 cup unsalted butter (1 stick) room temperature
- 8 ounces aged cheddar shredded
- 1 cup plus 2 Tablespoons all-purpose flour
- 1/2 teaspoon paprika
- 1 1/2 Tablespoons water
- 1 teaspoon kosher salt
- flaked sea salt
Instructions
- Mix together the butter, cheddar, flour, paprika, and salt. Add the water. Continue to mix together until it forms a cohesive dough; add a touch more flour if it’s too wet, or a dribble of water if it’s dry.
- Use a food scale to weigh the dough and divide it in half. Roll out the plastic wrap to about 10 inches. Place half the dough on the plastic and shape into a thick tube, then wrap it in plastic to compress it and make it into an even log about an inch in diameter. Completely seal in plastic wrap. Repeat with other half of dough.
- The dough can be kept in the fridge for up to 4 days, or frozen for several months.
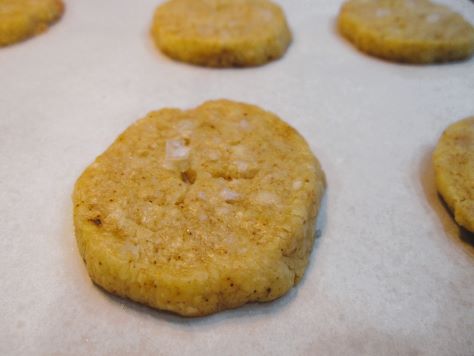
- When ready to bake, preheat the oven at 350-degrees. Place parchment paper on baking sheet. Place a chilled (thawed) dough tube on a cutting board and slice about 1/4-inch thick. Place with minimal spacing on the parchment. Add a pinch of flaked sea salt onto each cracker and gently press it into the surface.
- Bake for 17 to 20 minutes, until edges are just starting to turn golden. Let set to cool on cookie sheet. Store in a sealed container. They are best eaten within 3 days.
