


Bready or Not Original: Food Processor Brioche Rolls
My no-fuss Food Processor Brioche Rolls recipe will dazzle your mind because they are SO EASY. Enriched doughs like this have a reputation (that is well-earned) to be time-consuming and aggravating. Not anymore.

The food processor is what makes this easy-peasey. It mixes the dough in no-time, and aerates the butter and eggs into the flour and develops that all-important gluten.

These rolls are good for any variety of uses, as they can be eaten with things sweet and savory. As the bread is nice and durable, we found they worked well for shredded pork sandwiches, with barbecue sauce and all.

Once these are baked-up, they are fantastic to freeze and thaw, too. They really are best eaten within a day–I suppose they still had to be fussy in at least one way!

Bready or Not Original: Food Processor Brioche Rolls
Equipment
- food processor
- food scale
Ingredients
1-lb batch
- 1/4 cup warm water no hotter than 130-degrees
- 2 1/4 teaspoon dry yeast 1 packet
- 1 3/4 cups all-purpose flour
- 3 Tablespoons white sugar
- 1/4 teaspoon salt
- 2 large eggs room temperature
- 6 Tablespoons unsalted butter melted
2-lb batch
- 1/2 cup warm water no hotter than 130-degrees
- 4 1/2 teaspoons dry yeast 2 packets
- 3 1/2 cups all-purpose flour
- 6 Tablespoons white sugar
- 1/2 teaspoon salt
- 4 large eggs room temperature
- 12 Tablespoons unsalted butter melted (1 1/2 sticks)
For egg wash
- 1 large egg room temperature
- 1 Tablespoon milk or half & half
Instructions
Follow these same directions, regardless of the batch size.
- Affix steel S-blade inside food processor.
- In a cup, stir together the dry yeast and water. Place the flour in the work bowl, followed by the yeast-water, sugar, and salt. Pulse a few times. Add the eggs and spin until they are mixed in, no more than 10 or 15 seconds.
- Start the processor on low and pour in the melted butter in a solid stream. Stop mixing after about 20 seconds. The dough will be very sticky and fluid.
- Apply nonstick spray or butter in a big mixing bowl. Pour in the dough. Cover with plastic wrap and let the dough rise at room temperature until it has tripled in size, no more than 3 hours. Keep an eye on it, because it can expand fast.
- Flour hands and punch down dough.
- Cover bowl with plastic wrap again, and stash the bowl in the fridge. Keep it there overnight, at minimum, or up to a day. It will rise a bit but nowhere near as much as the initial rise.
- To make rolls, prepare a baking sheet with parchment or nonstick spray.
- Prepare egg wash. Crack egg into a bowl. Beat in milk. In addition, add water to a small saucer and set it within reach.
- Grab small handfuls of dough. To get amounts even, use a kitchen scale to measure out 4-ounces worth. Working fast, pat into a ball. Dip fingers in water then stroke dough to smooth out rough spots. Set rounds on prepared sheet, spaced out. If the dough gets too sticky to work with, place in fridge briefly to chill again.
- Once rolls are formed, brush them with the egg wash. Let them rise for an hour, until nicely puffed.
- Preheat oven at 400-degrees.
- Gently brush on more egg wash. Place in oven and bake for 12 to 15 minutes, until browned and set. Doneness can be double-checked by jabbing a thermometer into a subtle spot along the bottom to ensure the middle is over 190-degrees.
- Rolls are best eaten within a day, but they keep very well frozen. Eat them warm or at room temperature.
OM NOM NOM!
CLOCKWORK DAGGER ebook on sale for $1.99!
My novel The Clockwork Dagger is currently on sale for $1.99! I have no idea how long it will be at that price. This is the first book in my series that’s been described as Agatha Christie meets Final Fantasy.
Please, if you haven’t read it yet, grab it while you can! And please spread the word, too.
#SFWAPro

Bready or Not: Almond Cake
This Almond Cake tastes fancy, but thanks to a handy-dandy food processor, it’s actually quite straightforward to make. I’m all about fancy without major effort!

The food processor isn’t just there to streamline the process, though. Those blades really shred into the eggs and sugar, creating a cake that lusciously dense, not light from being gently blended.

This cake bakes up into a soft, almond-fragrant pillow with a tender crumb and a golden, crunchy top. It’s one of those cakes that is as delicious as it is beautiful.

To make this even better, unlike many other cakes, it keeps well! Wrap up individual slices, and they are fine at room temperature for up to 3 days. They can also keep in the freezer for weeks!

This cake would be wonderful for breakfast, brunch, or dessert. It’s great by itself, but would also be lovely with some fresh fruit.

Modified from America’s Test Kitchen.
Bready or Not: Almond Cake
Equipment
- 9-inch springform pan
- parchment paper
- large food processor
Ingredients
Cake:
- 1 1/2 cups sliced almonds
- 3/4 cup all-purpose flour
- 3/4 teaspoon salt
- 1/4 teaspoon baking powder
- 1/8 teaspoon baking soda
- 4 large eggs room temperature
- 1 1/4 cups white sugar
- 2 lemons zested
- 3/4 teaspoon almond extract
- 5 Tablespoons unsalted butter melted
- 1/3 cup vegetable oil
Topping:
- 2 Tablespoons white sugar
- 1/2 teaspoon lemon zest
- 1/3 cup sliced almonds
Instructions
- Preheat oven at 300-degrees.. Cut a piece of parchment to fit in the bottom of the springform pan. Grease pan, place parchment inside, then grease that as well. Set aside.
- In food processor, pulse sliced almonds, flour, salt, baking powder, and baking soda until the almonds are finely ground. This will be 5 to 10 pulses. Move mixture to another bowl.
- Into the now-empty processor, place the eggs, white sugar, 1 Tablespoon of lemon zest (reserve rest for topping), and almond extract. Process for about 2 minutes, until everything turns pale yellow. Pour in the melted butter and oil until they are blended in. Add the almond mixture with a series of pulses.
- Pour batter into the prepared pan.
- Start preparing the topping by using fingertips to mix the lemon zest into the white sugar, dispersing the zest throughout. Sprinkle the almonds all over the top of the cake. Follow that up with the lemon-sugar.
- Bake cake until the middle is set and bounces back when gently pressed, about 55 minutes to an hour. The middle should also pass the toothpick test. Let the cake cool for about 15 minutes. Run a plastic knife or toothpick around the sides of the cake to make sure it is loose. Set a plate on top of the cake and tip it out to invert it. Then set cake back onto a cooling rack, almonds up.
- Let cake cool at least 2 hours at room temperature, or speed the process by chilling it in the fridge. Cake tastes best at room temperature. Cut into wedges and serve.
- Individual wedges of cake can be wrapped in plastic to keep at room temperature for up to 3 days, or can be frozen for later enjoyment.
*OM NOM NOM!*
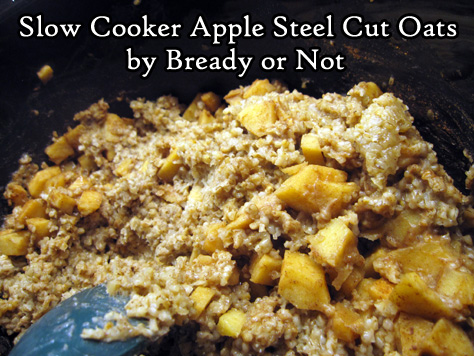
Bready or Not Original: Slow Cooker Apple Steel Cut Oats
These Slow Cooker Apple Steel Cut Oats are not the most photogenic of foods, but they are delicious, healthy, and good, and probably one of the most convenient meals in my cooking repertoire.
I’ve been cooking this recipe for over five years now, tweaking it here and there, making it better. What I present here is really a foundation. This recipe can be customized all kinds of ways–either when the food is being assembled, by adding in different spices or apples, or by tweaking it at serving time.

I love using Gala, Honeycrisp, or Pink Lady apples, but go for any good baking-type apple or a variety thereof. You don’t want the apples to go to mush. Or maybe you do? That might not be a terrible thing here.

I typically use unsweetened vanilla almond milk or cashew milk, but any plain or vanilla nut, soy, or oat milks would work, or you can opt for dairy milk.

This isn’t an overnight slow cooker oats recipe. I’ve tried that. Even on low and warm settings, the oats just plain overcooked for my preference. The consistency goes brick-like and the pot requires some intense scraping if you don’t use a removable liner. I prefer to make this during the day, and then portion out the oats to go in the fridge and freezer. They reheat beautifully.
Bready or Not Original: Slow Cooker Apple Steel Cut Oats
Equipment
- large slow cooker
Ingredients
- 2 cups steel cut oats no substitutes
- 2 cups nut milk or oat milk, regular or vanilla, sweetened or unsweetened
- 2 cups water
- 2 medium apples peeled and chopped
- 1/4 cup brown sugar packed
- 1/4 cup pure maple syrup
- 2 teaspoons ground cinnamon
- 1/4 teaspoon sea salt
- 2 teaspoons vanilla extract
Instructions
- Place all ingredients in slow cooker and stir to distribute. Place lid on pot and put heat level to LOW. Cook for 3 hours before lifting lid again. Stir and taste to test doneness. Continue to cook for 30 minutes to an hour more, dependent on the desired texture for the oats. The longer it cooks, the thicker it will be.
- Serve oats fresh, or stash in fridge to reheat in microwave over the next week. These oats are great to portion out and freeze for later. If desired, add more spices, fresh fruit, or extra milk when serving–the customization possibilities are endless!
