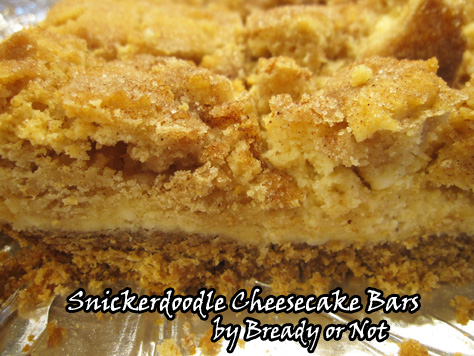
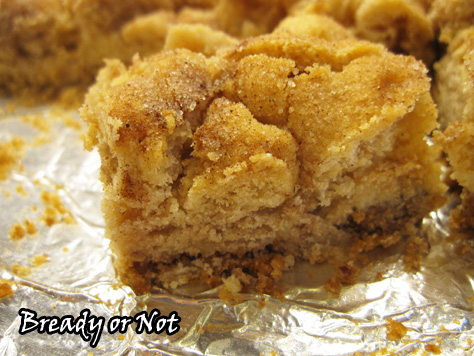
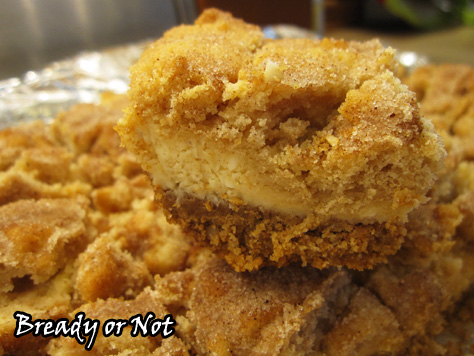
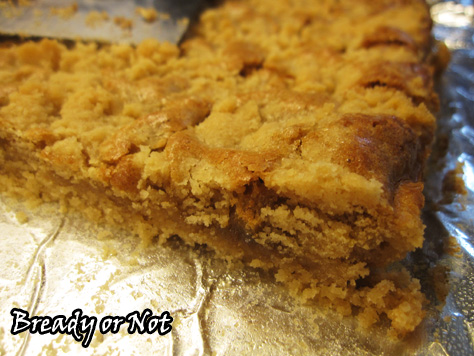
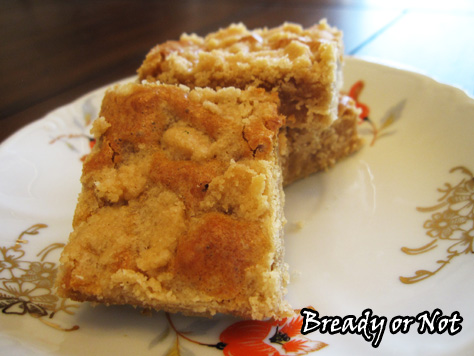
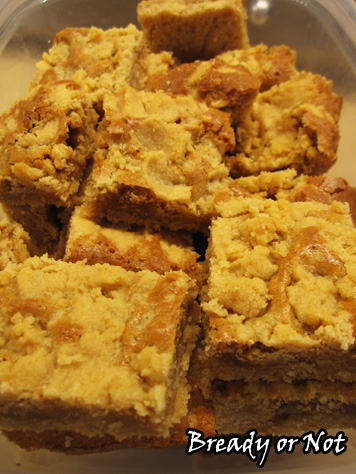
Bready or Not: Snickerdoodle Cheesecake Bars
These Snickerdoodle Cheesecake Bars are thick, lush, and oh-so-good.
I had to make this recipe twice to get it right. The first time I made it, I chilled it for only a few hours and then started to cut up the bars. It became a huge, awful mess. I was embarrassed by how they looked–crumbles more than bars–but my husband took them to work and people went crazy over them.
It turned out, the recipe produced something seriously delicious… but it sure needed a lot more time to set.
Therefore, I made them again. I also tweaked it from the original by taking out extra pecans and adding the essential ingredient of cream of tartar. I mean, what the heck? Something can’t be named Snickerdoodle and lack cream of tartar!
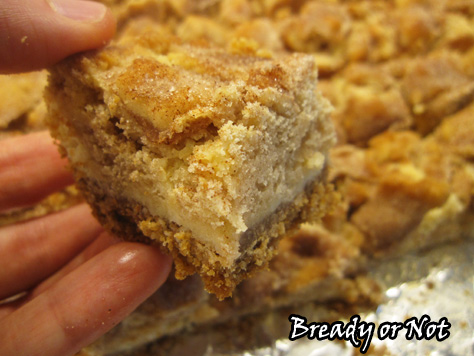
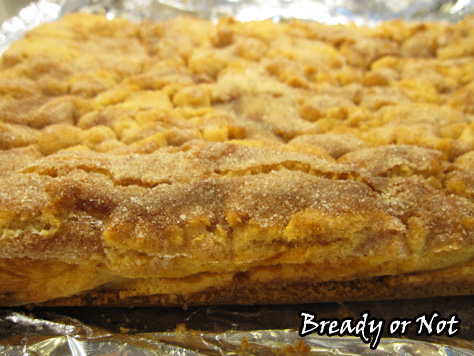
This time, I let the bars set in the fridge for almost a full day before I sliced them. The top crackled but the bars stayed cohesive–and my husband’s co-workers went bonkers over them, yet again.
This recipe makes a lot, too. The bars fill a 13×9 pan all the way to the top! Have a lot of containers handy, or keep them in the original pan with plastic wrap or foil over the top.
These Snickerdoodle Cheesecake Bars would wow a crowd at a holiday potluck! The leftovers keep well for days, too.
Modified from Shugary Sweets.
Bready or Not: Snickerdoodle Cheesecake Bars
Ingredients
Crust
- 8 ounces graham cracker crumbs
- 1/2 cup pecans chopped
- 1/4 cup white sugar
- 1/2 cup unsalted butter melted
Cheesecake Filling
- 16 ounces cream cheese 2 boxes, softened
- 3/4 cup white sugar
- 2 large eggs room temperature
- 1 tsp vanilla extract
- 1/2 tsp cinnamon
Snickerdoodle layer
- 3/4 cup unsalted butter softened
- 1 1/2 cups white sugar
- 1 large egg room temperature
- 1 tsp vanilla extract
- 1 1/2 tsp baking powder
- 1/4 tsp kosher salt
- 2 cups all-purpose flour
- 1/2 tsp cinnamon
- 1/2 tsp cream of tartar
Topping
- 1/4 cup white sugar
- 1 tsp cinnamon
Instructions
- Line a 13x9 baking dish with aluminum foil so that it is covered on the bottom and all four sides; apply nonstick spray or butter. Set dish aside. Preheat oven at 350 degrees.
- In a food processor, pulse graham crackers with pecans and sugar until everything is reduced to fine crumbs. Add the melted butter and pulse until it clumps.
- Press the crumbs into the bottom of prepared baking dish. A handy way to do this is to lay a piece of wax paper over the crumbs, then use a glass to compress the bottom crust. Form an even layer.
- Next, start the cheesecake filling. In a large bowl, beat the softened cream cheese with sugar, eggs, vanilla extract, and cinnamon. Beat until fluffy and smooth, about 3 to 4 minutes. Pour over the filling over the graham crust.
- Time for the cookie dough top crust! Clean up the bowl and use it to beat the butter with sugar for 2 minutes, until it's fluffy. Mix in the egg and vanilla. Add the baking powder, salt, flour, cinnamon, and cream of tartar. Use your hands to form flat pieces of dough to lay atop the cream cheese. Fill in the holes until you form a cookie dough lid.
- In a small bowl, combine the sugar and cinnamon topping, and sprinkle that over the top layer.
- Bake for 30-35 minutes. The cookie dough layer should be completely cooked and golden, even if the middle still jiggles a bit. The cheesecake bars will completely fill the pan.
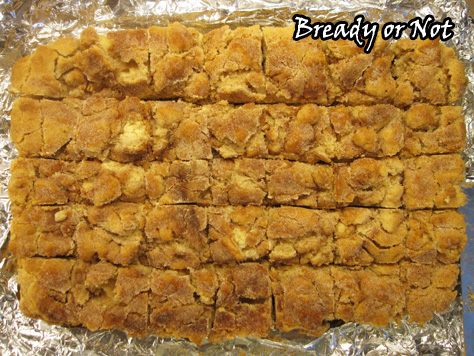
- Remove from oven and cool completely. Once it's cooled, cover with foil and refrigerate overnight or full a full day. THIS IS IMPORTANT. It will be delicious if you cut into it early, but it will also be a complete mess when cut!
- After the bars have had a long chill, cut them into bars and keep stored in fridge.
- OM NOM NOM!
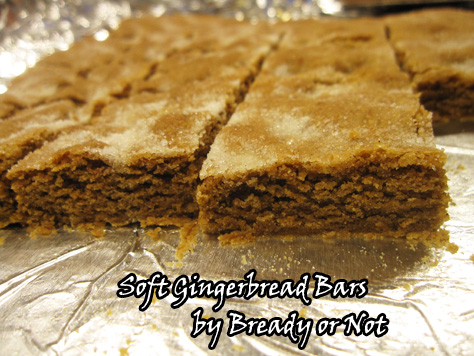
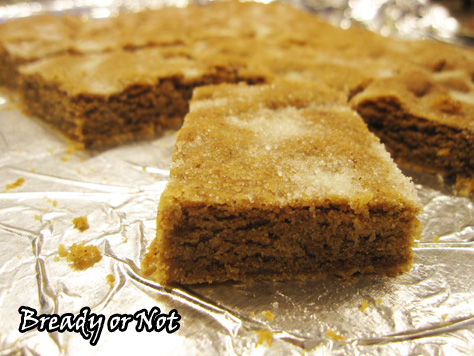
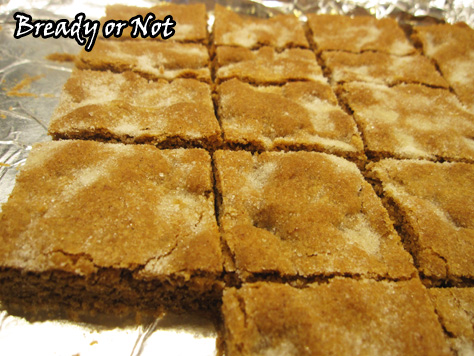
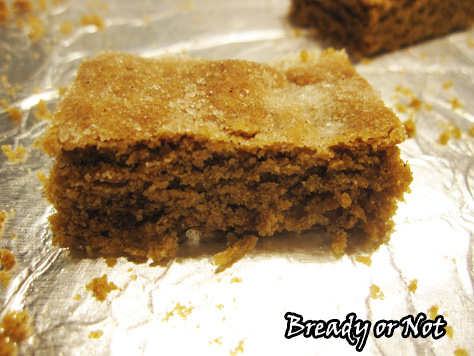
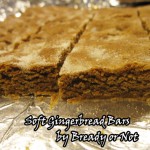
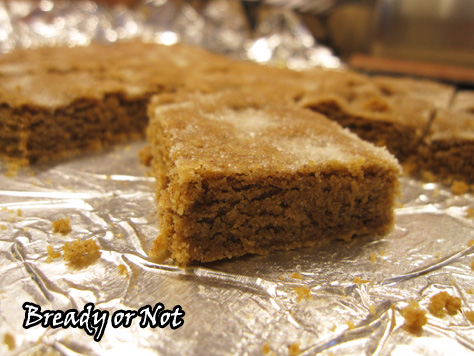
Bready or Not: Soft Gingerbread Bars
We’re kicking off the Christmas season with a recipe that’s been a favorite of mine since 2003: Soft Gingerbread Bars!
My original recipe was clipped from the inside of a Land O Lakes butter box. Before trying that recipe, I had associated gingerbread with dry, hard cut-out cookies.

Land O Lakes enlightened me. They taught me gingerbread could be rendered into soft, chewy bars that were a sugary equivalent to crack cocaine.
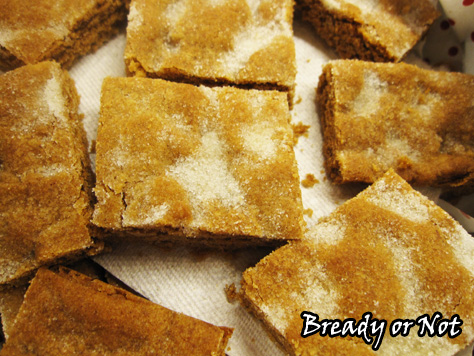
These bars have been a household favorite ever since. You can cut the gingerbread into fancier shapes, but I prefer basic bars. These bars are soft and luscious, embodied with the divine scent of Christmas itself.
Plus, this is the perfect recipe when you’re low on time–it mixes together quickly and bakes in under 20 minutes. No standing around the oven for an hour, waiting for batch after batch of cookies to be done.
As soft as these bars are, they are surprisingly durable. When my husband was deployed in the Navy, I mailed several batches to him overseas. I packed them in Gladware with napkins for padding, and they survived the journey, intact and tasty.
Modified from the original recipe at Land O Lakes Butter. Originally posted at Bready or Not back in 2012 on Live Journal.
Bready or Not: Soft Gingerbread Bars
Ingredients
- 1 1/4 cups white sugar
- 1 cup unsalted butter softened
- 1 egg
- 3 Tablespoons molasses
- 3 cups all-purpose flour
- 1 teaspoon baking soda
- 2 teaspoons ground cinnamon
- 2 teaspoons ground ginger
Topping
- 2 - 3 tablespoons white sugar
Instructions
- Preheat oven to 350-degrees. Line a jelly roll or large bar pan with aluminum foil.
- Combine the 1 1/4 cups sugar, butter, egg, and molasses in a large mixer bowl. Mix until creamy. Add the flour, baking soda, and spices and mix until just combined.
- Press the dough evenly into the pan. Sprinkle a few tablespoons of sugar across the top. Dust the sugar with your fingers to fill the nooks and crannies.
- Bake the pan for 16 to 20 minutes, or until very lightly browned around the edges. Cool completely. Cut into bars or other shapes. Try to resist eating them all.
- OM NOM NOM!
Read More
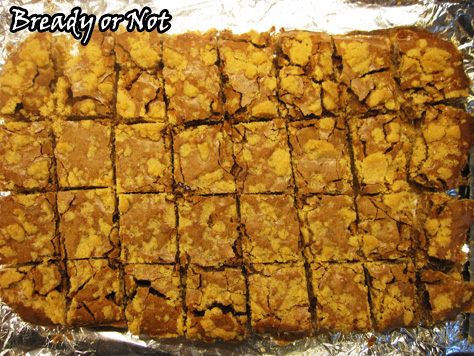
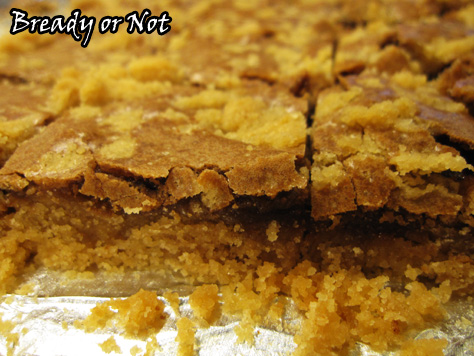
Bready or Not: Biscoff-Nutella Ecstasy Bars
Last week I shared Peanut Butter Ecstasy Bars. This week I switch out the peanut butter for a version that tastes even better.
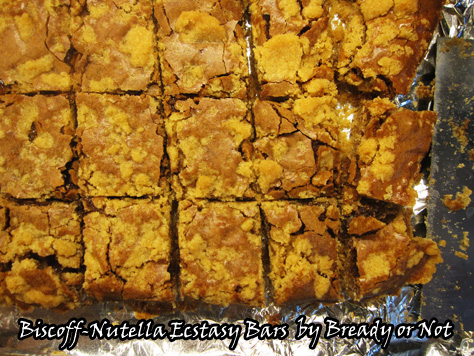
The top and bottom layers use cookie butter (Biscoff, Speculoos, whichever!) while the middle layer uses just a touch of Nutella. That combination is luscious. Cookie dough and chocolate. Guh.
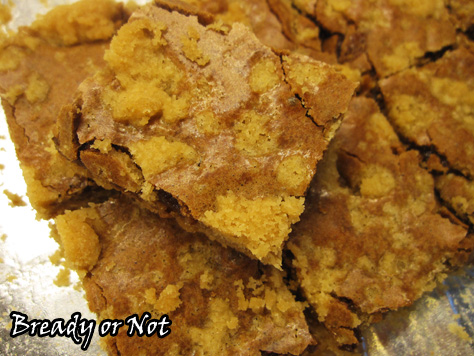
I mentioned before that the peanut butter version can be crumbly, especially the edge pieces. Well, this new variation is even messier. Karmic balance for the extra deliciousness, right? The middle pieces were a touch gooey, even as the edge pieces pretty much shattered as they were cut.
That’s not a bad thing here, though. These pieces are delicious. Lap them up. Save them to top ice cream or yogurt. Just please, don’t let them go to waste.
Mind you, they’ll also go to your waist, but that’s a totally separate dilemma.
Bready or Not: Biscoff-Nutella Ecstasy Bars
Ingredients
Crust:
- 1/2 cup unsalted butter room temperature
- 1/2 cup Creamy Biscoff spread or other cookie butter brand
- 1 1/2 cups white sugar
- 1 teaspoon vanilla extract
- 1 1/2 cups all-purpose flour
Filling:
- 2 eggs room temperature
- 2 Tablespoons Nutella or similar chocolate spread
- 1/2 cup white sugar
- 1/2 cup brown sugar packed
Instructions
- Preheat oven to 375-degrees. Line a 9x13 pan with aluminum foil and apply nonstick spray.
- In a large bowl, mix butter, cookie butter, and sugar. Add the vanilla. Slowly mix in the flour. Set aside about 1 cup of the dough, and firmly press the rest into the prepared pan.
- Using the same bowl, make the filling. Beat together the eggs, Nutella, and two sugars. Spread this over the unbaked crust. Sprinkle the reserved dough over the top.
- Bake for 20 to 25 minutes, until the dough it set and golden. Cool completely in pan. Slice into bars. The bars may be crumbly, especially the edge pieces, but every bit is delicious. Keeps for at least 3 days in a sealed container.
- OM NOM NOM!
Read More
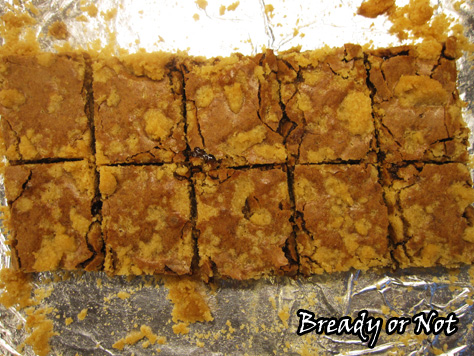
Bready or Not: Peanut Butter Ecstasy Bars
If you like peanut butter, these are for you. I found the original recipe on the back of a C&H Brown Sugar box.
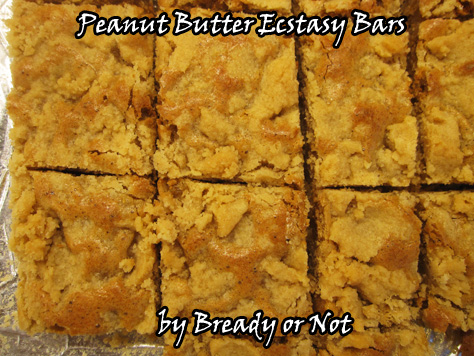
I tweaked it some (MORE VANILLA!) and clarified the instructions. It’s an incredibly simple recipe. Basic ingredients that whip together fast and bake up fast, too.
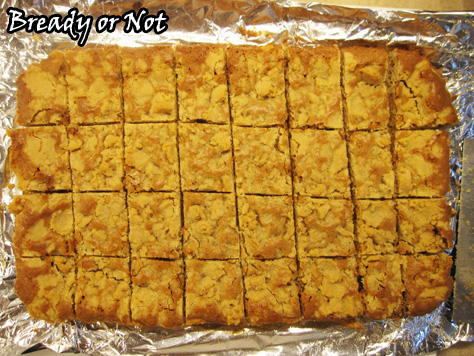
The end result is like a peanut butter sugar cookie in bar form. It’s like getting punched in the face by the peanut butter fairy! They even look pretty because of the mottled layers.
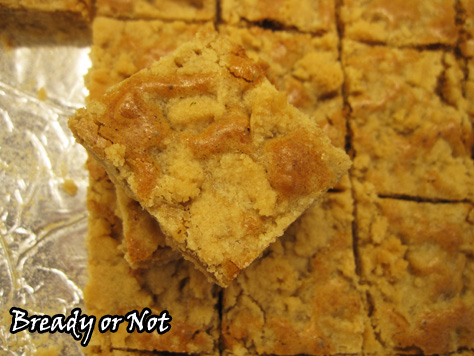
One caveat: these aren’t the neatest cookies, and probably not the best for travel. They are crumbly, especially the edge pieces. Seriously, though, you will want to save and eat those crumbs. They are that good.
As I made these, I couldn’t help but think of more modifications. Therefore, stay tuned for next week when I post the Biscoff and Nutella version of these bars. OH YEAH.
In the meantime, try these and experience peanut butter bliss.

Bready or Not: Peanut Butter Ecstasy Bars
Ingredients
Crust:
- 1/2 cup unsalted butter 1 stick, room temperature
- 1/2 cup peanut butter smooth or chunky
- 1 1/2 cups white sugar
- 1 teaspoon vanilla extract
- 1 1/2 cups all-purpose flour
Filling:
- 2 eggs room temperature
- 2 Tablespoons peanut butter smooth or chunky
- 1/2 cup white sugar
- 1/2 cup brown sugar packed
Instructions
- Preheat oven to 375-degrees. Line a 9x13 pan with aluminum foil and apply nonstick spray.
- In a large bowl, mix butter, peanut butter, and sugar. Add the vanilla. Slowly mix in the flour. Set aside about 1 cup of the dough, and firmly press the rest into the prepared pan.
- Using the same bowl, make the filling. Beat together the eggs, peanut butter, and two sugars. Spread this over the unbaked crust. Sprinkle the reserved dough over the top.
- Bake for 20 to 25 minutes, until the dough it set and golden. Cool completely in pan. Slice into bars. The bars may be crumbly, especially the edge pieces, but every bit is delicious. Keeps for at least 3 days in a sealed container.
- OM NOM NOM!
Read More
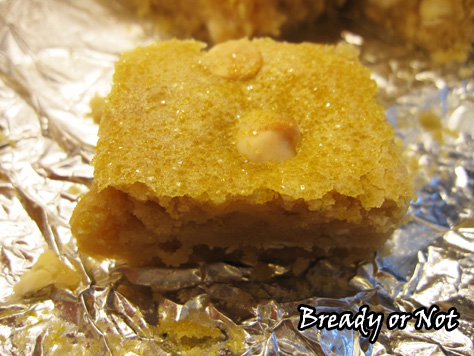
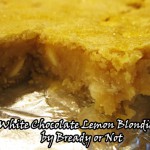
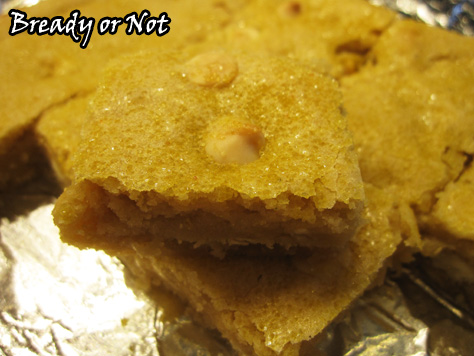
Bready or Not: White Chocolate Lemon Blondies
Memorial Day weekend is coming up, so let’s do make something fresh and summer-y! How about chewy bars that taste like lemonade?
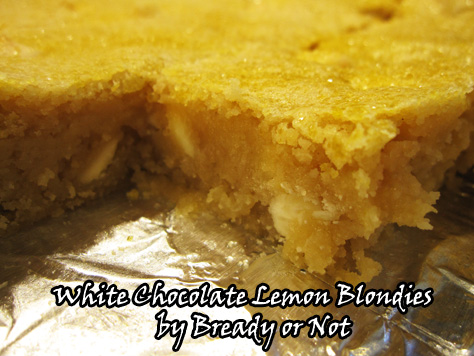
These bars are soft and chewy with a delightfully fresh flavor. White chocolate and lemon make for a wonderful pairing in both taste and texture.
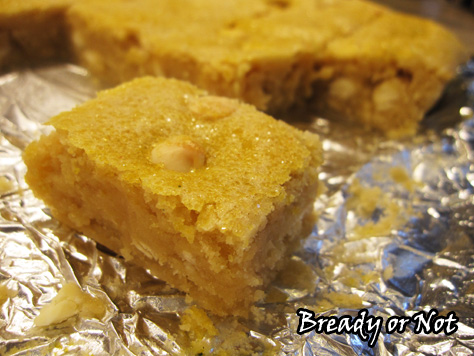
I’d like to say that these kept well for days, but I really don’t know. They stayed yummy for one day, at least.
When my husband took these to work, a co-worker told him, “Your wife can make these any time she wants.” I always welcome that kind of encouragement to bake more!
Modified from A Kitchen Addiction.
Bready or Not: White Chocolate Lemon Blondies
Ingredients
- 1/2 cup unsalted butter 1 stick, softened
- 1/2 cup brown sugar packed
- 1/2 cup white sugar
- 1 lemon zested and juiced
- 2 eggs room temperature
- 1 1/2 tsp vanilla extract
- 1/2 tsp lemon extract
- 1 1/2 cup all-purpose flour
- 1/2 tsp baking powder
- 1/4 tsp salt
- 1/2 cup white chocolate chips
- sparkling sugar or turbinado sugar for top, optional
Instructions
- Preheat oven to 350-degrees. Line an 8x8 or 9x9 inch baking dish with aluminum foil and apply non-stick cooking spray.
- Cream together butter and both sugars. Add lemon juice, eggs, and vanilla extract, and beat until combined.
- In a separate bowl, stir together the dry ingredients: flour, lemon zest, baking powder, and salt. Gradually add the flour mix into the wet ingredients.
- Stir in white chocolate chips; dough will be thick. Spread into the bottom of the ready baking dish. An offset spatula works well to smooth it out. If desired, sprinkle sparkling or turbinado sugar all over the top.
- Bake for 20-25 minutes, until it passes the toothpick test.
- Set on a wire rack to cool completely, then use foil to lift contents to a cutting board. Cut into bars.
- OM NOM NOM!
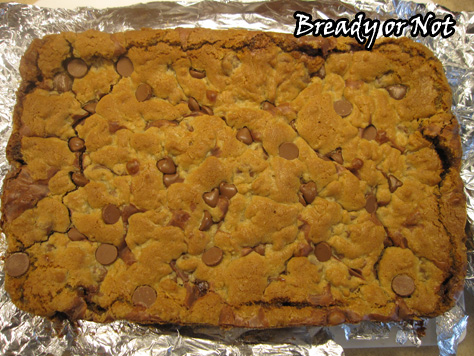
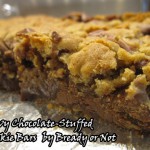
Bready or Not: Chewy Chocolate-Stuffed Cookie Bars
Do you like chocolate chip cookies, the kind that are soft, dense, and cakey? Do you like chocolate? Oh boy. Do I have the recipe for you.
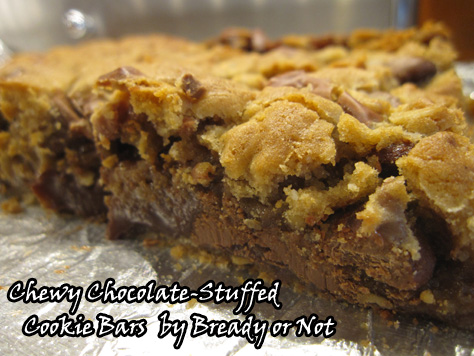
These babies are rich, indulgent, and made to pad thighs. Did I mention they are tasty? Yeah. These are chewy in the best kind of way.
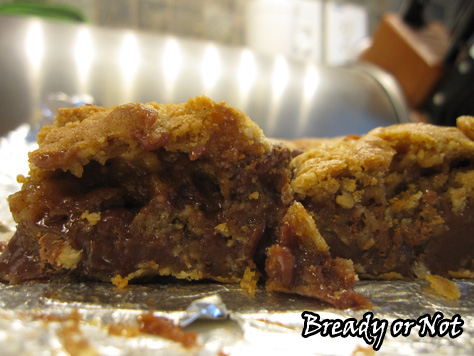
I prefer using milk chocolate chips, but you can tailor these to your taste buds. Go semi-sweet or dark. Mix them all up. Be crazy.
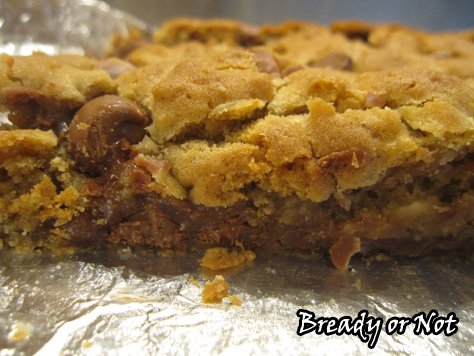
The filling in these bars is rather like a ganache, so it will soften a lot if it’s at room temperature or warmer. I found they kept in the fridge really well in a sealed container.
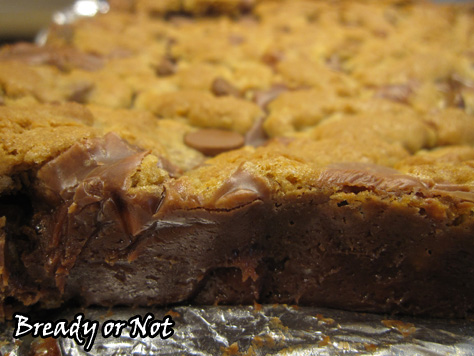
They keep well in your belly, too.
Modified from Recipe Girl.
Bready or Not: Chewy Chocolate-Stuffed Cookie Bars
Ingredients
CHOCOLATE FILLING:
- 2 cups semi-sweet chocolate chips or milk chocolate chips
- 14 oz sweetened condensed milk
- 2 teaspoons vanilla extract
COOKIES:
- 1 cup unsalted butter 2 sticks, room temperature
- 1 cup light brown sugar packed
- 1/2 cup white sugar
- 2 eggs
- 1 Tablespoon vanilla extract
- 2 cups all-purpose flour
- 1 cup oats quick-cooking or old-fashioned rolled
- 1 teaspoon baking powder
- 1 teaspoon baking soda
- 1 teaspoon kosher salt
- 2 cups semi-sweet chocolate chips or milk chocolate chips
Instructions
For the chocolate filling:
- Place the chocolate chips and condensed milk in a microwave-safe bowl and heat for 40-50 seconds, watching it the whole time--condensed milk can turn to lava if you're not careful! Stir well, and heat again if necessary; the chocolate chips should blend in. Once that happens, add the vanilla extract and stir in. Set aside to cool to room temperature.
For the cookie bars:
- Preheat oven to 350-degrees. Line a 9x13-inch pan with foil, overlapping the sides to make it easy to lift out later. Spray foil with nonstick spray or rub with butter.
- Place the butter and both sugars in a large bowl. Beat until smooth and creamy. Add the eggs and vanilla.
- In a separate bowl, combine the dry ingredients: the flour, oats, baking powder, baking soda and salt. Gradually add to the butter mixture until everything is well incorporated. Stir in the chocolate chips.
- Place about half the cookie dough in dollops in the ready pan. Gently smooth it out to cover the bottom. Pour the cooled chocolate over the dough. Top that with the remaining dough in dollops; don't worry about covering the whole surface.
- Bake for 20 to 25 minutes, until the top is just golden brown. Cool completely. Use the foil to lift it out of the pan to cut. Store in a sealed container in the fridge, as the middle will soften at room temperature.
- OM NOM NOM!