


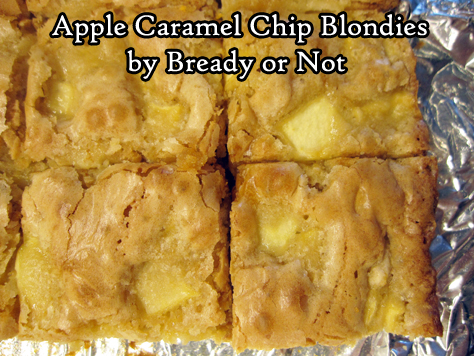
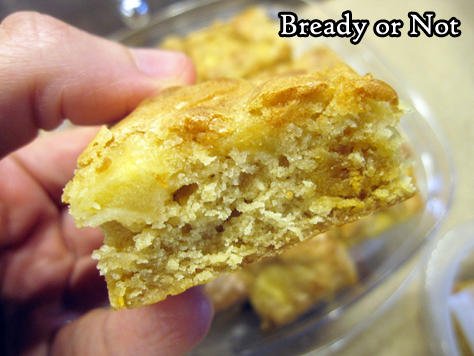
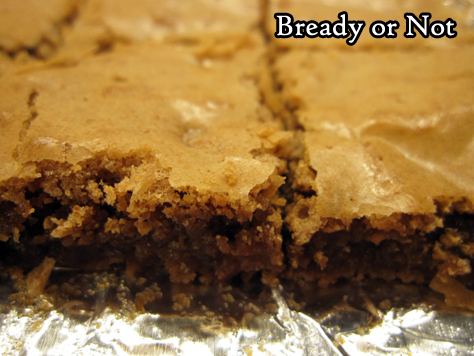
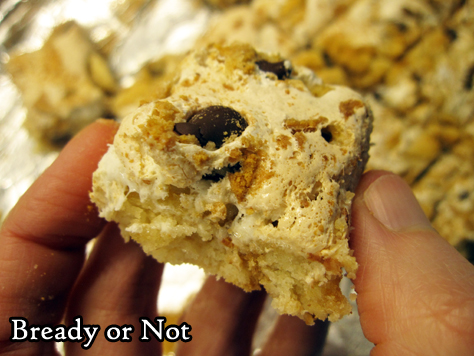
Bready or Not Original: Apple Caramel Chip Blondies
These Apple Caramel Chip Blondies are soft, sweet, and dangerously snackable, perfect for a quick bite to get you through the day.
I have other apple bar recipes like my tried-and-true Apple Cake that are thicker and more meal-like.
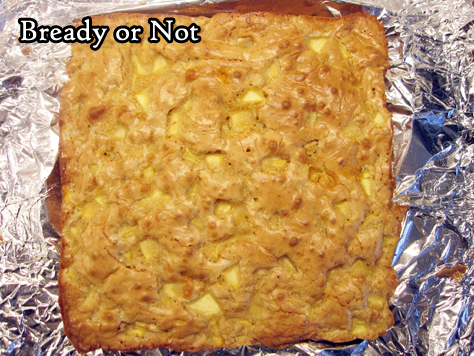
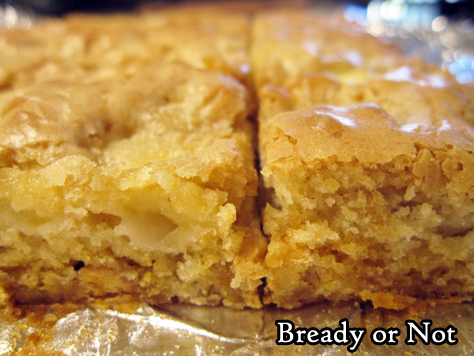
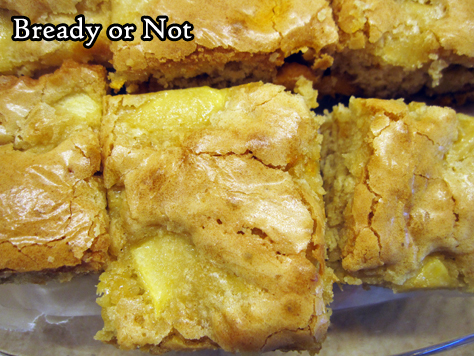
These bars are thin and light. They aren’t even heavy with apples, but the apple flavor is definitely there.
This is the kind of thing to use for a light breakfast, snack, or dessert, and they’d be great to wrap up and pack to go.
I used caramel chips for this recipe, but butterscotch or white chocolate would be great, too–or even seasonal sweet chips like pumpkin spice!
Bready or Not Original: Apple Caramel Chip Blondies
Equipment
- 9x9 pan
- medium saucepan
Ingredients
- 1 cup all-purpose flour
- 1/2 teaspoon kosher salt
- 1/4 teaspoon baking powder
- 6 Tablespoons unsalted butter
- 3/4 cup light brown sugar packed
- 1 teaspoon pure vanilla extract
- 2 large eggs room temperature
- 1 apple such as Ambrosia or Honeycrisp, peeled and chopped into raisin-sized pieces
- 1/3 cup caramel chips or substitute butterscotch chips or white chocolate chips
Instructions
- Preheat oven at 350-degrees. Line a 9x9 pan with foil and apply nonstick spray or butter.
- In a small bowl, whisk together flour, salt, and baking powder. Set aside.
- In a medium saucepan, melt the butter, and continue to monitor a few more minutes, stirring often, to brown the butter. It should have a fresh, nutty smell. Remove from heat. Stir in the brown sugar and vanilla until the sugar is less grainy. Let the pan cool for a few minutes. Beat in the eggs until smooth. Stir in the dry ingredients next, followed by the apple pieces. Fold in the chips last.
- Pour the batter into the pan and smooth out the top. Bake for about 25 minutes, until the middle passes the toothpick test.
- Cool to room temperature. Use the foil to lift the contents onto a cutting board to slice up. Store the bars in a sealed container, with waxed paper or parchment between stacked layers.
OM NOM NOM!
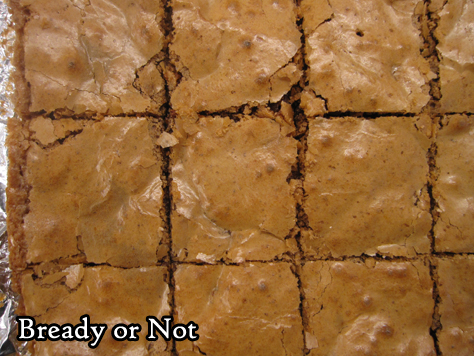
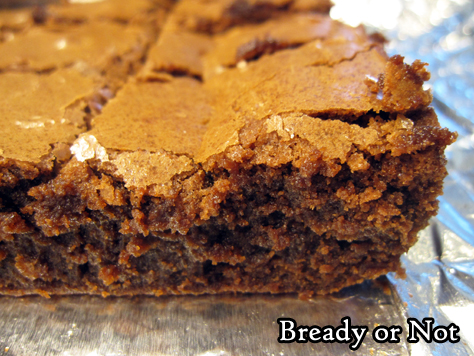
Bready or Not Original: Small Batch Cakey Brownies
Sometimes you just need a few brownies. That’s the perfect time for this Small Batch Cakey Brownies recipe.
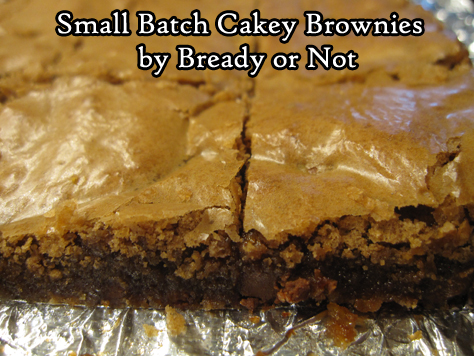
These are not monstrously thick brownies. They are thin with a crackled top, with a nice, cakey moist crumb.
I created this recipe by combining about four other recipes, trying to find a middle ground recipe that my son would like. This is the one that turned out to be the winner.
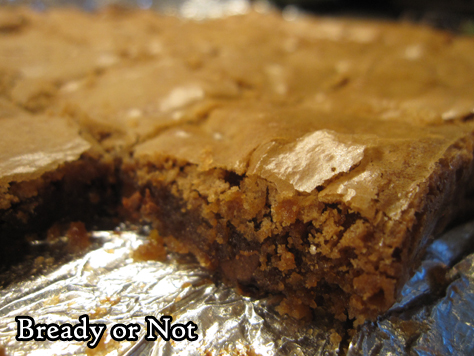
Even better, I found out these brownies kept well for an entire week in a sealed container at room temperature–and who knows, maybe they could last a lot longer? In any case, there’s no urgent need to gorge on them lest they go bad.
These brownies are all about goodness.
Bready or Not Original: Small Batch Cakey Brownies
Ingredients
- 2 ounces semi-sweet chocolate
- 6 Tablespoons unsalted butter
- 1 cup white sugar
- 2 large eggs
- 1/2 teaspoon vanilla extract
- 1/2 teaspoon fine sea salt
- 1/4 cup all-purpose flour
- 1/4 cup cake flour
- 1/2 cup milk chocolate chips
Instructions
- Preheat the oven to 350-degrees. Line a 9x9 or 8×8-inch pan with foil, letting foil overhang each side. Apply nonstick cooking spray.
- In a microwave-safe bowl, microwave the chocolate and butter on high in 30 second increments, stirring between each burst, until everything is melted. Let cool slightly.
- Using a stand mixer or hand mixer, in a large bowl beat together the sugar and eggs for 3 to 5 minutes, until they are pale, light, and fluffy. Pour in the cooled chocolate and butter mixture, followed by the vanilla.
- Combine the salt and both flours in a bowl. Stir in the chocolate chips. Fold flour mix into the wet ingredients. Pour into the prepared pan and even out.
- Bake for 20 minutes, or until a toothpick inserted in the center comes out with moist crumbs attached. Cool completely. Use foil onto a cutting board to slice into bars.
- Brownies will keep for upwards of a week in a sealed container at room temperature.
OM NOM NOM!
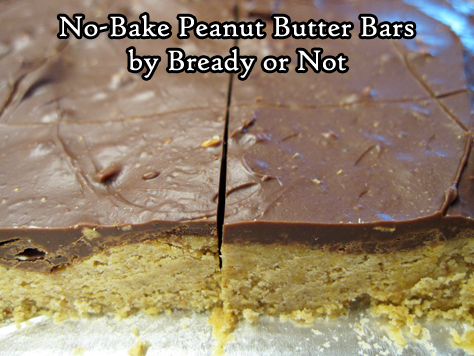
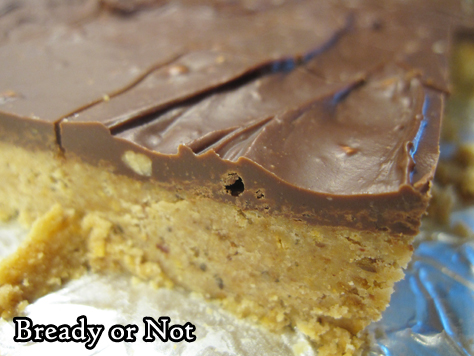
Bready or Not Original: No-Bake Peanut Butter Bars
When you need a dessert in a hurry, these delicious No-Bake Peanut Butter Bars are the way to go.
I especially enjoy this recipe because it doesn’t involve the oven, which is a wonderful thing during Arizona summers.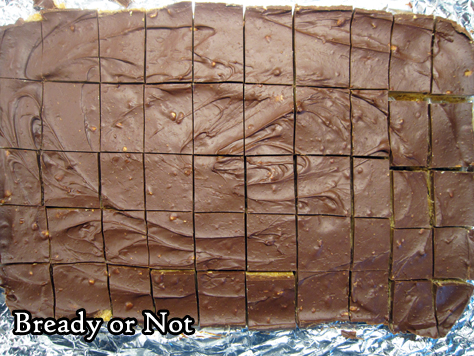
These bars come together in minutes thanks to a microwave, and they only need a few hours to set. You end up with an entire casserole dish of candy bars. Yum.
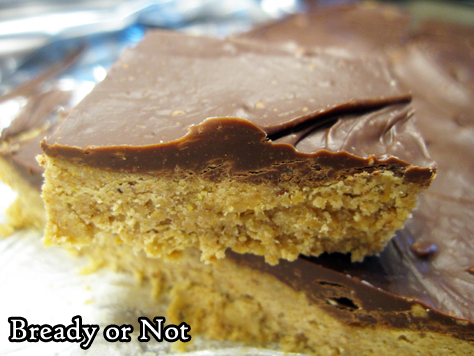
Use crunchy or creamy peanut butter. I used a jar from Trader Joe’s that had flaxseeds mixed in, and my son didn’t like it. This recipe gave me a way to use it up by sending the result with my husband to work!
This would be an easy recipe to dress up, too. Add sprinkles, nuts, or cacao nibs atop the chocolate. Have fun with it!
Bready or Not Original: No-Bake Peanut Butter Bars
Equipment
- 13x9 pan
- large microwave-safe bowl
- uneven spatula
Ingredients
Bars
- 2 cups peanut butter crunchy or smooth
- 1 cup unsalted butter 2 sticks
- 2 cups graham cracker crumbs
- 2 cups confectioners' sugar
Ganache
- 1 1/2 cups chocolate chips semisweet, dark, milk, or a mix
- 1/4 cup peanut butter crunchy or smooth
Instructions
- Line a 13x9 pan with foil and apply nonstick spray or butter.
- In a large microwave-safe bowl, melt together the peanut butter and butter by zapping in short increments and stirring well between each pass. Once they mix together, stir in the graham cracker crumbs and confectioners' sugar. Spread the mixture into the prepared pan. Use a hands or maybe a piece of waxed paper and a heavy glass to compress the layer as much as possible.
- Use the same microwave-safe bowl to bowl for the chocolate chips and peanut butter, again zapping in brief increments and stirring well between each burst. Once they can mix together smoothly, dump dollops atop the layer in the pan. Use an uneven spatula to even out the chocolate to the edges.
- Chill in the fridge for at least 2 hours.
- Use the foil to lift the contents onto a cutting board. Let sit for about 10 minutes, enough time to soften the chocolate so that it doesn't shatter when sliced. Use a long knife or sharp bench knife to cut bars. If desired, cut off edges first to produce neater pieces to share.
- Store bars in a sealed container in the fridge with waxed paper between the layers. Keeps for days.
OM NOM NOM!
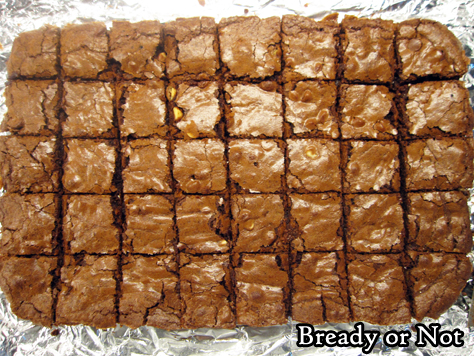
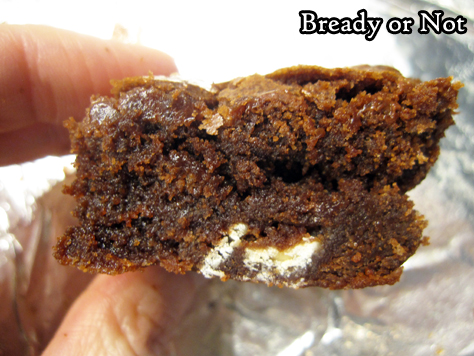
Bready or Not: Triple-Chocolate Brownies
These Triple-Chocolate Brownies are loaded with three kinds of chocolate, cocoa, and a unique blend of flours: all-purpose along with chickpea flour.
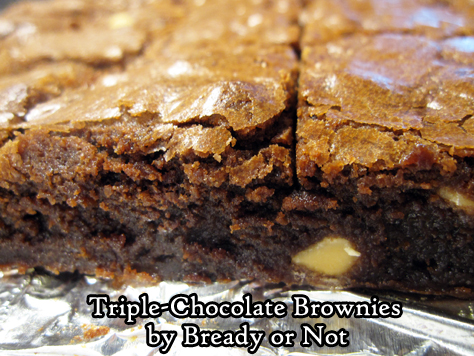
What does the chickpea flour do for the recipe? Well, it handles moisture differently. That makes these dense, moist, in a texturally more complex way than the usual all-wheat-flour brownies.
The flavor is also more complex. Soon after baking, these brownies taste almost like they have breakfast cereal mixed in. You can tell something is different.

Like a lot of chocolate baked goods, though, these taste better after a day. In these brownies, that means the complicated flavors deepen. They taste more chocolaty, more delicious.
If you don’t want to fuss with a big bag of chickpea flour, check out your local grocery or natural goods stores that have flours in bins. In the Phoenix area, that includes Sprouts and WinCo.
Once you make these brownies, though, you may want to make them again soon, so maybe a larger amount of chickpea flour isn’t a bad thing.
Modified from February 2020 Bake from Scratch/Bob’s Red Mill lesson.
Bready or Not: Triple-Chocolate Brownies
Equipment
- 9×13 baking pan
Ingredients
- 1 1/2 cups semisweet chocolate divided
- 1 1/4 cups milk chocolate chips divided
- 1 cup unsalted butter 2 sticks, cubed
- 1 cup white sugar
- 1 cup brown sugar packed
- 1 1/4 cups all-purpose flour
- 1/2 cup chickpea flour
- 1/4 cup Dutch process cocoa powder sifted
- 2 teaspoons kosher salt
- 1 teaspoon espresso powder
- 4 large eggs room temperature, lightly beaten
- 2 teaspoons vanilla extract
- 1/2 cup white chocolate chips
Instructions
- Preheat oven at 325-degrees. Line a 13×9 pan with foil and apply nonstick spray or butter.
- Using a double boiler on the stove top or a microwave-safe bowl in the microwave, melt together 1 cup of dark chocolate/semi-sweet chocolate chips, 3/4 cup milk chocolate chips, and butter. Heat until it can be stirred smooth. Remove from heat and stir in all of the sugar. Set aside.
- In a medium bowl, mix together both flours, cocoa powder, salt, and espresso powder. Set aside.
- Return to the chocolate bowl. Mix in the eggs and vanilla. Gradually fold in the dry ingredients, and follow up with the rest of the three kinds of chocolate chips. Spread the batter evenly in the prepared pan.
- Bake until the center passes the toothpick test, about 35 to 40 minutes. Cool completely at room temperature or speed the process in the fridge. Use the foil to lift the contents onto a cutting board. Slice into bars.
- Store in an airtight container in the fridge up to a week. Like many chocolate baked goods, these brownies will actually taste better after the first day as the flavor intensifies.
OM NOM NOM!
Bready or Not Original: S’mores Cake Mix Bars
Cake mix is fantastic ingredient to keep in the pantry for a quick-fix dessert. It’s easy to doctor into something extraordinary, such as with these S’mores Cake Mix Bars.
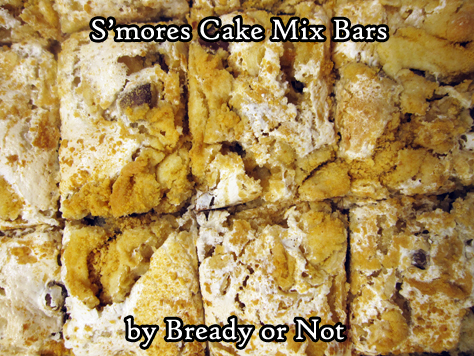
This is a treat that doesn’t taste like cake mix at the end. It’s just sweet and wonderful, courtesy of the lovely combination of ingredients.
I used ready-made graham crackers crumbs here, but really, you could probably use various kind of vanilla cookies, smashed, to mix in. Vanilla wafers or even Golden Oreos would be good substitutes.
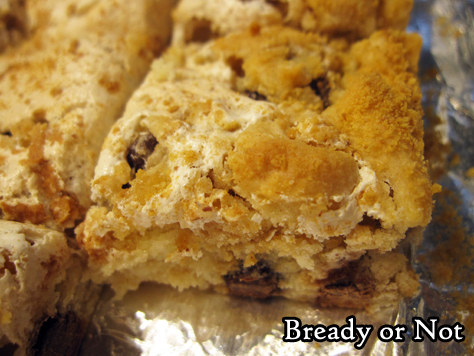
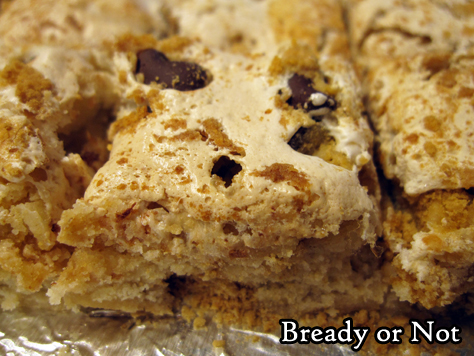
I love bar recipes like this where ingredients are swirled together at the end. There is something visually delightful about that marbled look.
Be sure that when these bars are sliced, they are stores with waxed paper between the layers. Marshmallow makes things a bit sticky! And delicious.
Bready or Not Original: S’mores Cake Mix Bars
Equipment
- 9×13 pan
- waxed paper
Ingredients
- 1 box white cake mix or yellow cake mix or French Vanilla
- 1/2 cup unsalted butter 1 stick, melted
- 1 teaspoon vanilla extract
- 2 eggs room temperature
- 1 cup semisweet chocolate chips
- 7 ounce marshmallow fluff jar
- 1/2 cup graham cracker crumbs
Instructions
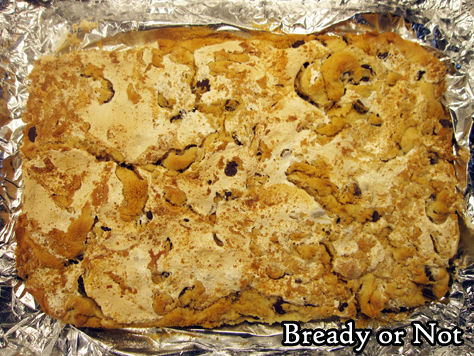
- Preheat oven at 350-degrees. Line a 9×13 casserole pan with foil and apply nonstick spray or butter.
- In a large bowl, mix together the cake mix, butter, vanilla extract, and eggs until no dry crumbs remain. Fold in the chocolate chips.
- Pour batter into the prepared pan and even out surface. Add the graham cracker crumbs in little piles scattered across the top. Use a butter knife to partially swirl the crumbs into the dough. Add dollops of marshmallow fluff across the top. Again, swirl the marshmallow into the dough, coating it with graham crackers in the process. Don’t combine everything too much–there should still be visible swirls and varied textures.
- Bake at 350-degrees for 20 to 25 minutes, until edges are golden and contents look set.
- Completely cool at room temperature or speed process in the fridge. Use foil to lift the contents onto a cutting board. Slice into bars. Store in a sealed container with waxed paper between the stacked layers.
OM NOM NOM!
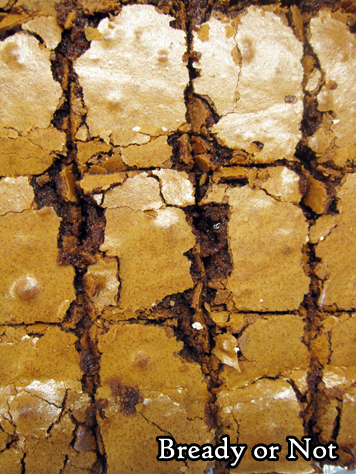
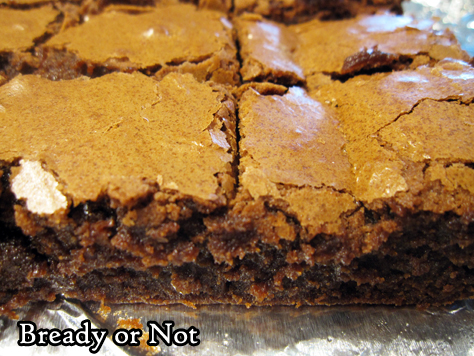
Bready or Not Original: Classic Brownies
Each year around Valentine’s Day, I like to share a chocolatey recipe. For this year, we’re going for Classic Brownies.
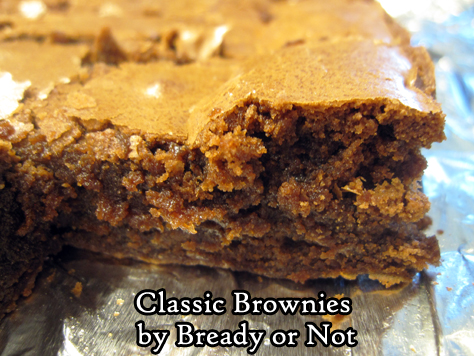
This straightforward recipe makes a 13×9 pan of luscious, moist brownies. They have a rich middle and a crackly top.
Yes, they might crumble a little, but they are by no means dry. Not unless they are overbaked.
These brownies are great on their own but would be out-of-this-world paired with some ice cream or fruit, or both of those at once.
Store these at room temperature for a few days at most, or freeze them for several months.
Bready or Not Original: Classic Brownies
Equipment
- 13×9 pan
Ingredients
- 8 ounces semisweet chocolate chips
- 1 cup unsalted butter 2 sticks
- 2 cups all-purpose flour
- 1/4 cup unsweetened Dutch-process cocoa powder sifted
- 2 1/2 cups white sugar
- 1 Tablespoon espresso powder or instant coffee granules
- 2 teaspoons ground cinnamon
- 6 eggs room temperature
- 2 teaspoons vanilla extract
Instructions
- Preheat oven at 325-degrees. Line a 13×9 pan with foil and apply nonstick spray or butter.
- In a medium microwave-safe bowl, microwave the chocolate and butter in very short bursts, stirring well between each pass, until it is melted and smooth. Set aside to cool.
- In a small bowl, combine the flour and cocoa.
- In a large bowl, combine the sugar, espresso powder, and cinnamon. Pour in the chocolate mixture. Beat until just combined. Add eggs, one at a time, followed by the vanilla. Gradually stir in the flour-cocoa mix. Spread the batter in the prepared pan.
- Bake for 35 to 42 minutes, until the edges start to pull away from the sides of the pan and the very middle passes the toothpick test. Set on rack to completely cool.
- Use the foil to lift the brownies onto a cutting board. Cut into bars. Store in a sealed container at room temperature. Brownies can also be layered in wax paper and frozen for later enjoyment.
