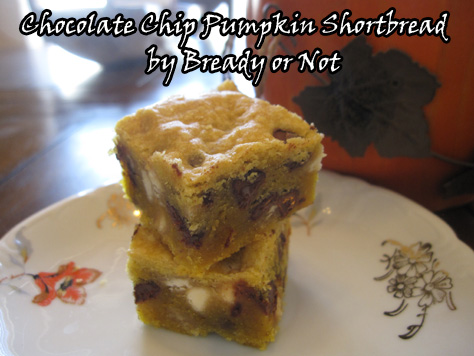
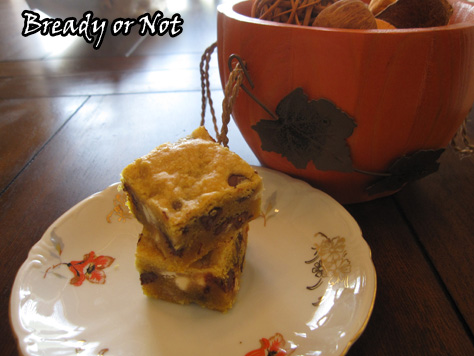
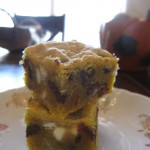
Bready or Not: Chocolate Chip Pumpkin Shortbread
Shortbread makes me think of autumn, so it’s only right to combine shortbread and pumpkin.
It’s been a while, but I have talked about my shortbread/autumn association before. It puts me in mind of kilts and bagpipes and happy family times.
Pumpkin lends an orange tint and a very mellow and pleasant flavor. It’s such a small amount that it doesn’t make the pieces feel tacky, either.
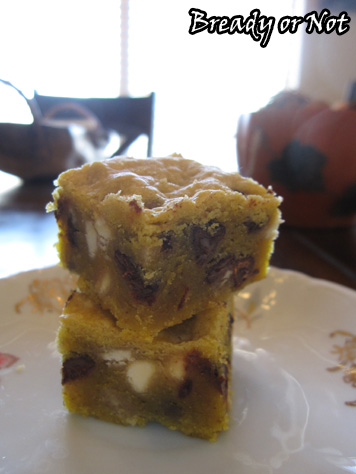
The original recipe called for dark chocolate. That’s just not my thing. I prefer white chocolate with pumpkin. Here, I mixed in white and semi-sweet chips. YUM.
Don’t be fooled by the fact that this uses an 8×8 pan–the shortbread is thick, so it makes a good bit. I cut it small, like I would with fudge.

Like most any shortbread, these keep very very well. I imagine it would mail well, too, if you don’t live in a place where it’s still 100-degrees in November.
Modified from Dark Chocolate Pumpkin Shortbread from The View from the Great Island.
Bready or Not: Chocolate Chip Pumpkin Shortbread
Ingredients
- 1 cup unsalted butter room temperature
- 1/2 cup white sugar
- 1 tsp vanilla extract
- 3 Tbsp pumpkin puree heaping
- 1/2 tsp cinnamon
- 1/2 tsp ground ginger
- 1/4 tsp cardamom
- 1/4 tsp cloves
- 1/4 tsp nutmeg
- 1/4 tsp allspice
- 2 1/4 cups all-purpose flour
- 1 cup chocolate chips white, dark, semi, etc
Instructions
- Preheat oven at 350-degrees. Prepare an 8x8 dish by lining it with aluminum foil or parchment paper and applying nonstick spray.
- In a large bowl, cream butter and sugar together. Beat in the vanilla, pumpkin, and spices.
- Fold in the flour, and then the chocolate chips.
- Spread the batter in the pan, smoothing it out evenly.
- Bake for about 40-45 minutes, until the edges just start to turn gold. Set out to cool to room temperature, then use the foil or parchment to lift the shortbread out for easy cutting.
Store in a sealed container at room temperature.
OM NOM NOM!
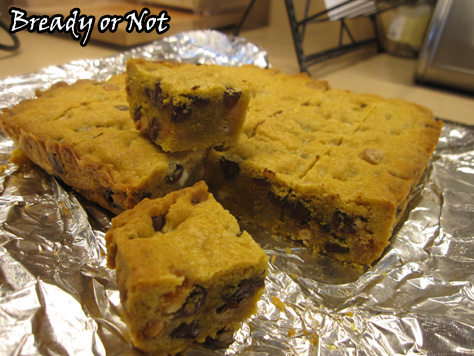
Bonus Bready or Not: Candy-Stuffed Cookie Cups
I could accurately name these Salted Browned Butter Candy-Stuffed Chocolate Chip Cookie Cups but that’s a royal pain to even type out, much less say.
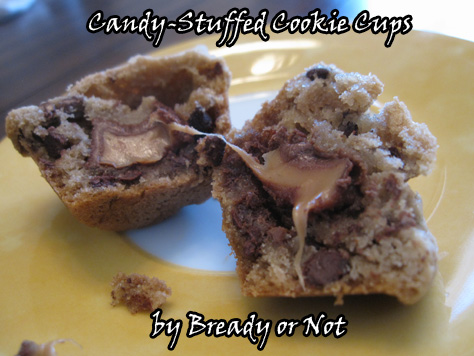
These are what I made for my book release at Changing Hands. My book has almost been out a month (!!!) so I figure it was about time I shared this recipe, as promised.
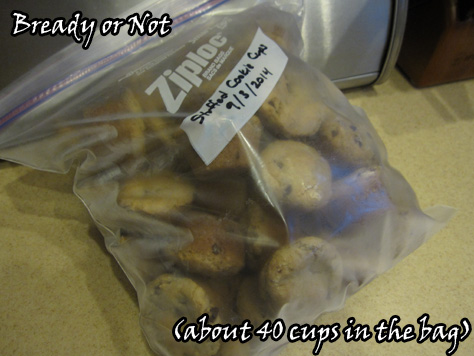
I wanted something cookie-like but more durable so that I could make it a few weeks ahead and freeze in a gallon freezer bag.
I thought, hey! Mini muffin pan cookies would be great! I already had a few such recipes pinned, so I combined them to create something new.
It was important to me that the candy be inside the cup. Since my event was in September in Arizona, I already knew I’d need to transport food in a cooler. Even so, I didn’t want lots of chocolate on the surface where it could melt.
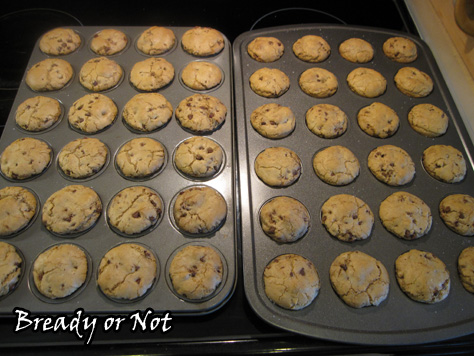
In my first attempt at this recipe, I used the tablespoon amount called for in one of the base recipes. They baked into these overflowing mushroom shapes. Taste-wise, the combo worked, but they were HUGE.
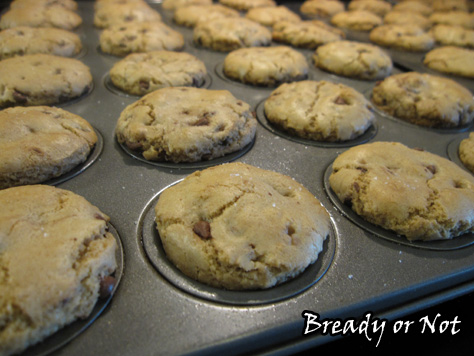
Therefore, I knew on my next attempt that I wanted to use about a teaspoon of dough for each cup. That’s enough for it to gently round, not overflow.
I also added corn starch to the recipe, which is what I use in my Soft Batch-like recipe. I prefer cookies chewy rather than crispy, and these would get crispy fast.
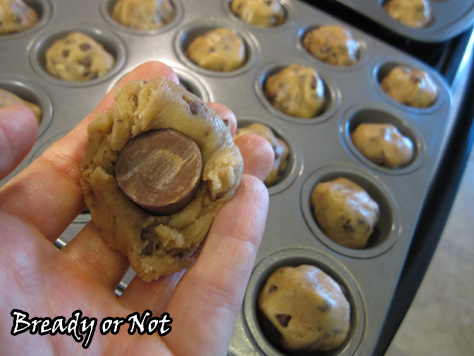
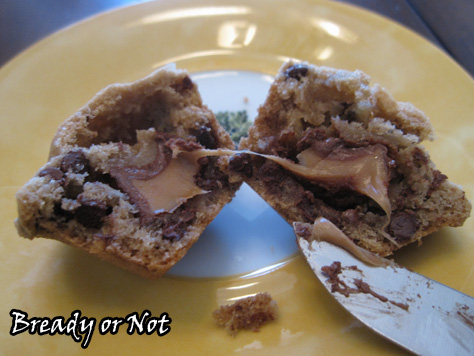
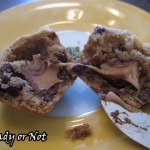
Stuff these cups with whatever you want. I used Rolos and mini Milky Ways. Any bite size chocolate candy would work, or caramels or Snak Sak Oreos. Go crazy. Go delicious.
My recipe is a combination of Rolo Chocolate Chip Cookie Cups at Crazy for Crust and Salted Caramel Browned Butter Cookie Cups at Buns in my Oven.
Bonus Bready or Not: Candy-Stuffed Cookie Cups
Ingredients
- 1 cup unsalted butter browned on stove
- 3/4 cup white sugar
- 1 cup light brown sugar packed
- 2 large eggs
- 1 Tablespoon pure vanilla extract
- 1 teaspoon baking soda
- 3 1/4 cups all-purpose flour
- 1/4 teaspoon salt
- 4 teaspoons corn starch
- 1 1/2 cups mini chocolate chips
- about 50-60 candies or mini cookies Rolos, Kisses, Reese's Peanut Butter Cups, mini Oreos, etc
- sea salt to sprinkle on top
Instructions
- Melt butter in saucepan at medium heat. Whisk until it turns deep golden brown, about 5 minutes. Let it cool a few minutes.
- Prep the mini muffin pan(s) by generously buttering or using a non-stick spray like Pam. If desired, use mini baking cup liners and spray them.
- Preheat oven to 350-degrees. In a medium bowl, combine flour, baking soda, salt, and corn starch.
- In a large bowl, pour in the white and brown sugar. Add the still-mildly-warm browned butter and mix. Add eggs one at a time followed by vanilla extract. Add the dry ingredients until just combined. Stir in mini chocolate chips.
- Have your candy unwrapped or ready at hand. Use a teaspoon scoop to dole out dough. Press a candy inside the dough ball and cover completely. Place in mini muffin pan hole. Once the pan is full, sprinkle sea salt on top.
- Bake cookie cups for about 11 minutes. Tops should be golden brown and gently rounded. Let cool in pan for an extended time before removing (especially if they overflow with a mushroom-like effect).
- Cookies will keep in the freezer for weeks, or for several days in a covered container at room temperature. Makes about 50-60
OM NOM NOM.
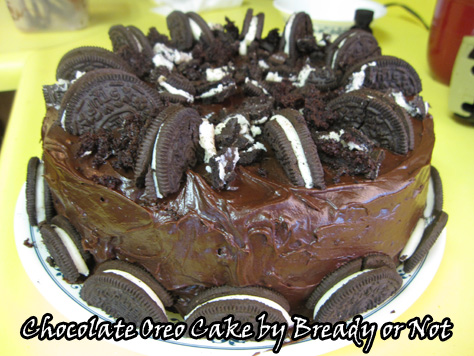
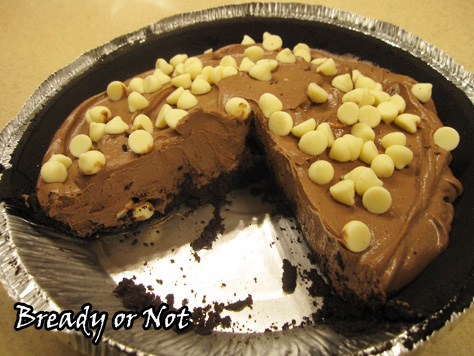
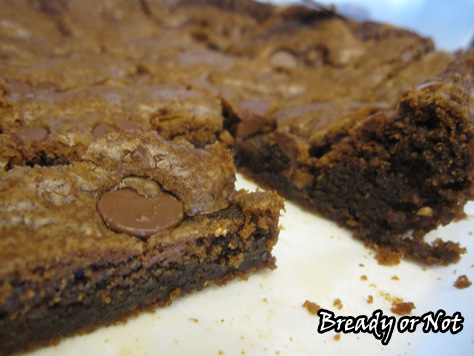
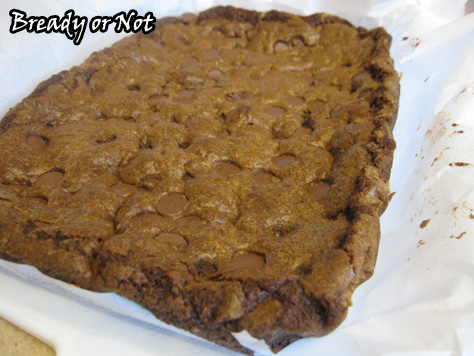
Bready or Not: Chocolate Oreo Cake
Let’s finish off Cake Month with a cake of chocolate wonder, shall we?
I made this while visiting my parents’ house for the 4th of July. My brother’s birthday was in June and I let him pick the recipe for me to try. I prepared all of the dry ingredients beforehand and toted them to California.
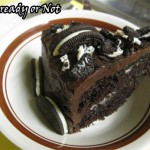
I think he chose pretty well. This actually reminded me of how our local Savemart bakery used to make their Oreo Cake back in the late ’80s. This is heavy duty chocolate with the frosting and all, though the cake layers had a light crumb. It may not be as dense as some cakes, but it’s still a chocolate fist to the face.
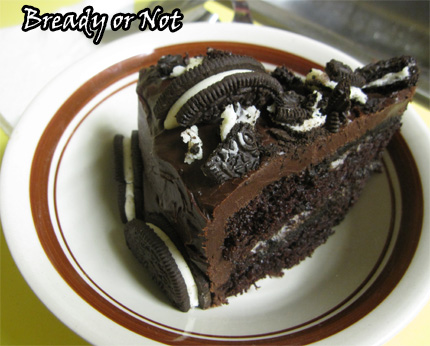
I was a little disappointed in the filling layer, though–it wasn’t even visible in the cut cake! Therefore, I modified the ingredients to double the cream and sugar there.
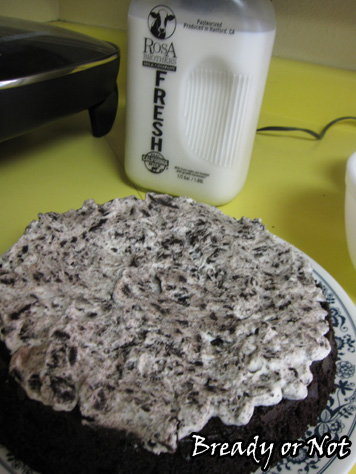
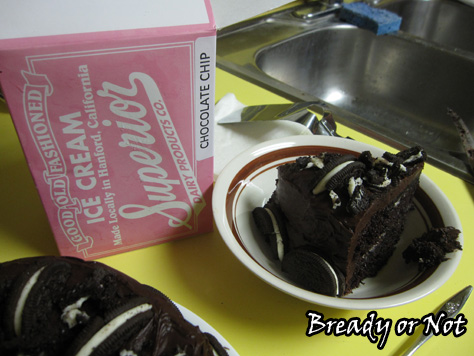
Since I was in my hometown, it was only right that I use local ingredients. I used Rosa Brothers milk–it comes in a glass bottle and everything! Then I had to serve the cake with Superior Dairy chocolate chip ice cream, the best ice cream anywhere. I’ve lived all over the country. I know.
Like most chocolate cakes, this one improved after a day in the fridge.
Yet another reason why chocolate cake is awesome.
Modified from version here.

Chocolate Oreo Cake
Ingredients
For cake:
- 2 cups white sugar
- 1-3/4 cups all-purpose flour
- 3/4 cup baking cocoa sifted
- 1-1/2 tsp baking powder
- 1-1/2 tsp baking soda
- 1 tsp salt
- 2 eggs room temperature
- 1 cup milk
- 1/2 cup vegetable oil
- 2 tsp vanilla extract
- 1 cup boiling water
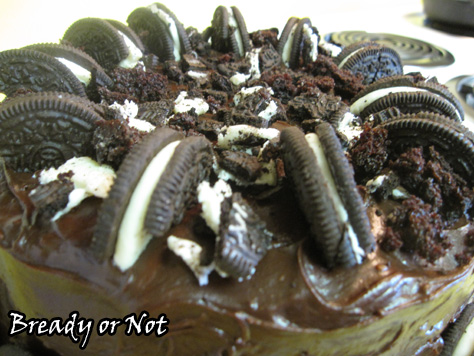
- 10-15 Oreos twisted to separate cookies and reveal cream center
- 15 Oreos chopped directly in half through cookie [for final garnish]
For filling:
- 2/3 cup whipping cream
- 4 tsp confectioners' sugar
- 1/4 tsp vanilla extract
- black Oreo sides crushed
For icing:
- 1/2 cup unsalted butter melted
- 2/3 cup baking cocoa sifted
- 3 cups confectioners' sugar
- 1/3 cup milk
- 1 tsp vanilla extract
Instructions
Make the cakes:
- Preheat oven to 350-degrees. Prepare two 9-inch round baking pans by applying nonstick spray, lining with parchment, and then spraying again.
- Set 5-8 Oreo halves down in each pan. These will be the cream sides, with the cream facing up. Set the black halves aside to be used in the filling.
- In a large bowl, stir together the sugar, flour, cocoa, baking powder, baking soda and salt.
- Add the eggs, milk, oil and vanilla; beat on medium speed for about 2 minutes.
- Stir in the boiling water. The batter will be very thin. Pour it very carefully into the prepared pans. Don't be surprised if the Oreos float around.
- Bake the pans for 30 to 35 minutes or until wooden pick inserted in center comes out clean.
- Cool them for 10 minutes; run a knife around the sides to make sure they are loose, then carefully remove the cakes from pans. Set them on wire racks and remove the parchment from the tops. Let the cakes completely cool.
To make the filling:
- Beat together the cream, sugar and vanilla until they form stiff peaks. Gently fold in the cookie crumbs.
- Set up the bottom layer of the cake on the serving dish. Depending on consistency, pipe the filling onto the cake or spread it on with a spatula.
- Set the top layer in place. If need be, trim the sides of the cake to make them more even.
Make the frosting:
- Melt the butter. Mix in the cocoa. Alternately beat in the powdered sugar, milk, and vanilla. Add small amounts of milk until it reaches spreading consistency.
- Frost the cake around the top and sides. Apply the remaining halved Oreos around the bottom and the top; add any sliced-off cake crumbs as well.
Store the cake in the fridge, covered by a dome, foil, or wrap. Like most chocolate cakes, it actually tastes better after the first day. It can also be frozen in slices.
OM NOM NOM!
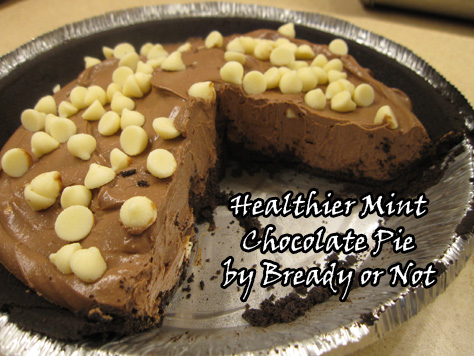
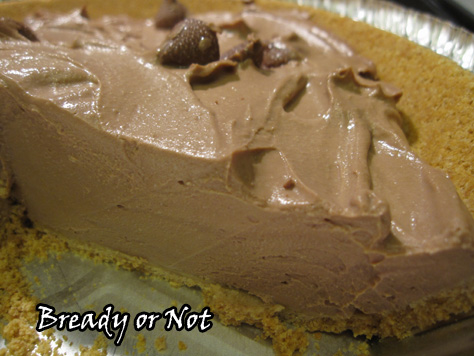
Bready or Not: Healthier Mint Chocolate Pie
Do not be afraid of this pie. Do not look at the main ingredient and go, “NOT GONNA GO IN MY MOUTH, NOPE NOPE.” I say that, because I was leery about this recipe, too, because I generally do not like tofu.
Yes, tofu. Stay with me.
The thing with tofu is, it takes on whatever flavors it is with. So if you dump a whole bag of chocolate in with the tofu, you don’t taste the soy byproduct. (This is why the adjective in the title is “Healthier” not “Healthy.”) Think of the tofu as scaffolding. It’s there to hold up the tastier stuff.
The original recipe comes from Chocolate Covered Katie, who is a great resource for healthier recipes. I’ve made this pie three times now and have adapted it a great deal from the original:
– tofu blocks around here come in 14 ounce, not 12.3.
– my first try, a chalky taste from the tofu was still evident, though it wasn’t bad. I upped the cocoa to mask that.
– increased the peppermint extract, as I couldn’t taste it at all in the original. I also tried this by using mint Hershey’s Kisses as part of the chocolate chip measurement, which was great.
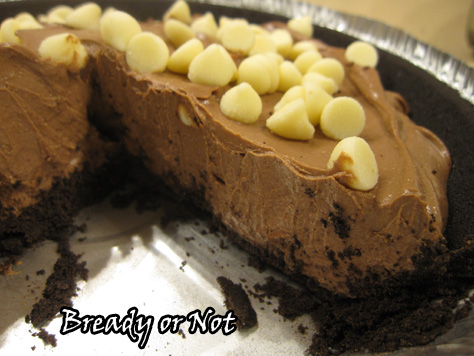
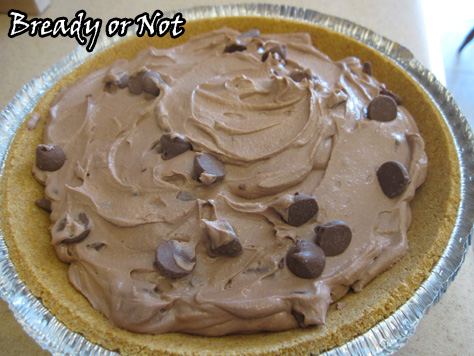
This all mixed up in my Vitamix in a matter of minutes. Then you dump everything into a premade graham cracker or Oreo crust, top with more chips if you want, then let it set for a few hours.
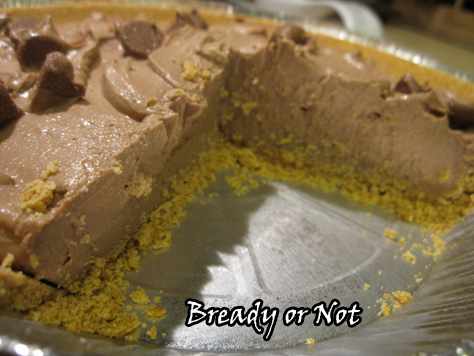
There’s just something awesome about a smooth, cool pie in the summertime, and if it’s a bit healthier than the average pie… even better!
Bready or Not: Healthier Mint Chocolate Pie
Ingredients
- 1 ready graham cracker crust or Oreo crust
- 14 ounce firm tofu
- 4 tsp cocoa powder sifted
- 1 tsp pure vanilla extract
- 2 Tablespoons milk almond milk works
- 1/8 tsp salt
- 2 teaspoons peppermint extract
- 8-10 ounces chocolate chips optional; also can mix in Hershey's Mint Kisses or other mint chips; reserve some chips for the top
- 2-3 Tablespoons maple syrup or agave or other sweetener
Instructions
- Set aside some of the chocolate if you want it for the top or mixed in. Melt the bulk of the chocolate.
- Add all of the other ingredients into a food processor or blender and pulse until very smooth.
- Scoop it into a prepared pie crust; it will be very thick. Place in fridge for several hours to set.
- Pie will keep perfectly well in fridge, covered, for up to a week.
OM NOM NOM!
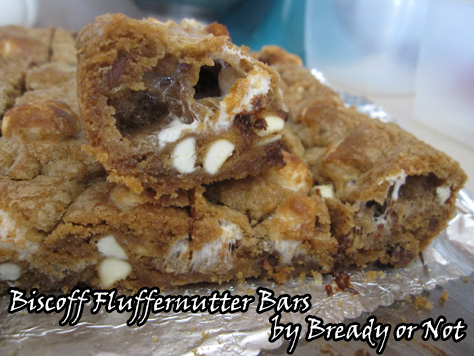
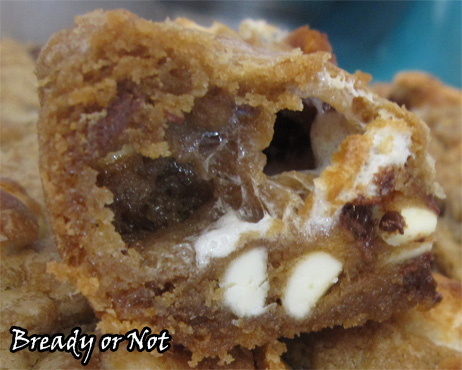
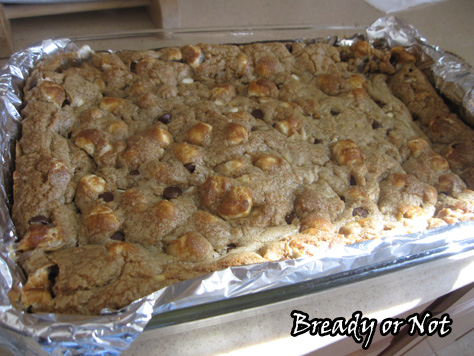
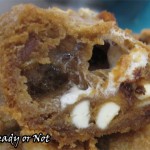
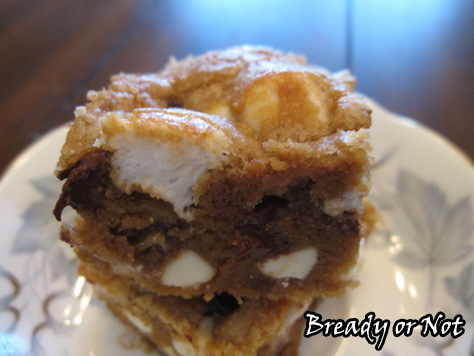
Bready or Not: Biscoff Fluffernutter Bars
Air conditioning is what makes Phoenix habitable, but even that has limits. We keep our air set at 82-degrees. This keeps us comfortable but is still not quite cool enough for some stuff in our kitchen.
The chocolate chips in my pantry go soft. Miniature candy bars, stockpiled from holiday clearance sales, goes outright melty. Marshmallows and caramels begin to fossilize. I keep some things in the fridge but I can’t get all of it in there.
This means I obviously need to start baking and use up the stuff while it’s still good.
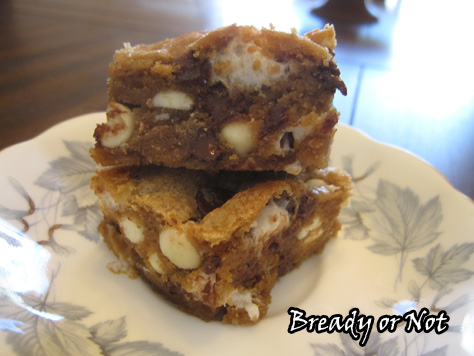
Traditional fluffernutter bars use peanut butter. You can certainly do that here–or use any nut butter–but I used my good ol’ Biscoff spread because, as you all know, I’m obsessed with the stuff. It makes everything taste like cookie dough. What’s not to love? I also used half a bag of mini marshmallows (you’ll find out what I did with the other half in another recipe) and a bag of chocolate chips.
You know what’s cool about using marshmallows in a recipe like this? CAVERNS. It creates pockets of invisible sweetness. Look! See?
My husband took this to work and it was, um, popular. The whole 9×13 pan’s worth of bars just kinda vanished and he had recipe requests.
I don’t believe in secret recipes. Share the love. If that love happens to involve chocolate, Biscoff spread, and marshmallows, all the better.
Recipe greatly adapted from Back for Seconds.
Bready or Not: Biscoff Fluffernutter Bars
Ingredients
- 1 cup unsalted butter softened
- 3/4 cups creamy Biscoff spread or nut butter
- 1 cup brown sugar packed
- 1/2 cup white sugar
- 2 eggs room temperature
- 1/2 teaspoon salt
- 1 teaspoon baking soda
- 2 1/4 cups all-purpose flour
- 2 cups chocolate chips
- 5 ounces mini marshmallows half bag
Instructions
- Preheat oven to 350-degrees. Prepare a 9x13 pan with aluminum foil or parchment and apply nonstick spray.
- In a mixing bowl, cream together the butter, Biscoff spread (or nut butter), and sugars. Add the eggs and blend in, followed by all of the dry ingredients. Gently fold in marshmallows and chocolate chips. It'll be thick.
- Spread the dough into the pan and even out. Bake for 20 to 25 minutes, or until lightly browned on the edges. The center will jiggle slightly from the marshmallows but it will set after it cools.
- Cool completely and cut into squares. Store in a tightly sealed container.
OM NOM NOM.
Bready or Not: Cardamom Toffee Coffee Blondies
My modified version of this recipe came about because I misread the original name on Pinterest. It was “Cardamom Coffee Blondies,” but at first glance I thought it said “Toffee.” Which sounded really good.
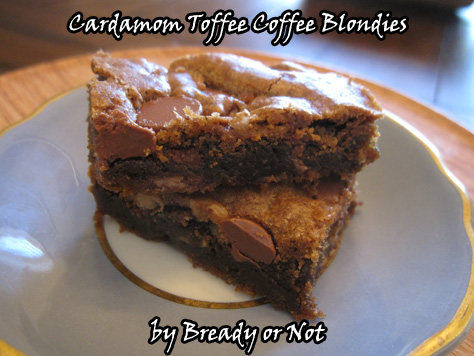
Once I read the recipe, I knew I had it in my power to make these with coffee and toffee. That’s because I had a bag of Heath Bits with Milk Chocolate stashed in my fridge.
The flavors here play very well together. You have the lovely flavor of cardamom, the sweetness of toffee, the touch of chocolate, and the incorporated espresso powder. It sounds like a lot, but it works.
The texture is amazing, too. These are soft, chewy, and keep well for several days at room temp or in a closed container in the fridge (a necessity in Arizona, alas).
Bready or Not: Cardamom Toffee Coffee Blondies
Ingredients
- 1 cup unsalted butter room temperature
- 1 cup brown sugar packed
- 1/2 cup white sugar
- 1 Tbsp instant espresso powder heaping
- 1 Tbsp ground cardamom heaping
- 2 eggs room temperature
- 1 teaspoon pure vanilla extract
- 2 cups all-purpose flour
- 1 tsp baking soda
- 1 tsp salt
- 1 bag of Heath bits with chocolate or chop up some Heath or other toffee bars
For the top
- 1/2 cup chocolate chips
Instructions
- Preheat oven at 350-degrees. Prepare a 9x13 pan by lining it with parchment or aluminum foil and apply butter or nonstick spray.
- Cream the butter, espresso powder, cardamom and sugars together until fluffy; this takes several minutes. Beat in eggs, one at a time, followed by the vanilla.
- In a small bowl, whisk together flour, baking soda and salt. Add dry ingredients to the wet, mixing just until combined. Add the bag of Heath Bits last.
- Spread the thick batter into the prepared casserole dish. Sprinkle the chocolate chips across the top and gently press in.
- Bake for 30-35 minutes, until the edges are set and the middle passes the toothpick test. Don't over bake! Let cool a while before cutting.
OM NOM NOM.