


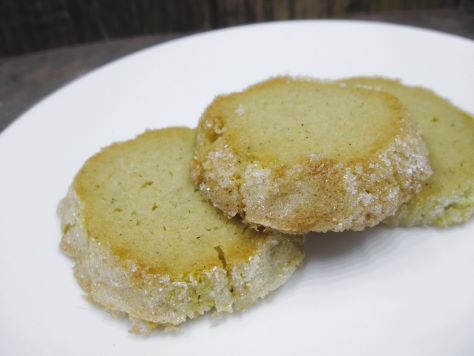
Bready or Not: Vanilla Sablé Cookies
These Vanilla Sablé Cookies are a delicate French take on shortbread. They are not heavily sweet, perfect for people who like their desserts a bit gentler.
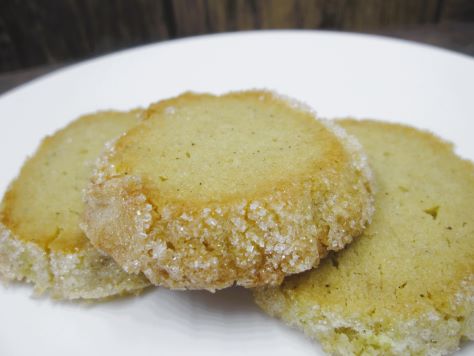
This recipe calls for vanilla bean paste. It will imbue the dough with a deeper vanilla flavor as well as beautiful flecks of vanilla. It makes the end result prettier–which is saying a lot, as they are already pretty courtesy of a sparkling sanding sugar crust.
Note that this dough requires chill time, as it is very soft. You don’t want it warm as it is sliced or baked!
Bready or Not: Vanilla Sablé Cookies
Equipment
- plastic wrap
- pastry brush
Ingredients
- 1 Tablespoon vanilla bean paste
- 1/3 cup white sugar
- 1 cup unsalted butter 2 sticks
- 1/2 teaspoon fine sea salt
- 1/3 cup confectioners’ sugar sifted
- 2 large egg yolks separated
- 2 cups all-purpose flour
- 1/2 cup sanding sugar white or other color
Instructions
- Mix together the vanilla bean paste, white sugar, and butter until smooth and creamy, not light and fluffy. Add the salt and confectioners’ sugar until smooth. Add 1 egg yolk. Mix in the flour until just combined.
- Turn out dough onto counter to lightly knead. Divide in half and shape into long logs about 1-inch tall. Wrap dough in plastic wrap and chill for at least 3 hours, or freeze up to 2 months.
- When it is baking time, preheat oven at 350 degrees. Line a baking sheet with parchment paper.
- Place egg yolk into a small bowl or ramekin. Add a splash of water and whisk it with the yolk. Pour sanding sugar onto a plate.
- Brush the yolk down the length of a cookie log, fully coating it. Roll the log in the sanding sugar. Place on a cutting board and slice into pieces 1/2-inch thick. Place spaced out on cookie sheet. Repeat process with other log. Don’t squeeze the cookies too close, as they will spread.
- Bake for 11 to 13 minutes, until set and just turning a hint of gold. Let them set on sheet for 5 minutes, then transfer to a rack to fully cool.
- Pack cookies in a sealed container at room temperature. They will keep for at least 4 days.
OM NOM NOM!
Bready or Not Original: Toffee Blondies
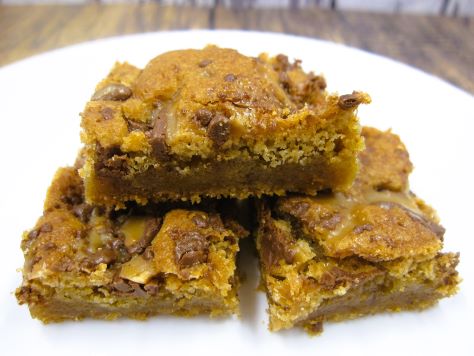
Why have a candy bar when you can have a chewy, luxurious treat that’s filled with candy bar pieces? These Toffee Blondies are a glorious combination of textures and sweetness.

If you can find it, use an 8 ounce bag of Heath Bits that include chocolate. All is not lost if that is unavailable, though. You can chop up normal Heath Bars, or use an all-toffee bag and add separate chocolate.

The result is a thick, chewy bar with crunchy little bits of toffee and pockets of chocolate. These things keep for days, too.
Bready or Not Original: Toffee Blondies
Equipment
- 9×13 pan
- aluminum foil
- nonstick spray
Ingredients
- 2 cups all-purpose flour
- 2 cups brown sugar packed
- 2 teaspoons baking powder
- 1/4 teaspoon salt
- 1/2 cup unsalted butter (1 stick) melted and cooled
- 2 large eggs room temperature
- 1 teaspoon vanilla extract
- 8 ounces Heath Bits with Chocolate
Instructions
- Preheat oven at 350 degrees. Line a 13×9 pan with foil and apply nonstick spray.
- In a bowl, mix together the flour, brown sugar, baking powder, and salt. Set aside.
- In a large bowl, beat the butter, eggs, and vanilla until smooth. Gradually mix in the dry ingredients. Fold in about 2/3 of the Heath Bits.
- Scoop the thick batter into the prepared pan and level out with an uneven spatula. Sprinkle the rest of the Heath pieces over the top.
- Bake for 24 to 27 minutes. Middle should be set and pass the toothpick test. Cool to room temperature, speeding the process in the fridge if desired.
- Use the foil to lift onto cutting board to slice into bars. Store in a sealed container at room temperature. They will keep for up to 3 days.
OM NOM NOM!
Bready or Not Original: Gingerdoodles
I’ve published many variations on Snickerdoodles (complete with pie and banana versions!), and here is a take called Gingerdoodles.
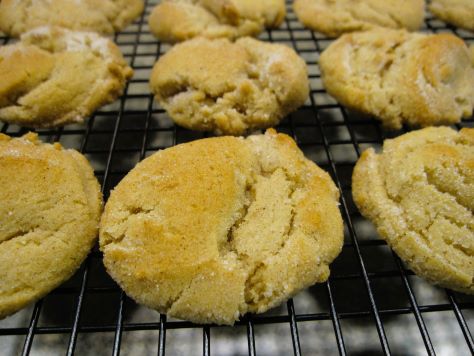
It should come as no surprise that these feature the warmth of ginger along with other complementary spices. To me, these were like a hybrid of snickerdoodles and sugar/spice cookies. The texture is soft and scrumptious.

This recipe is a must if you love soft cookies with some sweetness and spice.

Bready or Not Original: Gingerdoodles
Equipment
- parchment paper
- small scoop or teaspoon
Ingredients
Dough
- 3/4 cup unsalted butter (1 1/2 sticks) softened
- 1/2 cup white sugar
- 1/2 cup brown sugar packed
- 1 large egg room temperature
- 1/2 cup real maple syrup
- 3 1/4 cups all-purpose flour
- 1 teaspoon baking soda
- 1/2 teaspoon ground cinnamon
- 1/2 teaspoon ground ginger
- 1/4 teaspoon salt
- 1/4 teaspoon cream of tartar
- 1/4 teaspoon nutmeg
Topping
- 1/2 cup white sugar
- 1/4 teaspoon ground cinnamon
Instructions
- Preheat oven at 350 degrees. Line a baking pan with parchment paper.
- Beat together butter and both sugars until light and fluffy. Beat in egg and syrup.
- In another bowl, combine flour, baking soda, cinnamon, ginger, salt, cream of tartar, and nutmeg. Gradually mix the dry ingredients into the wet, forming a cohesive dough.
- In a small bowl, stir together the two topping ingredients.
- Use a small cookie scoop or spoon to shape dough into round balls. Roll them in the topping to coat. Place spaced out on baking pan.
- Bake for 9-10 minutes, until set and crackled. After 5-10 minutes, move them to a cooling rack.
- Store cookies in a sealed container at room temperature.
OM NOM NOM!
Bready or Not Original: Chai Crinkle Cookies
These Chai Crinkle Cookies are a fantastically fresh take on spice cookies. They are like pudgy soft pillows with gentle spice flavor.

This recipe is an easy one to break into sections to make for faster baking. There are a lot of ingredients–tiny amounts of flavorful spices–and those can be mixed with the flour hours or days in advance. The dough itself needs to chill for at least a few hours. I kept it in the fridge a full day.

These are great cookies to make year-round, but there’s something extra special about a warmly-spiced treat at this time of year!
Bready or Not Original: Chai Crinkle Cookies
Equipment
- plastic wrap
- parchment paper
- cookie scoop or spoon
Ingredients
- 1/2 cup unsalted butter (1 stick) softened
- 1/4 cup vegetable shortening
- 1 cup brown sugar firmly packed
- 1 large egg room temperature
- 1/4 cup molasses
- 1 Tablespoon vanilla extract
- 3 cups all-purpose flour
- 1 1/2 teaspoons ground cinnamon
- 1 1/4 teaspoons baking soda
- 1/2 teaspoon kosher salt
- 1/2 teaspoon ground ginger
- 1/2 teaspoon ground cardamom
- 1/8 teaspoon ground cloves
- 1/8 teaspoon ground black pepper
- 1/3 cup white sugar for topping
Instructions
- In a large bowl, beat together butter, shortening, and brown sugar, until fluffy, scraping the bottom of the bowl on occasion. Add egg, molasses, and vanilla.
- In another bowl, stir together flour, cinnamon, baking soda, salt, ginger, cardamom, cloves, and pepper. Gradually add the dry ingredients to the wet.
- Cover dough with plastic wrap and chill for at least two hours, or up to a day.
- Preheat oven at 350 degrees. Line a baking pan with parchment paper. Measure out topping sugar into a bowl.
- Use a scoop or spoon to form walnut-sized balls. Roll dough balls in sugar. Place them slightly spaced on pan and then compress each one; they will not spread much while baking.
- Bake for 10 to 12 minutes, until puffed and set. Let cool on pan a few minutes before transferring to a cooling rack.
- Store them in a sealed container at room temperature up to 3 days.
OM NOM NOM!
Bready or Not Original: Raspberry-Almond-Chocolate-Oatmeal Cookies
Merry Christmas to those of you who celebrate, and warm wishes to visitors of any or no faith!

The name for these cookies is a mouthful, but that list of ingredients lets everyone know that these aren’t standard Oatmeal Cookies. No, these Raspberry-Almond-Chocolate-Oatmeal Cookies are loaded with flavors and textures with nary a raisin in sight.
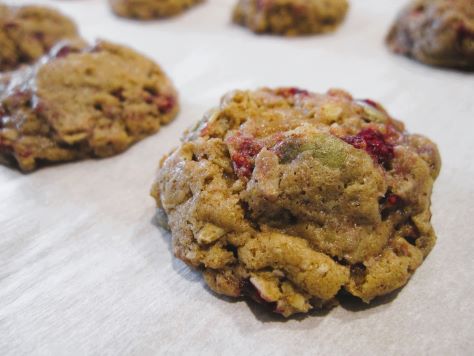
The chocolate is optional here, but I really do love that chocolate-raspberry combo. It adds some oomph (and results in a few more cookies). Only use mini chips, though, or you’ll likely have cohesion issues.
Bready or Not Original: Raspberry-Almond-Chocolate-Oatmeal Cookies
Equipment
- parchment paper
- kitchen shears
- small cookie scoop or teaspoon
Ingredients
- 3/4 cups frozen raspberries unthawed
- 1/4 cup unsalted butter room temperature
- 1/4 cup almond butter room temperature
- 1/2 cup brown sugar packed
- 1/4 cup white sugar
- 1 large egg room temperature
- 1 teaspoon vanilla extract
- 1/4 teaspoon almond extract
- 3/4 cup all-purpose flour
- 1/2 teaspoon baking soda
- 1/2 teaspoon ground cinnamon
- 1/4 teaspoon ground nutmeg
- 1/4 teaspoon salt
- 1 1/2 cups old fashioned rolled oats
- 1/4 cup pepitas
- 1/2 cup mini chocolate chips optional but awesome
Instructions
- Preheat the oven to 350 degrees. Line a baking sheet with parchment paper.
- Use kitchen shears to gently shatter apart the frozen raspberries into a measuring cup. Set cup in freezer again as the rest of the dough is formed.
- In a large bowl, beat together butter, almond butter, brown sugar, and white sugar until light and fluffy. Add in eggs, vanilla, and almond extract. Follow up with flour, baking soda, cinnamon, nutmeg, and salt. Stir in oats and pepitas until combined.
- If using, fold in the mini chocolate chips. Gently fold in frozen raspberries until evenly dispersed in the dough. Note that if an excess of raspberry bits are left until the end, the dough will be especially wet and harder to work with.
- Use a small cookie scoop or teaspoon to form balls about 1 inch apart onto the prepared baking sheet. Bake until cookies are set, 9 to 10 minutes. Chill remaining dough while a batch bakes.
- Allow cookies to cool 5 minutes on the baking sheet before removing to a wire rack to cool completely. Store in a sealed container at room temperature.
OM NOM NOM!
Bready or Not: Gingerbread Cookie Cheesecake Bars
If you love both gingerbread cookies and cheesecake, oh boy, do I have the recipe for you. These Gingerbread Cookie Cheesecake Bars are dense, rich, and outright divine.
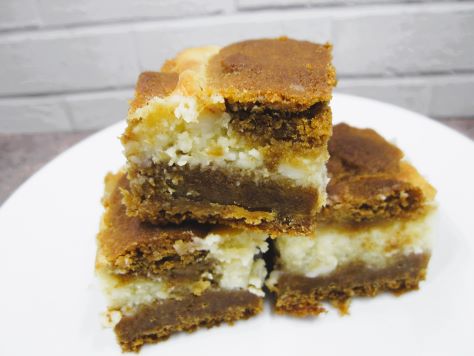
The creation process also dirties a lot of dishes, but hey, sometimes that’s what is required to make something that truly comes across as special. This recipe makes a 9×13 pan of thick bars, so bake this to feed a crowd!

Modified from Holiday Cookies magazine 2019.

Bready or Not: Gingerbread Cookie Cheesecake Bars
Equipment
- 9×13 pan
- aluminum foil
- nonstick spray
- uneven spatula
Ingredients
Gingerbread
- 1 1/2 cups unsalted butter (3 sticks) softened
- 1 1/4 cups white sugar
- 3/4 cup brown sugar packed
- 1/2 cup molasses
- 2 large eggs room temperature
- 4 cups all-purpose flour
- 2 teaspoons ground cinnamon
- 2 teaspoons ground ginger
- 1 1/2 teaspoons kosher salt
- 1 teaspoon baking powder
- 1 teaspoon baking soda
- 1/4 teaspoon nutmeg
- 1/8 teaspoon allspice
- 1/8 teaspoon cloves
- 3 Tablespoons minced candied ginger
Cheesecake
- 16 ounces cream cheese (2 blocks) softened
- 1 cup white sugar
- 1 Tablespoon all-purpose flour
- 2 large eggs room temperature
- 1 Tablespoon vanilla extract
Instructions
- Preheat oven at 350 degrees. Line a 13×9-inch pan with aluminum foil. Apply nonstick spray.
- In a large bowl, beat the butter and sugars until fluffy. Add the molasses, mixing until no streaks remain. Add eggs, one at a time, scraping the bottom of the bowl on occasion.
- In a separate bowl, combine the flour, cinnamon, ground ginger, salt, baking powder, baking soda, nutmeg, allspice, and cloves. Gradually add the dry ingredients to the wet. Fold in the candied ginger.
- Measure out 2 cups of the dough and set it aside.
- Press the remainder of the dough into the pan, forming an even layer.
- Time to make the cheesecake layer. Beat the cream cheese until creamy. Add the sugar and flour. Add the eggs one at a time, followed by the vanilla. The mixture should be fairly consistent in color and texture, but it’s okay if there are some small lumps.
- Use an uneven spatula to spread the cheesecake into an even layer. Crumble the reserved topping over it.
- Bake for 50 to 60 minutes; the middle should not look jiggly and should pass the toothpick test. If the top is browning too much, cover with foil.
- Cool at room temperature for about an hour, then place in fridge to completely chill for a few hours. Use foil to lift onto cutting board to slice into small pieces. Store in fridge in a sealed container.
