


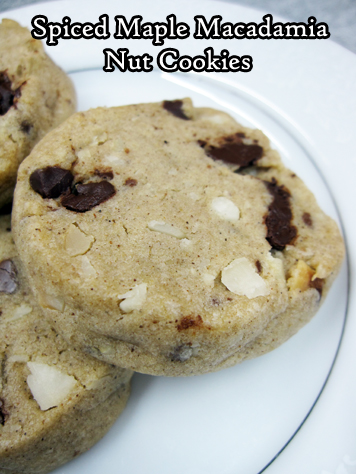
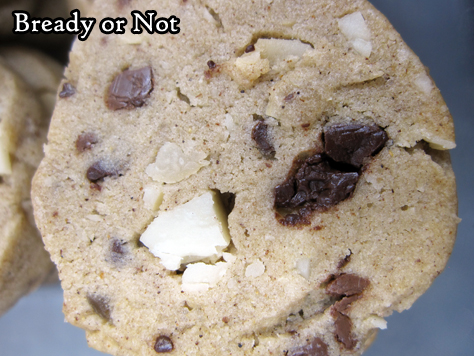
Bready or Not Original: Spiced Maple Macadamia Nut Cookies
These Spiced Maple Macadamia Nut Cookies mix maple sweetness and warm spices and chocolate with the wonderful crunch of macadamias. They are perfect for fall–and throughout the year.
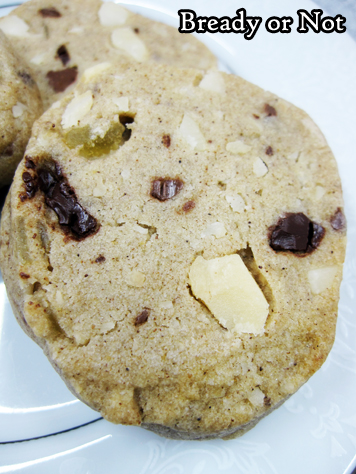
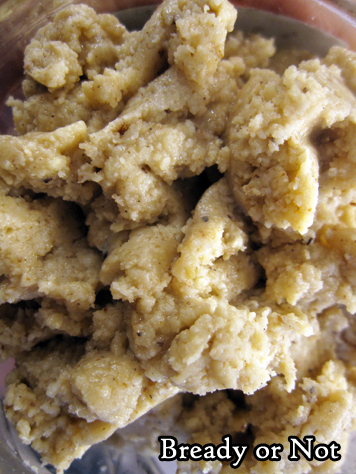
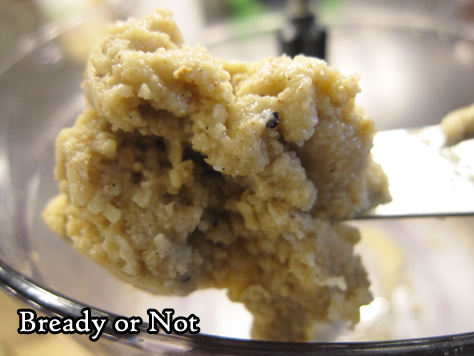
A food processor will be a big help in this recipe. The nuts and chocolate need to be in fine slivers. If the chunks are too big, the sliced cookies won’t be cohesive.
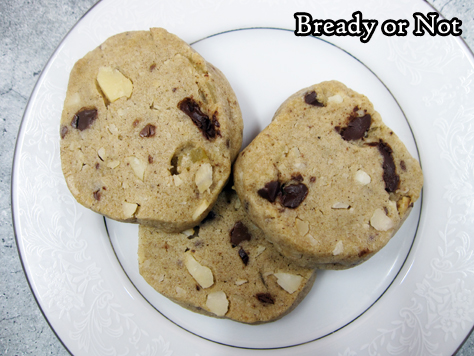
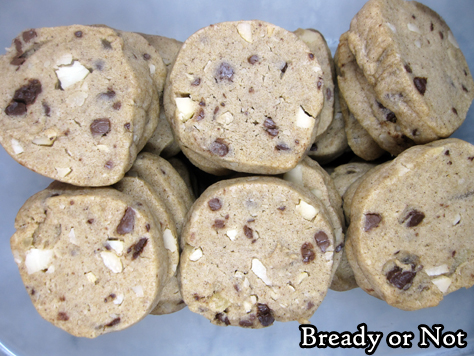
These are fridge cookies. Form the dough into tube shapes, wrap up well, then stash them in the fridge or freezer. Then thaw, slice, and bake when you need cookies.
If you do the full batch at once, you’ll likely get a lot of cookies, depending on your tube size and how you slice them. I got about 70 cookies.
These are perfect cookies to warm up your belly on a cool autumn or winter night (or in Arizona, to make-believe in such a temperature shift).
Bready or Not Original: Spiced Maple Macadamia Nut Cookies
Equipment
- food processor
Ingredients
- 1 1/2 cups unsalted butter 3 sticks, room temperature
- 1/2 cup white sugar
- 3/4 cup real maple syrup
- 4 cups all-purpose flour
- 3 teaspoons ground ginger
- 3 teaspoons ground cinnamon
- 1 teaspoon allspice
- 1/2 teaspoon ground cloves
- 1 teaspoon salt
- 1 1/2 teaspoons baking soda
- 1 cup macadamia nuts
- 3/4 cup chocolate chips semisweet or dark or mixture
- 1/3 cup candied ginger finely chopped
Instructions
- In a food processor or by knife, finely chop macadamia nuts, followed by the chocolate chips. Set aside. (If these are not in fine pieces, the dough will fall apart when sliced.)
- In a large bowl, cream together butter and sugar until light and fluffy. Beat in maple syrup.
- In a separate bowl, stir together the flour, spices, salt, and baking soda. Gradually work this into the creamed mixture. Fold in the nuts, chocolate, and candied ginger until incorporated.
- Divide dough in half and shape into foot-long logs. Encase in plastic wrap. Chill at least two hours, or freeze for later baking.
- Preheat oven at 350-degrees. Unwrap log and cut dough into 1/4-inch thick medallions, reshaping with fingers as needed. Place spaced out on parchment-covered cookie sheet.
- Bake for 10 to 12 minutes, until set with a firm, golden base. Cool on pan for 5 minutes then move to rack to completely cool.
- Cookies keep for at least 3 days in sealed containers at room temperature.
OM NOM NOM!
Bready or Not Original: Hazelnut Hand Cake [cake mix]
Doctor up a basic yellow cake mix box into an amazing Hazelnut Hand Cake!
![Bready or Not Original: Hazelnut Hand Cake [cake mix]](https://www.bethcato.com/blog/wp-content/uploads/2020/04/Hazelnut-Cake-Squares11_sm.jpg)
It’s called hand cake because it’s convenient to eat without a knife and fork. Heck, napkins are optional, if you don’t mind a dropped crumb or two.
![Bready or Not Original: Hazelnut Hand Cake [cake mix]](https://www.bethcato.com/blog/wp-content/uploads/2020/04/Hazelnut-Cake-Squares1_sm.jpg)
This cake has a mild chocolate flavor–milder than that of a typical chocolate cake, from a mix or not. Nutella (or use a store-brand equivalent, as I did) is whipped into the batter, with some extra chocolate chips adding a gentle layer of flavor.
![Bready or Not Original: Hazelnut Hand Cake [cake mix]](https://www.bethcato.com/blog/wp-content/uploads/2020/04/Hazelnut-Cake-Squares3_sm.jpg)
This thing is all about convenience. The cake comes together fast. Bakes fast. Give it some initial time to cool at room temp, then stash it in the fridge, and you can eat it even faster.
![Bready or Not Original: Hazelnut Hand Cake [cake mix]](https://www.bethcato.com/blog/wp-content/uploads/2020/04/Hazelnut-Cake-Squares7_sm.jpg)
The end result is a cake with a soft, high, very moist crumb. The scattered nuts and toffee add extra flavor and crunch.
![Bready or Not Original: Hazelnut Hand Cake [cake mix]](https://www.bethcato.com/blog/wp-content/uploads/2020/04/Hazelnut-Cake-Squares9_sm.jpg)
My husband’s co-workers inhaled this cake. One guy said it was the best Cato treat ever. Considering the goodies that come their way, that is high praise indeed.
Bready or Not Original: Hazelnut Hand Cake [cake mix]
Equipment
- 13x9 pan
Ingredients
- 1 box yellow cake mix
- 3 large eggs
- 2/3 cup water
- 2/3 cup Nutella or similar hazelnut spread
- 1/4 cup canola oil or vegetable oil
- 1/2 cup semisweet chocolate chips
- 1/2 cup chopped hazelnuts toasted or not
- 1/2 cup Heath toffee bits
- confectioners' sugar to dust top, optional
Instructions
- Preheat oven at 350-degrees. Line a 13x9-inch pan with foil and apply nonstick spray.
- In a large bowl, beat together the cake mix, eggs, water, hazelnut spread, and oil for several minutes, until thoroughly combined and no lumps remain. Fold in the chocolate chips, hazelnuts, and toffee bits. Pour batter into prepared pan.
- Bake for 25 to 30 minutes, until center is no longer jiggly and passes the toothpick test.
- Cool completely to room temperature; place in fridge to speed process along. Use foil to lift contents onto cutting board. If desired, sprinkle confectioners' sugar over top. Slice into pieces.
- Store in sealed container(s) at room temperature.
OM NOM NOM!
Read More
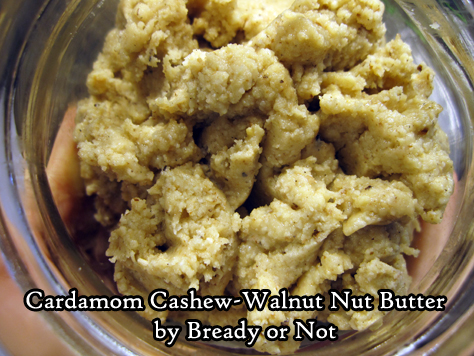
Bready or Not Original: Cardamom Cashew-Walnut Butter
This is a two-for-one Bready or Not posts: recipes for Cardamom Cashew-Walnut Butter, for both small and large food processors.
For the past few years, I had an 8-cup Cuisinart food processor. The thing was great, but as I tried more recipes, I found that most were designed for a larger food processor. Darn.
So when Costco advertised a Cuisinart double the size, I circled the ad and shoved it toward my husband, saying, “This is what I want for Christmas.”
After overcoming my initial anxiety about operating the darn thing (blades and pieces galore! confusing!), I delighted in the increased capacity. Now I can make bigger batches of stuff like nut butter!
This recipe is a particular favorite of mine. I created the original small batch recipe for my old unit, and then modified it for the shiny new machine.
You can substitute other nuts in the recipe, but the mixing time may be different. Almonds are harder, and take longer to process.
Also check out my Maple Nut Butter recipe!
Bready or Not Original: Cardamom Cashew-Walnut Butter [Small Batch]
Equipment
- 8-cup food processor
Ingredients
- 1 1/2 cups cashews
- 1 cup walnuts
- 1/2 teaspoon sea salt
- 1 Tablespoon honey
- 1/2 teaspoon ground cardamom
- 1/2 teaspoon vanilla extract
Instructions
- If the nuts are unroasted, roast them first for a boost of flavor. Line a rimmed baking sheet with foil and preheat oven at 350 degrees. Spread cashews and walnuts in an even layer. Bake for about 6 minutes, whereupon they should smell pleasantly toasty. Let cool at least 30 minutes before continuing with next step.
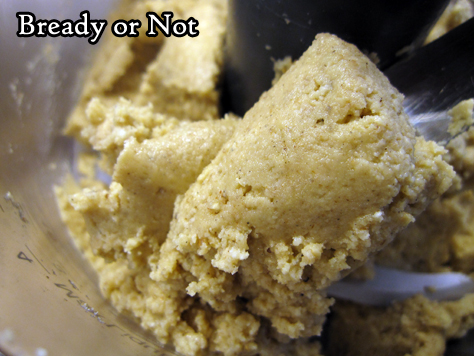
- Fit processor with an S-shaped blade inside. Pour in cashews, walnuts, and sea salt. Process for about 5 to 10 minutes, stopping sporadically to scrape sides. The nut butter is done when the mixture looks smooth and flows over the blades like a thick river.
- Add the honey, ground cardamom, and vanilla. Process another two minutes to incorporate.
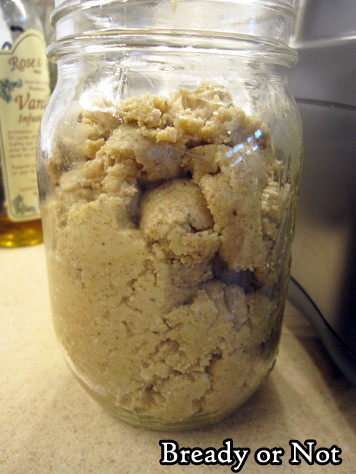
- Place nut butter in a clean glass jar (or jars). Store sealed at room temperature for as long as a year. Some separation of nuts and oil is natural--just stir them together again, if needed. If the nut butter dries out, warm what is needed in a microwave-safe bowl to make it spreadable.
OM NOM NOM!
Bready or Not Original: Cardamom Cashew-Walnut Butter [Large Batch]
Equipment
- 16-cup food processor
Ingredients
- 3 cups cashews
- 2 cup walnuts
- 1 teaspoon sea salt
- 2 Tablespoon honey
- 1 teaspoon ground cardamom
- 1 teaspoon vanilla extract
Instructions
- If the nuts are unroasted, roast them first for a boost of flavor. Line a rimmed baking sheet with foil and preheat oven at 350 degrees. Spread cashews and walnuts in an even layer. Bake for about 6 minutes, whereupon they should smell pleasantly toasty. Let cool at least 30 minutes before continuing with next step.
- Fit processor with an S-shaped blade inside. Pour in cashews, walnuts, and sea salt. Process for about 5 to 10 minutes, stopping sporadically to scrape sides. The nut butter is done when the mixture looks smooth and flows over the blades like a thick river.
- Add the honey, ground cardamom, and vanilla. Process another two minutes to incorporate.
- Place nut butter in a clean glass jar (or jars). Store sealed at room temperature for as long as a year. Some separation of nuts and oil is natural--just stir them together again, if needed. If the nut butter dries out, warm what is needed in a microwave-safe bowl to make it spreadable.
- OM NOM NOM!
