


Bready or Not: Confetti Pudding Cookies
These Confetti Pudding Cookies are such classic, happy-making cookies. They have sprinkles inside and out, and they taste like cookie dough even after being baked!

What causes that, you ask? That’s part of the magic imbued by instant pudding mix. You can use Bird’s Custard Powder (which can be hard to find or expensive in the US) or a standard Jell-O Vanilla Instant Pudding Powder. DO NOT make the pudding. You use the powder! Just make sure it’s not clumpy.

Use rainbow sprinkles to make these festive for a birthday, pride, or any old day, or use colors coordinated to holidays throughout the year.
Modified from Bake from Scratch Magazine May/June 2024.
Bready or Not: Confetti Pudding Cookies
Equipment
- parchment paper
- small cookie scoop or spoon
Ingredients
- 3/4 cup unsalted butter (1 1/2 sticks) room temperature
- 1 cup white sugar
- 1 large egg
- 1/2 teaspoon vanilla extract
- 1/2 teaspoon almond extract
- 1 1/2 cups all-purpose flour
- 3.4 oz vanilla instant pudding mix or Bird’s Custard Powder (96 grams)
- 1/2 teaspoon baking soda
- 1/2 teaspoon kosher salt
- 1/3 cup rainbow sprinkles plus more for the top
Instructions
- These cookies can be baked right away or chilled/frozen for later. Note that if they are chilled, the dough may get extra hard, and need to soften at room temperature for 20 minutes before shaping.
- If baking right away, preheat oven at 350 degrees. Line a baking sheet with parchment paper.
- In a big bowl, mix together butter and sugar until light and fluffy. Add egg and both extracts, scraping the bottom of the bowl to incorporate everything.
- In another bowl, stir together flour, pudding mix (make sure that any clumps are pressed out), baking soda, and salt.
- Gradually mix the dry ingredients into the wet. Fold in the sprinkles. Pour some extra sprinkles into a saucer.
- Use a scoop or spoon to shape the dough into a small ball. Press one side into the sprinkles and set on baking sheet with the super-sprinkly side on top. Continue with rest of dough balls.
- Bake for 10 to 12 minutes, until cookies are flatter and no longer look gooey. Let them rest about 5 minutes before moving them to a rack to finish cooling.
- Store cookies in a sealed container at room temperature. Best eaten within 4 days.
OM NOM NOM!
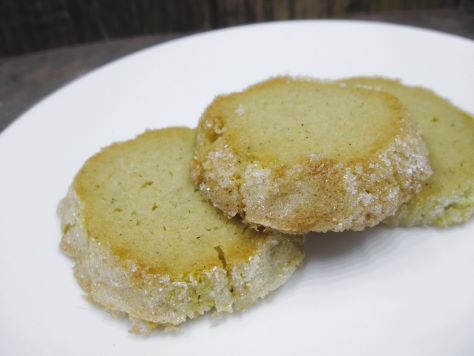
Bready or Not: Vanilla Sablé Cookies
These Vanilla Sablé Cookies are a delicate French take on shortbread. They are not heavily sweet, perfect for people who like their desserts a bit gentler.
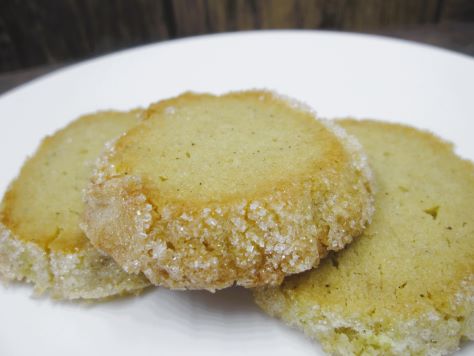
This recipe calls for vanilla bean paste. It will imbue the dough with a deeper vanilla flavor as well as beautiful flecks of vanilla. It makes the end result prettier–which is saying a lot, as they are already pretty courtesy of a sparkling sanding sugar crust.
Note that this dough requires chill time, as it is very soft. You don’t want it warm as it is sliced or baked!
Bready or Not: Vanilla Sablé Cookies
Equipment
- plastic wrap
- pastry brush
Ingredients
- 1 Tablespoon vanilla bean paste
- 1/3 cup white sugar
- 1 cup unsalted butter 2 sticks
- 1/2 teaspoon fine sea salt
- 1/3 cup confectioners’ sugar sifted
- 2 large egg yolks separated
- 2 cups all-purpose flour
- 1/2 cup sanding sugar white or other color
Instructions
- Mix together the vanilla bean paste, white sugar, and butter until smooth and creamy, not light and fluffy. Add the salt and confectioners’ sugar until smooth. Add 1 egg yolk. Mix in the flour until just combined.
- Turn out dough onto counter to lightly knead. Divide in half and shape into long logs about 1-inch tall. Wrap dough in plastic wrap and chill for at least 3 hours, or freeze up to 2 months.
- When it is baking time, preheat oven at 350 degrees. Line a baking sheet with parchment paper.
- Place egg yolk into a small bowl or ramekin. Add a splash of water and whisk it with the yolk. Pour sanding sugar onto a plate.
- Brush the yolk down the length of a cookie log, fully coating it. Roll the log in the sanding sugar. Place on a cutting board and slice into pieces 1/2-inch thick. Place spaced out on cookie sheet. Repeat process with other log. Don’t squeeze the cookies too close, as they will spread.
- Bake for 11 to 13 minutes, until set and just turning a hint of gold. Let them set on sheet for 5 minutes, then transfer to a rack to fully cool.
- Pack cookies in a sealed container at room temperature. They will keep for at least 4 days.
OM NOM NOM!
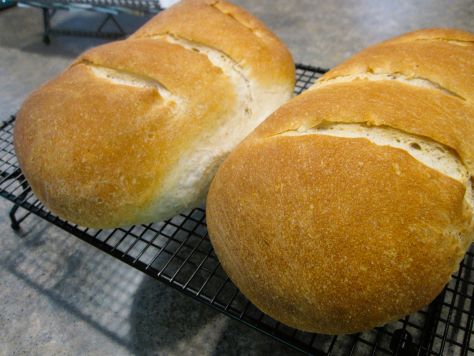
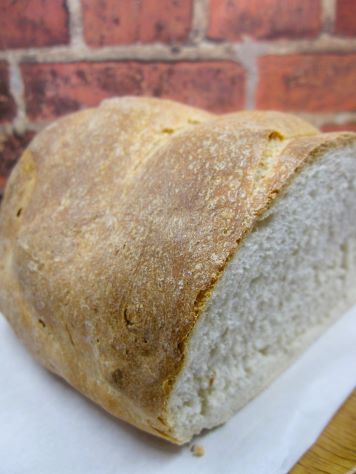
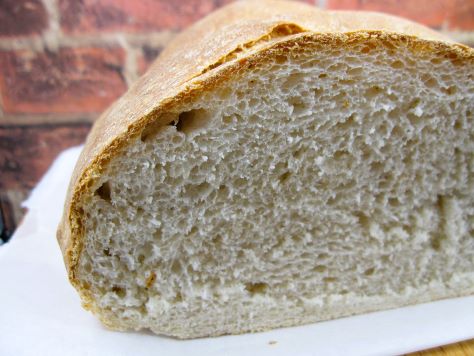
Bready or Not: Sourdough French Bread started in the Bread Machine (2 loaves)
Fresh French Bread is one of the best things on the planet. With your bread machine and a little bit of effort, you can create this wonder at home!
(Of course, you don’t NEED a bread machine to make the dough. You can just use the ingredients and mix by hand. This recipe aims for greater accessibility, though, for those who are crunched for time, have conditions like arthritis, or simply hate kneading.)
This recipe produces two loaves. A food scale will make for more precise results, both in assembling ingredients and dividing the dough later on.
Greatly modified from Making Artisan Breads in the Bread Machine by Michelle Anderson (a book I highly recommend).
Bready or Not: Sourdough French Bread started in the Bread Machine (2 loaves)
Equipment
- food scale
- bread machine
- food thermometer
- parchment paper
- baking sheet
- cake pan
Ingredients
- 1 1/2 cups active sourdough starter (around 350 grams)
- 3/4 cups lukewarm water (180 ml) about 100-110 degrees
- 2 1/2 Tablespoons white sugar (31 grams)
- 2 teaspoons sea salt
- 4 cups bread flour (480 grams)
- 1 1/2 teaspoons instant dry yeast or bread machine yeast
Instructions
- Most bread machines call for adding liquids to the bucket first. Therefore, place the starter and water inside. Use fingertips to whisk them together. Add sugar and salt, followed by the flour and yeast. Start the machine on dough mixing mode.
- Monitor the dough as it mixes. If it seems especially lumpy, drizzle in some extra water until the texture smooths out.
- Once the dough is done, measure it on a food scale to divide in half. Sprinkle extra flour on a clean work surface. Press dough out to a flat rectangle, about 10 inches long, then fold inward as if folding a sheet to go in an envelope. Pinch the seam together while gently elongating bread. Place seam underneath. Set loaf on parchment paper. Repeat with other half of dough.
- Let rise in a warm spot in the kitchen or in an oven on proof mode for an hour or so, until loaves look doubled. If loaves were in warm oven, remove them so the oven can preheat at 400 degrees. On a lower oven rack, place something like a metal cake pan that is an inch or two in depth so that it can heat as well.
- Once the oven is preheated, use a French lame or knife to slash the top of the loaf so that it can vent while baking. Being VERY careful to not overfill or get scalded by steam, pour water into the hot pan in the oven. Immediately place the risen loaves on the rack above and close the oven (and don’t open it again until the bread looks done!).
- Bake for 20-25 minutes, until loaves are golden and sound hollow when tapped. A check with a food thermometer should find an interior temperature over 190 degrees.
- Let loaves cool at least 30 minutes before slicing in. Bread will keep in a sealed bag at room temperature for up to 3 days. It can also be frozen right after cooling, and will keep well for up to a month there.
OM NOM NOM!
Bready or Not Original: Red Velvet Brownies in Two Sizes
I really think the pictures do justice to how incredible these Red Velvet Brownies are. They are beautiful to the eyes and delicious to the tongue.

I’m offering up this recipe in two sizes, too: a version for a smaller pan (8×8 or 9×9) and another for a full 9×13 pan. Note that even the small pan makes a lot of brownies. These are rich enough that they feel indulgent if you have a square about the size of a fudge serving.

Another nice thing: these keep for at least a week in a sealed container. I suppose further testing is in order to see if they keep beyond that!

Bready or Not Original: Red Velvet Brownies (8×8 or 9×9 size)
Equipment
- 8×8 or 9×9 pan
- aluminum foil
- nonstick spray or extra butter
Ingredients
- 1 1/4 cup all-purpose flour
- 3 Tablespoons cocoa powder sifted
- 1 Tablespoon cornstarch
- 1/4 teaspoon salt
- 3/4 cup unsalted butter (1 1/2 sticks) melted and cooled slightly
- 1 1/4 cups white sugar
- 2 large eggs room temperature
- 1 teaspoon vanilla extract
- gel red food coloring
- 1 teaspoon white vinegar
- 1 cup white chocolate chips
Instructions
- Preheat oven to 350 degrees. Line the pan with foil going up the sides. Apply nonstick spray or butter.
- In a small bowl, stir together flour, cocoa, cornstarch, and salt.
- In a large mixing bowl, beat together the melted butter and sugar. Add the eggs. Drip in the red food coloring, mixing it in, adding enough to reach the desired color. Add vanilla extract and vinegar. Gradually work in the dry ingredients, scraping the bottom of the bowl a few times. Fold in the white chocolate chips.
- Dollop batter into the pan. Use an uneven spatula to level out the surface. Bake for 28 to 30 minutes, until the middle passes the toothpick test.
- Let cool completely, speeding process in the fridge if desired. Use the foil to lift it onto a cutting board to cut into small bars.
- Store in a sealed container at room temperature. They keep for at least a week.
OM NOM NOM!
Bready or Not Original: Red Velvet Brownies (9×13 size)
Equipment
- 9×13 pan
- aluminum foil
- nonstick spray or extra butter
Ingredients
- 2 1/2 cups all-purpose flour
- 6 Tablespoons cocoa powder sifted
- 2 Tablespoons cornstarch
- 1/2 teaspoon salt
- 1 1/2 cups unsalted butter (3 sticks) melted and cooled slightly
- 2 1/2 cups white sugar
- 4 large eggs room temperature
- 2 teaspoons vanilla extract
- gel red food coloring
- 2 teaspoons white vinegar
- 11 ounces white chocolate chips 1 bag
Instructions
- Preheat oven to 350 degrees. Line the pan with foil going up the sides. Apply nonstick spray or butter.
- In a small bowl, stir together flour, cocoa, cornstarch, and salt.
- In a large mixing bowl, beat together the melted butter and sugar. Add the eggs. Drip in the red food coloring, mixing it in, adding enough to reach the desired color. Add vanilla extract and vinegar. Gradually work in the dry ingredients, scraping the bottom of the bowl a few times. Fold in the white chocolate chips.
- Dollop batter into the pan. Use an uneven spatula to level out the surface. Bake for 30 to 33 minutes, until the middle passes the toothpick test.
- Let cool completely, speeding process in the fridge if desired. Use the foil to lift it onto a cutting board to cut into small bars.
- Store in a sealed container at room temperature. They keep for at least a week.
OM NOM NOM!
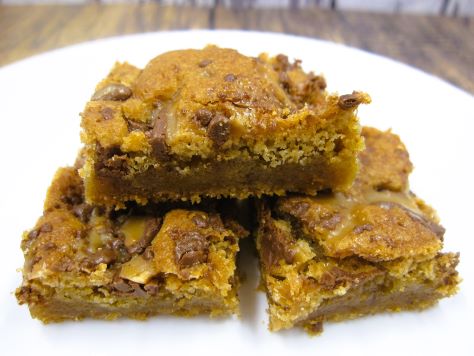
Bready or Not Original: Toffee Blondies
Why have a candy bar when you can have a chewy, luxurious treat that’s filled with candy bar pieces? These Toffee Blondies are a glorious combination of textures and sweetness.

If you can find it, use an 8 ounce bag of Heath Bits that include chocolate. All is not lost if that is unavailable, though. You can chop up normal Heath Bars, or use an all-toffee bag and add separate chocolate.

The result is a thick, chewy bar with crunchy little bits of toffee and pockets of chocolate. These things keep for days, too.
Bready or Not Original: Toffee Blondies
Equipment
- 9×13 pan
- aluminum foil
- nonstick spray
Ingredients
- 2 cups all-purpose flour
- 2 cups brown sugar packed
- 2 teaspoons baking powder
- 1/4 teaspoon salt
- 1/2 cup unsalted butter (1 stick) melted and cooled
- 2 large eggs room temperature
- 1 teaspoon vanilla extract
- 8 ounces Heath Bits with Chocolate
Instructions
- Preheat oven at 350 degrees. Line a 13×9 pan with foil and apply nonstick spray.
- In a bowl, mix together the flour, brown sugar, baking powder, and salt. Set aside.
- In a large bowl, beat the butter, eggs, and vanilla until smooth. Gradually mix in the dry ingredients. Fold in about 2/3 of the Heath Bits.
- Scoop the thick batter into the prepared pan and level out with an uneven spatula. Sprinkle the rest of the Heath pieces over the top.
- Bake for 24 to 27 minutes. Middle should be set and pass the toothpick test. Cool to room temperature, speeding the process in the fridge if desired.
- Use the foil to lift onto cutting board to slice into bars. Store in a sealed container at room temperature. They will keep for up to 3 days.
OM NOM NOM!
Bready or Not Original: Gingerdoodles
I’ve published many variations on Snickerdoodles (complete with pie and banana versions!), and here is a take called Gingerdoodles.
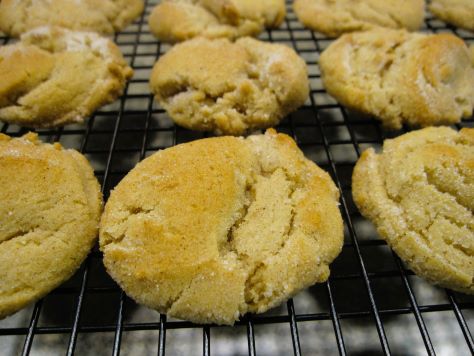
It should come as no surprise that these feature the warmth of ginger along with other complementary spices. To me, these were like a hybrid of snickerdoodles and sugar/spice cookies. The texture is soft and scrumptious.

This recipe is a must if you love soft cookies with some sweetness and spice.

Bready or Not Original: Gingerdoodles
Equipment
- parchment paper
- small scoop or teaspoon
Ingredients
Dough
- 3/4 cup unsalted butter (1 1/2 sticks) softened
- 1/2 cup white sugar
- 1/2 cup brown sugar packed
- 1 large egg room temperature
- 1/2 cup real maple syrup
- 3 1/4 cups all-purpose flour
- 1 teaspoon baking soda
- 1/2 teaspoon ground cinnamon
- 1/2 teaspoon ground ginger
- 1/4 teaspoon salt
- 1/4 teaspoon cream of tartar
- 1/4 teaspoon nutmeg
Topping
- 1/2 cup white sugar
- 1/4 teaspoon ground cinnamon
Instructions
- Preheat oven at 350 degrees. Line a baking pan with parchment paper.
- Beat together butter and both sugars until light and fluffy. Beat in egg and syrup.
- In another bowl, combine flour, baking soda, cinnamon, ginger, salt, cream of tartar, and nutmeg. Gradually mix the dry ingredients into the wet, forming a cohesive dough.
- In a small bowl, stir together the two topping ingredients.
- Use a small cookie scoop or spoon to shape dough into round balls. Roll them in the topping to coat. Place spaced out on baking pan.
- Bake for 9-10 minutes, until set and crackled. After 5-10 minutes, move them to a cooling rack.
- Store cookies in a sealed container at room temperature.
