


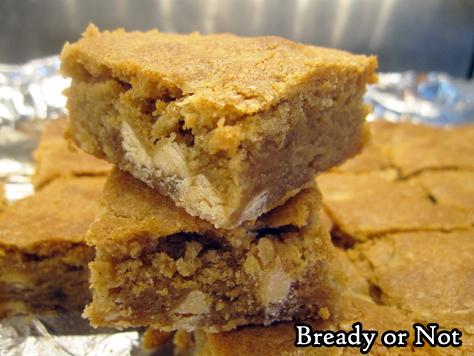
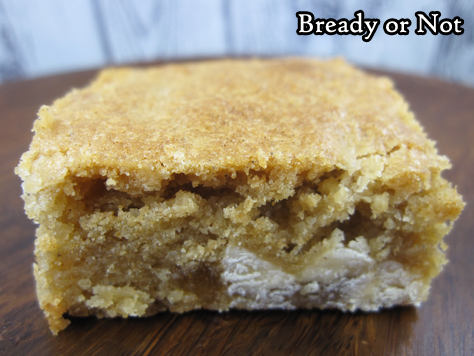
Bready or Not: White Chocolate Spiced Blondies
Let’s end 2018 on a sweet note with these White Chocolate Spiced Blondies!
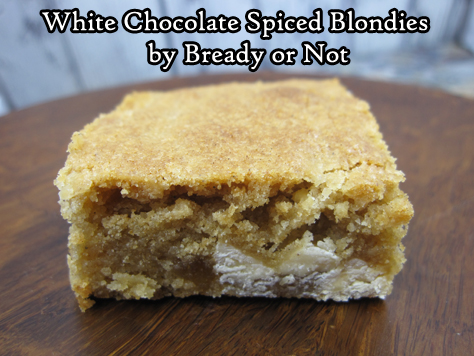
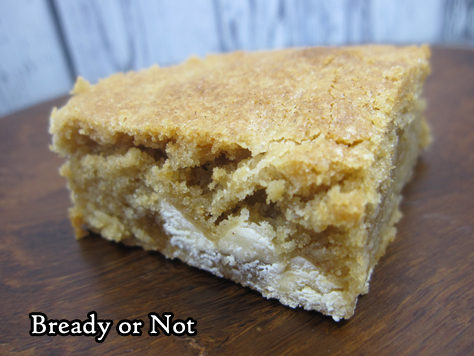
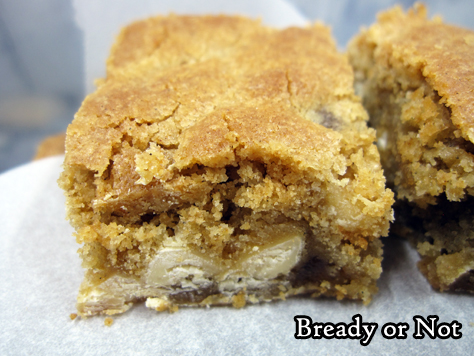
These things are fantastic. Their spiciness is mild and refreshing. These would be great for a between Christmas-and-New-Year party, or any time of year.
I’m a firm believer that good food shouldn’t be confined to just one season. If you like it, eat it when you want.
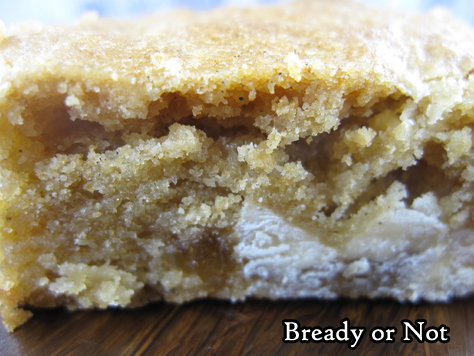
This recipe is fairly fast to mix up. Chopping up the crystallized ginger is the most tedious thing; rather than use a knife, I like to use kitchen shears. The blades can still get goopy after a few pieces, but I have more control over the cuts.
Since I’ve been asked before, you can often find crystallized ginger in the spice area at the grocery store–look in the glass jarred section. Also, if you have a natural food store like Sprouts, check their bins.
I love to keep candied ginger around for recipes like this. If I can catch a good sale around the holidays, I stock up!
If you want to stock up on these blondies, do note that they freeze well. Pack some in the freezer for later enjoyment!
Bready or Not: White Chocolate Spiced Blondies
Ingredients
- 2 1/2 cups all-purpose flour
- 1 1/2 teaspoons baking powder
- 1 teaspoon ground cardamom
- 1 teaspoon ground cinnamon
- 1/2 teaspoon ground ginger
- 1/4 teaspoon salt
- 1 cup unsalted butter two sticks, room temperature
- 1 3/4 cups brown sugar packed
- 3 eggs room temperature
- 1 Tablespoon vanilla extract
- 6 ounces white chocolate chips about half a bag
- 1 Tablespoon crystallized ginger chopped
Instructions
- Preheat oven at 350-degrees. Line a 13x9 inch baking pan with aluminum foil and apply nonstick spray or butter.
- In a medium bowl, stir together the dry ingredients: flour, baking powder, cardamom, cinnamon, ground ginger, and salt.
- In a big mixing bowl, beat the butter until its smooth. Add the brown sugar and mix, pausing to scrape the sides of the bowl, until the two are fluffy in texture. Beat in the eggs and vanilla.
- Slowly add in the flour mixture until just combined, then sprinkle in the white chocolate and candied ginger pieces. Spread the batter in the prepared pan.
- Bake for 30 minutes, until the middle passes the toothpick test. Cool to room temperature. Use the foil to lift the contents onto a cutting board to slice.
- Store blondies in a sealed container between parchment or waxed paper layers. Blondies can be frozen for later enjoyment.
- OM NOM NOM!
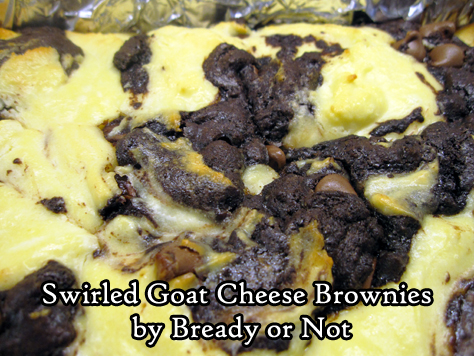
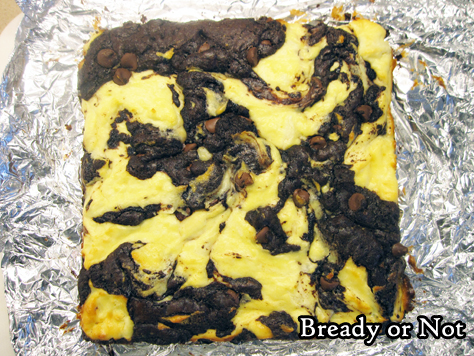
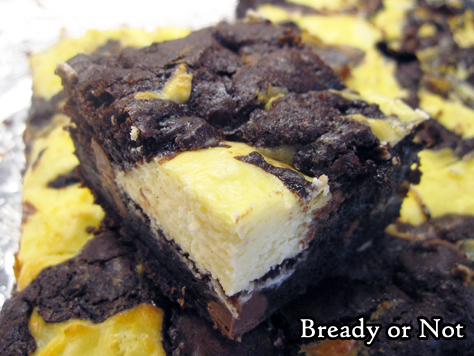
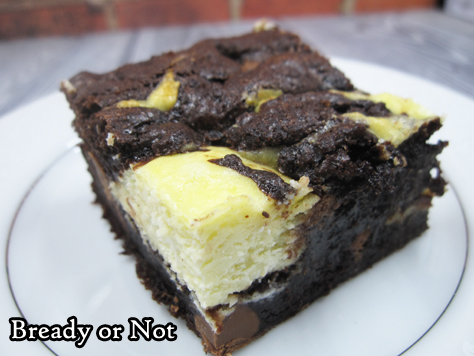
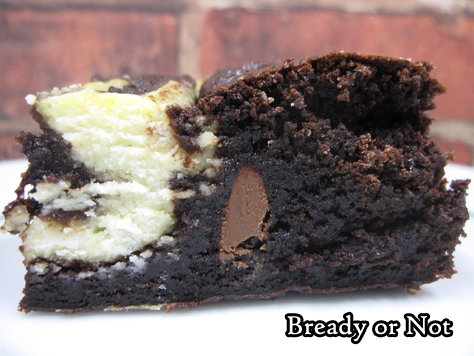
Bready or Not Original: Swirled Goat Cheese Brownies
Swirled Goat Cheese Brownies. These things are sweet, savory, rich, and absolutely perfect for holiday fixin’s.
These are brownies that taste fancy, because they are. Goat cheese ain’t cheap, people, though I acquired mine for a good price at Costco.
Costco’s chevre comes in two logs of 10 1/2 ounces. I bought it for use in a recipe that’ll be coming up in a few weeks (goat cheese rounds for a salad, YUM) but then had to figure out what to do with the other log.
The answer, of course: DESSERT! I ended up melding several recipes to suit my Costco-sized cheese, and ta-da! This recipe is the result.
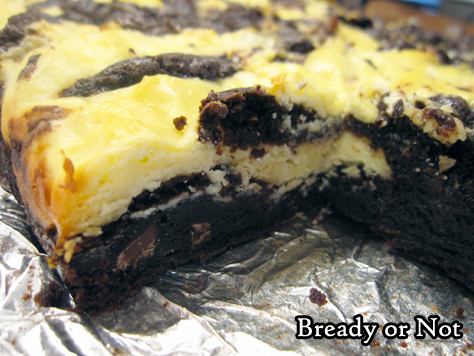
I’ve made brownies like this using cream cheese before. This version takes that up several notches. Chevre is a strong, somewhat gamey cheese. The end result is a brownie that is rich and sweet with a distinct savory note.
Treat yourself with these amazing brownies this holiday season–and be sure to check out last week’s Holiday Cherry Brownies, too!
Bready or Not Original: Swirled Goat Cheese Brownies
Ingredients
Goat Cheese Swirl
- 10 1/2 ounces goat cheese room temperature
- 2 Tablespoons confectioners' sugar
- 2 Tablespoons all-purpose flour
- 2 large eggs room temperature
Brownie Base
- 2/3 cup Dutch process cocoa powder sifted
- 1 cup white sugar
- 1/2 cup brown sugar packed
- 1/2 cup confectioners' sugar
- 3/4 teaspoon sea salt
- 1 cup all-purpose flour
- 1 cup semisweet chocolate chips or milk chocolate chips
- 3 large eggs room temperature
- 1/2 cup canola oil
- 1 teaspoon vanilla extract
Instructions
- Preheat oven to 350-degrees. Line an 8×8 or 9x9-inch square pan with aluminum foil and apply nonstick spray or butter.
- Mix goat cheese swirl ingredients. Set aside.
- Make the brownie base by whisking together the cocoa, sugars, salt, flour, and chips in a big mixing bowl. Add the eggs, oil, and water and vanilla extract until everything is just combined.
- Spoon half the brownie batter into the prepared pan. Dollop the cheese mixture atop it, then add the remaining brownie batter into the open spots. Use a knife to swirl the two layers together while still keeping them a bit distinct.
- Bake the brownies for 35 to 45 minutes, depending on the pan size. Use the toothpick test to check for doneness. The center should be set with the consistency still moist and fudgy. Cool to room temperature, then place in fridge to chill an hour or two prior to cutting.
- Use foil to lift brownies onto cutting board for easy slicing. Store in a sealed container in fridge, with parchment or waxed paper between the layers.
- OM NOM NOM!
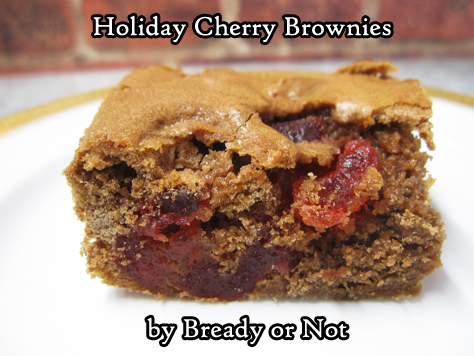
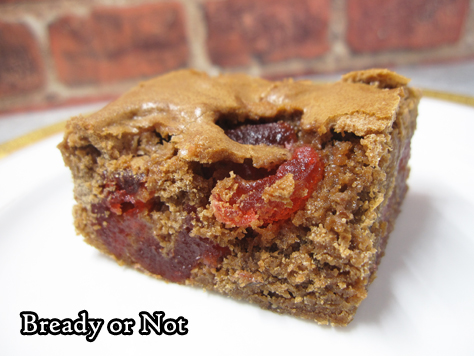
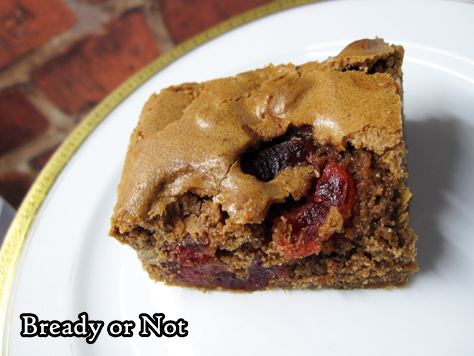
Bready or Not: Holiday Cherry Brownies
Those big jewel-like candied cherries aren’t just meant for fruitcake. Bake them into some Holiday Cherry Brownies!
As with my recent Fruitcake Cookies, this recipe is handy if you want to make a festive treat in December–or put those clearance tubs of fruitcake fixins to good use in the new year.
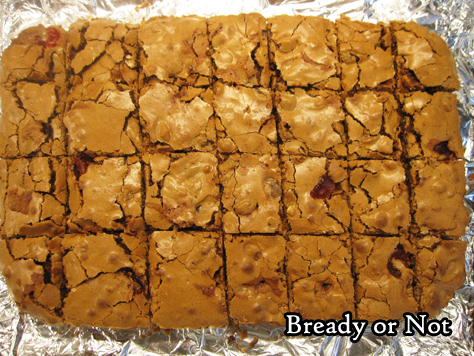
Plus, these are darn good brownies with a thin, crisp top and a chewy interior. The cherries add lovely flavor and juiciness, which is even better alongside the crunch of walnuts.
Oh yeah, and these brownies are PRETTY. That counts for something.
I modified the original recipe to melt the chocolate and butter the quick and lazy way with the help of my microwave, because my stove is old and cheap and that method would probably triple my prep time. But you can certainly use the stove, too. Whatever works best for you.

Mind you, I am a purist about butter on the stovetop for things like browned butter (SO GOOD) but here alongside the chocolate, I don’t think there would be a discernible difference.
Modified from Taste of Home Best Loved Cookies & Bars magazine.

Bready or Not: Holiday Cherry Brownies
Ingredients
- 1/2 cup unsalted butter 1 stick
- 4 ounces semisweet chocolate chips
- 2 cups white sugar
- 1 1/4 cup all-purpose flour
- 2 teaspoons ground cinnamon
- 1/2 teaspoon salt
- 4 eggs room temperature
- 1 teaspoon vanilla extract
- 12 ounces candied cherries halved, red and/or green, about 1 1/2 cups
- 1 cup walnuts chopped
Instructions
- Preheat oven at 350-degrees. Line a 13x9 pan with foil and apply nonstick spray.
- In a microwave-safe bowl, melt the butter and sugar in careful, 30 seconds bursts. Once everything is smooth, set aside to cool a bit. (This step could also be done at a low temperature on the stove.)
- In a bowl, combine the sugar, flour, cinnamon, and salt. Stir in the chocolate mixture. Follow that up with the eggs and vanilla until everything is smooth. Fold in the cherries and walnuts.
- Pour batter into the pan. Bake for 35 to 40 minutes, until the center passes the toothpick test.
- Completely cool. Use foil to lift brownies on cutting board to slice up. Store in a sealed container.
- OM NOM NOM!
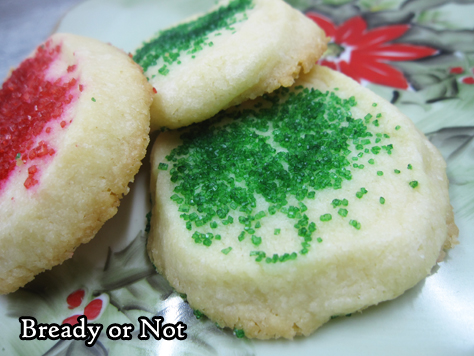
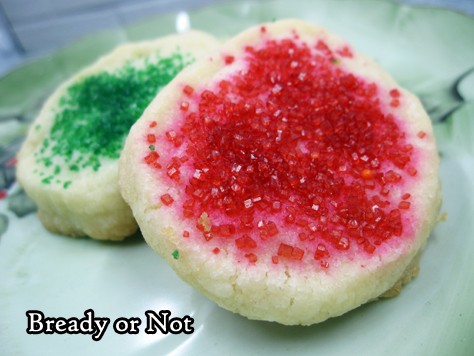
Bready or Not: Classic Icebox Cookies
These Classic Icebox Cookies are the kind of cookie I think about when holiday cookies come to mind.

That’s because these are the kind of cookies I remember eating at Christmas when I was a kid–at preschool, at school, at home, everywhere. When my mom baked them, I had the all-important duty of Sugar Sprinkler.

When I was just starting to bake, but still really nervous about it, I’d buy sugar cookie dough tubes at the store. At least I had the sugar-sprinkling down pat.
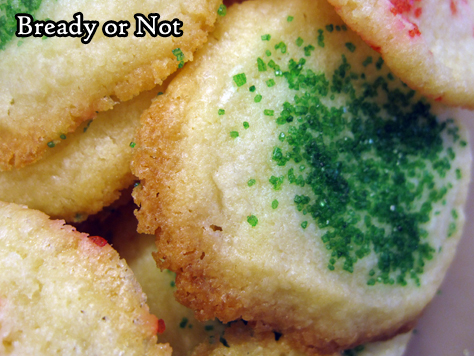
This recipe makes cookies that are a total nostalgia trip. They look and taste like a childhood holiday.
The only difficult thing about this recipe is stirring everything together. Get your biggest bowl, the one a large cat can completely fit in. Even then, stirring everything together might get messy.
If you have kids or grandkids around, this is the perfect recipe for them to help out and build some memories of their own. Carry the nostalgia forward.

Modified from All Recipes Magazine December/January 2018.

Bready or Not: Classic Icebox Cookies
Ingredients
- 2 cups unsalted butter 4 sticks, softened
- 3 cups white sugar
- 1/2 teaspoon cream of tartar
- dash salt
- 1 egg
- 4 1/2 - 5 cups all-purpose flour
- decorating sugar
Instructions
- Beat butter with an electric mixer until creamy. Add the sugar, cream of tartar, and salt. Gradually mix in as much flour as possible, then stir by hand to get to at least 4 1/2 cups. Dough should be stiff.
- Divide dough into thirds and shape into logs about 1 1/2 inches in diameter. Enshroud in plastic wrap and chill until firm, at least 1 hour.
- Preheat oven at 375 degrees. Line baking sheet with parchment paper. Slice dough rolls into 1/4-inch slices, reshaping with hands as necessary, and place them on cookie sheet with plenty of space to spread. Add decorating sugar on top.
- Bake until the cookie edges are turning golden brown, 8 to 10 minutes.
- Depending on how cookies are cut, makes anywhere from 60 to 90 cookies.
- OM NOM NOM!
Bready or Not: Fruitcake Cookies
After Christmas last year, I scored a whole stack of fruitcake fruit containers for 80% off on the grocery clearance aisle. I already had recipes in mind for the fruit, and this is one of them.

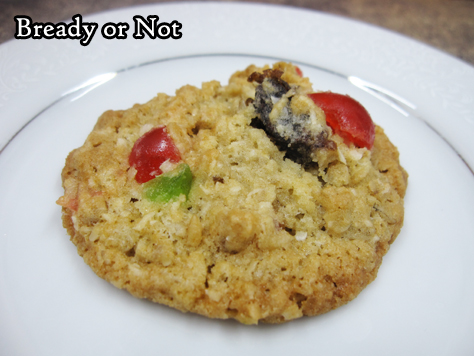
These Fruitcake Cookies are essentially good old fashioned chewy oatmeal cookies with new mix-ins. Really good mix-ins.
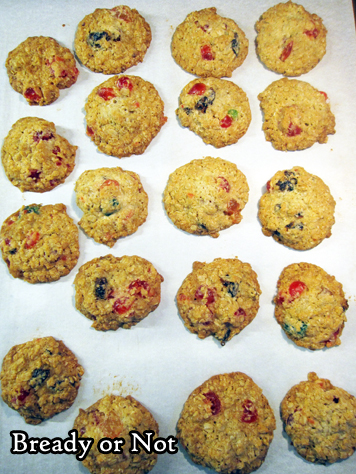
Really, these are pretty and rustic cookies to behold. The red and green cherries look like sparkling jewels. I was surprised at how well the dates worked, too; they were meatier and softer than the usual raisins.
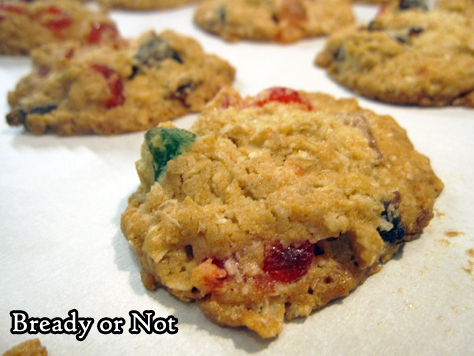
Plus, there’s a comfort food vibe around these cookies. They look like a variation of oatmeal cookies, but the different fruit gives them a distinct holiday vibe.
Of course, if you’re like me and use fruit snagged on a post-Christmas sale, that might be a holiday vibe in January or February. But hey, good cookies shouldn’t be confined to any one season.

And these are definitely good cookies.
Modified from Taste of Home Best Loved Cookies & Bars.
Bready or Not: Fruitcake Cookies
Ingredients
- 1/2 cup unsalted butter 1 stick, softened
- 1/2 cup shortening
- 1/2 cup white sugar
- 1/2 cup brown sugar packed
- 1 egg
- 1 teaspoon vanilla extract
- 1 cup all-purpose flour
- 1/2 teaspoon baking soda
- 1/2 teaspoon salt
- 2 cups old-fashioned rolled oats
- 1 cup flaked coconut or shredded
- 1/2 cup dates chopped
- 1 1/2 cups fruitcake fruit mix about 12 ounces, with chopped red and green cherries, pineapple, etc
Instructions
- Preheat oven at 325-degrees. Line cookie sheet with parchment paper.
- In a large mixing bowl, cream together butter, shortening, and sugars. Add egg and vanilla.
- In a smaller bowl, sift together flour, baking soda, salt, and oats. Gradually mix into creamed ingredients. Stir in the coconut, dates, and other fruit.
- Use a tablespoon scoop to place dollops of dough on parchment paper, giving them space to spread. Bake for about 15 minutes. Set on rack to cool. Store cookies in a sealed container at room temperature.
- OM NOM NOM
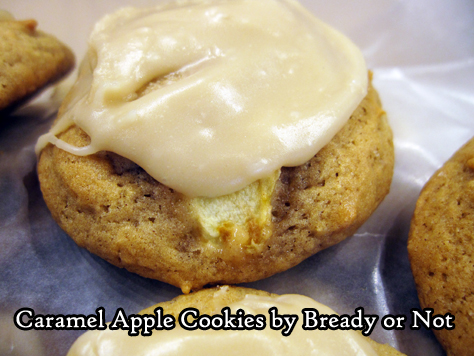
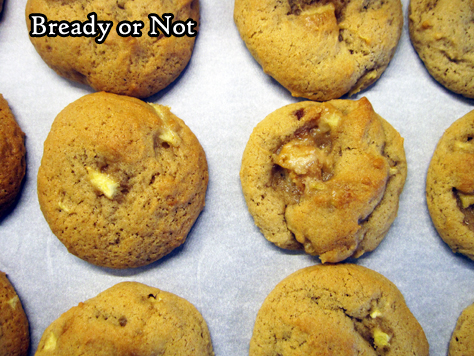
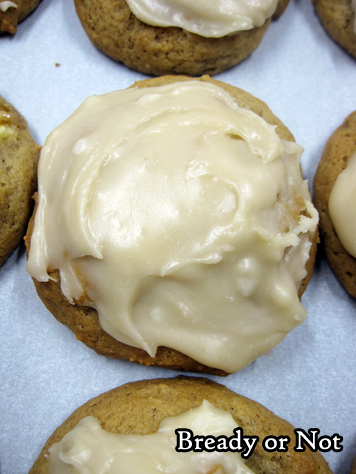
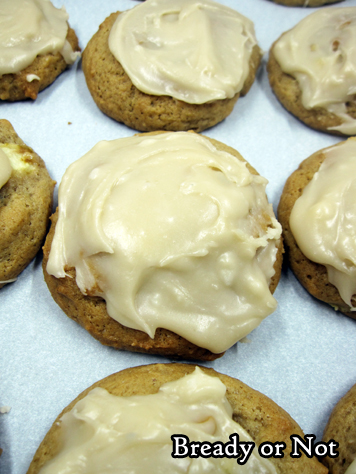
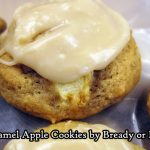
Bready or Not: Caramel Apple Cookies
These Caramel Apple Cookies involve some extra work, but they are worth it. These are among the best cookies I have ever made. That’s saying something.
They also might involve some blood-letting. Let’s just say I will never again try to grate apple. I’m fine with finely dicing with a knife from now on.
But hey, as history and mythology has taught us, sometimes blood-letting comes to good purpose. These are chewy, sweet, soft apple cookies topped with caramel. If that’s not worth sacrifice, what is?
Use some variety of sweet-tart apple like you’d use for a pie. I used Braeburn, but Granny Smith and Jonathan are also good choices. 1 cup grated/diced is most of a medium apple.
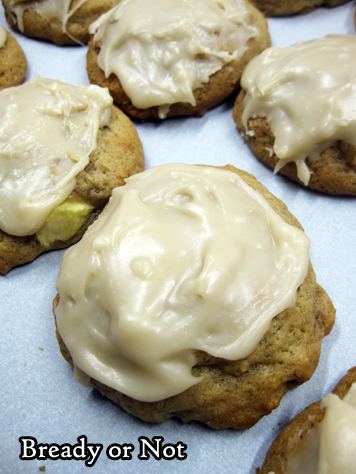
These cookies reminded me of a fresh-made and frosted version of the Little Debbie’s Apple Delights that I loved loved loved as a kid. I have never before had a homemade cookie that was like this.
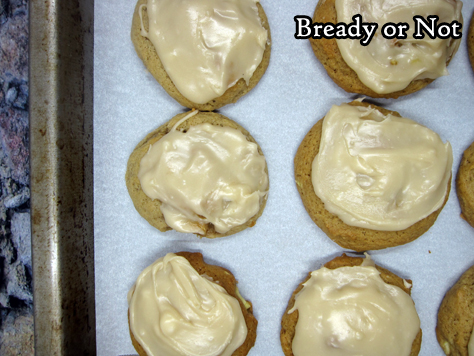
You may have some frosting leftover at the end; I had about 1/3 cup. Just look for random things you can frost like Golden Oreos, the cat, graham crackers, human flesh, etc. Trust me, you don’t want this apple-caramel frosting to go to waste.
Modified from Fall Baking 2016 by Better Homes & Gardens.
Bready or Not: Caramel Apple Cookies
Ingredients
Cookies:
- 1/2 cup unsalted butter 1 stick, softened
- 1 1/4 cups brown sugar packed
- 1 teaspoon baking soda
- 1 teaspoon cinnamon
- sprinkle cloves
- sprinkle nutmeg
- 1/4 teaspoon salt
- 1 egg room temperature
- 1/2 cup apple cider or juice
- 2 1/2 cups all-purpose flour
- 1 cup tart apple peeled and coarsely shredded or diced, most of a medium apple
Frosting:
- 1/2 cup brown sugar packed
- 3 Tablespoons unsalted butter
- 3 Tablespoons apple cider or juice
- 2 2/3 cups confectioners' sugar
Instructions
- Preheat oven at 350-degrees. Line cookie sheet with parchment paper.
- In a large bowl, beat butter until smooth, then add brown sugar, baking soda, cinnamon, cloves, and nutmeg, and salt. Continue to beat until fluffy, scraping bowl as needed.
- Beat in the egg and apple cider or juice. Slowly mix in flour. Fold in the apple bits last; dough will be very soft.
- Use a tablespoon scoop to space out dollops of dough on the parchment paper. Bake about 12 to 14 minutes, until golden brown; be careful not to under-bake, as the cookies need to be sturdy enough to be frosted. Completely cool cookies on wire rack.
- When the cookies are cool, begin making frosting on stovetop. On medium heat in small saucepan, stir together brown sugar, butter, and apple cider or juice. Heat until the brown sugar is dissolved. Gradually stir in the confectioners' sugar.
- Begin frosting cookies immediately; the back of a spoon works well. If the frosting in the pan begins to harden, stir in a few drops of hot water until it is smooth again.
- Store cookies in a sealed container at room temperature with wax paper between the layers.
- OM NOM NOM!
