Bready or Not: Earl Grey Tea Shortbread Cookies
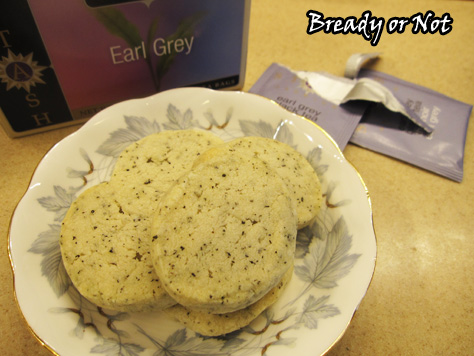
Plain shortbread cookies are buttery and amazing. This recipe amps them up with a delicious boost of Earl Grey tea!
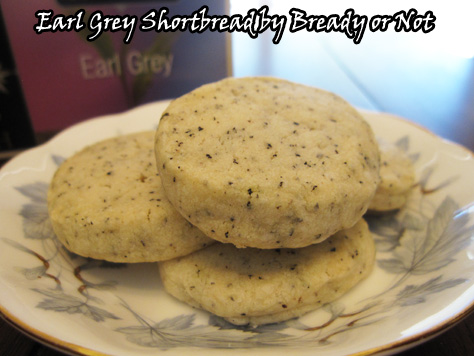
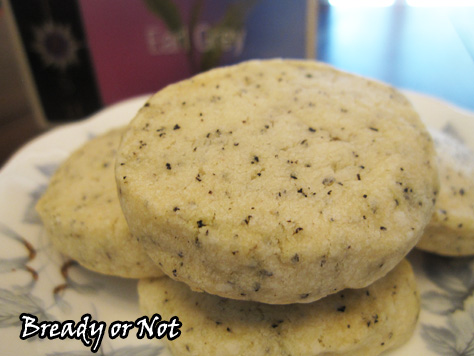
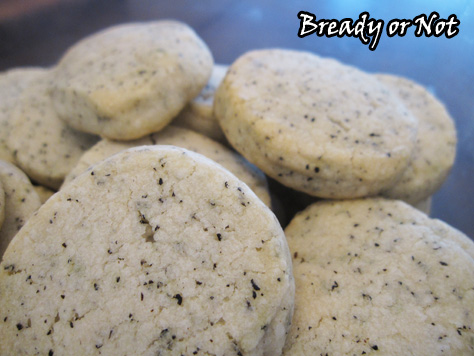
I love how the tea freckles the cookie dough all the way through!
I like to think that these are cookies that Captain Picard would enjoy with a cup of Earl Grey. (Hot.) You don’t actually brew tea to make these cookies. You rip open the tea bags and pour the contents right into the dough.
The texture is pure shortbread: buttery and soft. The Earl Grey flavor is distinct (and you could toggle this by adjusting the amount of tea you add) and adds a smidgen of heat and freshness. These are unlike any other shortbread I’ve had before.
Pair these cookies with your favorite beverage, place them on your holiday cookie tray, or leave some out for Santa in a few days. You know he needs the caffeine.
Make it so!
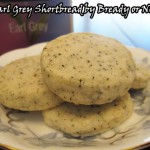
Bready or Not: Earl Grey Tea Shortbread Cookies
Ingredients
- 2 cups all-purpose flour
- 1/2 teaspoon coarse salt
- 1 cup unsalted butter 2 sticks, softened
- 1 Tablespoon Earl Grey tea leaves heaping, from about 3 bags
- 3/4 cup confectioners' sugar
- 2 teaspoons vanilla extract
Instructions
- In a small bowl, whisk together the flour and salt.
- Open up the tea bags and measure the contents to get a heaping tablespoon. Blend butter and tea together until fluffy. Add confectioners' sugar and vanilla extract. Mix on medium speed until pale and fluffy, which takes about 3 minutes. Gradually add in flour mixture until just combined.
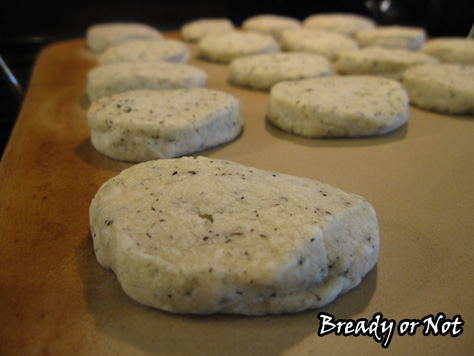
- Divide the dough in half. Form into logs about an inch in diameter (to slice) or into flat rounds (to roll out and cut with a cookie cutter). Wrap the dough in plastic wrap and freeze until firm, about 1 hour. (Or keep frozen for days or weeks, then allow to thaw in fridge for a day before proceeding with the baking.)
- Preheat oven to 350 degrees. Cut the cookies into discs or with a cutter; be aware that the dough will spread when baking. Place on baking sheets lined with parchment or silicon mats.
- Bake for 10 to 12 minutes, until the edges are just turning color.
- OM NOM NOM!
Bready or Not Guest: Bryan Thomas Schmidt with Pizza Loaf
I’m happy to welcome Bryan Thomas Schmidt to Bready or Not today! I have come to know him well as an editor–he’s editing two Baen anthologies that’ll include my work–but he is foremost a writer. His novel The Worker Prince was just released by WordFire Press. Find out all about his science fiction novel, and continue reading the post to find his traditional family recipe for a quick ‘n easy Pizza Loaf.
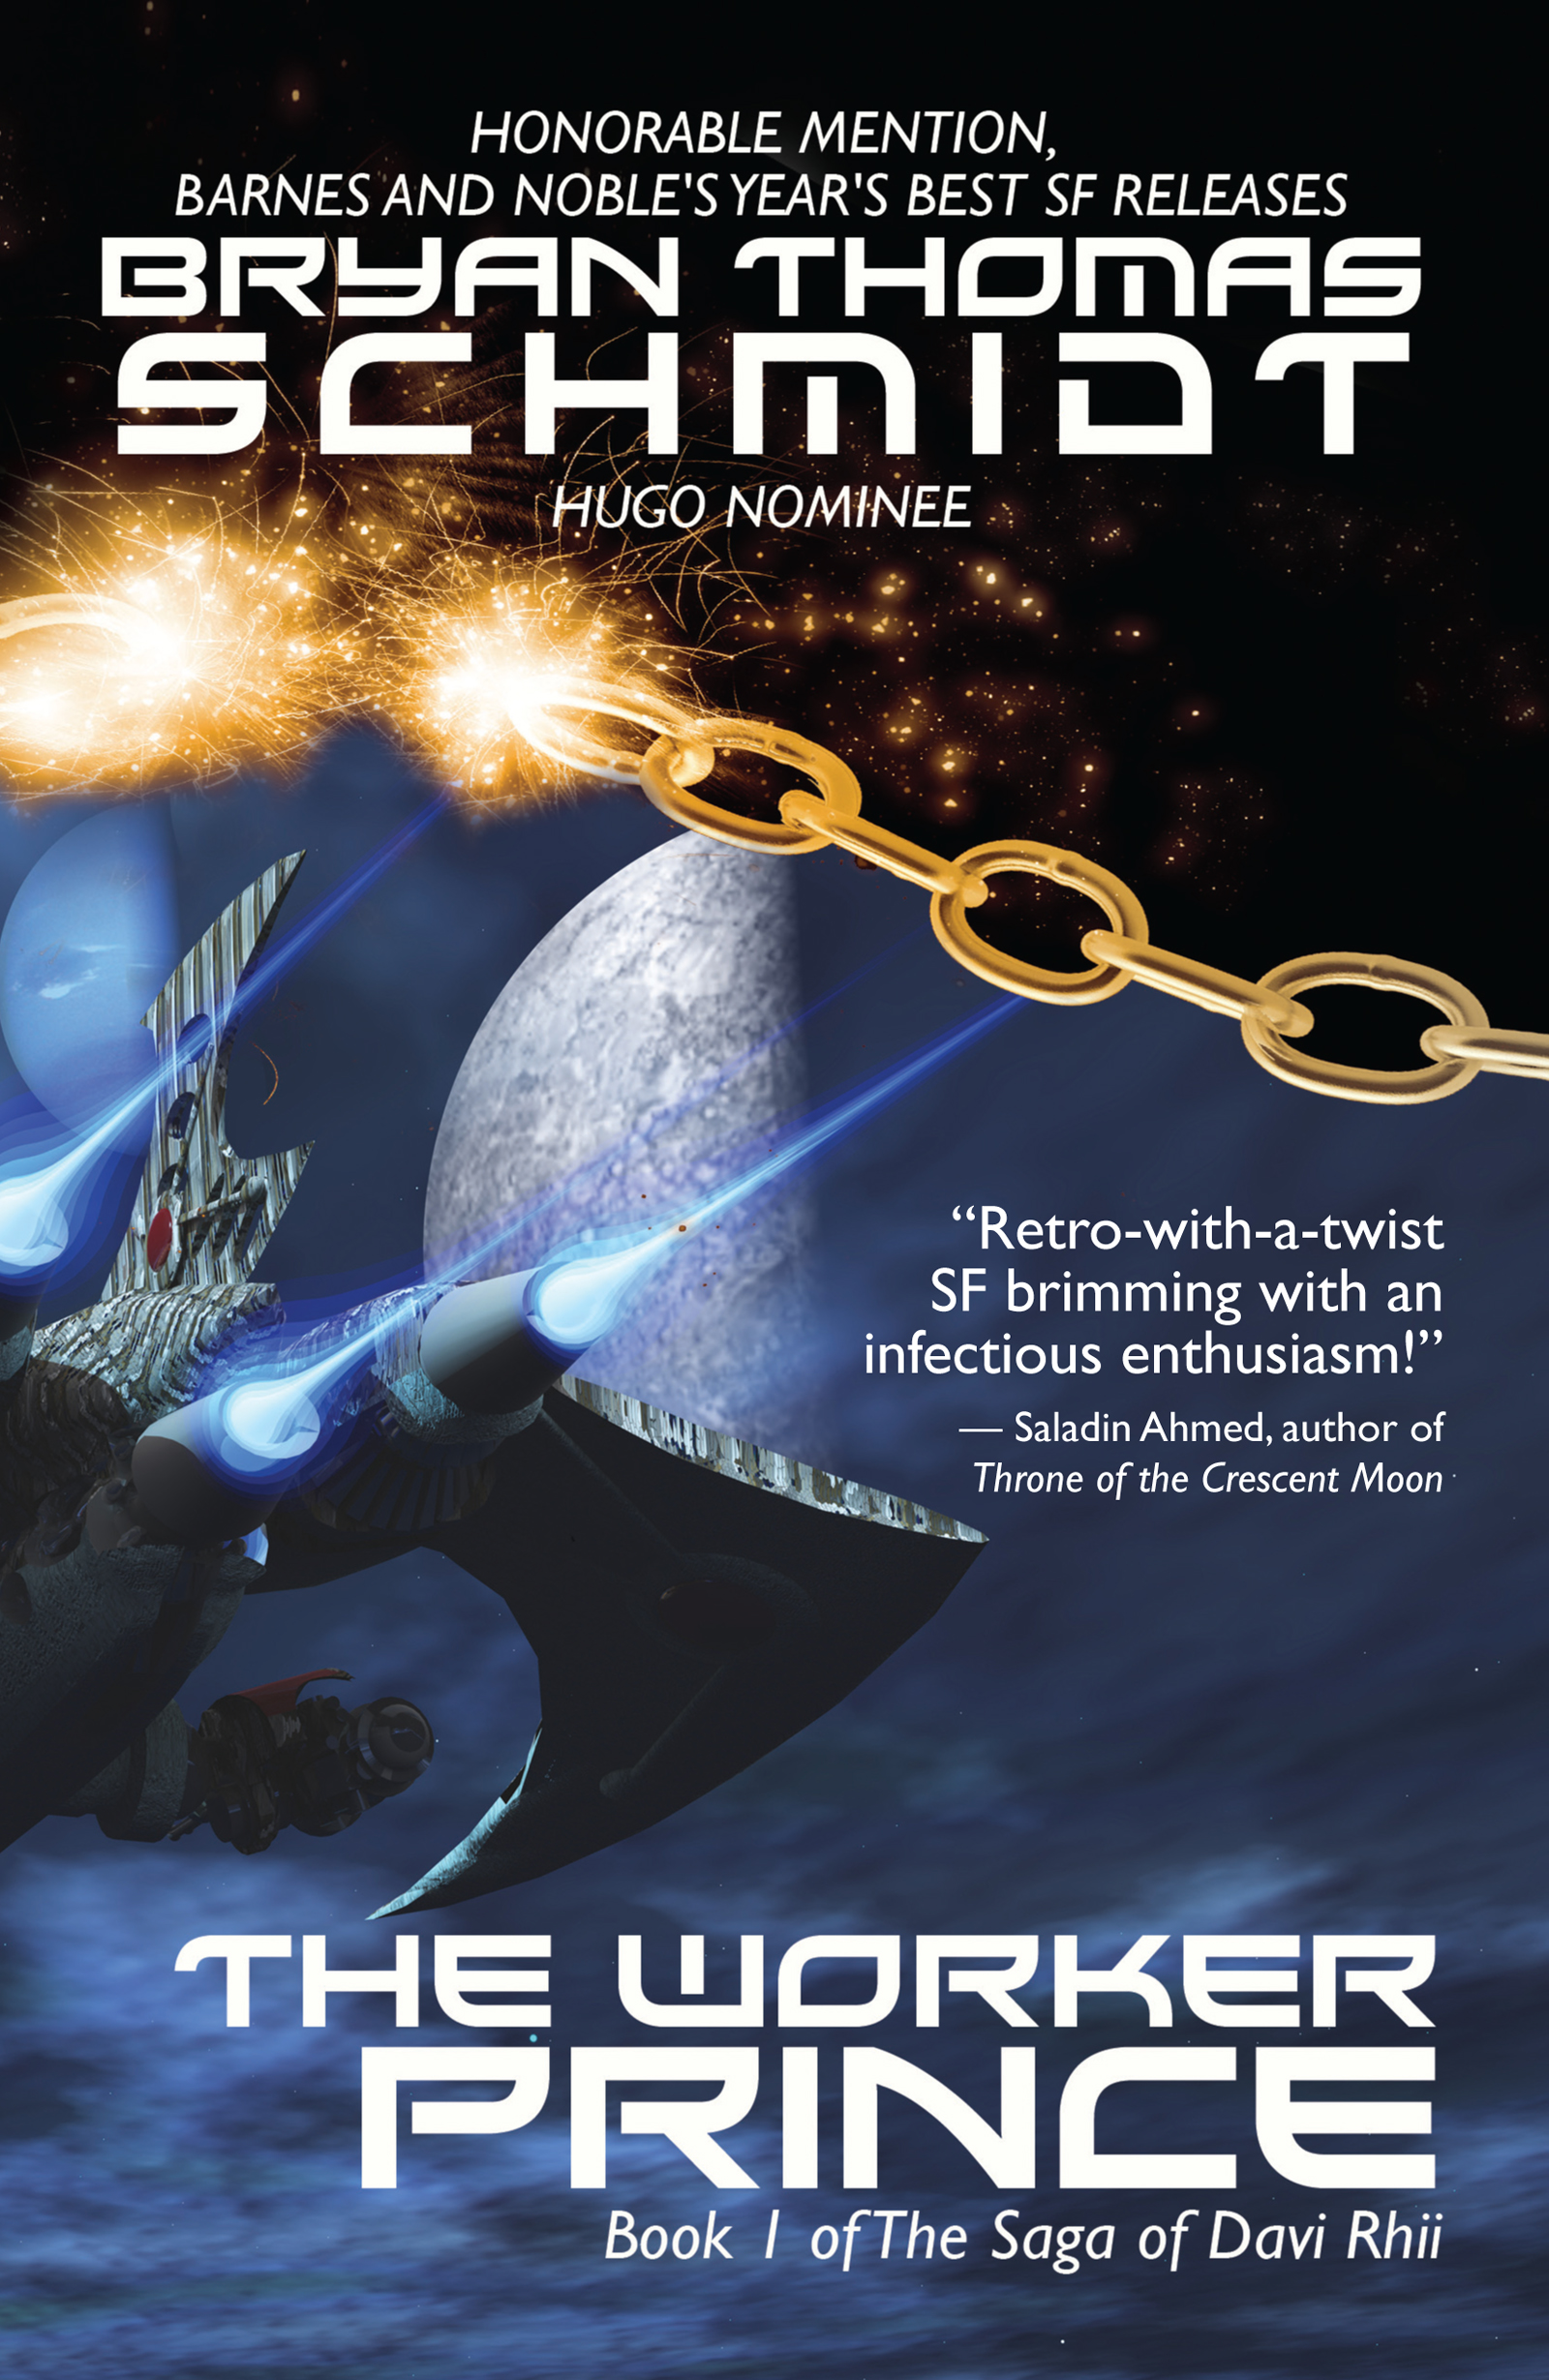
WordFire Press proudly presents the debut novel of Hugo-nominated editor Bryan Thomas Schmidt, which received Honorable Mention on Paul Goat Allen’s Year’s Best Science Fiction Releases of 2011 at BarnesandNoble.com, alongside books by Ben Bova, Robert J. Sawyer, Jack Campbell, Ernest Cline and more.
What if everything you thought you knew about yourself and the world turned out to be wrong? Freshly graduated from the prestigious Borali Military Academy, Davi Rhii, Prince of the Boralian people discovers a secret that calls into question everything he knew about himself. His quest to rediscover himself brings him into conflict with his friends and family, calling into question his cultural values and assumptions, and putting in jeopardy all he’s worked for his whole life. One thing’s for sure: he’s going to have to make decisions that will change his life forever… Welcome to the book that captures the feel of the original Star Wars like no other—engaging characters, entertaining banter, non-stop action, Moses meets Star Wars… The Worker Prince.
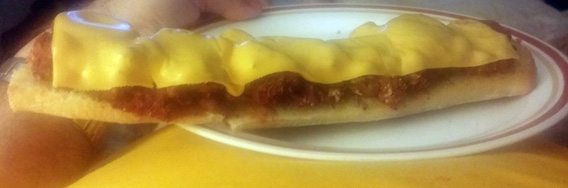
PIZZA LOAF by Glenda Schmidt
Ingredients:
1 1 lb loaf of French bread or 4 long Italian rolls
Softened butter or margarine (optional)
3/4 lb Ground Beef
1/2 cup Grated Parmesan Cheese
1/2 tsp Oregano
1 tsp Salt (optional)
1/8 tsp Pepper
1 1/2 tbsp Minced Onion (real onion preferred)
1 1.2 6 oz cans Tomato Paste
1/4 cup Black or Green Olives, sliced (optional)
2 Ripe Tomatoes, thinly sliced (optional)
8 slices Processed Cheese (your choice)
Cut French bread or rolls in half lengthwise and spread butter or margarine across the exposed inside.
Combine beef, Parmesan cheese, seasonings, minced onion, olives and tomato paste in mixing bowl.
Spread mixture on insides of the bread or rolls with a knife so it is evenly distributed.

If freezing for later use, cut into serving size, approximately 1/2 roll each and wrap individually in aluminum foil for best results then freeze. (When ready to use, defrost 1 1/2 hours in wrap before continuing.)
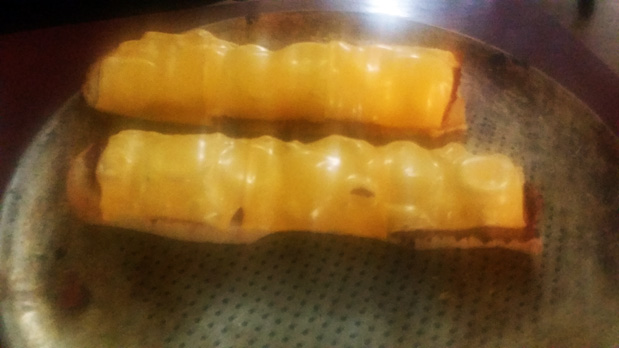
To cook, place unwrapped loaves on cookie sheet or flat pan, meat side up, top with tomato slices (if desired).
Bake at 250 degrees for 20 minutes.
Remove from oven and top with processed cheese slices.
Return to oven for 5 minutes until cheese is melted.
Your kids and the kid in you will love it.
 Bryan Thomas Schmidt is an author and Hugo-nominated editor of adult and children’s speculative fiction. His debut novel, The Worker Prince received Honorable Mention on Barnes & Noble Book Club’s Year’s Best Science Fiction Releases. His short stories have appeared in magazines, anthologies and online. As book editor he is the main editor for Kevin J. Anderson and Rebecca Moesta’s WordFire Press where he has edited books by such luminaries as Alan Dean Foster, Tracy Hickman, Frank Herbert, Mike Resnick, Jean Rabe and more. He was also the first editor on Andy Weir’s bestseller The Martian. His anthologies as editor include Shattered Shields with co-editor Jennifer Brozek, Mission: Tomorrow, Galactic Games and Little Green Men–Attack! (forthcoming) all for Baen, Space Battles: Full Throttle Space Tales #6, Beyond The Sun and Raygun Chronicles: Space Opera For a New Age. He is also coediting anthologies with Larry Correia and Jonathan Maberry set in their New York Times Bestselling Monster Hunter and Joe Ledger universes.
Bready or Not Guest: Megan E. O’Keefe with Baklava
I’m happy to welcome author Megan E. O’Keefe! Her debut novel Steal the Sky is out from Angry Robot on January 5th. It features airships and con men and a gorgeous cover. She’s here today to share a delicious-looking recipe for baklava.

When I was first considering what to bake for Bready or Not I knew that, due to the time of year, I wanted to do a holiday bake. Something the people of the Scorched Continent would make for a winter celebration. My first thoughts were fruitcake-esque, as dried fruit is pretty much the only way people on the Scorched eat fruit, but that didn’t quite work.
You see, the Scorched Continent, as its name implies, is an arid climate. It’d be okay for growing wheat, if it weren’t for the fact the whole continent suffers a really nasty monsoon season once a year. Great for replenishing aquifers, not so great for growing wheat.
Which isn’t to say they don’t get wheat. They do – they just have to import it from their mother empire. So by the time mid-winter rolls around, wheat is looking pretty scarce. Which means no cake, unless you’re stupidly rich. There are some people on the Scorched who could afford such a luxury, but I wanted to capture a snack that the everyday populace might stand a chance of getting their hands on.
Enter: baklava.
The Scorched is also home to a species of wild, oversized bee which builds massive hives. This means that honey and beeswax are both plentiful, and cheap. Another common foodstuff on the continent is a wide variety of nuts, as they preserve well and are full of protein. And what better way to make use of scarce wheat than to roll it into a very, very thin sheets?
I’d never made baklava before, but I figured hey, if I’m assuming my characters can do it, so can I! Of course my characters can also move magical gas around and take one hell of a beating, but that’s beside the point.
Ingredients:
1 cup caster sugar
1 cup water
1/2 cup honey
1 tsp vanilla
1 package phyllo dough (16oz) defrosted
1 cup butter
1 lbs chopped nuts
1 1/2 tsp cinnamon
Method:
The real secret to baklava is that, to keep it crispy, you either have to combine cold baklava with hot syrup, or cold syrup with hot baklava. Hint: it’s much easier to do it the second way. So, before you even preheat that oven, combine 1 cup caster sugar, 1 cup water, and boil until all the sugar is melted.
Is the sugar melted? Coolio. Throw in 1/2 cup honey and a tsp vanilla. Well, don’t actually throw it, because boiling sugar water splash back is enough to peel skin. Pour it gently. If you’re having trouble getting all of the honey out of your 1/2 cup scoop, and if your scoop is metal, just scoop up some of the hot sugar water and swish it around until the scoop is clean. Don’t do this with plastic. If I have to tell you why, you probably shouldn’t be reading this. Mix until everything is combined, lower your heat and simmer it for 20-25 minutes until it’s begun to slightly thicken, then set aside to cool.
Get yourself a wee tiny saucepan, and chunk about a cup of butter into it, then set it on the very lowest setting to melt.
![[My wee tiny saucepan]](https://www.bethcato.com/blog/wp-content/uploads/2015/10/baklava-tiny-pot.jpg)
[My wee tiny saucepan]
![[That’s a lotta’ nuts]](https://www.bethcato.com/blog/wp-content/uploads/2015/10/baklava-walnuts.jpg)
[That’s a lotta’ nuts]
![[A finer chop than this is easier to work with, but I never learn.]](https://www.bethcato.com/blog/wp-content/uploads/2015/10/baklava-chopped-nuts.jpg)
[A finer chop than this is easier to work with, but I never learn.]
Now it’s time for the part everyone hates: the phyllo. Depending upon who made your phyllo (and I’m going to guess it wasn’t you, because only a masochist would make that stuff themselves) you’ll either have one large roll or two smaller ones. If you have a large one, unroll it and chop it in half to fit your pan.
Now that you have phyllo that fits your pan, cover it with a layer of saran wrap or wax paper and then cover that with a SLIGHTLY damp paper towel. This helps keep the phyllo from drying out while you work – but do not get water directly on the dough. Then you’ll have mush. You do not want mush.
To create the base of your baklava: layer two sheets of phyllo (pick them up together, it’s easier than going one by one) in the bottom of your pan. Use a pastry brush to coat with melted butter. Add another two layers of dough – then butter – and another two layers – then butter. Repeat until you have a total of eight layers of pastry with butter in between every two layers. Good? Good. That wasn’t too painful, right?
![[Magical pastry brush. Adds +2 to butter application]](https://www.bethcato.com/blog/wp-content/uploads/2015/10/baklava-pastry-brush.jpg)
[Magical pastry brush. Adds +2 to butter application]
![[Should look something like this]](https://www.bethcato.com/blog/wp-content/uploads/2015/10/baklava-layering.jpg)
[Should look something like this]
Pop the baklava in the oven and your honey sauce in the fridge. Bake the baklava about 50 minutes, or until golden brown on top.
![[Saucy]](https://www.bethcato.com/blog/wp-content/uploads/2015/10/baklava-honey-sauce.jpg)
[Saucy]
Toast your success, and vow to buy baklava from the store next time.
![[Flakey goodness.]](https://www.bethcato.com/blog/wp-content/uploads/2015/10/baklava-finished.jpg)
[Flakey goodness.]
Find out more about Megan at her website. Order Steal the Sky at Amazon, Barnes & Noble, or any other bookstore.
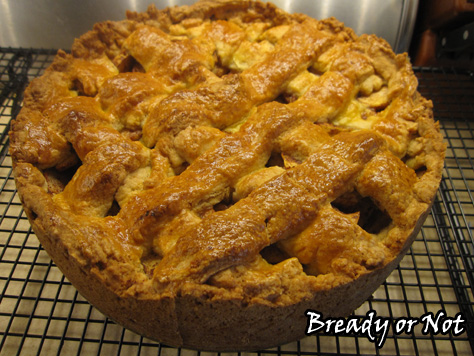
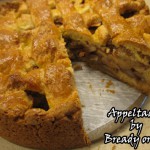
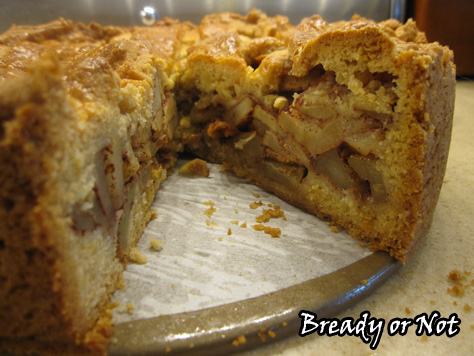
Bready or Not: Appeltaart
I love my traditional Caramel Apple Pie recipe, but this deep-dish apple pie is something extraordinary! It uses a springform pan.
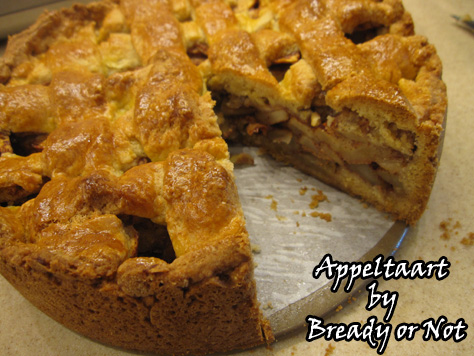
Brace yourself for a lot of pictures. This is one of those rare times when my end result looked exactly like the photo in the magazine.
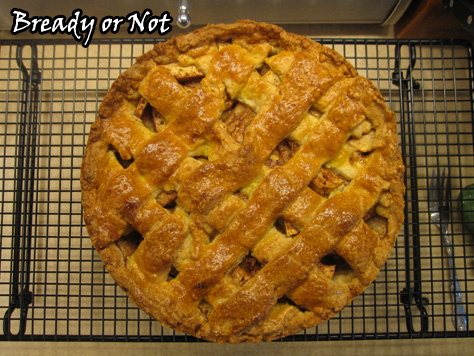
It’s a photogenic pie, isn’t it?
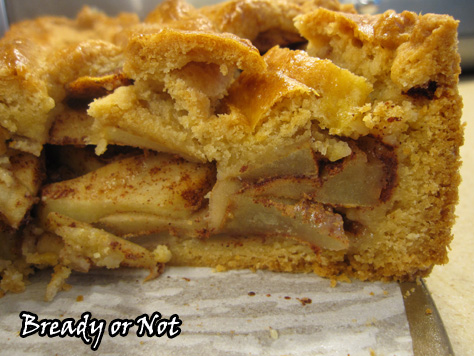
This Appeltaart is as delicious as it looks, too. My husband and my dad are hardcore apple pie lovers. It’s probably one of their all-time favorite foods. This pie rated VERY highly for both of them.
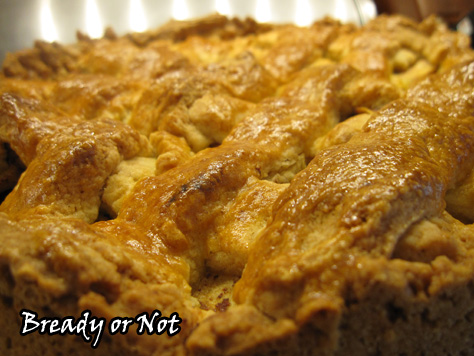
The directions look long, but really, it’s not an intimidating pie. I know a lot of folks hate rolling out pie crusts–well, this is the recipe for you! You press most of the dough into the pan and then slice strips for the lattice on top.
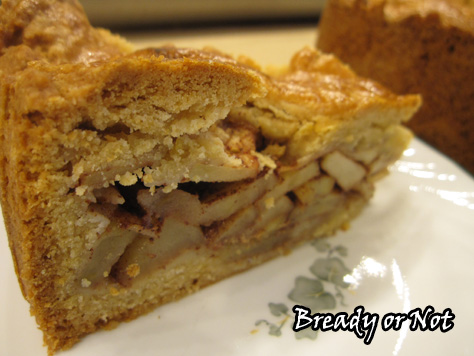
The original recipe had raisins in it–which was blasphemous to my family. I omitted the raisins and added more cinnamon.
It would be easy to modify the recipe more. Add a drizzle of caramel or dulce de leche. Try adding some nutmeg, cloves, or cardamom. Or if the making the lattice top worries you, tuck that dough away for other purposes, and throw together a crumb topping. Or instead of cutting strips for the lattice, roll out the dough and use small cookie cutters shaped like leaves or other things.
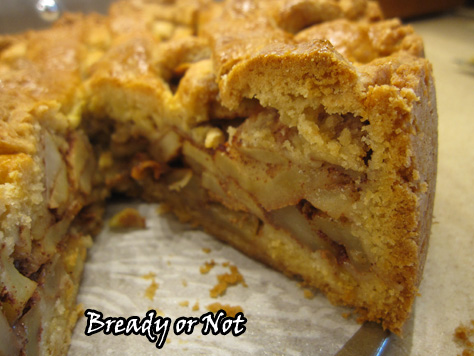
Whatever you do, I bet you’ll be amazed at the Appeltaart. This will be the showcase for your holiday dessert table… and something special to make all year round.
Modified from a recipe in Martha Stewart Living magazine; also online.
Bready or Not: Appeltaart
Ingredients
Dough
- 2 1/4 cups all-purpose flour plus more for surface
- 1 Tablespoon baking powder
- 1 teaspoon salt
- 1/2 cup light brown sugar packed
- 3/4 cup unsalted butter 1 1/2 sticks, cut into small pieces, plus more for pan
- 1 large egg
- 2 Tablespoons water
- 1 teaspoon pure vanilla extract
Filling
- 2 1/4 pounds Granny Smith apples peeled, cored, and cut into chunks (6 cups)
- 1/4 cup white sugar
- 3 teaspoons cinnamon
- pinch salt
- 2 teaspoons fresh lemon juice
- 1 1/2 Tablespoons all-purpose flour plus more as needed
- 1 large egg lightly beaten
Instructions
Dough:
- In a bowl, stir together the all-purpose flour, baking powder, salt, and brown sugar. Add the butter and work it in until only pea-size pieces are visible.
- In a small bowl, whisk together the egg, water, and vanilla, then pour into the dry mix. Mix until the dough makes a ball. Form about two-thirds of the dough into one disk and remaining third of dough into another disk. Separately wrap each portion in plastic wrap. Refrigerate them until firm, about 1 hour.
Filling:
- Toss together the apples, granulated sugar, cinnamon, salt, lemon juice, and 1 1/2 tablespoons flour. Set aside but stir every so often as you make other preparations.
- Preheat the oven to 350-degrees. Prepare a 9-inch round springform pan by cutting parchment paper to fit the circle inside. Use butter or Pam to adhere the parchment in the pan, then fully grease the top of the parchment and the sides of the pan.
- Lightly flour a surface. Take out your large dough disk and roll it out. It's okay if it's fragmented. Take the pieces and press them into the bottom and up the sides of the pan. Sprinkle some flour over the dough.
- Use a slotted spoon to transfer the apple filling into the crust; you'll discard any leftover juice. Roll out the other dough disk to be about 1/4-inch thick. Use a pizza cutter or knife to cut the dough into thick strips. Lay half of the strips over the filling, then do the other half crossing the other way. Press the edges of the strips into the crust at the sides.
- Lightly beat the egg and brush the lattice with the egg wash.
- Bake the pie until the crust is golden brown and apples are tender when stabbed with a fork, about 1 hour 10-20 minutes. Check it at the 40 minute point and cover it with foil if it starts to look too dark.
- Let it cool on a wire rack until sides of tart pull away from pan, about 30 minutes. Unsnap the springform pan and remove the side circle; keep the appeltaart on the base for convenient serving. Let it cool for an least an hour before cutting in.
- OM NOM NOM!
Read More
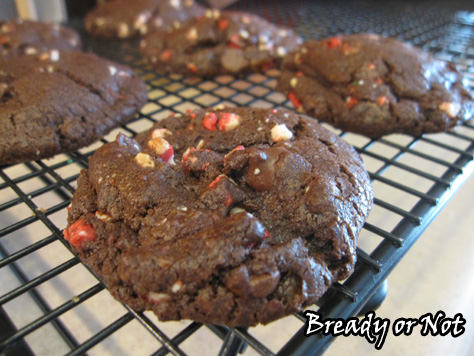
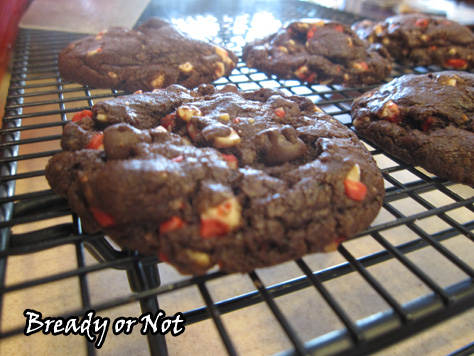
Bready or Not: Cocoa Peppermint Cookies
I bake a wide variety of things and send the goodies along with my husband to his work. When the guys there say, “These cookies are among the best ever,” that makes me take notice.

I first found this recipe on a bag of Andes Baking Chips, dubbed with the long name of “Andes Double Chocolate Peppermint Crunch Cookies.” Whew. I modified it by taking out the nuts (they just don’t pair well with peppermint, I think) and compensating by adding more mint chocolate chips. Because you can’t go wrong with that.
I chilled the dough, since that often produces better cookies, and I was surprised at how much this dough still spread. Be sure you space out those dough balls!
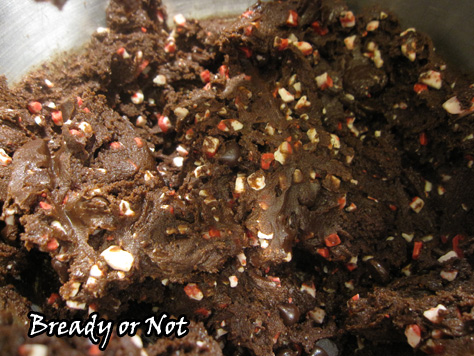
These cookies would be fantastic for a holiday cookie exchange or to give as a gift. The Andes chips look fantastically festive against the backdrop of rich dough… and you know what? They taste darn good, too.
Modified from a recipe found on Andes Peppermint Crunch Chips package; also found online.

Bready or Not: Cocoa Peppermint Cookies
Ingredients
- 1 cup unsalted butter 2 sticks
- 2 Tablespoons espresso powder
- 2 cups plus 2 Tablespoons all-purpose flour
- 3/4 cup baking cocoa sifted
- 1/2 tsp baking soda
- 1/2 tsp salt
- 1 cup brown sugar packed
- 1/2 cup white sugar
- 2 large eggs room temperature
- 1 teaspoon vanilla extract
- 1 package Andes Peppermint Crunch Baking Chips 10 oz
- 4 ounces semi-sweet chocolate chips or milk chocolate or chopped candy bars
- 1 cup mint chocolate chips
Instructions
- In a small saucepan on low heat, melt the butter with the espresso powder, stirring often. When the two are incorporated, remove the pan from heat and set aside to cool for an hour.
- In a medium bowl, sift together the main dry ingredients: flour, cocoa, baking soda and salt.
- Now it's time for the big mixing bowl. Pour in the cooled butter mixture, then add the white sugar, brown sugar and vanilla extract. Beat at medium speed for a few minutes until it's all creamy. Beat in the eggs, one at a time. Gradually work in the flour mixture a bit at a time until it's just blended. Now stir in the Andes Chips and the extra chocolate.
- Wrap the dough in plastic wrap and stash it in the fridge to chill for a few hours or days, or even freeze it.
- When it's time to bake, preheat oven to 350-degrees.
- Drop the dough in rounded tablespoons about two inches apart on a greased or parchment-lined baking sheet; note that this dough does spread, even when the dough is chilled.
- Bake for 10 to 12 minutes. Let them rest of the cookie sheet a few more minutes to set, the transfer to a wire rack to finish cooling.
- OM NOM NOM!
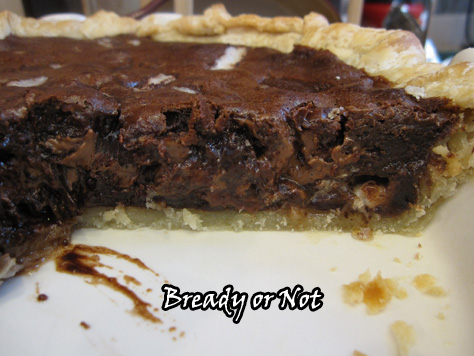
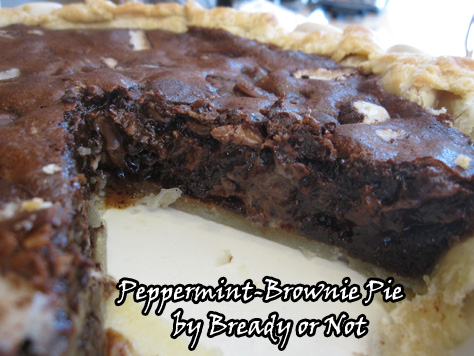
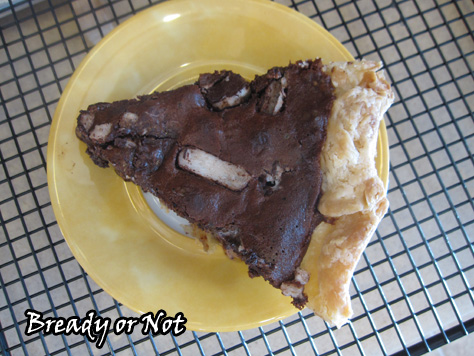
Bready or Not: Peppermint-Brownie Pie
You could just make normal brownies, sure, but it’s an indisputable fact that everything is better in pie form.
Back in March, we were in Tucson for the Book Festival on Pi Day. To my amazement, pie was hard to find. We ended up driving a good distance to a Village Inn, where they had already run out of most pies. Our selections ended up being fine, but my husband was tormented by a tabletop ad for a mint brownie pie that was not available.
“Don’t worry,” I told him. “I’ll make one for you.”
This ended up being more of a challenge than I expected. I ended up looking at a number of recipes until I found a good base recipe to modify. I wanted a strong mint flavor and for it to not necessarily LOOK Christmassy. I wanted a pie that could be made year-round.
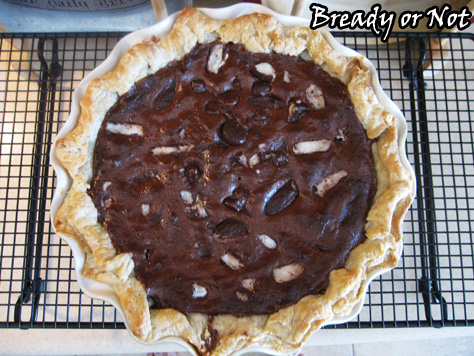
I already had some York Patties stashed away, courtesy of post-holiday clearance sales, so I had the very candy to mix into my recipe, too.

The end result was peppermint-brownie perfection. I used my homemade pie crust (shown below as well) and was pleased that the brownie contents didn’t make the crust get soggy or hard.
If you love mint brownies, if you love pie, welcome to your new bliss.
Modified from Culinary Concoctions by Peabody.
Bready or Not: Basic Pie Crust
Ingredients
- 3 cups all-purpose flour
- 1 Tablespoon sugar
- 1 teaspoon fine salt
- 1 cup unsalted butter 2 sticks, cold, cut into cubes
- 3/4 cup ice water
Instructions
- Make dough hours in advance or the night before. In a medium mixing bowl, whisk together the flour, sugar, and salt. Add in the cold butter cubes, and either use a pastry blender or pulse the ingredients in a food processor until the butter is pea-sized.
- Pour in the cold water and pulse/mix together until the dough forms a loose ball. I like to use my hands at this point. The dough may be sticky, but it will firm up well.
- Pour dough onto a floured surface. Divide into two balls and fallen them into discs. Wrap each disc in parchment paper, then in plastic wrap. Refrigerate at least one hour before placing in pie dish, or freeze for up to 3 months.
- Roll out the refrigerated dough into a 12-inch round. Press it into a 9-inch dish, trimming the excess and pinching the edges. Wrap loosely with plastic wrap and freeze at least two hours before using, or keep frozen up to three months.
Bready or Not: Peppermint-Brownie Pie
Ingredients
- 14 oz sweetened condensed milk
- 1/4 cup unsalted butter half stick, cut into pieces for quicker melting
- 1/2 cup unsweetened baking cocoa sifted
- 3 eggs room temperature
- 3 Tablespoons all-purpose flour
- 2 tsp espresso powder optional but awesome
- 1 tsp vanilla extract
- 1/2 tsp peppermint extract
- 1 cup milk chocolate chips
- 1 cup York Peppermint Patties chopped
- 1 pie shell make your own or use a store bought crust
Instructions
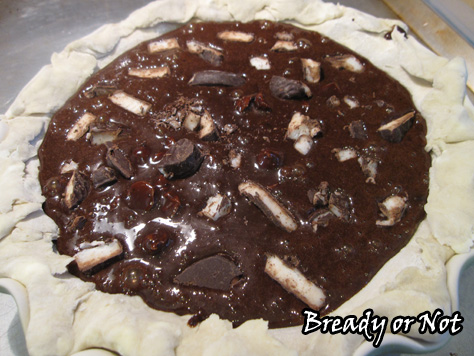
- Set out the pie crust atop a cookie sheet. Chop up the York patties and place half of them in the crust.
- In a medium sauce pan, place the milk, butter, and cocoa powder. Warm on low heat. Stir occasionally so the mixture doesn't stick and scorch. Remove from heat when all ingredients are melted and mixed together fully. Set aside to cool for 15 minutes.
- Preheat the oven at 350-degrees.
- In a large bowl, lightly beat the three eggs. Temper them by adding a couple spoonfuls of the chocolate mixture and mixing. Do this three times. Finally, stir the remaining chocolate into eggs.
- Add the flour, espresso powder, vanilla extract, and peppermint extract. Fold in chocolate chips.
- Pour brownie batter into the pie shell and then top with remaining chopped York Patties.
- Bake for 30-40 minutes on the cookie sheet, until a knife in the center comes out clean. Let set to cool for several hours. Store covered with foil in the fridge.
- OM NOM NOM!