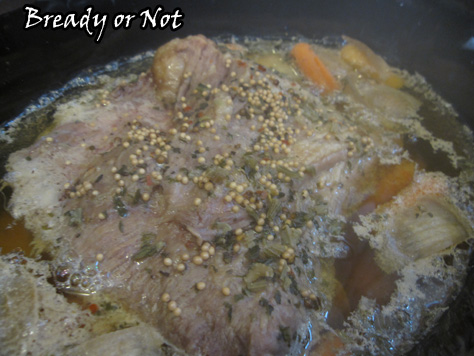
Bready or Not: Crock Pot Corned Beef & Vegetables
Corned beef in the slow cooker. This is by far the easiest, tastiest way I’ve found to make this dish!
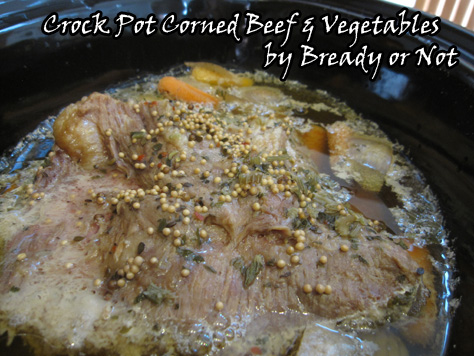
It’s become an annual tradition for me to make a St. Patrick’s Day corned beef brisket. I boiled the meat one year, and baked it in the oven the next. It’s turned out delicious both ways (though the quality of the Kroger-branded brisket was lousy with fat) but I found that the crock pot is the best way to go. No watching the pot for boil-overs! Plus, it makes side dish veggies at the same time.
I dislike celery so I replaced the cut stalks with celery flakes, which provides flavor without the icky texture. You’ll want to cut the potatoes into big chunks that are all of like size. It’ll depend on the size of the potato if you need to cut them into halves or quarters. I had pretty big potatoes, so I did quarters. Do get red potatoes, though. They cook all day and get tender, not mushy.
Make this along with the Mini Muffin Irish Soda Bread from last week, and your St. Paddy’s Day meal is all set! … Oh, you want dessert? How about these Irish Coffee Blondies from a few years ago?
Don’t forget to wear green on the 17th… unless you want to get pinched…
Modified from TheSkinnyFork.com

Bready or Not: Crock Pot Corned Beef & Vegetables
Ingredients
- 3 lb corned beef brisket + seasoning packet
- 1 Tb celery flakes or chopped celery stalks
- 1 yellow onion in wedges
- 1/2 lb red potatoes cut into halves or quarters
- 8 ounces baby carrots
- 4-6 cups water
Instructions
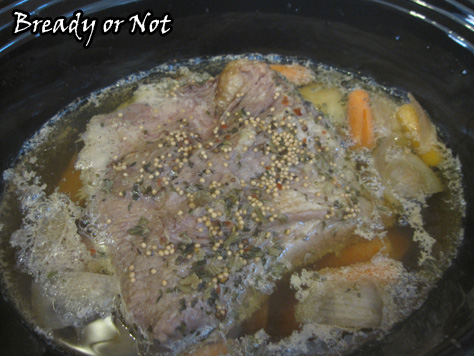
- Place celery flakes, onion slices, potatoes and carrots into the crock pot. Trim fat from the brisket and place it on top of the veggies.
- Add 4-6 cups of water to the crock pot until the brisket is almost covered. Sprinkle the brisket's seasoning packet over the top.
- Put the lid on and cook on high for 4 1/2 hours, or 8 to 9 hours on low.
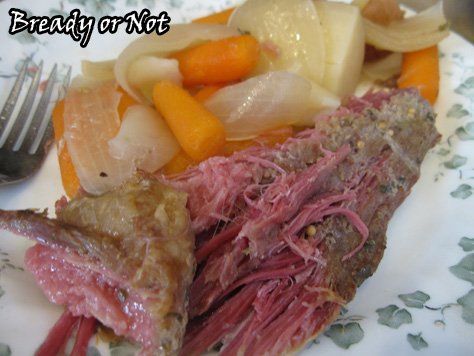
- Remove the brisket and slice thinly or pull into chunks. Serve with the cooked veggies.
OM NOM NOM!
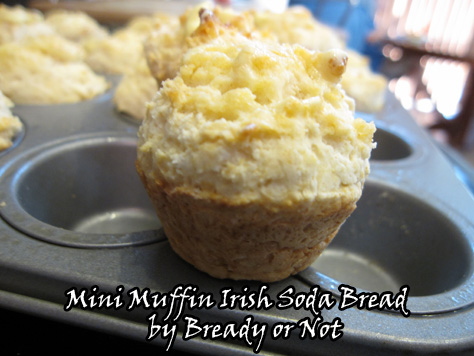
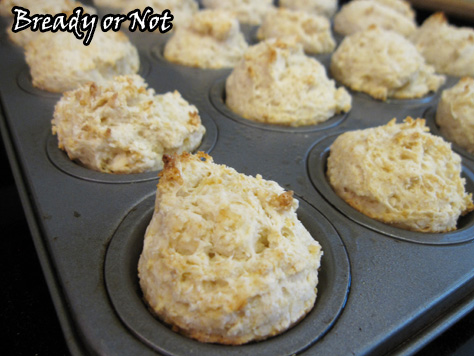
Bready or Not: Mini Muffin Irish Soda Bread
Irish soda bread is traditionally a big round. I took a shrink ray to it.
Here’s the problem: standard recipes make way too much bread for the two of us to eat. I halved the recipe a few years ago, and that worked out better but it was still a lot. I got to thinking, what if I made it in a form that was a lot easier for my husband to take to work?
I searched online, and to my surprise, no one else had made Irish soda bread like that. Huh. So I resolved to try it, using a halved version of the same Irish soda bread recipe I posted back in 2012.
It turned out FANTASTIC. The bread cooked up in only ten minutes. It was already portioned out so I didn’t go bread crazy.
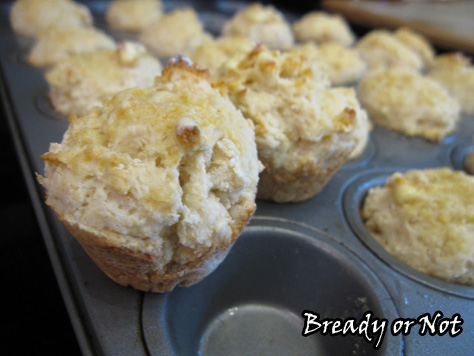
My husband happily took the leftovers in his work lunches–plus, the mini bread froze and thawed and tasted just as good weeks later. This recipe produces very soft, tender soda bread–not dense like some recipes I’ve tried.
This is the only way I’ll make Irish soda bread from here on. If I need to feed more people, I’ll just use the old, full version of the recipe and pull out another mini muffin pan.
Be sure to come back next week when I feature my favorite corned beef recipe–cooked in the crock pot!

Bready or Not: Mini Muffin Irish Soda Bread
Ingredients
- 2 cups all-purpose flour don't overfill
- 2 Tb cornstarch
- 1 Tb white sugar
- 3/4 ts baking soda
- 3/4 ts cream of tartar
- 3/4 ts kosher salt
- 2 Tb butter
- 3/4 cup buttermilk
- 1 Tb butter melted, for tops afterward (optional)
Instructions
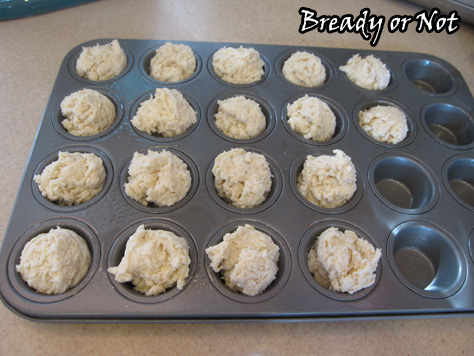
- Preheat oven to 385-degrees. Prepare mini muffin pan by applying nonstick spray in each well, though not all will be filled.
- Whisk together all of the dry ingredients. Work the butter into mixture with a pastry blender or your fingertips until it resembles coarse crumbs; just as with making pie crust, you want those bits of butter in there.
- Add the buttermilk and stir until just combined. Knead in the bowl until the dough just starts to come together and is still craggy and bumpy, adding more buttermilk if necessary. Don't over-knead or the bread will be tough and dense.
- Use a tablespoon scoop or spoon to evenly dole out dough into the pan. Expect about eighteen mini muffins.
- Bake for ten minutes. Use the toothpick test to check middle ones for doneness. Melt the remaining tablespoon of butter and brush it on the tops of the little rounds.
Leftovers freeze well, and are the perfect size to fit in lunches.
OM NOM NOM!
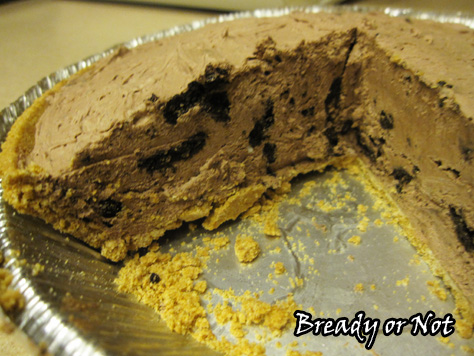
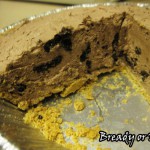
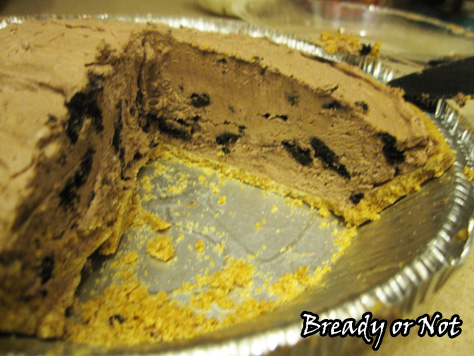
Bready or Not: No Bake Chocolate Pie
This super-easy pie comes together in minutes and is all things fluffy, chocolately, and delicious.
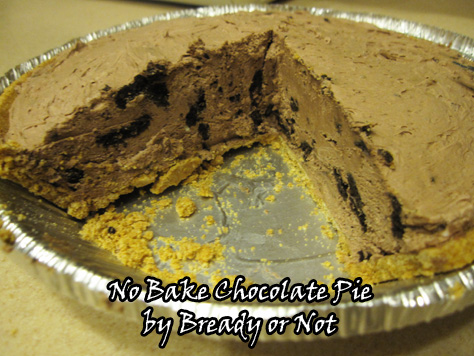
I love to bake, but when company’s coming and I’m already cooking meals AND juggling writing deadlines, a fancy cake or pie ain’t gonna happen. No-bake is the way to go. That way I can even make it the day before and I know it will keep just fine–and even improve in flavor.
This pie is really easy to tweak. I added mini Oreos, but you can throw any kind of cookie or candy bar in there… or keep it smooth and add nothing at all.
One concern I had was that this would taste like cheesecake. My family isn’t into cheesecake. The cream cheese here adds a lot of texture and richness, but the clear flavor is that of chocolate. Which meant… shhh… people didn’t know the cream cheese was in there.
It’ll be our secret.
Modified from German Sweet Chocolate Pie at Let’s Dish.
Bready or Not: No Bake Chocolate Pie
Ingredients
- 4 ounces Baker’s German Sweet or Semi Sweet Chocolate
- 1/3 cup milk or cream or half & half
- 2 Tablespoons white sugar
- 1 8 ounce package cream cheese, softened
- 1 8 ounce Cool Whip topping, thawed Reduced Fat works fine
- 1 graham cracker or chocolate pie crust
- 4 ounces Mini Oreos, chopped or other cookies or candy
Instructions
- Heat chocolate and 2 tablespoons of the milk in a small saucepan over low heat, stirring frequently until chocolate is melted. Remove from heat.
- In a large bowl, beat together the sugar and cream cheese. Add the rest of the milk, and the cooled chocolate mixture. Beat until smooth.
- Fold in whipped topping and until the colors are blended. Add in the cookie chunks. Spoon into the premade cookie crust.
- Freeze the pie until firm, about 4 hours, or in the fridge overnight. Thaw at room temperature for a short while before serving, if need be. If desired, garnish with more Cool Whip, or chocolate or caramel drizzle. Store in the fridge.
OM NOM NOM!
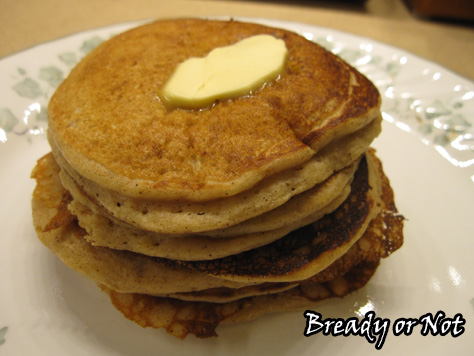
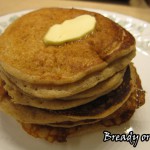
Bready or Not: Snickerdoodle Pancakes for One
One day my husband sighed most pitifully. “You know what I miss?” he said. “Pancakes. You never make pancakes anymore.”
“That’s because I can’t eat piles of bready things oozing in syrup,” I said. “But let me see if I can find a good recipe that will work for just you.”
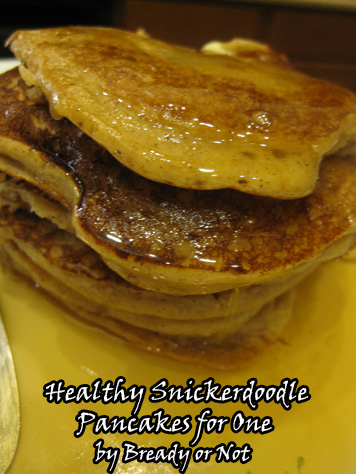
In the end, I had to work some kitchen magic. I found a good recipe, cut the amounts in half, and played with the ingredients. I was pleased that it used sour cream as the base because I know it makes a rich, tender dough in breads. Almondmilk worked just fine, too. It actually made for a somewhat healthy stack of pancakes… which he then, of course, drowned in pure maple syrup.
My husband loves Snickerdoodle cookies and many other Snickerdoodle-like things. He vows that these live up to the name. They are Snickerdoodle goodness in pancake form.
This small stack is perfect for a hungry adult or to feed a couple kids.
Modified from Snickerdoodle Pancakes at No. 2 Pencil.
Bready or Not: Snickerdoodle Pancakes for One
Ingredients
- 1/2 cup all-purpose flour
- 1 1/2 Tablespoon white sugar
- 1 teaspoon cream of tartar
- 1/4 teaspoon baking soda
- 1/4 teaspoon kosher salt
- 1 teaspoon cinnamon
- pinch nutmeg
- 1/2 cup sour cream or vanilla or plain yogurt
- 2 Tablespoons melted butter
- 1 egg lightly beaten
- 3 + Tablespoons milk almondmilk works great
Instructions
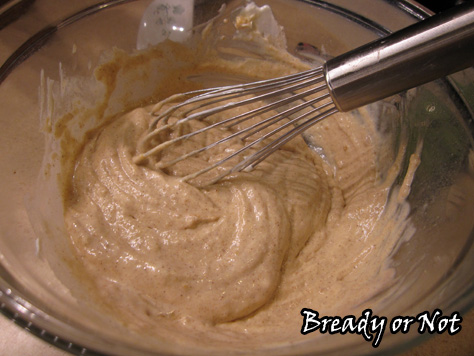
- Combine the dry ingredients in a large bowl. In a small bowl, mix together the wet ingredients, and then combine everything. If the batter is really thick, slowly add milk to get the right consistency.
- Heat up a nonstick griddle or pan. Use 1/4 cup to scoop up batter onto the surface. When the edges of a pancake are set with little bubbles creating craters on top, it's time to flip to cook the other side.
- Makes a small stack of medium-sized pancakes. Serve with whatever fixings you like!
OM NOM NOM!
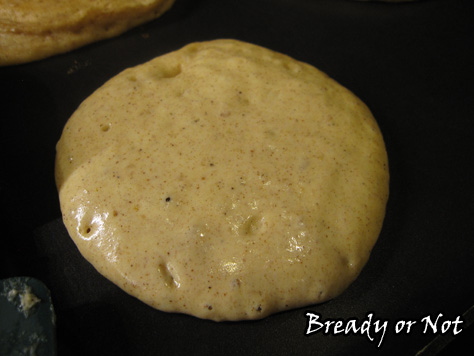
Those little bubbles popping on top mean I should set down the camera and flip this baby over.
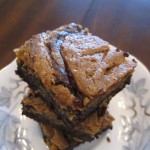
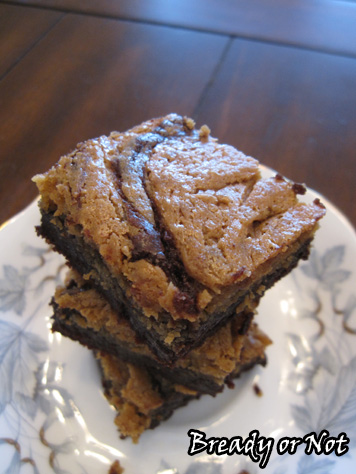
Bready or Not: Biscoff Brownies
How about some beautiful brownies for Valentine’s Day?
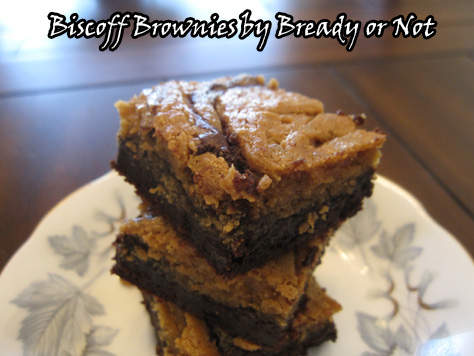
Sometimes you want a brownie that punches you in the face with its chocolate flavor. Other times you want a gentle slap. This brownie is the latter.
These mild brownies blend the magic of Biscoff spread/Speculoos spread with chocolately brownies. Neither flavor is strong, but together they create something delicious, tender, and good.
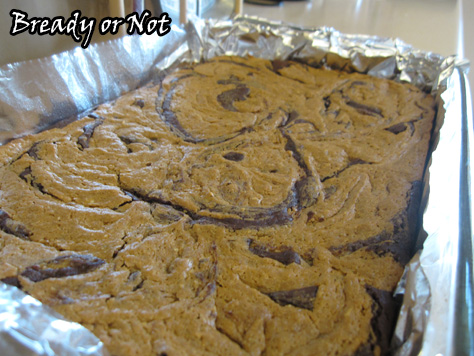
Also, they are PRETTY. Look at that swirl!
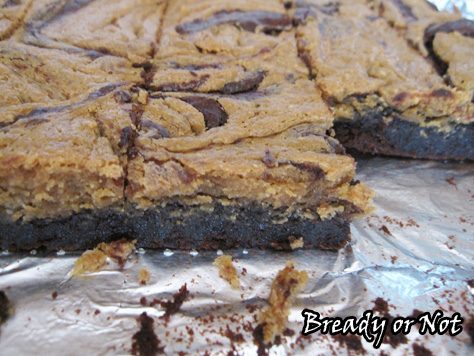
These are photogenic brownies.
They also keep really well for several days in a sealed container at room temperature. If you can restrain yourself to make them last that long.
Slightly modified from Biscoff Brownies at Bake at 350.
Bready or Not: Biscoff Brownies
Ingredients
For the Biscoff swirl:
- 1/2 cup smooth Biscoff or cookie butter spread
- 4 ounces cream cheese softened
- 2 Tbsp sugar
- 1 egg room temperature
For the brownies:
- 1 cup Dutch-process cocoa sifted
- 1 tsp kosher salt
- 1/2 tsp baking powder
- 12 Tb unsalted butter 1 1/2 sticks
- 2 cups white sugar
- 1 Tbsp vanilla extract
- 3 eggs room temperature
- 1 cup all-purpose flour
Instructions
- Preheat oven to 325-degrees. Line a 9x13 pan with aluminum foil and grease surface.
- For the Biscoff swirl: In a small bowl, combine the cookie butter spread, cream cheese, sugar, and egg, until smooth. Set aside.
- For the brownies: Sift together the cocoa, salt and baking powder and set aside.
- In a medium saucepan, melt the butter over low heat. Remove from heat and add the sugar. Once they are mixed, return to the burner and keep stirring as it heats through. You don't want it to bubble.
- Remove the pan from heat and stir in the cocoa mixture. Let it cool a few minutes. Whisk in the eggs and vanilla extract until smooth. Stir in the flour. Pour into the prepared pan and smooth it out.
- Dollop the Biscoff mixture here and there on top of the brownie batter. Use a table knife to gently swirl the mixture every which way across the surface.
- Bake for 30-35 minutes, until the swirl looks set and it passes the toothpick test. Cool on a wire rack before cutting.
OM NOM NOM!
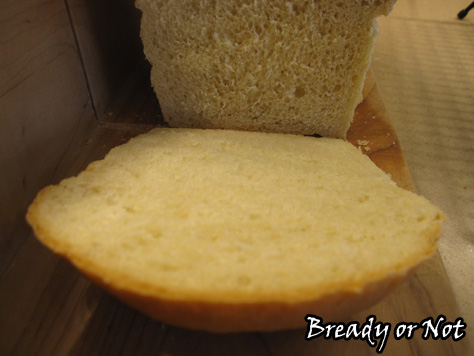
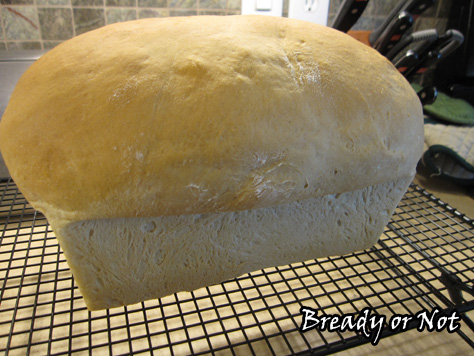
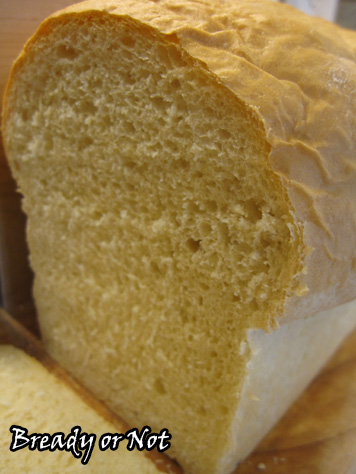
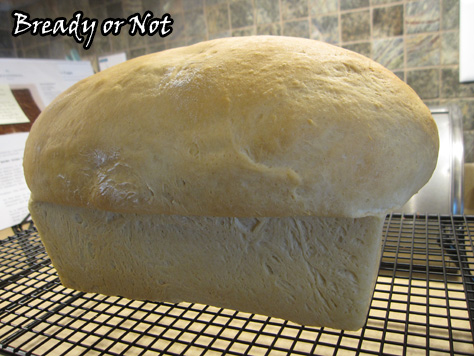
Bready or Not: Sour Cream Bread
Make note: this recipe doesn’t make sourdough bread. Instead, it uses sour cream to create tender, delicious sandwich bread that isn’t the least bit sour.
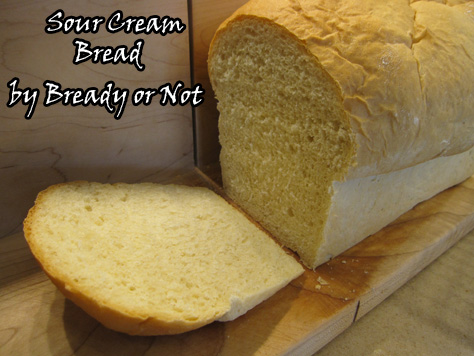
I always keep sour cream around. It’s often on sale, it keeps well, and I can use it for tacos, salads, or making this bread. I actually make this bread on an almost weekly basis.
Different brands of sour cream have different consistency. That means you need to keep an eye on this in the mixing stage. If it looks lumpy, add more water. If it’s looser, add more flour.
This loaf bread may be finicky, but it’s worth the effort. The end result has that perfect fresh bread smell and soft texture. It makes your whole house smell cozy and happy, and does the very same to your belly.
I originally found this recipe in a fabulous book, The Bread Lover’s Bread Machine Cookbook by Beth Hensperger.
Bready or Not: Sour Cream Bread
Ingredients
- 1/2 cup plus 1 Tablespoon water
- 1 cup sour cream use nonstick spray on measuring cup
- 3 1/2 cups bread flour
- 1 Tablespoon light brown sugar
- 2 teaspoons vital wheat gluten
- 1 1/4 teaspoons salt
- 2 1/4 teaspoons active dry yeast
Instructions
- If you're using a bread machine, add the ingredients in the recommended order and run on dough cycle or full bread mode. I prefer to do dough cycle and bake in the oven.
- If you're using a stand mixer, blend water and sour cream. In a separate bowl, combine bread flour, brown sugar, gluten, salt, and yeast. Mix wet and dry ingredients together and knead with a dough hook.
Either method: Keep an eye on the texture. If it's wet or too tacky, add more flour. If it's too lumpy or thick, splash in a tiny bit more water as needed.
- Let dough rise until it has doubled, 1-2 hours. Grease or non-stick spray a bread pan.
- Lightly grease a surface and dump your dough onto it. With your greased hands, form the dough into a loaf shape by gently folding. Set in the pan--or glop it in, and smooth it out (that's still a professional method, I think). Cover with lightly greased plastic wrap or a shower cap.
- Let dough rise in a warm spot until it's crested to desired height, 30-60 minutes. Watch it.
- Preheat oven to 350-degrees.
- Bake bread for 20 minutes. Cover the top with foil to prevent heavy browning, then bake for an additional 15-20 minutes. When it's done, it'll sound hollow when tapped.
- Remove bread from oven and hold it over a rack so it will gently drop out; use a spatula to carefully loosen it, if needed. If you want, you can brushed the top with some butter to soften the crust and give it a shine.
- Let the bread cool at least 45 minutes before cutting. Also, you can let it cool completely and then wrap it several layers of plastic wrap before placing it in the freezer. Keeps well in freezer up to one month.
OM NOM NOM.