


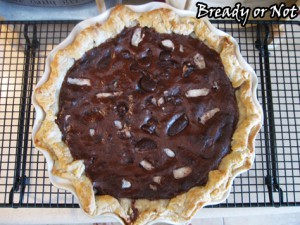
Bready or Not: No-Bake Maple Pecan Pie
I am never baking a pecan pie again. This will be my go-to recipe forever more: No-Bake Maple Pecan Pie.
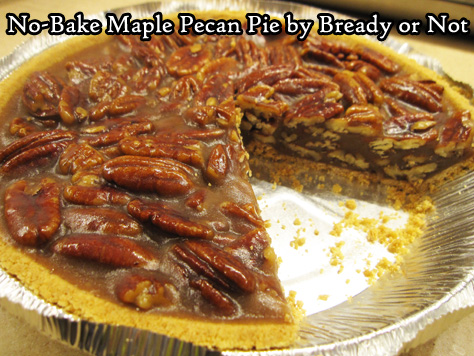
Depending on how fast your stovetop heats up, you may have your pie assembled in 15 to 20 minutes without ever having to heat up the oven.
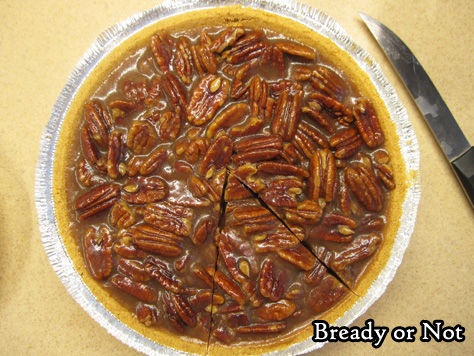
No worries about making a crust or pre-baking a crust or any of that. Every time I’ve made this, I’ve used a graham cracker crust from Wal-mart. You could make a from-scratch graham crust if you want, but I’m all about making this pie as quickly and conveniently as possible.
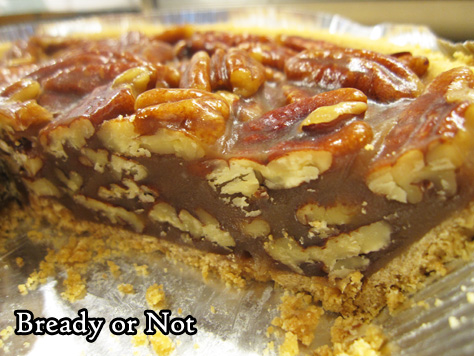
The way the filling solidifies once chilled is kind of amazing. It’s easy to cut but stays intact, with the exception of some graham cracker crumbles. My husband was able to cut slices and wrap them in plastic wrap to take with his lunch to work, then eat the pieces right out of hand. No need for a fork.
This is the perfect holiday pie, to my way of thinking. It dirties almost no dishes. It doesn’t use the oven. It keeps perfectly well, tucked in the fridge.
Oh yeah, and it’s DELICIOUS. Sweet, slightly-crunchy, and decadent, just as a pecan pie should be.

Modified from Southern Plate.
Bready or Not: No-Bake Maple Pecan Pie
Ingredients
- 3/4 cup brown sugar light or dark, packed
- 3/4 cup unsalted butter 1 1/2 sticks
- 1/4 cup pure maple syrup
- 1/4 cup honey
- 3 Tablespoons milk or cream or half & half
- 1 teaspoon vanilla extract
- 2 1/2 cups whole pecans
- 1 graham cracker crust homemade or store-bought
Instructions
- Place the brown sugar, butter, maple syrup, and honey in a medium-sized pot. Set the heat to medium high and stir constantly as it comes to a boil.
- Once it's boiling, add the pecans and milk/cream. Reduce to a low boil and keep it there for 10 to 12 minutes, stirring often. Remove from heat and add vanilla extract.
- Pour everything into the graham cracker crust. Let cool on counter to set. Cover and place in fridge to completely chill for several hours before cutting.
- Keep pie stored in fridge. Pie keeps well for at least a week.
- OM NOM NOM!
Bonus Bready or Not: Dried Apple Pie Feature at Unbound Worlds
Just in time for this week’s holidays (Independence Day! And heck, Canada Day, too!) I’m sharing a special recipe over at Unbound Worlds. I combined a bunch of 19th-century recipes to create my own recipe for Dried Apple Pie. A century ago, that was the handiest way to make apple pie all year-round no matter where you lived. This is how my character Ingrid Carmichael learned to make apple pie from her mother.
It’s actually a pretty simple recipe, too–all you have to do is re-hydrate the apples in some apple cider or juice! You’re spared the pain of peeling the apples, too. Check out the recipe and post at Unbound Worlds.
#SFWAPro
Read More
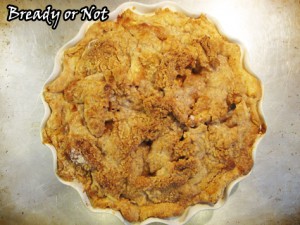
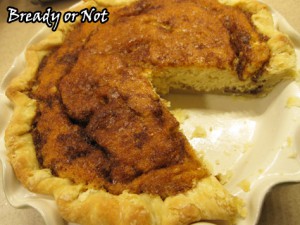
Pi Day! Celebrate with Bready or Not
It’s March 14th and that means it’s PI DAY (3.14). Therefore, it’s only right to celebrate by making and eating some pie, right? I have a whole subcategory of pie recipes in Bready or Not, but let’s highlight some favorites.
 Maple Pecan Pie Bars
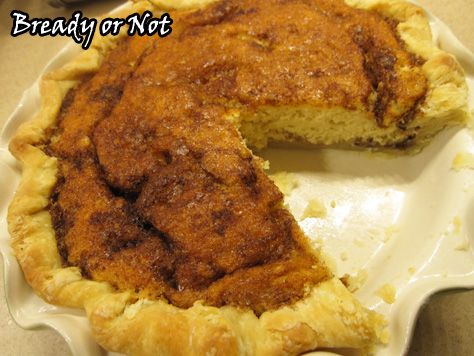
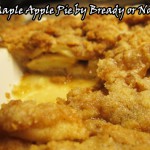
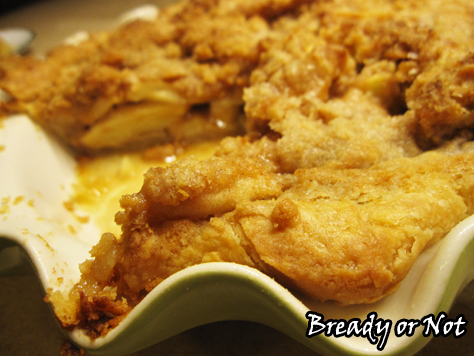
 Maple Apple Pie
 Snickerdoodle Pie
 Peppermint Brownie Pie

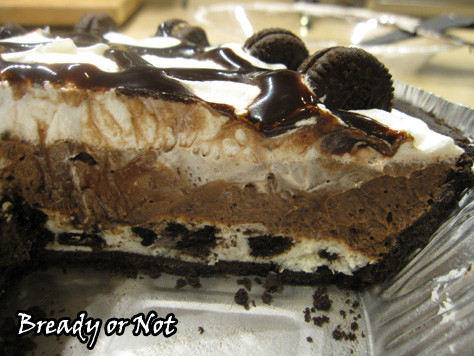
 No-Bake Cookies and Cream Chocolate Pie
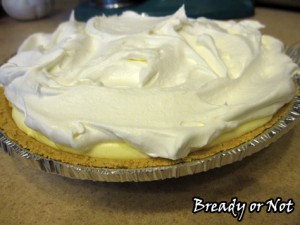 No-Bake Triple Layer Lemon Pudding Pie

Om nom nom! #SFWAPro
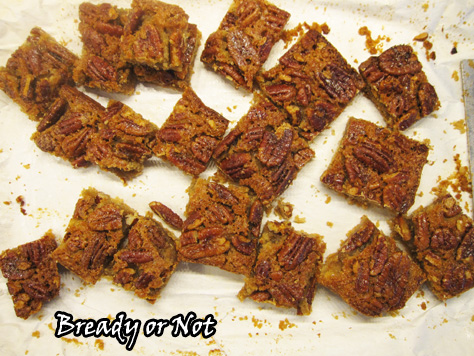
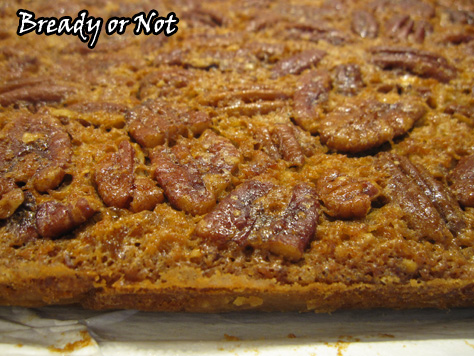
Read MoreBready or Not: Maple Pecan Pie Bars
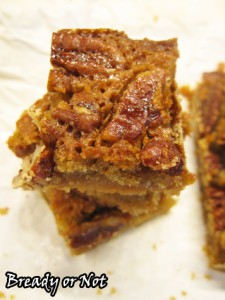
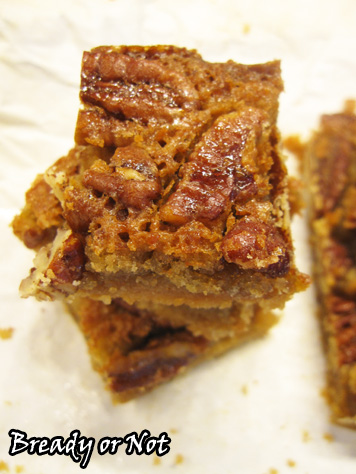
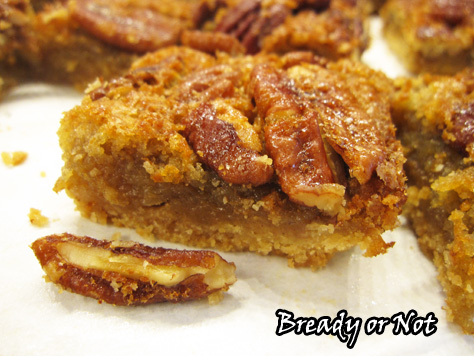
These Maple Pecan Pie Bars offer all the goodness of pecan pie in a form that is 1) more readily portable, 2) keeps well for up to a week, 3) freezable.
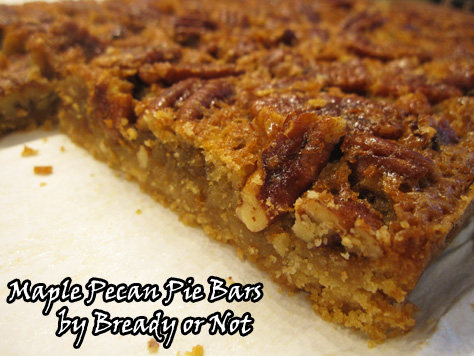
Oh, and did I mention these are DELICIOUS? They seriously are. My dad is a native Alabaman and he knows pecan pie and pecan in all forms. He LOVED these bars.
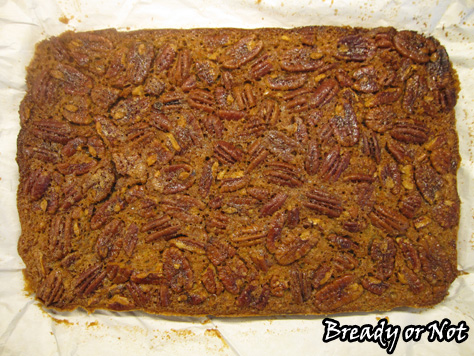
The base is shortbread, and atop that is a just-right thickness of pecans in syrup. This avoids the usual butt-ton of corn syrup that other recipes use and relies on a combo of maple syrup and brown sugar. Which is… maybe healthier? Kinda?
What matters to me, though, is that it tastes good. The maple syrup adds the right sweetness here to complement the nuts.
You don’t have to use pecans here, either. You could certainly try walnuts, cashews, or a combination. Do go for “softer” nuts, though, to make it easier to cut the bars.
I froze a bunch of pecan bars between layers of waxed paper in a freezer container. They thawed again with no difference in taste. They also keep well for at least a week, making these a good candidate for shipping.
As my dad can attest, these bars are perfect for breakfast, snack, or dessert. While you could eat them along with vanilla ice cream, they are good eaten out of hand. Heck, you can even zap them in the microwave if you want them warmed.
However or whenever you eat them, these Maple Pecan Bars will be delicious.
Modified from Bake or Break.
Bready or Not: Maple Pecan Pie Bars
Ingredients
Crust
- 1 1/2 cups all-purpose flour
- 3/4 cup light brown sugar packed
- 1/2 teaspoon salt
- 1/2 cup unsalted butter 1 stick, cold, cut into pieces
Filling
- 3 large eggs room temperature
- 1/2 cup pure maple syrup
- 1/4 cup unsalted butter 1/2 stick, melted and cooled for a few minutes
- 1/2 cup light brown sugar packed
- 1/4 cup white sugar
- 1/2 teaspoon salt
- 1 1/2 cups pecans or mixed soft nuts like walnuts or cashews
Instructions
- Preheat oven to 350-degrees. Line a 13x9-inch pan with parchment paper and lightly apply butter or nonstick spray along the bottom and sides.
- In a large bowl, mix the flour, brown sugar, and salt. Add the cold butter and use a pastry blender or a fork to mash it down into small crumbles. The overall mix will feel sandy, but it'll hold together after baking.
- Pour the crust mixture into the prepared pan. Use some wax paper and a heavy glass to compress the crumbs.
- Bake for 15 minutes or until edges are lightly browned. Set aside as you make the filling.
- Lightly beat the eggs in a large bowl. Add the maple syrup, melted-and-cooled butter, brown sugar, white sugar, and salt, stirring until combined. Stir in the pecans to coat.
- Pour filling over the partially baked crust. Bake for another 30 to 35 minutes, or until filling is set.
- Cool bars to room temperature and then use the overhanging parchment to lift the contents out to cut into bars. Store in a sealed container for up to a week, or freeze bars for later enjoyment.
- OM NOM NOM!
Read More
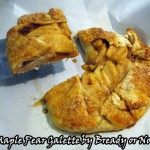
Bready or Not: Maple Pear Galette
It’s my husband’s birthday, so I’m sharing a dessert that he looooves.

This recipe laces maple sugar into every layer: the galette dough, the thick maple paste for the pears, and as a golden accent and perfect crunch for the top of the galette.
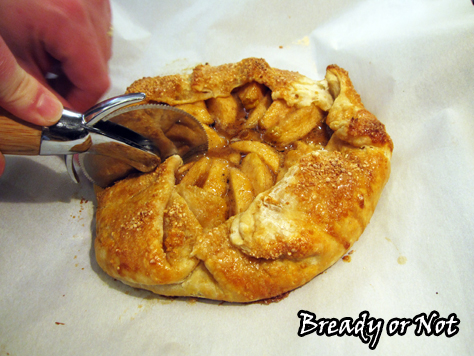
This is remarkably easy to make, too. Peeling and coring the pears is the biggest hassle. I made the dough a day ahead of time, which made the assembly part go pretty fast.
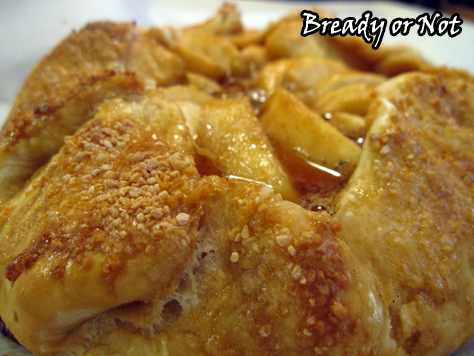
I modified this recipe from one found in this incredible cookbook called Maple by Katie Webster. Seriously, if you love maple used in dishes for any meal of the day, get this cookbook!

This galette is one of the three recipes I melded together to create my Maple Apple Pie (aka Voltron Pie). Specifically, I tweaked the maple-lemon paste for the filling and ported it over. I’m pretty certain that such a potent maple mix can improve anything. Maybe it can inspire world peace. I dunno.
In the case of this galette, though, I say give a piece a chance.
Bready or Not: Maple Pear Galette
Ingredients
- 1 1/4 cups plus 2 Tablespoons all-purpose flour divided, plus more for dusting
- 1/2 cup plus 2 Tablespoons maple sugar divided
- 1/2 teaspoon salt
- 4 Tablespoons unsalted butter
- 3 - 6 Tablespoons ice water
- 1 vanilla bean split open and scraped out, or 2 teaspoons vanilla extract
- 1 Tablespoon lemon juice
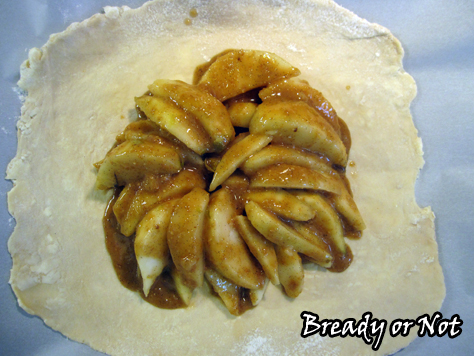
- 3 ripe pears peeled, cored, and cut into wedges
- 1 egg lightly beaten
Instructions
- In a medium bowl, whisk together the 1 1/4 cups flour, 1 tablespoon maple sugar, and salt. Add butter and work into dough so that the butter is down to pea-sized chunks. Add just enough water to incorporate as dough, smearing butter chunks in the process. Shape dough into a disk and shroud in plastic wrap; refrigerate for 30 minutes, or overnight.
- Preheat oven to 350-degrees. Place parchment paper on a large rimmed baking sheet.
- In a large bowl, gently stir together the vanilla (bean or extract), lemon juice, 2 tablespoons flour, and 1/2 cup maple sugar; it will form a thick paste. Gently stir in the pears to coat. Expect the mixture to become more liquid as it sits with the pears in it.
- Use flour to lightly dust a large work surface. Roll out the dough to at least a foot diameter circle. Transfer it to the prepared parchment paper on baking sheet; the dough might hang over the edges for now, but that's okay.
- Arrange the pears in a circular pattern in the center; leave a 2.5 to 3-inch border. Scrape the rest of the maple paste over the pears. Fold the dough inward, with the center still exposed. Brush the egg over the top and sprinkle on the maple sugar.
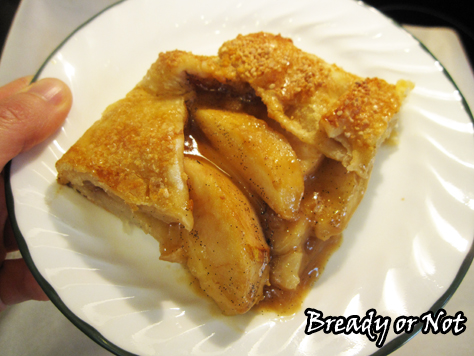
- Bake for 40 to 50 minutes, until the crust is golden and the filling bubbles. Let cool before cutting.
- OM NOM NOM!
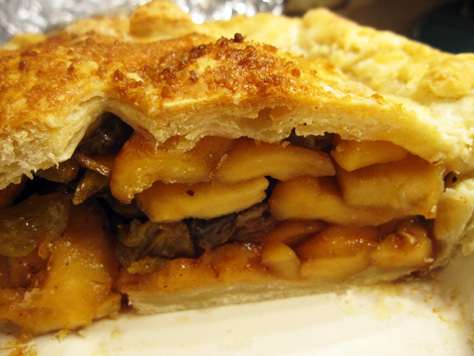
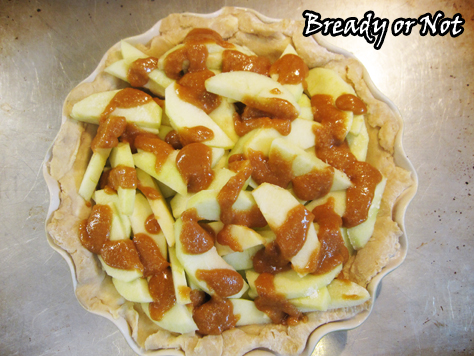
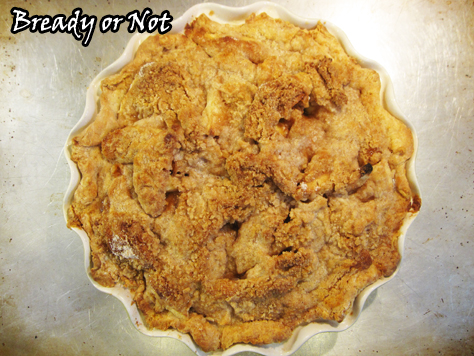
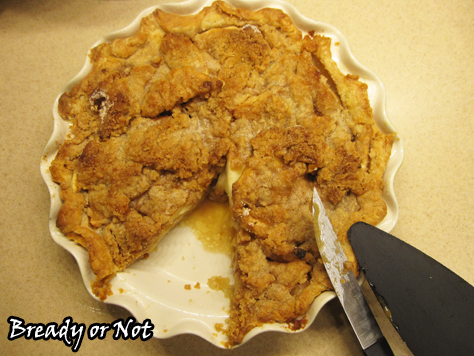
Bready or Not: Maple Apple Pie
This pie is my own original creation. I hacked together three existing recipes and amped up the maple to make something totally new. When I told my husband about how I melded everything, he said, “Oh, so it’s a Voltron pie.” That’s now our nickname for this Maple Apple Pie.

Maple sugar is the key ingredient in every step, but it’s just enough to embody the flavor without it going overkill. I highly recommend buying a big ol’ container of maple sugar–trust me, if you want to follow along with my recipes, you’ll go through it eventually. This is the brand I use:

The most amazing thing about this? The filling sauce. I borrowed and modified it from a pear galette recipe (which I’ll feature this fall) from the cookbook Maple. It’s really more like a paste in texture, grainy and strong with a lovely combo of maple and lemon. You’ll want to lick the bowl.
This pie smells glorious. It’s like autumn, Thanksgiving, Christmas. And the taste… well. My husband adores my Caramel Apple Pie and considers it his all-time favorite.
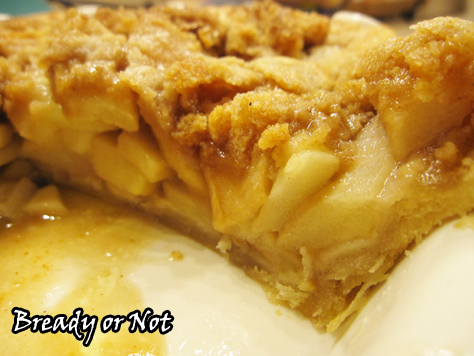
Or it was, until he had Voltron Pie.
That’s right. This maple-filled pie is the new champion in the Cato household.
Bready or Not: Maple Apple Pie
Ingredients
Crust:
- 1 1/2 cups all-purpose flour
- 1 Tablespoon maple sugar
- 1/4 teaspoon salt
- 4 Tablespoons unsalted butter 1/2 cube, cold
- 2 Tablespoons avocado oil or canola oil
- 3 - 5 Tablespoons ice water
Filling:
- 4 - 5 Granny Smith apples
- 1 teaspoon vanilla extract or a vanilla bean, scraped
- 1 Tablespoon lemon juice
- 2 Tablespoons all-purpose flour
- 1/2 cup maple sugar
Crumb topping:
- 2/3 cup all-purpose flour
- 1/4 cup white sugar
- 1/4 cup maple sugar
- 1/2 teaspoon ground cinnamon
- 1/2 cup unsalted butter 1 stick , cold
Instructions
- Combine crust ingredients. Work in butter until it is just pea-sized, and use only as much water as needed to make the dough cohesive. Wrap well in plastic wrap and refrigerate for a few hours or a few days.
- Roll out dough to equal thickness and place in pie dish. Cover with plastic wrap and freeze while preparing the filling, or freeze for several days.
- Preheat oven at 375-degrees. Peel and core apples and slice to 1/8s or smaller. Toss them in a light dusting of flour to prevent sticking. Place apples in pie crust on a cookie sheet.
- In a small bowl, whisk together the vanilla extract, lemon juice, flour, and maple sugar; it'll form a thick maple paste. Set aside.
- In another small bowl, combine the topping ingredients. Use a fork and knife to reduce the butter to pea-sized chunks.
- Return to the maple sauce. Give it a good stir, and drizzle thick syrup all over apples. Cover evenly with crumb topping.
- Bake for 40-45 minutes, or until the apples are tender when stabbed with a fork.
- OM NOM NOM!
Read More
Follow me


