


Bready or Not Original: Fruity Pastry Bars
These Fruity Pastry Bars are the perfect treat for a crowd. This recipe makes a nice big pan to share with others!
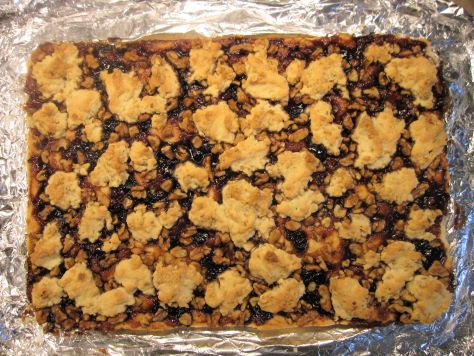
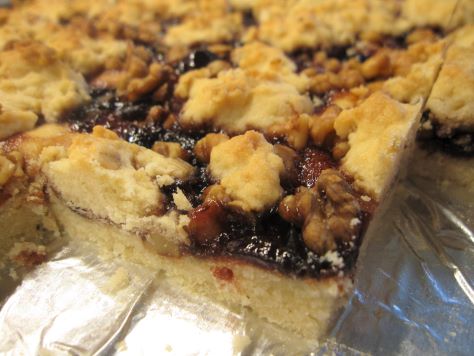
When I make bars like this, I’m always worried about how crumbly they will be. I can report that, at least for me, these were surprisingly durable bars that could even be held in the hand when eating. They barely crumbled when they were cut.

I love how they can be customized, too. You can use all sorts of berry preserves; these pictures depict Bonne Maman Cherry Preserves. The rich, bold flavor is lovely with the buttery crust, while the nuts add a great textural contrast. Of course, you could substitute different nuts like sliced almonds, or omit them entirely.
Bready or Not Original: Fruity Pastry Bars
Equipment
- jelly roll pan
- aluminum foil
- nonstick spray
Ingredients
Bars
- 1 1/2 cup unsalted butter (3 sticks) room temperature
- 1 1/4 cups white sugar
- 2 large eggs room temperature
- 1 teaspoon vanilla extract
- 1 teaspoon salt
- 3 1/2 cups all-purpose flour
Topping
- 12 to 13 ounces fruit preserves such as strawberry, cherry, or raspberry
- 1 cup chopped walnuts
- 1/4 cup quick oats
Instructions
- Line a jelly roll pan with a large piece of aluminum foil. Apply nonstick spray or butter. Preheat oven at 350-degrees.
- In a large bowl, cream together the butter and sugar until light and fluffy. Beat in eggs and vanilla. Gradually mix in the flour and the salt. Batter will be very thick. Grease a hand and use that to pat down about 3/4 of the dough into the bottom of the pan.
- Wash hands. Spread preserves over the dough. Sprinkle the walnuts over the top. Add quick oats to the reserved dough. Place small handfuls of dough spaced out over the top.
- Bake for about 35 minutes, until top is set and doesn’t jiggle in middle. Cool completely, speeding process in fridge if desired. Use foil to lift contents onto a cutting board to slice into bars. Store in a sealed container. Bars can also be frozen for later enjoyment.
OM NOM NOM!
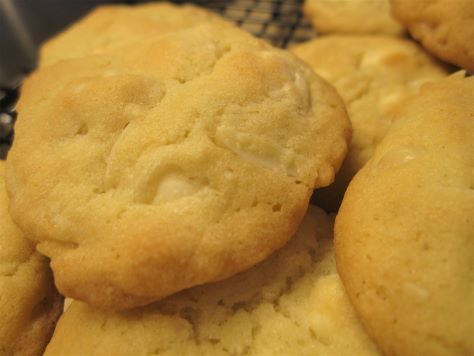
Bready or Not: Almond White Chocolate Cookies
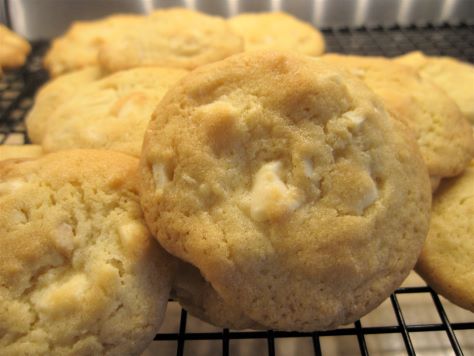
These Almond White Chocolate Cookies are quick to fix-up and bake, making them the perfect treat when you need cookies in a hurry!
And who among us hasn’t had a few cookie emergencies in their lives, truly?
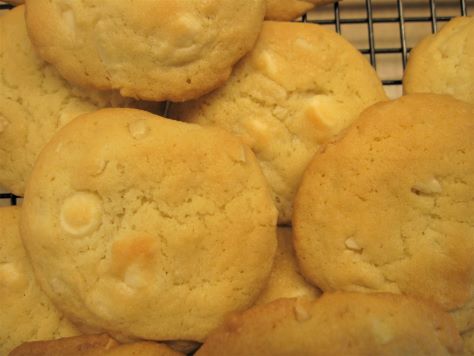
These cookies are light and crisp. The almond flavor is imbued in the dough thanks to almond extract and the almond slivers throughout. White chocolate is the perfect sweet to balance with the nuttiness.
Modified from a McCormick product ad.
Bready or Not: Almond White Chocolate Cookies
Equipment
- parchment paper
- baking sheet
- teaspoon scoop
Ingredients
- 2 1/2 cups all-purpose flour
- 1 teaspoon baking soda
- 1/2 teaspoon salt
- 1 cup unsalted butter (2 sticks) room temperature
- 1 1/4 cups white sugar
- 2 large eggs room temperature
- 1 1/2 teaspoons almond extract
- 9 ounces white chocolate chips
- 1 cup slivered almonds
Instructions
- Preheat oven at 375-degrees. Line a baking sheet with parchment paper.
- In a medium bowl, combine flour, baking soda, and salt. Set aside.
- In a large bowl, beat butter and sugar until they are light and fluffy. Add the eggs and almond extract. Gradually add in the dry ingredients, scraping the bowl as needed. Fold in the white chocolate and almonds.
- Use a teaspoon scoop to place dough, spaced out, on cookie sheet. Bake for 7 to 9 minutes, until cookies are set. Immediately transfer to a rack to cool.
- Store cookies in a sealed container at room temperature.
OM NOM NOM!
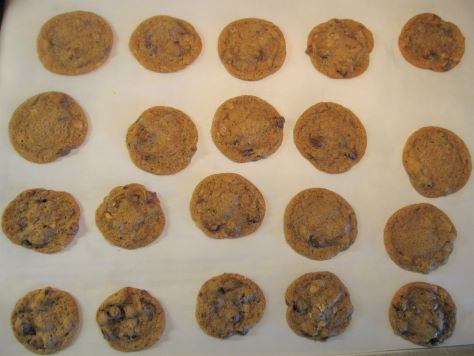
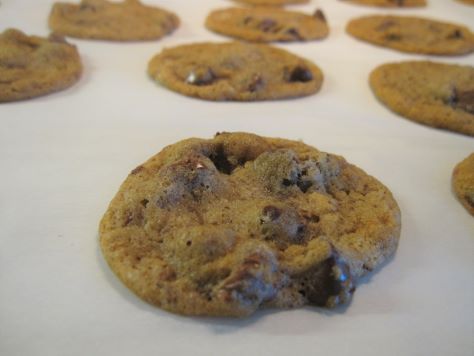
Bready or Not Original: Chewy Honey Graham Cracker Cookies
Today’s Chewy Honey Graham Cracker Cookies are a new twist on my original Chewy Honey Cookie base recipe.
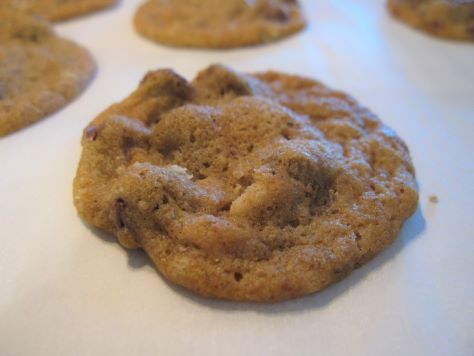
This time around, crushed graham crackers are substituted for some of the all-purpose flour. This not only changes the texture, adding some pleasant grittiness, but also introduces a different sort of sweetness that pairs beautifully with chocolate.
Want to try some of my other original cookie recipes that use this same base? Here you go!
Chewy Honey Chocolate Chip Cookies
Bready or Not Original: Chewy Honey Graham Cracker Cookies
Equipment
- plastic wrap
- teaspoon or tablespoon scoop
Ingredients
- 3/4 cup 1 1/2 sticks unsalted butter softened
- 1/2 cup light brown sugar packed
- 1/2 cup white sugar
- 2 Tb honey
- 1 large egg room temperature
- 1 Tablespoon vanilla extract
- 1 cup bread flour
- 1/2 cup all-purpose flour
- 1/2 cup graham cracker crumbs
- 2 teaspoons cornstarch
- 1 teaspoon baking soda
- 1/2 teaspoon salt
- 1 cup chocolate chips add a variety!
Instructions
- In a large bowl, beat the butter until smooth. Add the sugar and honey and beat until creamy and fluffy, about 3 minutes. Scrape down the sides of the bowl and then mix in the egg and vanilla extract.
- In a separate bowl, combine the dry ingredients: bread flour, all-purpose flour, graham cracker crumbs, cornstarch, baking soda, and salt. Sift together.
- Slowly stir together the wet ingredients and flour mix until just combined. Sprinkle in the chocolate chips. Wrap the dough in plastic wrap and stash in the fridge for several hours or days; dough can also be frozen at this stage.
- When ready to bake, preheat the oven at 350-degrees. Use greased stoneware, parchment paper, or silpat mats. The cookie dough, even straight from the fridge, has a soft Play-Doh-like consistency, and will spread when it bakes; keep this in mind when spacing cookie dough.
- Teaspoon-sized cookies need to bake 9 to 12 minutes; Tablespoon-sized take 11 to 13 minutes. Let set on cookie sheets for 10 to 15 minutes before moving to a rack to cool completely.
- Store cookies will keep in a sealed container, between waxed paper or parchment layers, for weeks. They are excellent for travel or shipping.
OM NOM NOM!
Bready or Not: Sicilian Orange Bundt Cake
If you’re in need of a refreshing summer bundt cake, look no further. This Sicilian Orange Bundt Cake is it.

This is a super-easy cake to make. The ingredients are minimal. It doesn’t make a massive cake. The oranges get used in the cake and in the glaze, so nothing is likely to go to waste.
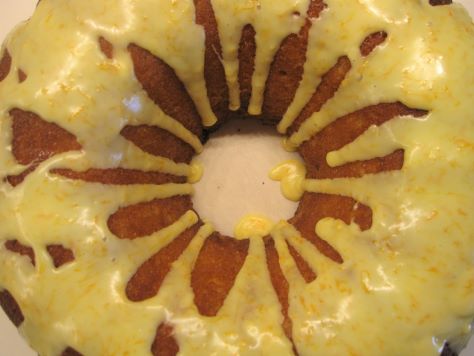
I love that the orange makes the cake look orange AND taste orange. There is something aesthetically pleasing about that. No surprises, no fake-outs. Orange cake tastes like orange. Got it.

If you have any leftovers, no worries. I found that the cake freezes wonderfully, even glazed. Freeze those extra slices the first day and they’ll taste fresh when you thaw them later!
Modified from Food & Wine September 2020 issue.
Bready or Not: Sicilian Orange Bundt Cake
Equipment
- small bundt cake pan
Ingredients
Cake
- 2 cups all-purpose flour
- 3 large oranges zested and juiced
- 1 1/2 Tablespoons baking powder
- 1 1/2 cups white sugar
- 1/2 cup vegetable oil
- 3 large eggs room temperature
Glaze
- 3/4 cup confectioners’ sugar
- 3 teaspoons orange juice
- orange zest
Instructions
- Preheat oven at 350-degrees. Use a baking spray with flour (or alternatively, some extra vegetable oil and flour) to coat the interior of the bundt pan. Set aside.
- In a small bowl, combine the flour, 2 Tablespoons of orange zest (the rest reserved for the glaze), and baking powder. Set aside.
- In a big mixing bowl, beat together sugar, vegetable oil, and eggs on high speed until it becomes quite pale, about a minute and a half. Add 1 1/4 cups orange juice, beating until combined. Gradually mix in the dry ingredients, scraping bottom of bowl as needed.
- Pour batter into the pan. Bake for 45 minutes, until the middle passes the toothpick test. Cool for about 20 minutes, then invert it onto a rack to completely cool, speeding the process in the fridge if desired.
- Make the glaze. Measure out the sugar. Add orange juice and any remaining zest. If mixture is thick, add a touch more juice; if runny, add more sugar. It should be a thick texture as it is drizzled on the cake. Let glazed cake set at least 30 minutes at room temperature or in fridge before slicing in.
- Cake is great kept sealed at room temperature for up to 3 days. It can also be sliced and frozen, glaze and all, and makes for a delicious treat even weeks later.
