


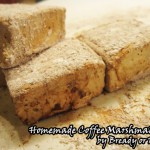
Bready or Not: Coffee Marshmallows
Let’s end the year on an obnoxiously sweet note with homemade Coffee Marshmallows. If you want to send someone a late gift or sabotage a New Year’s resolution, here you go.
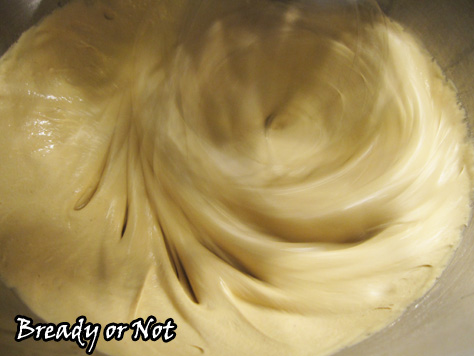
This recipe involves lots of beating. No, not with a stick. You’ll want a good stand mixer, or be ready for your hand to vibrate to numbness if you use a hand mixer. I don’t recommend doing this with a whisk in hand. Your hand might fall off.
Not recommended, unless your last name is Skywalker and you have access to cool prostheses.
Once I started the recipe, I had the bulk of it done in about an hour. My stove is reeeeaaally slow to heat up. I did the mixing in my valiant Kitchen Aid.
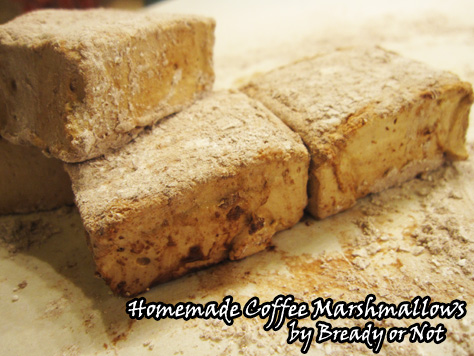
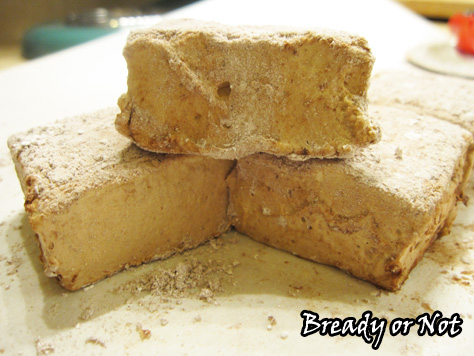
The results were fantastic: soft yet dense blocks of sugary goodness, coated in more sugary goodness.
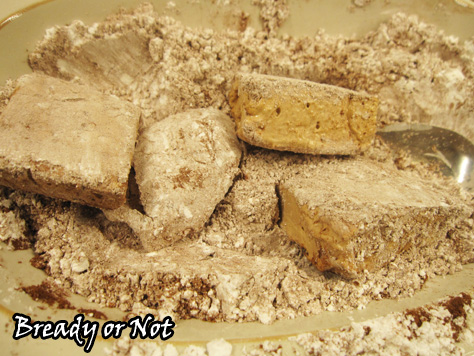
This makes a 9×13 pan. That’s a lot of mallows. They’re supposed to stay fresh up to a week if they are well-sealed. Bag these things up! Eat them by themselves, or plunked in coffee or hot chocolate.
Originally posted at the Holy Taco Church.
Bready or Not: Coffee Marshmallows
Ingredients
Powder coating
- 1/4 cup confectioners' sugar
- 1/4 cup corn starch
- 1 tablespoon Dutch-processed cocoa powder sifted
Marshmallows
- 3/4 cup warm water divided
- 1 Tablespoon espresso powder
- 3 envelopes Knox gelatin
- 1 1/2 cups white sugar
- 1 cup light corn syrup
- 1/2 teaspoon salt
Later mixing stage additions
- 2 Tablespoons Dutch-processed cocoa powder sifted
- 2 teaspoons vanilla extract
- Pam or oil for pan
Instructions
- Whisk together 1/2 cup warm water and the instant espresso. Let this cool in the fridge for a bit.
- In a medium bowl, sift together the powdered sugar, corn starch and cocoa powder.
- Grease a large casserole dish (like 9x13 or 10x8) with Pam or vegetable oil. Sift a small bit of the powdered sugar/cocoa mix over the bottom of the pan.
- Pour the cooled coffee into the large bowl you will use for the mixing phase. Sprinkle the gelatin onto the coffee and let it sit for at least 10 minutes. Have a whisk attachment ready on your mixer.
- In a medium sauce pan with an attached candy thermometer, combine the granulated sugar, corn syrup, salt and remaining 1/4 cup of water. Start heating this on medium until the sugar is dissolved and then crank it to high heat. Bring the mixture to a hard boil and cook for 1 minute, until the candy thermometer reaches 240 degrees. The color will start to change.
- With the mixer on low, VERY CAREFULLY pour the boiling liquid into the gelatin/coffee mix. Once it's all in there, turn it to high and beat for 10-15 minutes, until it has doubled in volume and holds stiff peaks. Note that the color will change dramatically in stages.
- Add in the remaining cocoa powder and vanilla extract and beat for another minute or so, until they are mixed in.
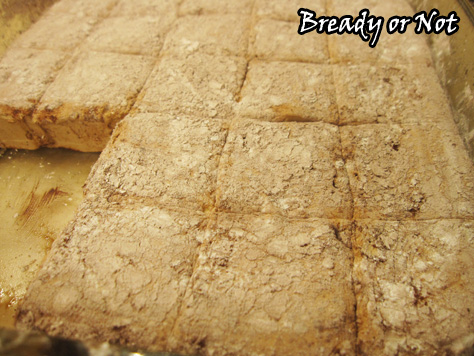
- Pour the very sticky goop into the ready casserole dish. Use a well-greased spatula to even it out. Add a few tablespoons of the cocoa/sugar mix and use your fingers to dust that over the top. Cover the dish with foil or plastic wrap and let it firm up. Give it at least four hours, or overnight.
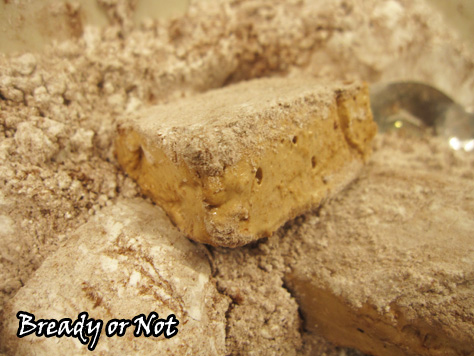
- Run a knife along the edges of the pan to loosen the marshmallows. You can try inverting the whole block onto a large cutting board, or use a knife or pizza cutter to do basic rectangles and then remove portions at a time. Cut the marshmallows into 1-inch cubes and toss them in the cocoa/sugar mix.
- Store the coffee marshmallows in an airtight container for up to one week. Enjoy them straight-up, or in coffee or hot cocoa.
- OM NOM NOM!
Read More
Sunday Quote wishes you a blessed day
Read More“There is no real ending. It’s just the place where you stop the story.”
~ Frank Herbert
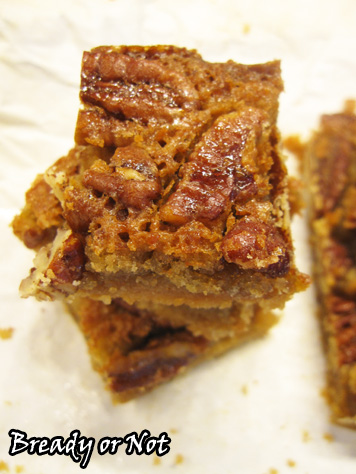
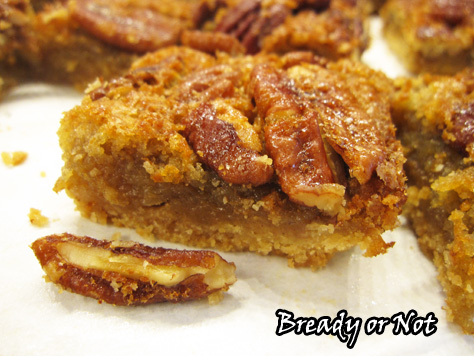
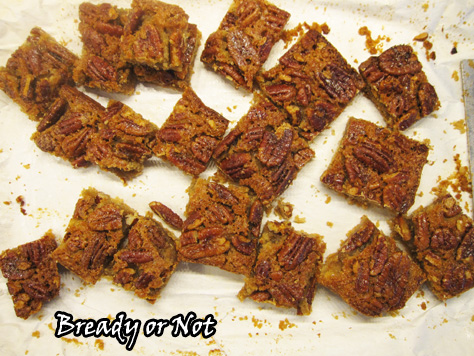
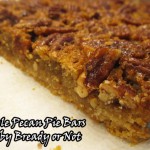
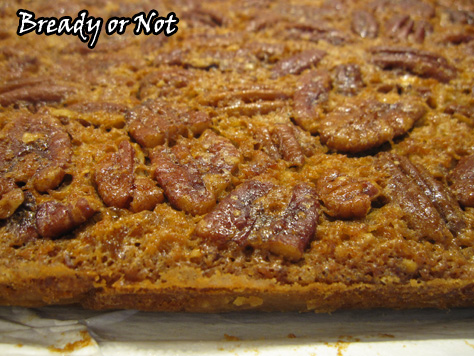
Bready or Not: Maple Pecan Pie Bars
These Maple Pecan Pie Bars offer all the goodness of pecan pie in a form that is 1) more readily portable, 2) keeps well for up to a week, 3) freezable.
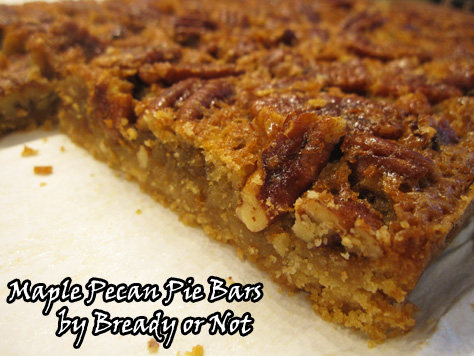
Oh, and did I mention these are DELICIOUS? They seriously are. My dad is a native Alabaman and he knows pecan pie and pecan in all forms. He LOVED these bars.
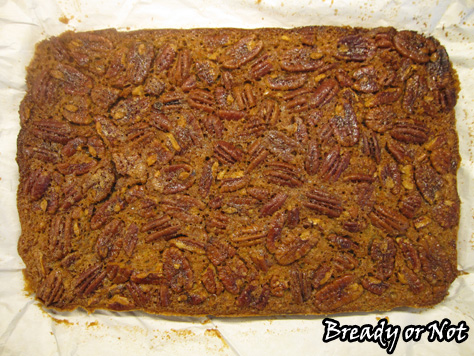
The base is shortbread, and atop that is a just-right thickness of pecans in syrup. This avoids the usual butt-ton of corn syrup that other recipes use and relies on a combo of maple syrup and brown sugar. Which is… maybe healthier? Kinda?
What matters to me, though, is that it tastes good. The maple syrup adds the right sweetness here to complement the nuts.
You don’t have to use pecans here, either. You could certainly try walnuts, cashews, or a combination. Do go for “softer” nuts, though, to make it easier to cut the bars.
I froze a bunch of pecan bars between layers of waxed paper in a freezer container. They thawed again with no difference in taste. They also keep well for at least a week, making these a good candidate for shipping.
As my dad can attest, these bars are perfect for breakfast, snack, or dessert. While you could eat them along with vanilla ice cream, they are good eaten out of hand. Heck, you can even zap them in the microwave if you want them warmed.
However or whenever you eat them, these Maple Pecan Bars will be delicious.
Modified from Bake or Break.
Bready or Not: Maple Pecan Pie Bars
Ingredients
Crust
- 1 1/2 cups all-purpose flour
- 3/4 cup light brown sugar packed
- 1/2 teaspoon salt
- 1/2 cup unsalted butter 1 stick, cold, cut into pieces
Filling
- 3 large eggs room temperature
- 1/2 cup pure maple syrup
- 1/4 cup unsalted butter 1/2 stick, melted and cooled for a few minutes
- 1/2 cup light brown sugar packed
- 1/4 cup white sugar
- 1/2 teaspoon salt
- 1 1/2 cups pecans or mixed soft nuts like walnuts or cashews
Instructions
- Preheat oven to 350-degrees. Line a 13x9-inch pan with parchment paper and lightly apply butter or nonstick spray along the bottom and sides.
- In a large bowl, mix the flour, brown sugar, and salt. Add the cold butter and use a pastry blender or a fork to mash it down into small crumbles. The overall mix will feel sandy, but it'll hold together after baking.
- Pour the crust mixture into the prepared pan. Use some wax paper and a heavy glass to compress the crumbs.
- Bake for 15 minutes or until edges are lightly browned. Set aside as you make the filling.
- Lightly beat the eggs in a large bowl. Add the maple syrup, melted-and-cooled butter, brown sugar, white sugar, and salt, stirring until combined. Stir in the pecans to coat.
- Pour filling over the partially baked crust. Bake for another 30 to 35 minutes, or until filling is set.
- Cool bars to room temperature and then use the overhanging parchment to lift the contents out to cut into bars. Store in a sealed container for up to a week, or freeze bars for later enjoyment.
- OM NOM NOM!
Read More
Sunday Quote is an optimistic pessimist
Read More“Life’s under no obligation to give us what we expect.”
~ Margaret Mitchell
D is for Dinosaur Cover Reveal
I’m contributing a story to the fourth volume in the Alphabet Anthology series… and this new book focuses on DINOSAURS. How cool is that?! And here’s the cover, revealed this week:
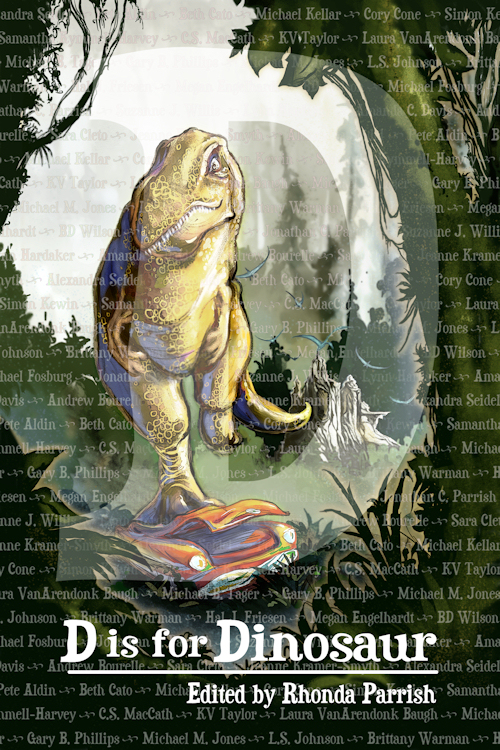
For the fourth installment of Rhonda Parrish’s Alphabet Anthologies, contributors were challenged to write about dinosaurs. The resulting twenty-six stories contain widely different interpretations of the dinosaur theme and span the spectrum from literal to metaphoric.
Within these pages stories set in alternate histories, far-flung futures and times just around the corner, dinosaurs whimper and waste away, or roar and rage. People can be dinosaurs, as can ideas, fictions and flesh. Knitted dinosaurs share space with ghostly, genetically engineered and even narcotic ones.
Teenagers must embrace their inner dinosaurs in order to find peace and belonging, a dying woman duels a God in a far future city that echoes aspects of our past, an abused wife accompanies her husband on a hunt for an ancient power and finds more than she could ever have imagined and a girl with wonderful magical powers stumbles across the bones of a giant long-dead lizard. And so much more!
The book will be released on February 21st. It’s already listed on LibraryThing and Goodreads.
#SFWAPro
Read More