


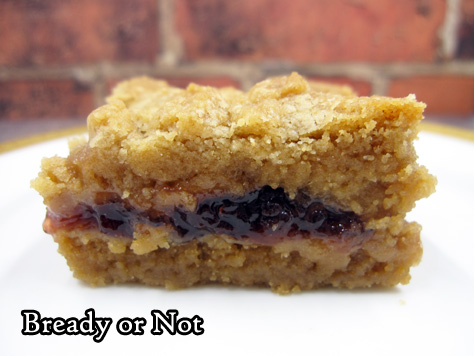
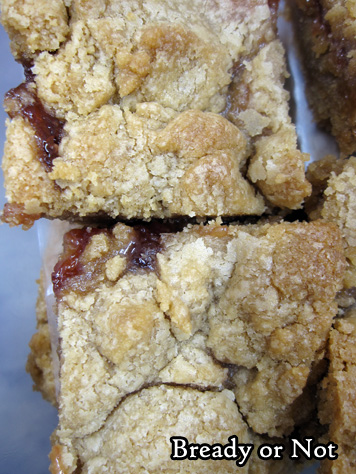
Bready or Not Original: Chewy Filled Bars
I present to you my Chewy Filled Bars: a versatile recipe that can use any number of fruit preserves, fruit butters, or other sweet filling, combined with different nuts or seeds, all to unique, delicious result.
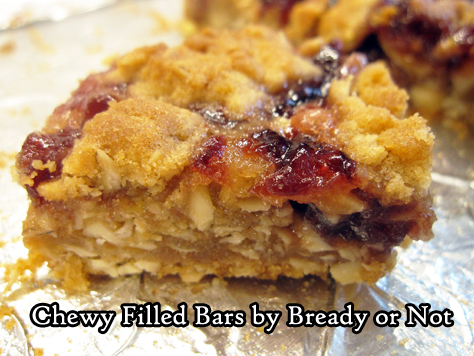
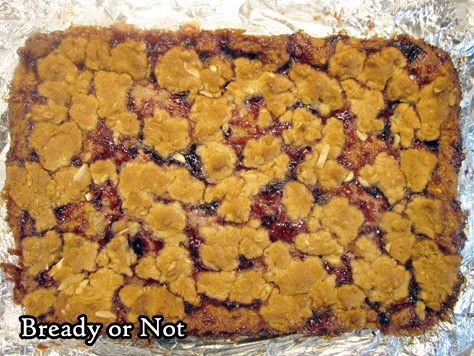
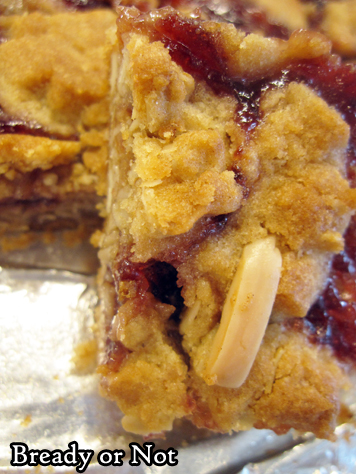
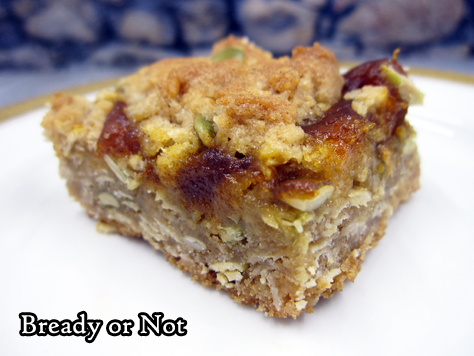
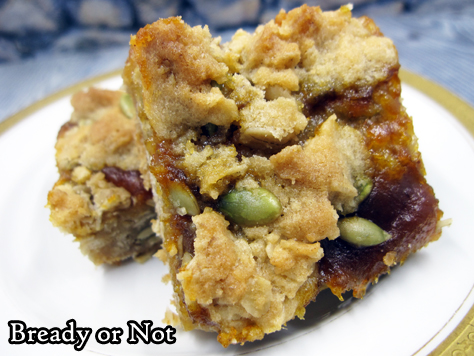
These pictures display the recipe using Sprouts Cherry Preserves (with slivered almonds and almond extract) and Sprouts Maple Pumpkin Butter (with pepitas and almond extract).
However, I also made the same recipe using Trader Joe’s cinnamon bun filling (with chopped pecans and vanilla extract) and Apple Cider Spread (with chopped walnuts and vanilla extract). Every single version was awesome.
The jarred filling I used varied from 12 to 14 ounces. All worked well, though the Cinnamon Bun Filling required a 40 minute bake to set. I liked mixing in different nuts or seeds to pair with the filling, but you could also omit that ingredient completely, if desired.
No matter the mix-ins, the result is a pleasantly thick, chewy bar that is just sweet enough.

Bready or Not Original: Chewy Filled Bars
Equipment
- 13x9 pan
Ingredients
- 1 cup unsalted butter room temperature
- 2 cups brown sugar packed
- 2 teaspoons baking powder
- 1 large egg
- 1 teaspoon almond extract or substitute vanilla extract
- 2 cups all-purpose flour
- 2 cups old-fashioned rolled oats
- 1/2 cup slivered almonds or sliced almonds or substitute other nuts or seeds
- 12 to 14 ounce fruit preserves or fruit butter or other sweet filling; possibilities include cherry preserves, pumpkin butter, cinnamon bun filling, etc
Instructions
- Preheat oven at 350-degrees. Line a 13x9 pan with aluminum foil and apply nonstick spray or butter.
- In a large bowl, beat butter until creamy. Add brown sugar and baking powder. Follow up with egg and almond extract. Gradually mix in flour, oats, and sliced almonds.
- Set aside 1 cup of dough. Press the rest into the bottom of the prepared pan. A piece of waxed paper and heavy glass will help to compress it into a form, even layer. Spread preserves over top. Crumble the reserved dough over the fruit.
- Bake for 30 to 35 minutes, until top is lightly brown and no longer wobbly in the middle. Completely cool at room temperature, speeding process in the fridge, if desired. Use foil to lift contents onto cutting board to slice up.
- Store in sealed containers with waxed paper or parchment between the layers. Keeps at room temperature for days, and can also be frozen for weeks.
OM NOM NOM!
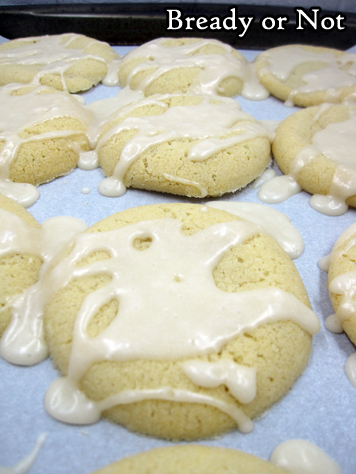
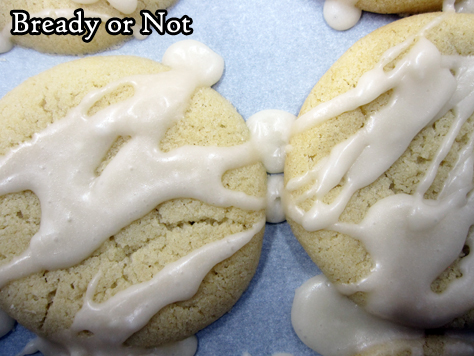
Bready or Not Original: Soft Maple Sugar Cookies
Soft Maple Sugar Cookies! That’s right, this recipe combines two of the best things ever for an original treat.
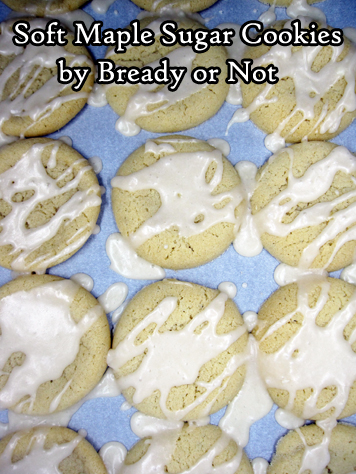
It has been way too long since I offered up a maple-flavored treat. These are so good, they make up for that lapse in a major way.
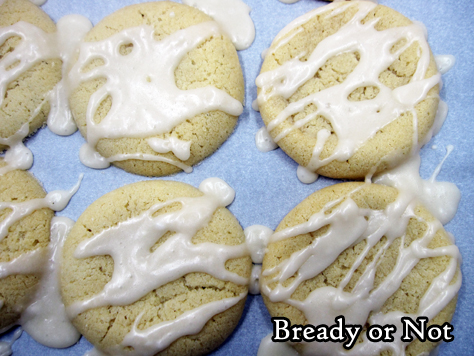
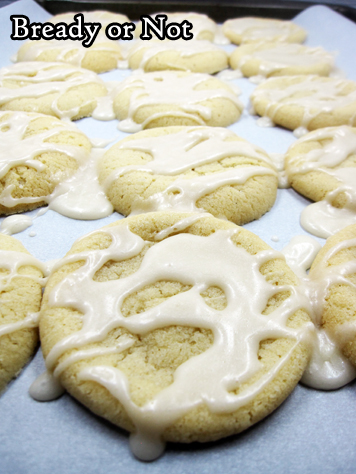
These are soft, chewy cookies. Maple flavor is built into the dough, and the drizzle of glaze adds a touch more.
I wish I could say how long these cookies will keep, but I don’t know. They stayed delicious for at least one full day, then they went to my husband’s work and were goooooooone.
You’ll have to bake them yourself and see how long they last!
Bready or Not Original: Soft Maple Sugar Cookies
Equipment
- teaspoon scoop
- parchment paper
Ingredients
Dough
- 1/2 cup unsalted butter softened 1 stick
- 1/2 cup shortening
- 1 1/2 cups white sugar
- 1/4 cup brown sugar packed
- 1/4 cup pure maple syrup
- 1 teaspoon baking soda
- 1 teaspoon cream of tartar
- 1/8 teaspoon salt
- 3 egg yolks
- 1 teaspoon vanilla extract
- 1 teaspoon maple flavor
- 1 3/4 cups all-purpose flour
Glaze
- 1/4 cup unsalted butter half stick
- 2 cups confectioners' sugar plus more is needed for thickness
- 1/4 cup half & half or milk
- 3 Tablespoons maple syrup
Instructions
- Preheat oven at 300-degrees. In a large bowl, beat together butter and shortening. Add both sugars, maple syrup, baking soda, cream of tartar, and salt. Beat for about 2 minutes, scraping bottle of bowl often. Add egg yolks one at a time, followed by vanilla extract and maple flavor. Mix in flour until just combined.
- Use a scoop or spoon to dollop dough onto a parchment paper-lined cookie sheet, spacing out to account for spread. Bake for 11 to 16 minutes. Let set on cookie sheet for 10 minutes, then transfer to a rack to completely cool.
- Once all cookies are baked and cooled, move them back to the parchment-covered pan, close together, before mixing glaze.
- In a small bowl, melt butter in microwave. Add the confectioners' sugar to bowl, followed by half & half and maple syrup. Stir. Add more sugar, if needed, to form a thick consistency. Drizzle all over cookies. Let set for 30 minutes to 1 hour before moving to sealed containers.
OM NOM NOM!
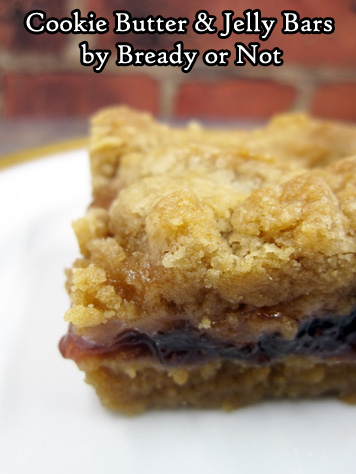
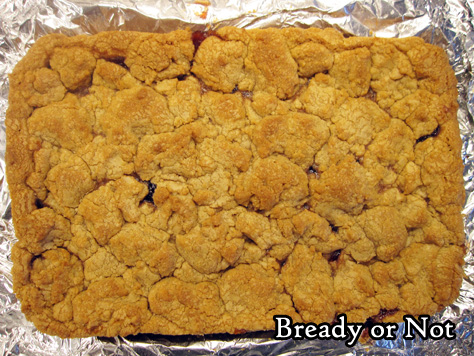
Bready or Not Original: Cookie Butter and Jelly Bars
Cookie butter and Jelly Bars! These things are soft and chewy, creating a whole casserole dish-worth of luscious goodies.
As often as I’ve advocated for cookie butter on Bready or Not, it seems people are always discovering it for the first time. Lucky you! It’s essentially pulverized cookies in spreadable form.
You can find generic versions or Biscoff brand at places like Walmart, Target, and Sprouts, and Trader Joe’s is famous for their Speculoos jars.
In these bars, cookie butter adds incredible softness and amps up the cookie flavor. That’s right, it has this weird ability to make cookies taste more like cookies.

Use whatever jelly or jam or preserves you want. Try not to spread it to the very edge, as it can be very sticky on the foil, even if it’s well-greased.
Bready or Not Original: Cookie Butter and Jelly Bars
Ingredients
- 1 cup unsalted butter 2 sticks, room temperature
- 1 1/2 cups white sugar
- 1 teaspoon vanilla extract
- 2 large eggs
- 2 cups creamy cookie butter
- 3 cups all-purpose flour
- 1 teaspoon baking powder
- 13 ounce jelly or preserves or jam, about 1 1/2 cups
Instructions
- Preheat oven at 350-degrees. Line a 13x9 baking pan with foil and apply nonstick spray or butter.
- In a big bowl, cream together butter and sugar until light and fluffy, scraping bottom of bowl as necessary. Follow up with the eggs, vanilla, and cookie butter, until blended.
- Gradually mix in the flour and baking powder.
- Spread about 2/3 of the batter in the prepared pan. Spread the jelly but not quite to the edges. Dollop the remaining dough all over the top.
- Bake for 25 to 30 minutes, until the surface is golden and not jiggly, with the middle passing the toothpick test.
- Cool completely at room temperature or in the fridge. Use foil to lift contents onto a cutting board to parcel into bars. Store in a sealed container with waxed paper or parchment paper between the layers, either in the fridge or on the counter.
OM NOM NOM!
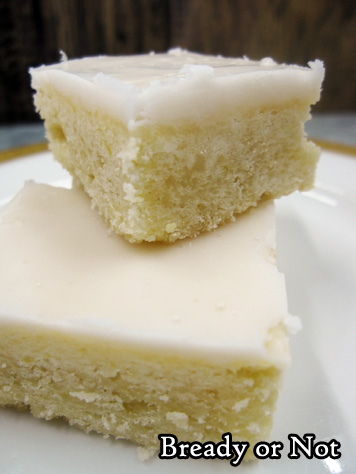
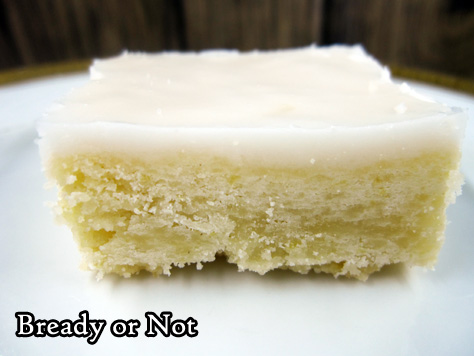
Bready or Not: Lemony Glazed Shortbread Bars
April’s lemon theme lingers into May with this week’s luscious Lemony Glazed Shortbread Bars.
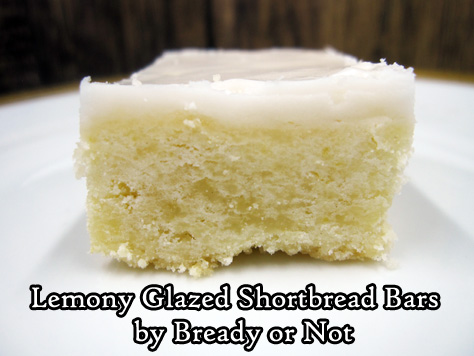
These things rely fully on lemons, no bottled lemon extract or flavor required. Get a lot of lemons. You need 6, maybe 7 medium or small lemons, or 4 giant lemons. Better to have leftover zest or juice rather than not enough.
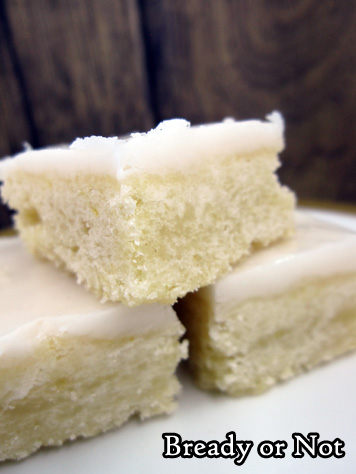
This dough is incredibly fun to work with, too. Thanks to the cornstarch with the flour, the result is soft and pliable like Play-Doh.
Most recipes I post that include glaze require the baked good to be completely cool first. Not so here. Make the glaze as soon as the dish is baked and put it on promptly. That means the glaze melts a bit after it’s spread on top, fusing with the bars.
With so much lemon infused into these bars, these things ends up smelling so summer and fresh, and the taste…! If you love lemon, these shortbread bars are totally for you.
Bready or Not: Lemony Glazed Shortbread Bars
Ingredients
Bars
- 3 cups all-purpose flour
- 1/3 cup cornstarch
- 1 1/4 cups confectioners' sugar
- 1/4 cup finely shredded lemon zest from 4 giant lemons or about 6 large lemons
- 1 1/2 cups unsalted butter 3 sticks, room temperature
- 1 Tablespoon lemon juice
- 1/2 teaspoon salt
- 1/2 teaspoon vanilla extract
Glaze
- 2 1/2 cups confectioners' sugar
- 3 Tablespoons lemon juice
- 1 Tablespoon light corn syrup
- 1/2 teaspoon vanilla extract use clear extract if available, as regular will tint glaze a bit
Instructions
- Preheat oven at 300-degrees. Line a 13x9 pan with foil and apply nonstick spray or butter.
- In a bowl, sift together flour and cornstarch; set aside.
- In another bowl, combine the confectioners' sugar and lemon zest. Using fingers, break apart the zest within the sugar to distribute the threads and release the oils. The result should be more yellow in coloration and quite fragrant.
- In a big bowl, beat together the butter, lemon juice, salt, and vanilla extract until it becomes creamy, scraping bowl as needed. Gradually mix in the sugar and zest. Slowly work the flour/cornstarch mix into the big bowl. The dough should become pliable and cling together, until it can be formed into a ball.
- Press dough evenly into the pan. Bake for 40 minutes.
- Immediately make glaze. Stir together everything to form a thick, spreadable glaze; thicken with more sugar, if necessary, or add extra lemon juice or water to loosen it. Spread glaze over bars.
- Cool completely, stashing dish in fridge to speed process if desired.
- Use foil to lift contents onto a cutting board. Slice into bars. Store in a sealed container, with waxed paper between stacked layers, either at room temperature or in the fridge. Keeps for at least 2 days.
OM NOM NOM!
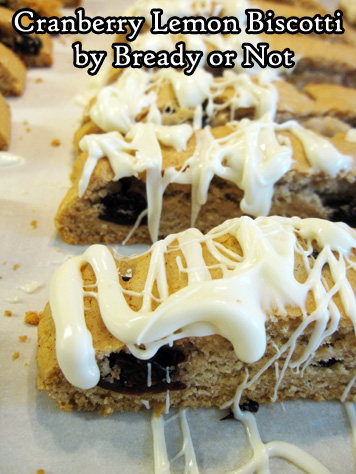
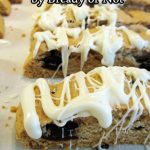
Bready or Not Original: Cranberry Lemon Biscotti
This lemon-themed month needs some breakfast food. How about some Cranberry Lemon Biscotti?
The lemon here isn’t hardcore. Zest throughout the dough adds freshness, and the dried cranberries are soaked in the juice to rehydrate. This gives the cranberries an especially pleasant zing.
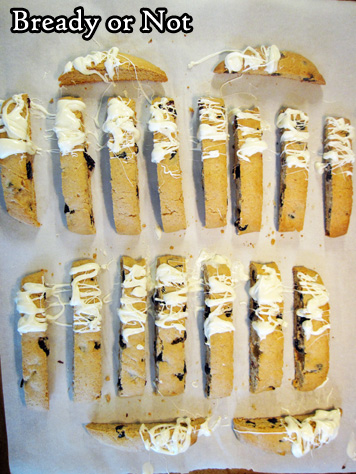
For years, I was intimidated by biscotti, but now I enjoy coming up with a couple new recipes a year. Really, the trickiest thing about this is how sticky the dough is when it’s time to shape it.
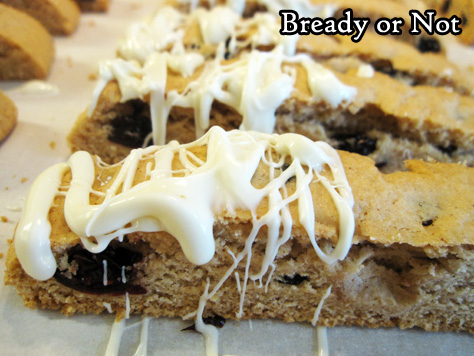
I like the addition of white chocolate drizzle to add a touch more sweetness, but that’s optional.
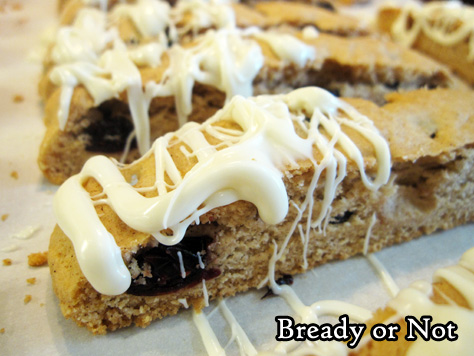
The end result is a biscotti with a bright, sunny flavor that complements plump, tart cranberries, all in crispy, bready form that’s especially good dunked in coffee or tea!
This recipe is midway through my April of lemon recipes!
Lemon Sour Cream Bundt Cake
Glazed Lemon Ginger Bars
Cranberry Lemon Biscotti [today]
Cream Cheese Stuffed Lemon Bundt Cake
Lemon Frangipane
Bready or Not Original: Cranberry Lemon Biscotti
Ingredients
- 1 lemon
- 3/4 cup dried cranberries
- 2 cups all-purpose flour
- 1 1/4 teaspoon baking powder
- 1 teaspoon ground cinnamon
- 1/4 teaspoon salt
- 2 eggs
- 3/4 cup white sugar
- 1/3 cup vegetable oil
- 1 teaspoon vanilla extract
- 1 teaspoon lemon extract
- 4 ounces white chocolate optional, to drizzle on top
Instructions
- Preheat oven at 350-degrees. Zest and juice lemon. Set aside zest, and soak cranberries in juice.
- Line a large baking sheet with parchment paper.
- In a medium bowl, mix together flour, baking powder, cinnamon, and salt. Set aside.
- In a large bowl, beat eggs with white sugar. Add oil, vanilla extract, lemon extract, and zest. Gradually mix in the dry ingredients.
- Drain lemon juice out of cranberries; discard juice. Fold cranberries into dough to equally distribute.
- Divide dough in half. Place each piece spaced out on parchment. Dough will be very sticky, so shape with plastic spatula or greased or floured hands into 1-inch high flat rectangular logs.
- Bake for 20 minutes. Remove from oven and let set for 5 minutes. Use a long bread knife and slice down--don't saw--into long, even cookies. Space out cookies upright, if possible, or lay on sides.
- Bake for another 20 to 25 minutes; if cookies are laying on sides, flip them to other side halfway through. Biscotti should be golden and somewhat crisp.
- Let biscotti sit out for anywhere from 30 minutes to several hours so that they can cool off and dry out even more.
- If adding white chocolate on top, melt chocolate in microwave or on stovetop (keep in mind, white chocolate can burn fast!). Use a fork to drizzle chocolate, or dip an end of each biscotti into the chocolate. Let set again for an hour or so, then pack into sealed bags or plastic containers.
- Biscotti can keep in sealed containers for as long as a month.
OM NOM NOM!
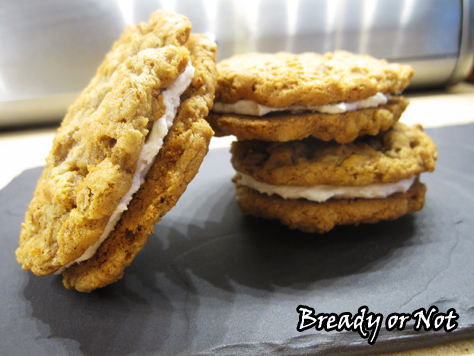
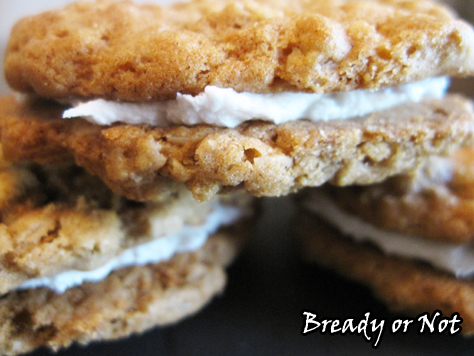
Bready or Not Classic: Oatmeal Cream Pies
I prepared two classic recipes to repost while I was on vacation this summer. That isn’t happening now. Therefore, I’m sharing them earlier with the hope that my fellow #stressbakers can enjoy them. Eat well and stay safe out there!
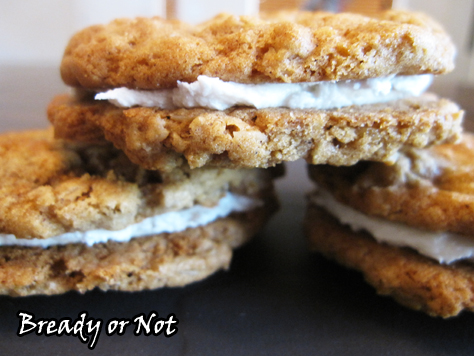
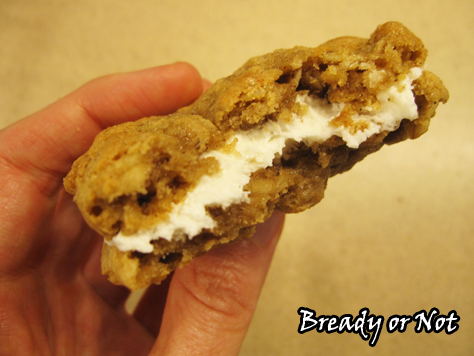
Today I present something seriously delicious: Oatmeal Cream Pies, aka Sandwich Cookies.
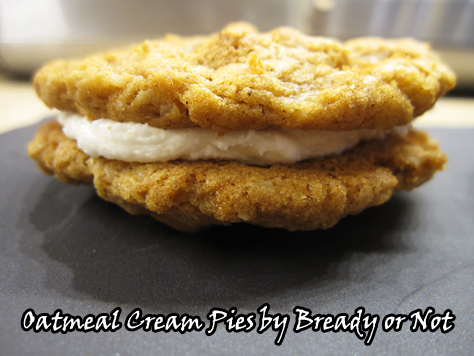
These things are about the size of a sandwich, too, and about as filling because of the chewy oatmeal cookies. You have two tablespoons worth of dough with a teaspoon of marshmallow cream between them. So yeah.
I don’t think I’d make smaller cookies, though, for sheer reasons of space and time. The recipe makes over four dozen cookies, which makes for over two dozen sandwich cookies. This is a recipe to make for a lot of hungry adults or kids!
If you love commercial-made cream pies like the ones from Little Debbie, these homemade ones will blow your mind. They have that same taste and texture, but with some extra chewy freshness.
I highly advise that you use tablespoon and teaspoon scoops for this recipe, too. It helps a lot if the cookies are of uniform size and that the amount of filling is equally distributed.
Modified from Taste of Home.
Bready or Not: Oatmeal Cream Pies
Ingredients
Cookies:
- 1 1/2 cups shortening
- 2 2/3 cups brown sugar packed
- 4 large eggs
- 2 teaspoons vanilla extract
- 2 1/4 cups all-purpose flour
- 2 teaspoons ground cinnamon
- 1 1/2 teaspoons baking soda
- 1 teaspoon salt
- 1/2 teaspoon ground nutmeg
- 4 cups old-fashioned rolled oats
Filling:
- 3/4 cup shortening
- 3 cups confectioners' sugar sifted
- 7 oz marshmallow creme 1 jar
- 1 - 3 Tablespoons milk or half & half
Instructions
- Preheat the oven at 350-degrees. In a large bowl, cream together the shortening and brown sugar until they are light and fluffy. Beat in eggs, one at a time, followed by the vanilla extract.
- In another bowl, combine the flour, cinnamon, baking soda, salt and nutmeg; gradually add this dry mix to the creamed mix. Stir in oats. If you're using a stand mixer, you'll probably need to stir the last of the oats in by hand. This is a lot of dough!
- Use a tablespoon scoop to dole out the dough onto a cookie sheet, keeping two inches between each spoonful. These will spread.
- Bake for 10 to 12 minutes; they brown very fast, so keep an eye on them at the end. Remove them when they are turning golden brown. Let sit on cookie sheet for 10 minutes before transitioning them to a rack to cool.
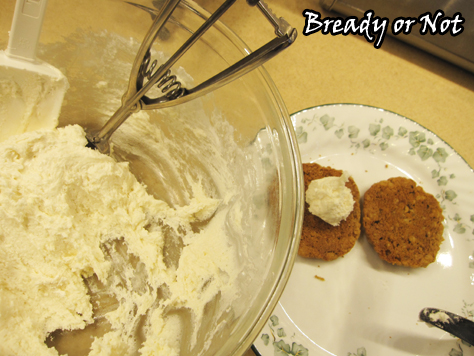
- To make the filling, start by sifting the confectioners' sugar into a large bowl. Add the shortening and marshmallow crème. Add a tablespoon of milk and gradually add more as needed to get it to spreadable consistency. Use a heaping teaspoon to dollop filling onto the base of a cookie. Spread it with a knife, top with another cookie, and press together to get cream to the edges.
- End result: about 30 large sandwich cookies.
- OM NOM NOM!
