


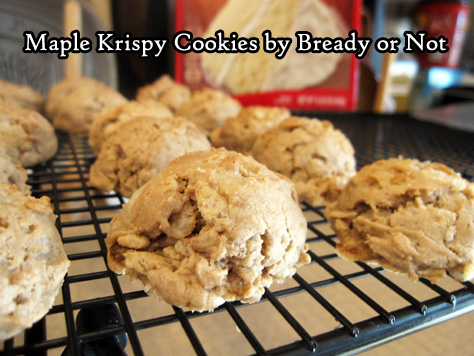
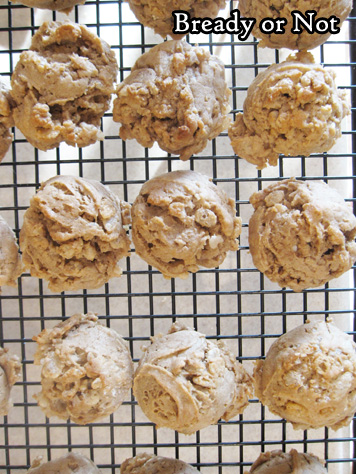
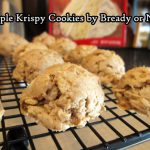
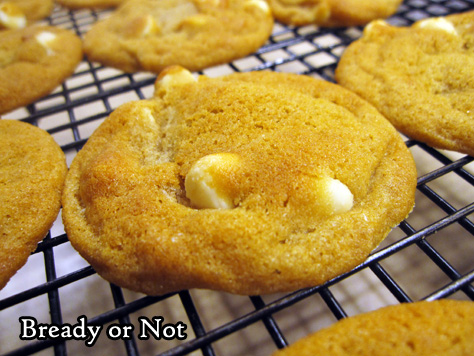
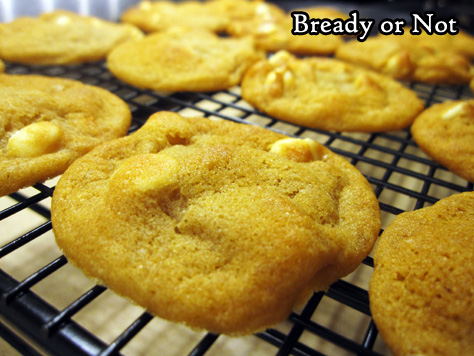
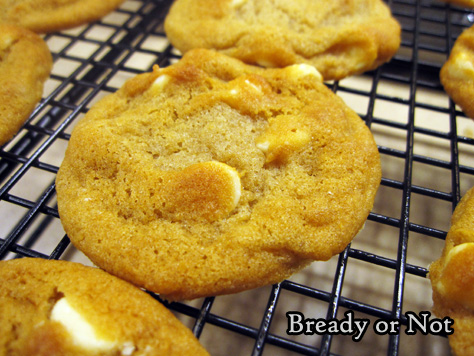
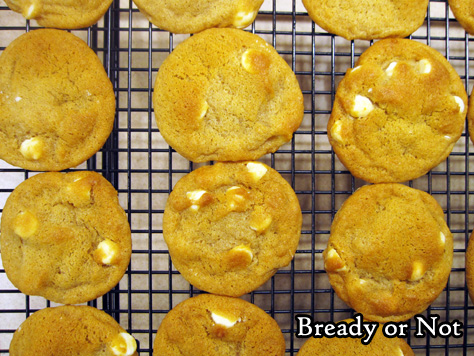
Bready or Not: Maple Krispy Cookies [uses cake mix]
If you need a cookie recipe that comes together in five minutes, this recipe for Maple Krispy Cookies is perfect!
I love to highlight cake mix recipes every so often for a couple reasons. First of all, doctored cake mix can produce really tasty desserts. Second, it’s an ingredient that is cheap and accessible to people on a tight budget.
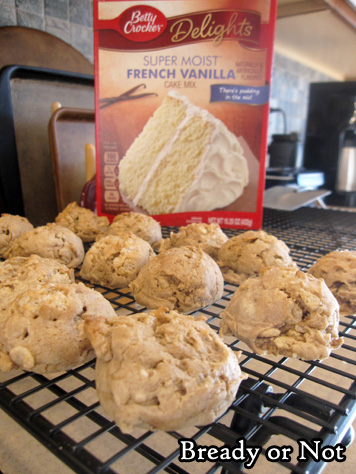
Third, it can be used as a fantastic shortcut in recipes like this, where everything comes together in a matter of minutes.
I used a French Vanilla Betty Crocker box for these, but any kind of white or vanilla mix should do. You want a good base to infuse with maple flavor.

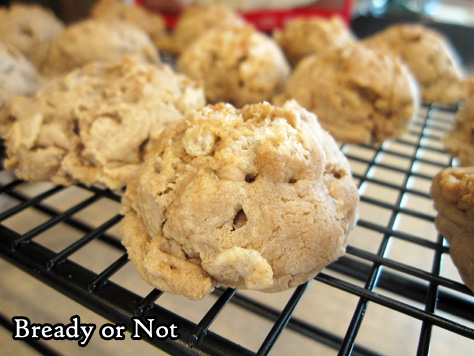
My husband described these cookies as “maple krispies in cookie form.” (I do have a maple krispies recipe. It’s also included in my Sweet Maple cookbook.)
These cookies end up with a lovely, fresh maple flavor which does a good job of masking the undeniably chemical taste of cake mix. Plus, the cereal pieces give each cookie a lovely, light crunchiness.
Bready or Not: Maple Krispy Cookies [uses cake mix]
Ingredients
- 18 white cake mix or vanilla
- 1/2 cup unsalted butter melted
- 1 large egg
- 2 teaspoons maple flavor
- 1 teaspoon vanilla extract
- 1 1/4 cup puffed rice cereal like Rice Krispies
Instructions
- Preheat oven at 350-degrees.
- In a large bowl, stir together the cake mix, butter, egg, maple flavor, and vanilla extract. When those are just combined, carefully stir in the cereal, trying not to crush it.
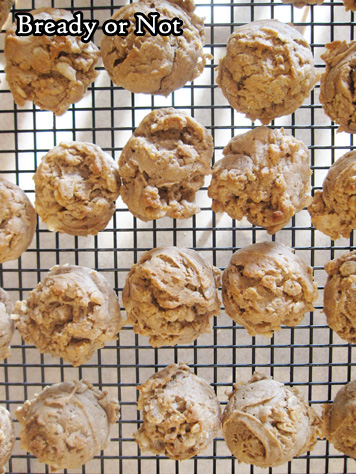
- Use a teaspoon scoop or spoon to dole out dough onto a cookie sheet. Bake for 10 to 12 minutes; also to set on sheet for about 10 minutes, then move cookies to a rack to finish cooling. Store in a sealed container.
- OM NOM NOM!
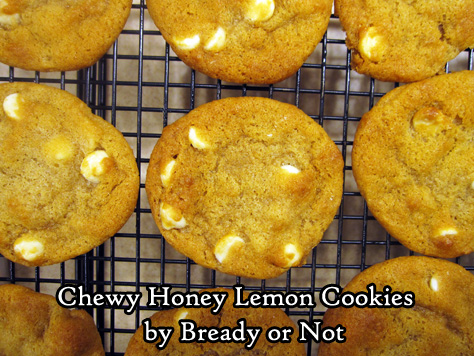
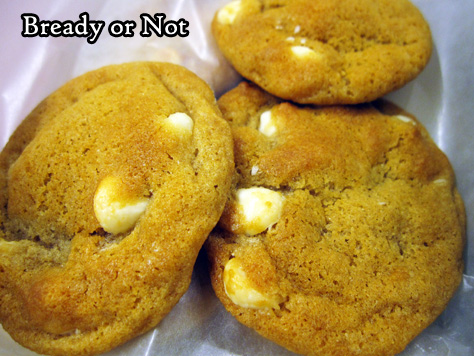
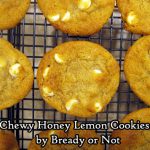
Bready or Not Original: Chewy Honey Lemon Cookies
I modified an old favorite recipe with delicious results: Chewy Honey Lemon Cookies!
This recipe is derived from my Chewy Honey Maple and Chewy Honey Snickerdoodles. It uses a combination of two flours to add extra chewiness, and cornstarch for tenderness and longevity.
However, my first attempt at this recipe was a total bust. I tried to rely on lemon juice and zest for flavor… and while the flavor was there, the cookies turned out FLAT.
That would not do. I wanted cookies that were chewy with just the right thickness. Therefore, I removed the lemon, amped up the lemon extract, and added white chocolate chips.
That was the right choice. The lemon flavor was just right (and the taste of that and the honey actually grows stronger after a day), and the white chocolate chips added smoothness and mellow sweetness.
In other words, if you love lemon cookies, you will LOVE these. And like the other recipes in the same family, these cookies keep well for weeks!
Bready or Not Original: Chewy Honey Lemon Cookies
Ingredients
- 3/4 cup unsalted butter 1 1/2 sticks, softened
- 1 cup light brown sugar packed
- 1/4 cup honey
- 1 large egg room temperature
- 1 teaspoon vanilla extract
- 2 teaspoons lemon extract
- 1 cup bread flour or all-purpose flour, but cookies will be less chewy
- 1 cup all-purpose flour
- 2 teaspoons cornstarch
- 1 teaspoon baking soda
- 1/2 teaspoon salt
- 1 cup white chocolate chips
Instructions
- In a large bowl, beat the butter until smooth. Add sugar and honey and beat until creamy and fluffy, about 3 minutes. Scrape down the sides of the bowl and then mix in the egg and both extracts.
- In a separate bowl, combine the dry ingredients: bread flour, all-purpose flour, cornstarch, baking soda, and salt.
- Slowly stir together the wet and dry ingredients until just combined. Mix in the white chocolate chips. Encase the dough in plastic wrap and stash in the fridge for several hours or days.
- When ready to bake, preheat the oven to 350-degrees. Use greased stoneware, parchment paper, or silpat mats. The cookie dough, even straight from the fridge, has a soft Play-Doh-like consistency, so it will spread when it bakes.
- Teaspoon-sized cookies need to bake 9 to 12 minutes; tablespoon-sized take 11 to 13 minutes. Let set on cookie sheets for 10 to 15 minutes before moving to a rack to cool completely.
- Cookies will keep in a sealed container for weeks. The lemon and honey flavors will grow stronger after the first day. They are excellent for travel or shipping.
- OM NOM NOM!
Bready or Not Guest: Author Dan Koboldt with Gooey Butter Cake Cookies
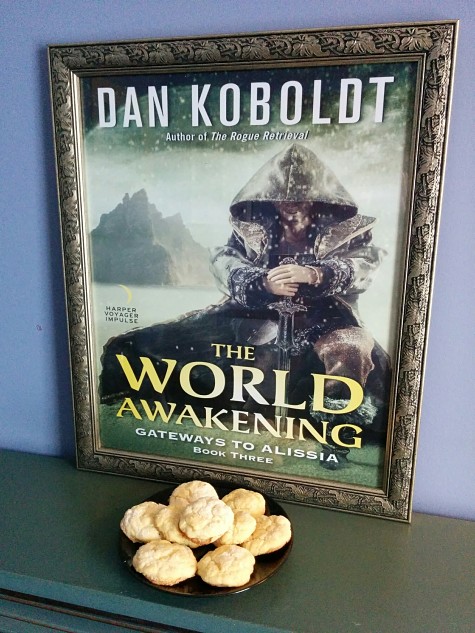
I’m happy to welcome friend and fellow author Dan Koboldt! The third book in his fantastic Gateways to Alissia series is out today, and Dan is here to celebrate in proper Bready or Not fashion: with COOKIES. But first, a bit about The World Awakening:
Quinn Bradley has learned to use the magic of another world. And that world is in danger.
Having decided to betray CASE Global, he can finally reveal his origins to the Enclave and warn them about the company’s imminent invasion. Even if it means alienating Jillaine…and allying with someone he’s always considered his adversary.
But war makes for strange bedfellows, and uniting Alissians against such a powerful enemy will require ancient enmities–as well as more recent antagonisms–to be set aside. The future of their pristine world depends on it.
As Quinn searches for a way to turn the tide, his former CASE Global squad-mates face difficult decisions of their own. For some, it’s a matter of what they’re willing to do to get home. For others, it’s deciding whether they want to go home at all.
Continuing the exciting adventures from The Rogue Retrieval and The Island Deception, The World Awakening is the spellbinding conclusion to the Gateways to Alissia fantasy series from Dan Koboldt.

I grew up in St. Louis, a place that specializes in delicious food and drink that’s not necessarily good for you. It’s home, for example, to Anheuser-Busch, the makers of Budweiser. When a new employee starts at Anheuser-Busch, they receive another local specialty as a welcome gift: a gooey butter cake. This delicious concoction is exactly what it sounds like. It has an almost pie-like consistency, however, so it’s not very portable. The solution to that problem is today’s recipe, gooey butter cake cookies.
These are easy to make and require only six ingredients. They taste like yellow butter cake. You really can’t go wrong.
Ingredients:
1/2 cup butter, softened
1 (8 ounce) package cream cheese
1 egg
1/4 teaspoon vanilla extract
1 (18.25 ounce) package yellow cake mix
1/4 cup confectioners’ sugar
Preheat oven to 175 degrees Celsisus. For you non-scientists, that’s 350 degrees Fahrenheit. In a medium bowl, cream together the butter and cream cheese. Once that’s consistent, blend in the egg and vanilla. Then, add cake mix, and continue mixing/stirring until it’s smooth and well blended.
Optional pro tip: chill the dough for 30 minutes, which will make the next step much easier.
Pour the powdered sugar into a separate shallow bowl. You’ll use this to coat the doughballs before you lay them on the cookie sheet.
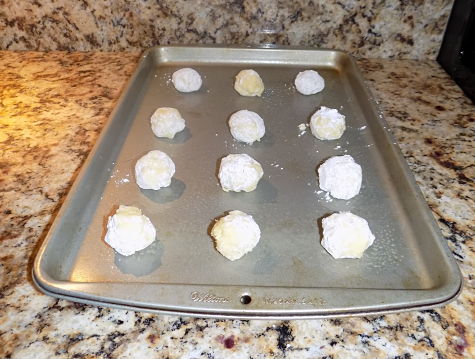
Roll the dough into 1-inch balls. I like to use a cookie dough scooper for this part, but you can also use a spoon. Optional pro tip: spray whatever you use with non-stick spray before you start.

Drop each into the powdered sugar to form a light coating. This can be a little messy if you didn’t chill the dough. Once you get some powdered sugar on them, the doughballs are easier to handle. Place sugar-coated balls at least an inch apart on a greased cookie sheet.
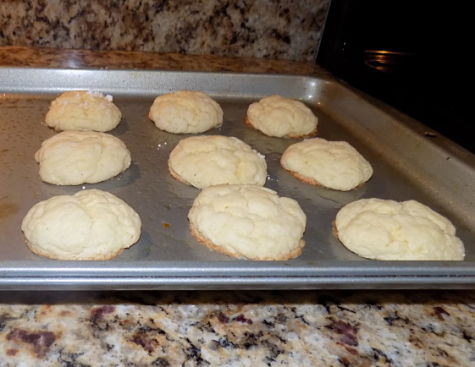
Bake for 11-13 minutes, until the edges begin to turn brown. Let them cool for a few minutes before you transfer them.
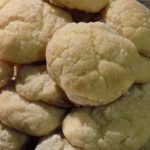
These cookies keep remarkably well in an airtight container. Enjoy them with a good book!
Author Bio
Dan Koboldt is a genetics researcher and fantasy/science fiction author from the Midwest. He is the author of the Gateway to Alissia series (Harper Voyager) about a Las Vegas magician who infiltrates a medieval world. He is currently editing Putting the Science in Fiction, (Writers Digest), a reference for writers slated for release in Fall 2018.
By day, Dan is a genetics researcher at a major children’s hospital. He has co-authored more than 70 publications in Nature, Science, The New England Journal of Medicine, and other scientific journals. He lives with his wife, daughter, and twin boys in Ohio.
Find out more about Dan’s books:
The World Awakening
Bready or Not Guest: Gooey Butter Cake Cookies By Dan Koboldt
Ingredients
- 1/2 cup butter softened
- 8 ounce cream cheese
- 1 egg
- 1/4 teaspoon vanilla extract
- 18.25 ounce yellow cake mix
- 1/4 cup confectioners' sugar
Instructions
- Preheat oven to 175 degrees Celsisus. For you non-scientists, that’s 350 degrees Fahrenheit. In a medium bowl, cream together the butter and cream cheese. Once that’s consistent, blend in the egg and vanilla. Then, add cake mix, and continue mixing/stirring until it's smooth and well blended.
- Optional pro tip: chill the dough for 30 minutes, which will make the next step much easier.
- Pour the powdered sugar into a separate shallow bowl. You’ll use this to coat the doughballs before you lay them on the cookie sheet.
- Roll the dough into 1-inch balls. I like to use a cookie dough scooper for this part, but you can also use a spoon. Optional pro tip: spray whatever you use with non-stick spray before you start.
- Drop each into the powdered sugar to form a light coating. This can be a little messy if you didn’t chill the dough. Once you get some powdered sugar on them, the doughballs are easier to handle. Place sugar-coated balls at least an inch apart on a greased cookie sheet.
- Bake for 11-13 minutes, until the edges begin to turn brown. Let them cool for a few minutes before you transfer them.
- These cookies keep remarkably well in an airtight container. Enjoy them with a good book!
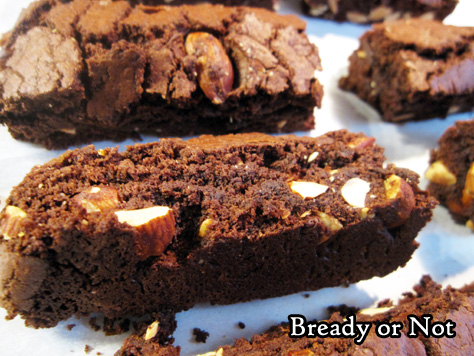
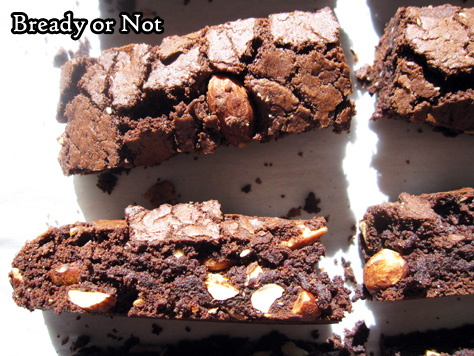
Bready or Not: Chocolate Almond Biscotti
Continuing the breakfast theme for the month, we now venture into the realm of chocolaty goodness with these Chocolate Almond Biscotti.
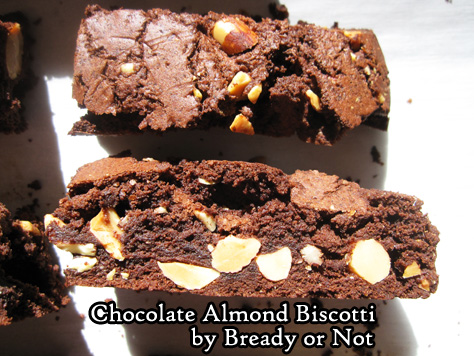
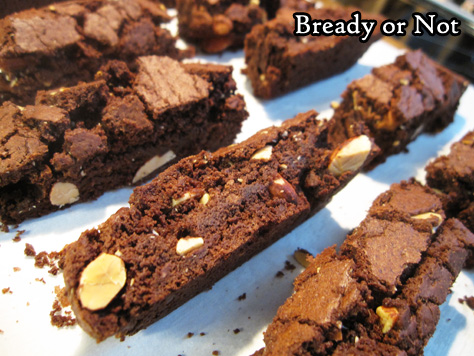
These taste like brownies… brownies that are firm enough to dip into coffee or hot chocolate or tea or your waiting mouth.
Almonds go wonderfully with chocolate–a lot of candy bars are proof of that–though they do complicate this recipe in one way. They get stuck on the knife blade when the biscotti are chopped apart.
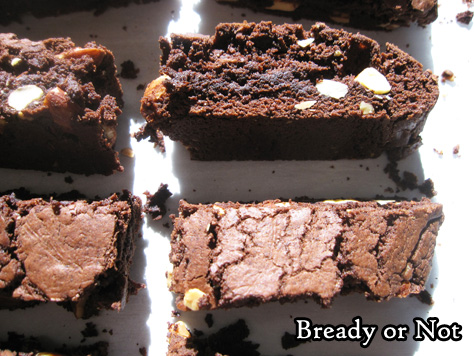
The good news is, the biscotti at still kind of soft then, so you can press them back together a bit–just don’t burn your fingers!
I can’t say I mind that some chocolate crumbles and almond bits are left on the cookie sheet, either. Oh darn. Can’t let those go to waste.
Do check out other biscotti featured on Bready or Not: Maple Walnut White Chocolate Biscotti and Snickerdoodle Biscotti.
This new recipe was modified from the original at McCormick.
Bready or Not: Chocolate Almond Biscotti
Ingredients
- 1 3/4 cups all-purpose flour
- 3/4 cup unsweetened cocoa powder sifted
- 1 teaspoon baking powder
- 1/4 teaspoon salt
- 4 ounces semi-sweet chocolate
- 1/2 cup unsalted butter 1 stick, softened
- 1 1/4 cups white sugar
- 2 eggs room temperature
- 1 teaspoon almond extract
- 1 cup almonds coarsely chopped
Instructions
- Preheat oven to 325-degrees. Prepare a large baking sheet with parchment paper. In a medium bowl, mix the flour, cocoa powder, baking powder, and salt; set aside.
- Melt the chocolate in the microwave, using short, careful bursts. Once it is melted, set aside to cool for a few minutes.
- In a large bowl, beat the butter and sugar until light and fluffy. Add the eggs followed by almond extract. Scrape in the melted chocolate. Gradually mix in the dry ingredients, and add the almonds last.
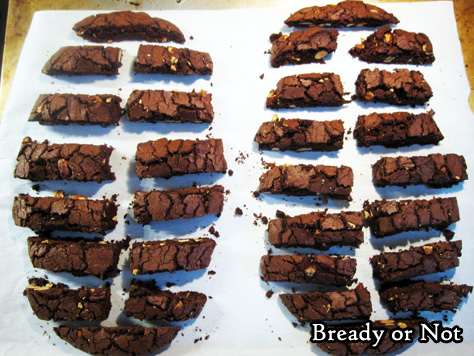
- Divide the dough in half. Drop each half onto the ready cookie sheet with lots of space between them. Use a spatula to shape them into logs roughly four inches across, eight inches long, and about an inch high.
- Bake 35 minutes, until the logs spring back when gently touched.
- Cool on stove top for 10 minutes. Use a sharp, serrated knife to chop the logs into 1/2-inch thick slices. The almonds will likely get stuck on the blade and cause the biscotti to crumble some; the biscotti is still somewhat soft, so try to wedge almonds back in and reshape the sticks. Do take care, as they are hot!
- Place the slices upright, if they will stay, or lay them on their sides. Bake for another 20 minutes, flipping them halfway, if necessary.
- Allow the biscotti to cool and dry out for several hours before placing them into sealed containers.
- OM NOM NOM!
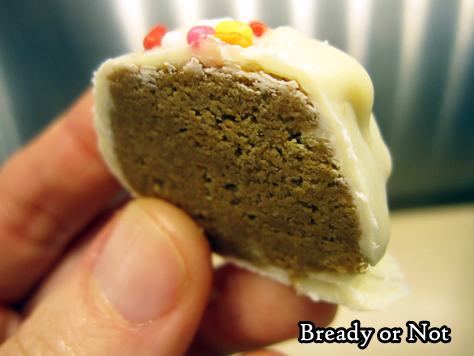
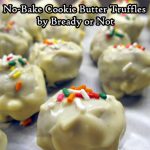
Bready or Not: No-Bake Cookie Butter Truffles
We’ll finish off the year with a sinfully sweet treat that acts in stark contrast to those diet ads already clogging the TV: No-Bake Cookie Butter Truffles.
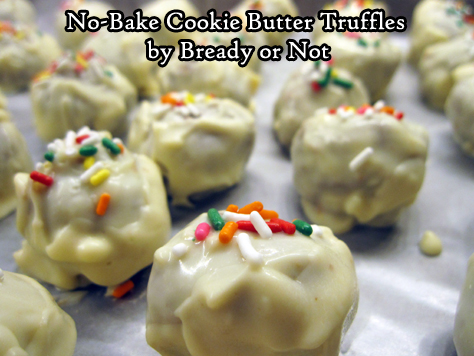
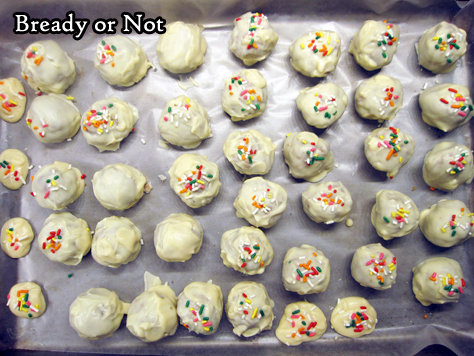
I’ll be honest. I hate making truffles. No matter how many times I do it, or what equipment or chocolate I use, they never end up “pretty” like on other food blogs.
But heck, I’m posting pics and this recipe anyway, because these things are DELICIOUS.
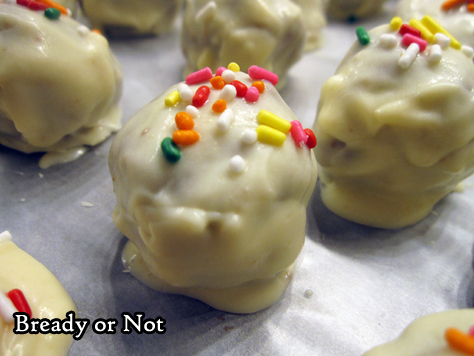
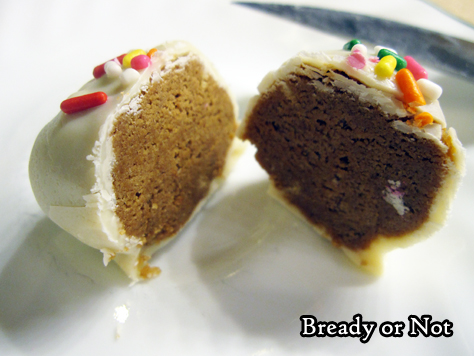
White chocolate (with a touch of oil) is used to coat balls made of crushed graham crackers and cookie butter. Those are the ingredients. It’s that easy.
It’s also that good. You see those ingredients, you know exactly how this will taste.
Cookie butter has gone mainstream at this point. Speculoos and Biscoff are the traditional options, but Walmart is even carrying their own brand now! If you haven’t tried cookie butter yet… I’m sorry/not sorry about the joy I am introducing to your life.
Modified from No-Bake Speculoos Truffle Cookies in Foot Network Magazine, December 2015.
Bready or Not: No-Bake Cookie Butter Truffles
Ingredients
- 9 graham crackers 1 sleeve, about 8 ounces
- 1 1/3 cup creamy cookie butter spread
- 11 ounces white chocolate chips 1 bag
- 1 Tablespoon coconut oil or vegetable shortening
- nonpareils or sprinkles for decoration
Instructions
- Line a baking sheet with wax paper. Pulse the graham crackers in a food processor until finely ground but not powdery. Add the cookie butter and pulse the two together, scraping down the sides as needed. If the mix isn't cohesive, add a touch more cookie butter.
- Use a teaspoon scoop or spoon to form 1-inch balls. Arrange them on the cookie sheet and cover with plastic wrap. Let them set in fridge at least one hour or overnight.
- Melt the white chocolate chips and coconut oil by your preferred method, on stove top, a stand-alone melter, or microwave; note that white chocolate burns quickly, so take care!
- One at a time, drop cookie butter balls into the chocolate and flip to coat. Allow excess chocolate to drip off before returning the truffle to the wax paper sheet. Continue to coat truffles, warming chocolate as necessary. Decorate truffles with nonpareils or sprinkles.
- Let set in fridge at least 30 minutes, then transfer to a lidded container. Store in fridge. Truffles will keep at least a week.
- Recipe makes about 35 teaspoon-sized balls.
- OM NOM NOM!
Bready or Not: Peppermint Meltaway Cookies
Do you love those peppermint meltaway candies that dissolve in your mouth with such refreshing flavor? Imagine that, in cookie form. Yes. Really.
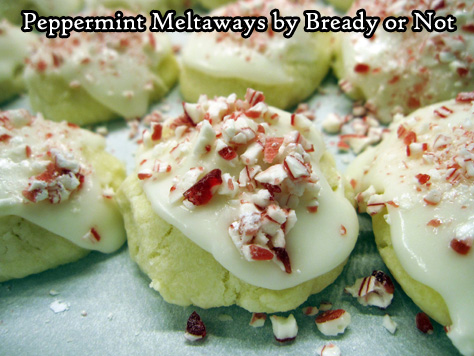
This recipe essentially makes very lightly-textured shortbread cookies. That texture arises from the use of confectioners’ sugar and cornstarch. These are like cookie clouds.
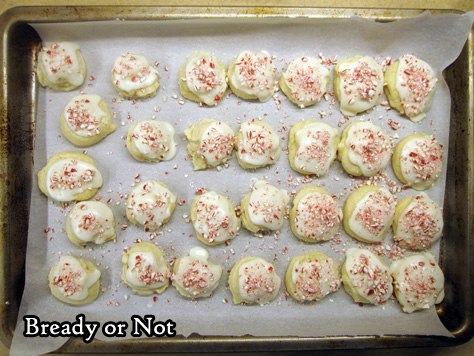
Then you top those small cookies with a smear of frosting and some crushed peppermint bits. The combo… yeah. These are called meltaways, and that’s exactly what they do.
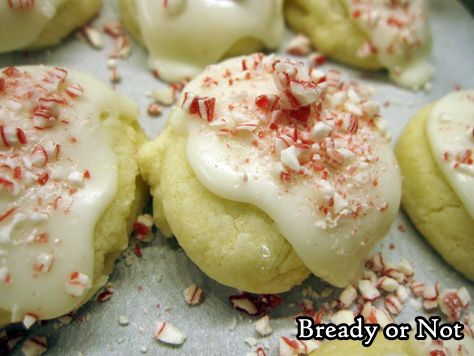
Plus, these things literally LOOK like the holiday season. Like snow and peppermints.
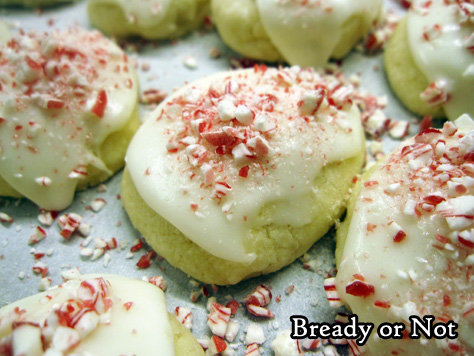
If you’re searching for a recipe to wow everyone in a cookie exchange, these are your cookies, and they don’t even taste or act like cookies. They’ll blow your mind. Blow the minds of everyone there.

Modified from Taste of Home, November 2015.
Bready or Not: Peppermint Meltaway Cookies
Ingredients
cookie dough
- 1 cup unsalted butter softened
- 1/2 cup confectioners' sugar
- 1/2 tsp peppermint extract
- 1 1/4 cups all-purpose flour
- 1/2 cup cornstarch
frosting
- 2 Tb unsalted butter softened
- 2 Tb milk or half & half
- 1/4 tsp peppermint extract
- 1 1/2 cups confectioners' sugar sifted
- 1/4 - 1/2 cup peppermint candies crushed
Instructions
- In a mixing bowl, cream together the butter and confectioners' sugar until light and fluffy, then add peppermint extract. Gradually beat in the flour and cornstarch.
- Wrap dough in plastic wrap and chill for 30 minutes or so, until the dough is firm enough to work with.
- Preheat oven at 350-degrees. Using a teaspoon scoop, dole out dough onto a cookie sheet. Use a spatula or the bottom of a glass to lightly compress the cookies, as they may not spread much while baking.
- Bake for 9 to 11 minutes, until set. Let cool on sheet for 10 minutes, then move to a rack to finish cooling.
- When the cookies are room temperature, prepare the frosting. Mash the two tablespoons butter until creamy; add the milk and peppermint extract. Beat in the confectioners' sugar until it is smooth. Add more sugar or milk, if necessary, to reach a thick yet spreadable consistency.
- Use the back of a spoon to frost the cookies then sprinkle with peppermint candies. Store in an airtight container with waxed paper or parchment between layers. Makes about 25 teaspoon-sized cookies.
- OM NOM NOM!
