


Bready or Not: French Apple Cake in a Springform Pan
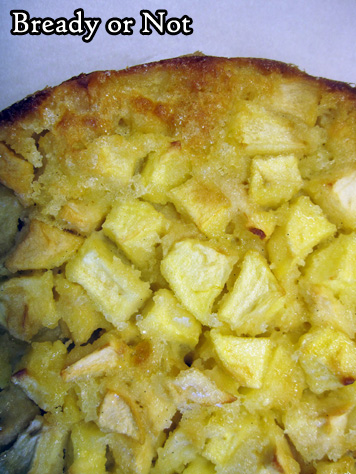
This French Apple Cake is thick with apples, not cake. There’s actually just enough batter to adhere everything together.
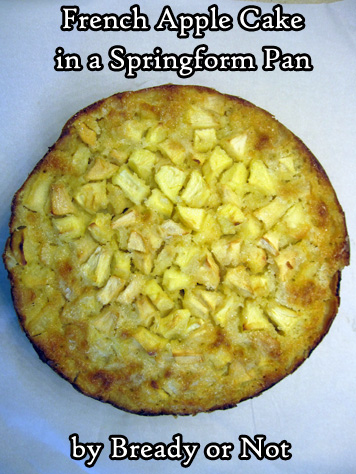
The apples are the star, so get good ones. I recommend doing about half Honeycrisp and Pink Ladies, but go for a combo of two good kinds of baking apples. (Not sure which ones are best for baking? Google has lots of recs!)
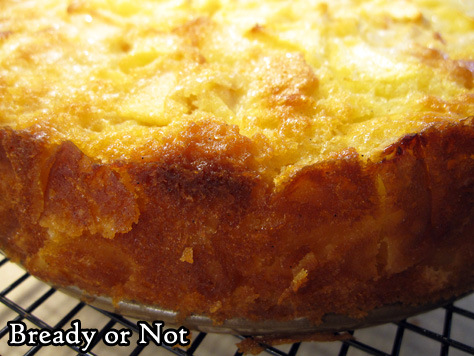
I’ve had a springform pan for years, but I’ve never used it like I did in 2020. That particular pan makes this cake extra good, too, because it creates a high cake with nicely browned edges.
One thing I’ve noticed about French and Irish apple cakes is that they really emphasize the fruit. American cakes and pies add a lot more spice. As much as I love loading on the cinnamon, it’s refreshing to do a take like this sometimes.

Let the fruit taste… well, fruity. Here, the addition of Calvados or another apple brandy brings that out even more. You don’t end up with an alcohol taste in the final result, but it does draw out more of the apple flavor.
This cake is a great one to slice up and freeze for later, too. Make the goodness last even longer!
Modified from Bake from Scratch September/October 2020 issue.
Bready or Not: French Apple Cake in a Springform Pan
Equipment
- 9-inch springform pan
- uneven spatula
- parchment paper
Ingredients
- 8 large baking apples totaling about 800 grams mix of Honeycrisp and Pink Lady recommended
- 2 teaspoons lemon juice
- 3 large eggs room temperature
- 3/4 cup white sugar
- 3 Tablespoons apple brandy use Calvados to make it especially French
- 1 teaspoon vanilla bean paste or substitute vanilla extract
- 1 cup all-purpose flour
- 1 1/2 teaspoons baking powder
- 1 teaspoon kosher salt
- 2/3 cup unsalted butter melted and cooled
- 1 Tablespoon sparkling sugar
- Confectioners' sugar for serving
Instructions
- Preheat oven at 350-degrees. Prepare a 9-inch springform pan by cutting a piece of parchment to fit the base. Apple nonstick spray to the pan, then add the parchment, and spray it as well. In addition, tear a piece of aluminum foil to cup the bottom of the pan to catch any drips.
- Peel the apples and chop into 1-inch pieces. Toss with lemon juice. Set aside.
- In a big bowl, beat eggs until they are pale and foamy. Add the white sugar, apple brandy, and vanilla.
- In a separate bowl, sift together the flour, baking powder, and salt. Gradually mix the dry ingredients into the big egg-sugar bowl along with the melted butter. Scrape the bowl as needed, stirring everything until just combined. Don’t expect a huge amount of batter–it’s there to act like delicious glue for all of the apple pieces!
- Reserve 1 heaping cup of the apple chunks. Fold the rest of the apples into the batter, coating them. Dump the mix into the prepared pan and even out with an uneven spatula. Arrange the remaining apples on top, pushing them into the batter and smoothing them out as much as possible.
- Bake for 20 minutes. Add sparkling sugar over the top. Bake another 20 minutes and check on the cake. It is done with apples in middle are tender and a digital thermometer plunged into the center reads at least 200-degrees. If needed, cook longer; if it’s browning too much, cover with foil.
- Let cake cool in pan for 15 minutes on a cooling rack. Carefully release the springform ring to let it completely cool for at least an hour; place in fridge to speed the chilling process, if desired.
- Slice into wedges. Enjoy cold, at room temperature, or warmed, with confectioners' sugar sprinkled over the top. Pieces can also be individually wrapped and frozen for later.
OM NOM NOM!
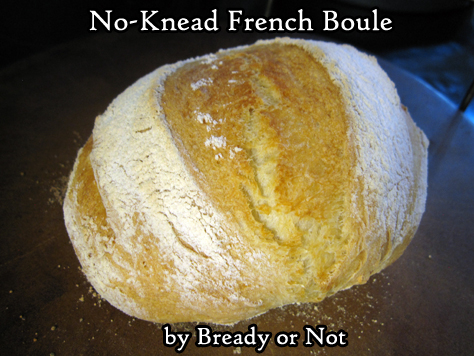
Bready or Not: No-Knead French Boule (French Bread Round)
French bread is one of the best things in the world and it is super-easy to make. All you need are four ingredients and some time.
The time element is not that much of an issue, though, because this takes all of five minutes to mix up. After an initial rise, the dough can then be tucked away in the fridge for up to two weeks.
If this technique looks familiar, it’s because it’s similar to the recipe I shared in February for my favorite pizza dough. They are both modified from the book Artisan Bread in Five Minutes a Day.
The boule, or bread round, is the most traditional form of French bread. The baguette is actually an innovation from the 1920s. The boule was first, and is, arguably, the best.
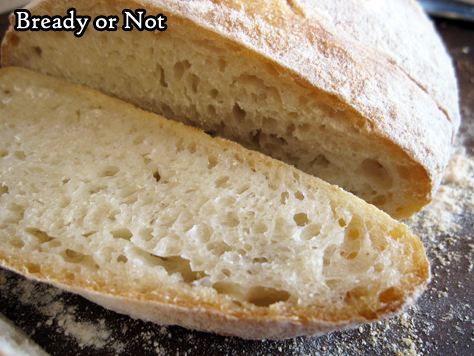
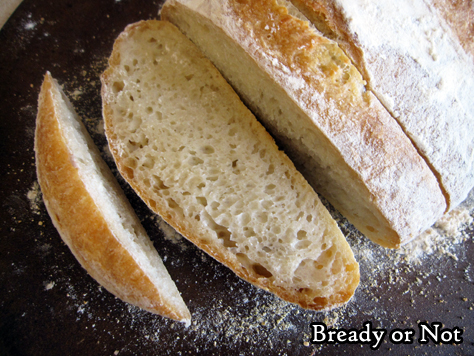
This bread is perfect to slice up, butter, and toast. It’s great for sandwiches. For charcuterie and cheese. To make French toast. Any way you can eat bread, really.
It’s also great to freeze and thaw for later enjoyment! This is really a recipe that is all about convenience, before and after baking.
Bready or Not: No-Knead French Boule (French Bread Round)
Equipment
- baking stone or baking steel
- small metal cake or casserole pan
Ingredients
- 1 1/2 cups lukewarm water
- 2 1/4 teaspoons active yeast or one store packet
- 3 1/4 cups all-purpose flour
- 2 1/4 teaspoons kosher salt
Instructions
- Warm the water to just above body heat, about 100-degrees. Pour it into a large bowl. Add the yeast, flour, and salt. Stir until everything is uniformly moist, no dry patches to be found.
- Loosely cover the bowl with plastic wrap, waxed paper, or an off-kilter lid, and set in a warm spot in the kitchen.
- After about 2 hours, it should double in size and flatten out on the top; a colder kitchen may need as long as 5 hours, which is fine.
- The dough can be used now, but is very sticky. It's easier to work with if it has chilled in the fridge for at least 2 hours, but can idle in there overnight or for as long as 2 weeks. Keep loosely covered so that it doesn't dry out.
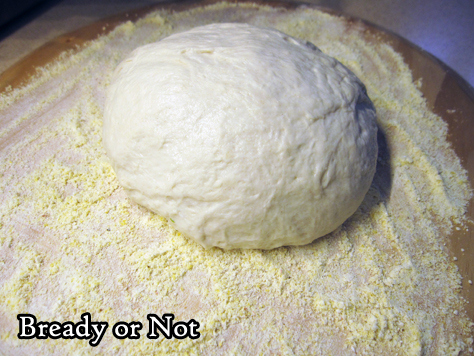
- Prepare a piece of parchment with a dusting or flour, semolina, or fine cornmeal. To shape the dough into a round, dust hands with flour then gently shape dough into a ball, tucking and smoothing rough bits into what will become the bottom. Set dough on prepared parchment. Let rise for 20 to 30 minutes. It may not rise a lot, but should puff a bit.
- Start preheating oven at 450-degrees. Place baking stone or steel in the middle rack of the oven. Place the empty metal cake or casserole pan beneath it. Let the oven heat for 20 minutes.
- Measure out 1 cup of water.
- After the bread has risen for about 40 minutes, lightly dust the top of the dough with flour. Use a lame or serrated knife to slash lines across the top.
- Pull the hot stone or steel from the oven. Use the parchment to carefully transfer the dough onto the hot surface. Set baking sheet into oven. Pull out the heated pan on the shelf below. With care, pour the water into the pan; do not overfill! Gingerly push the shelf back into place and close the oven so that the steaming water can work its magic on the baking bread.
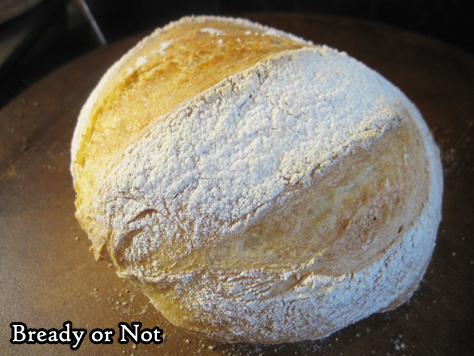
- Bake for about 30 minutes. Do NOT open the oven until the end of that time! The bread should look crusty and golden over the top. Pull out the pan and let the bread cool. It may emit a crackling sound as it cools down. If the bottom is carefully thumped, the bread should sound hollow.
- Let cool about 20 or 30 minutes before cutting into the bowl. Store in a sealed bag for up to 2 days. If freezing portions of the bread, do so within the first day so they will be as fresh as possible.
OM NOM NOM!
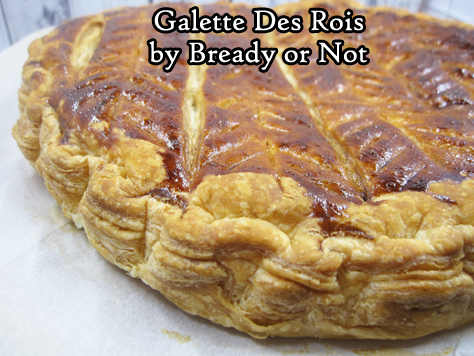
Bready or Not: Galette Des Rois
Eat like royalty without a lot of fuss with this shortcut recipe for Galette Des Rois!
Galette des Rois (King Cake) celebrates Epiphany and is available throughout January in France.
I am so not in France. Nor did I get to go there in June, as planned. Sigh. So, I have to make-do.
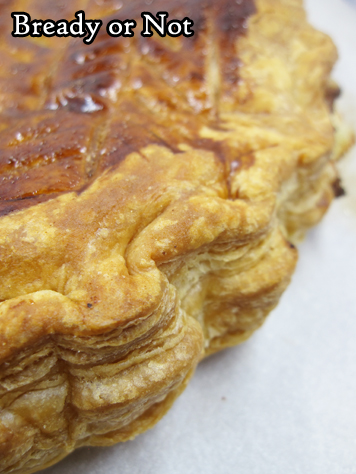
However, making-do can still be delicious. Frozen puff pastry is great stuff. You make a frangipane from scratch, but it’s pretty straightforward.
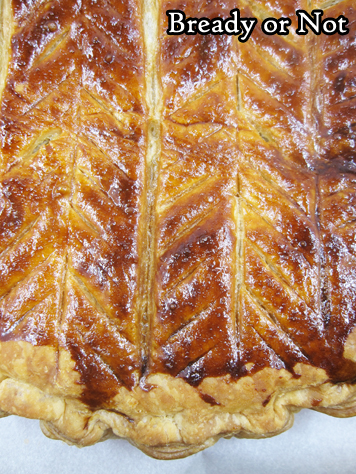
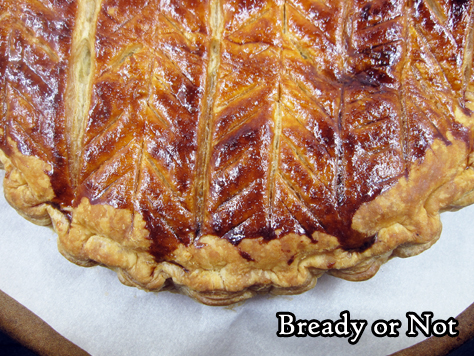
Honestly, the trickiest part for me was figuring out what pattern to etch into the top of the galette–and then hope that I didn’t dig the knife in too deeply.
If you do a Google search for Galette des Rois, you’ll see all sorts of different patterns you can do. I’m happy with my choice. And that I didn’t cut too deeply.
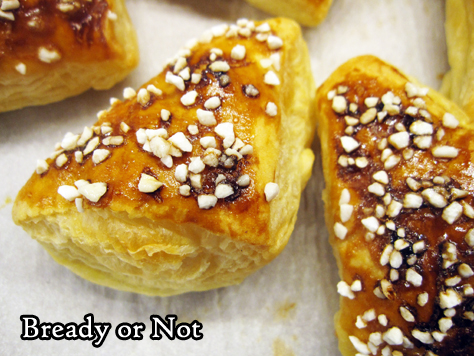
Because I am OCD and can’t bear to waste food, I include a bonus recipe on a great way to bake-up the scraps of puff pastry, too.
The galette and scraps are tastiest the day they are baked, but they are still good for the next few days, too.
Adapted from Dorie Greenspan.
Bready or Not: Galette Des Rois
Equipment
- baking sheet
- parchment paper
- pastry brush
Ingredients
Frangipane filling
- 6 Tablespoons unsalted butter room temperature
- 3/4 cup confectioners’ sugar
- 3/4 cup almond flour sifted
- 1/4 teaspoon salt
- 2 large eggs room temperature
- 1 Tablespoon rum optional but awesome
- 1 teaspoon vanilla extract or vanilla bean paste
Cake
- 1 puff pastry dough box 14-17 ounce package, cold
- 1 whole almond for the traditional charm
Instructions
Prepare the frangipane
- This can be made up to a day ahead, but needs at least an hour to chill before assembling the galette.
- Beat together the butter and sugar until they are creamy and light. Add the almond flour and salt. Add one whole egg. Divide the other egg, adding only the white–reserve the yolk for later. Mix in the rum, if using, and the vanilla extract.
- Transfer to a small bowl. Cover with plastic wrap, pressing it against the top of the mix, then place in fridge to chill.
- Mix the reserved yolk with 1 teaspoon of cold water, and cover it and set it in the fridge as well.
Assembling the galette
- Set out a complete sheet of puff pastry. Cut a 9-1/2 diameter circle out of the middle; if a 9-inch tart pan insert is available, use that as a handy guide. Set aside scraps from edges. Place the cut round on a parchment-lined baking sheet.
- Repeat the process with the second sheet of puff pastry. Place all of the cut-off bits aside in the fridge for now.
- Return to the pastry round on the baking sheet. Spread the frangipane evenly over the dough, but leave a 1-inch border bare. Place the almond somewhere on the filling. Moisten the border with some cold water. Set the second round of pastry on top and press it down around the edges to seal them together.
- Use the back of a butter knife to scallop the edges by creating an indentation about a quarter-inch deep, spaced out about a half-inch apart. Refrigerate for about 30 minutes.
- Preheat the oven at 425-degrees.
- Pull out the chilled galette. Brush a thin layer of yolk over the top, but be very careful that it doesn’t drip down over the edge, or the galette won’t rise. Use a paring knife to etch a design on the very top of the galette while taking care not to cut too deeply. Add 6 small slits spaced out to act as steam vents.
- Drop the oven temperature to 400-degrees. Bake the galette for 30 to 40 minutes, until it is puffed and golden brown. Keep an eye on it. If filling starts to ooze out, scrape it away so that it doesn’t drip off the pan. If the galette is browning too fast, cover it with aluminum foil.
- Transfer it to a rack to cool for at least 15 minutes. Expect it to deflate some, as that is the way of puff pastry. Best eaten when fresh, served warm or at room temperature, but can be chilled and eaten over the coming days.
- Bonus: As soon as the galette is out of the oven, put the puff pastry scraps on the parchment. Brush the remaining yolk atop. Then add a topping like pearl sugar, turbinado sugar, or maple sugar. Bake scraps for 15 to 20 minutes, until pieces are puffed and golden. Like the galette, they are best eaten the same day, but are still quite edible after that.
OM NOM NOM!
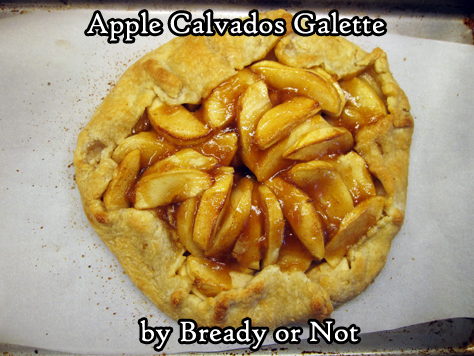
Bready or Not Original: Apple Calvados Galette
This Apple Calvados Galette is a perfect dessert for one or two people. Plus, it’s rustic and pretty to behold!
Calvados is an apple brandy made in Normandy. The price point of it can vary quite a bit. Feel free to use another kind of apple brandy in the recipe.
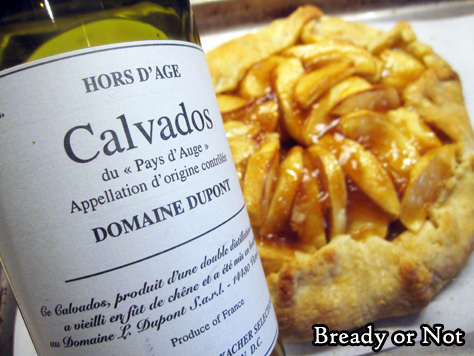
The delicious, original aspect of this treat is that you use the calvados to make a quick stovetop jelly that you then coat the apples with at the end of the bake time.
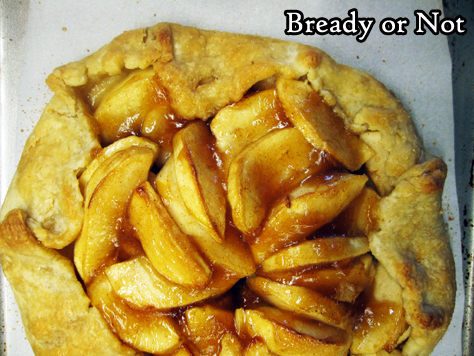
The alcohol flavor doesn’t linger. What you get is a concentrated sweet flavor of apples, right atop the fresh apples.
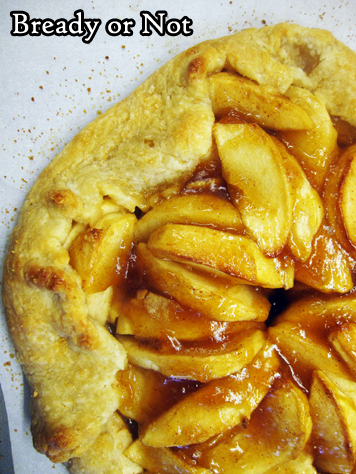
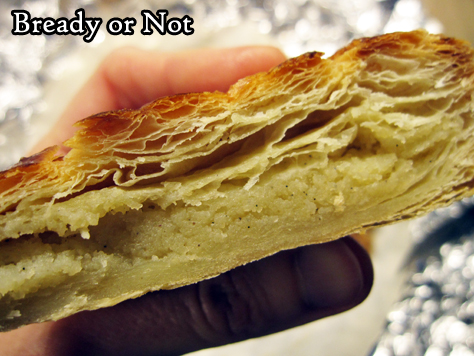
The baked galette keeps for days wrapped up in foil in the fridge. A quarter slice is the perfect amount for breakfast or dessert, and it’s not anywhere near as bready and dense as a full piece of pie.
Bready or Not Original: Apple Calvados Galette
Equipment
- baking sheet
- parchment paper
- basting brush
Ingredients
Galette
- 1 single-layer pie dough store-bought or homemade
- 4 medium apples such as Gala, Fuji, and Ambrosia
- 1 Tablespoon lemon juice
- 1/3 cup calvados or other apple brandy
- 1 Tablespoon cornstarch
- 3 Tablespoons brown sugar packed
- 1/2 teaspoon ground cinnamon
Glaze
- 1 Tablespoon pure maple syrup
- 1 Tablespoon maple sugar or turbinado sugar
Instructions
- Preheat oven at 400-degrees. Line a baking sheet with parchment paper.
- On a lightly floured surface, roll out the pie crust to about a 10-inch diameter circle. Transfer it to the baking sheet and set in fridge while the other ingredients are prepared.
- Peel, core, and thinly slice the apples, placing them in a large bowl. Pour in the lemon juice, calvados, cornstarch, brown sugar, and cinnamon. Toss the apples to coat them completely.
- Pull out the chilled crust. Begin to arrange apple slices in the middle, fanning them out and stacking them, but leaving a 2-inch border of dough around the outside. DO NOT DISCARD THE LIQUID IN THE BOWL! Once the apples are arranged, fold the dough over to partially cover the apples.
- Start baking the galette for 15 minutes. While that is cooking, pour the leftover liquid into a small pot on medium-high. Stay close to the stove and stir liquid often. As soon as it gels, which is right at right about boiling temperature, remove it from heat. Set aside.
- Reduce oven temperature to 350-degrees. Bake galette for another 20 minutes.
- Pull out the galette. Drizzle the gel over the exposed apples in the middle of the galette then use basting brush to coat every nook and cranny. Measure out maple syrup. Use same brush (no need to wash it) to coat the top crust, then sprinkle maple sugar or coarse sugar over it to add a crystalline crunch.
- Bake for another 10 to 15 minutes, until apples in middle are fork-tender.
- Let cool slightly before cutting–a pizza cutter is ideal. Leftovers can be kept wrapped up in foil in the fridge for days.
*OM NOM NOM!*
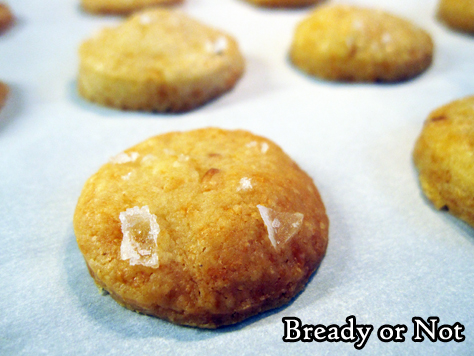
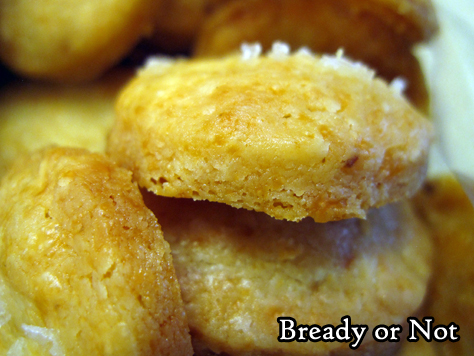
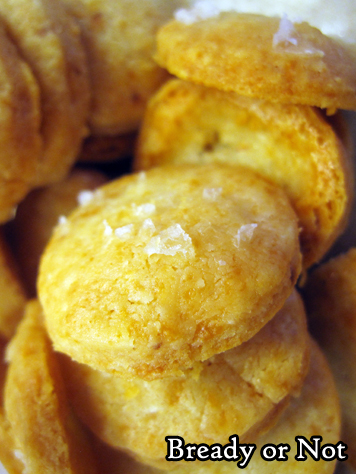
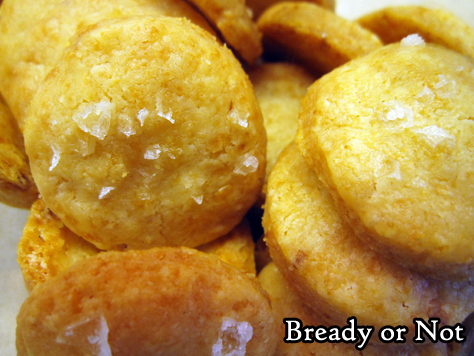
Bready or Not: Homemade Cheese Crackers
Cheese is divine to eat straight-up, but it can also be baked into delicious things such as these Homemade Cheese Crackers.

These crackers can be as fancy as you want. Use an import cheese like Gruyere or Comte, or stick with a basic American cheddar.
Whatever cheese you choose, be sure you have a food processor to, well, process the dough. The cheese needs to be at one with the flour and spices.
The dough can be frozen, but do be aware that the finished crackers have a definite shelf life.
After about 3 days, the crackers become softer and crumblier. They still taste okay, but the structural integrity won’t be very good if you want to carry them in a baggy.
But then, these crackers are so good, you might have them inhaled so quickly that this is not a problem at all.
Modified from Around My French Table by Dorie Greenspan.
Bready or Not: Homemade Cheese Crackers
Equipment
- food processor
- baking sheet
- parchment paper
- 1-inch cookie cutter
Ingredients
- 1/2 cup unsalted butter 1 stick, cut into small pieces
- 4 ounces Comte grated, or Gruyere or Emmenthal or good old cheddar
- 1/2 teaspoon salt
- 1/8 teaspoon white pepper
- pinch cayenne pepper optional
- 1 cup plus 2 Tablespoons all-purpose flour
- Maldon sea salt or other flaky gourmet salt, optional
Instructions
- Place the butter, cheese, salt, white pepper, and cayenne (if using) in the food processor. Pulse until the butter is broken into uneven pieces and the mixture begins to form small curds. Add the flour and mix until it looks like larger curds. If the dough is stubborn, pulse a bit more to distribute ingredients.
- Dump dough onto a flat surface and gently knead with hands to make cohesive. Divvy dough in half, forming each piece into a flat disk, and wrap in plastic. Tuck into fridge to chill for at least an hour or a couple days; it can also be frozen at this stage.
- When time to bake, preheat oven at 350-degrees. Line a baking sheet with parchment or nonstick mats.
- Pull out a dough disk. Use two sheets of parchment to roll dough to about 1/4 inch thickness; if the dough is too hard to roll, let it rest at room temperature for a few minutes before trying again. Use a small cookie cutter (about 1-inch) to cut dough into crackers. Place them spaced out on parchment on pan. Gather the scraps to form more crackers, using a touch of water, if needed, to make it cohesive again.
- If desired, sprinkle some Maldon sea salt atop crackers; only a few flakes are needed to add extra flavor.
- Bake for about 10 minutes. Rotate pan. Bake for another 4 to 7 minutes, until crackers are lightly golden and firm to the touch. Let cool on pan or on a rack.
- Crackers are great warm or at room temperature. They are best eaten within 3 days. After that, they soften and become more crumbly, but they are still tasty.
OM NOM NOM!
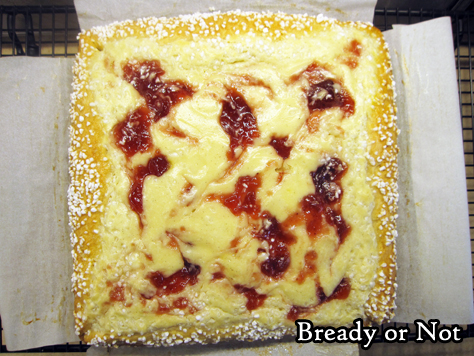
Bready or Not: Jam and Cream Brioche Tart
This Jam and Cream Brioche Tart is probably among the most extraordinary things I’ve ever baked, and that is saying something.
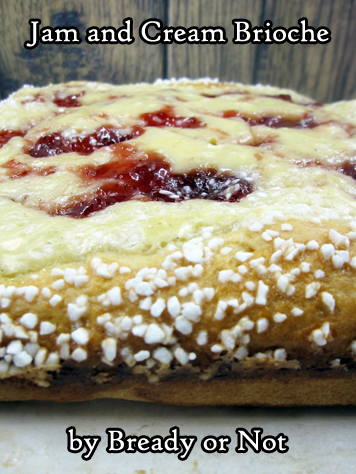
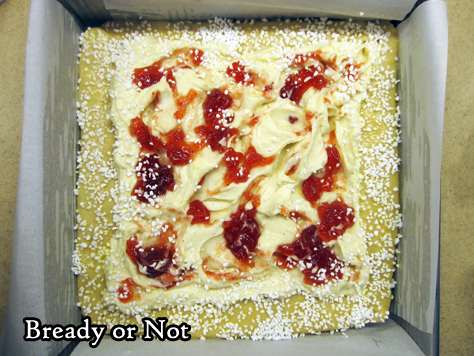
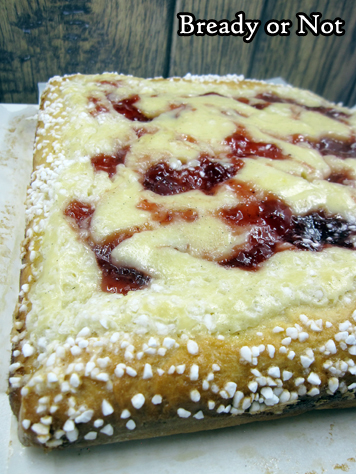
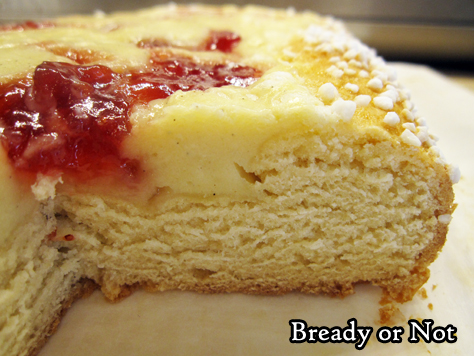
First of all, the end result is gorgeous. Golden, thick crust freckled by pearl sugar. Marbled cream cheese and contrasting jam, with flecks of vanilla bean throughout.
The tart is as delicious as it looks, too. The enriched dough is sweet and soft, providing a luscious base for the different kind of sweet-and-soft offered by the filling.
This is a showstopper of a dessert or breakfast.
The only unusual ingredient involved is the Swedish pearl sugar. I bought it on Amazon. I consider it a worthwhile investment, as there are a number of other pastry recipes I want to try that also use it. Plus, heck, you could even throw them on waffles or fruit or whatever.
Another not-quite-so-obscure ingredients I suggest you use is vanilla bean paste. This is VERY useful if you’re making fancy desserts because you get the flecks of vanilla beans without the high cost of using actual vanilla beans.
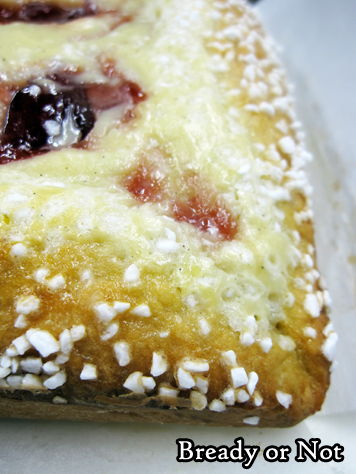
In a cream cheese filling or frosting, those flecks really stand out, and they add a lot to the WOW factor. Which this tart already has, many times over.
Recipe modified from Bake from Scratch, Sep/Oct 2019.
Bready or Not: Jam and Cream Brioche Tart
Equipment
- 9x9-inch pan
- parchment paper
Ingredients
For Brioche
- 1/3 cup plus 1 tablespoon whole milk or half & half
- 2 3/4 cups all-purpose flour
- 3 Tablespoons white sugar
- 2 1/4 teaspoons instant yeast
- 1 1/2 teaspoons kosher salt
- 3 large eggs room temperature and divided
- 1 teaspoon vanilla extract
- 6 tablespoons unsalted butter softened
For Cream Cheese Filling
- 2 tablespoons unsalted butter softened
- 1/3 cup white sugar
- 1 teaspoon vanilla bean paste or substitute vanilla extract
- 1/4 teaspoon kosher salt
- 8 ounces cream cheese softened
- 1 large egg room temperature
- 3 Tablespoons all-purpose flour
To Finish
- 2 Tablespoons fruit preserves use good quality stuff with nice chunks
- 1 Tablespoon water
- 1 1/2 Tablespoons Swedish pearl sugar
Instructions
- Using the microwave and a safe dish, heat the milk to between 120 and 130 degrees. Set aside.
- In the bowl of a stand mixer with a paddle attachment, beat the flour, white sugar, yeast, and salt at very low speed until combined, about 30 seconds.
- Slowly add the warm milk to incorporate. Add 2 of the eggs along with the vanilla, and beat for about 1 minute. Switch to the dough hook attachment. Beat at low speed until smooth and elastic, about 8 minutes.
- Add butter, about 1 tablespoon at a time, letting each piece incorporate before adding the next, about 8 minutes total. (If it refuses to incorporate, switch back to the paddle for this stage.) Beat until a smooth and elastic dough forms, about 6 minutes.
- Lightly flour a stretch of counter or tabletop and dump the dough there. Knead it for a minute or so and form it into a smooth round.
- Apply cooking spray inside a large bowl. Place the dough inside and give it a spray, too, to prevent sticking. Cover with a towel or plastic wrap in a warm spot to rise until doubled, 30 to 45 minutes.
- Cut parchment paper to line pan going up all four sides. Apply nonstick spray to pan, then lay both strips inside the pan and spray the top-most sides.
- On a lightly floured surface, roll the dough into an 11-inch square. Score a 9-inch square in center of dough (using the pan as a reference, if needed). Fold outside 2 inches over score mark, creating a crust around edges.
- Place dough in the prepared pan, making sure it is even and fills corners of pan. Cover and let rise until puffed, 20 to 30 minutes.
- Meanwhile, prepare the cream cheese filling. Beat together the butter, sugar, vanilla bean paste (or extract), and salt until well combined. Gradually add cream cheese, beating until smooth. Add egg to incorporate, followed by the flour.
- Preheat oven to 325-degrees. Using your fingertips to dimple the center of dough back down, leaving outside crust as is. Pour the cream cheese mix into the center of dough. Make small indentations in the cream cheese then add dollops of the preserves. Use a knife to swirl the fruit in a bit more.
- In a small bowl, whisk together the 1 tablespoon water and remaining egg. Brush the crust with the egg wash, then finish by sprinkling the pearl sugar all over the edge.
- Bake until the crust is golden brown with the filling set around outside edges, about 35 to 40 minutes. (If desired, check the temp: an instant-read thermometer inserted in center of filling should register 175°F.)
- Let cool in pan for 10 minutes then use the parchment sling to lift up the tart onto a serving plate or rack. Eat fresh, or let cool.
- Tart keeps for days well-wrapped in fridge. Eat slices cold, or make pieces even more delicious with a short zap in the microwave.
