


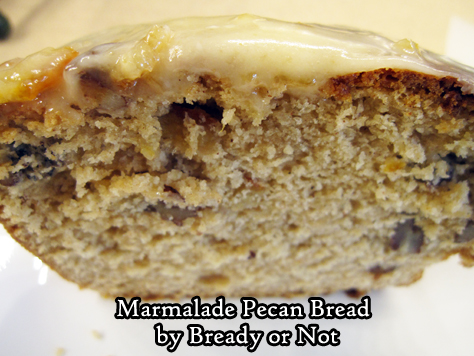
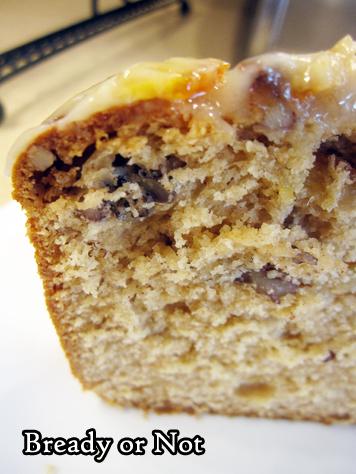
Bready or Not Original: Marmalade Pecan Bread
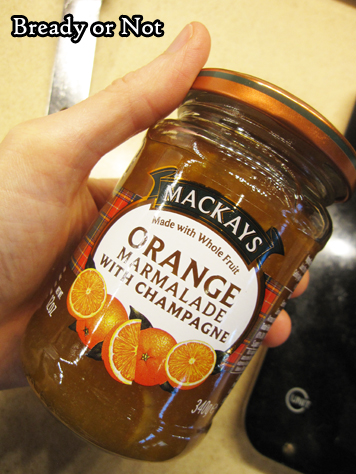
Orange marmalade is delicious stuff atop an English muffin or toast, and it’s also amazing incorporated into this Marmalade Pecan Bread.
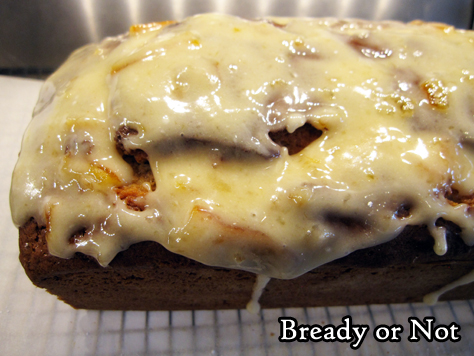
If your jar is large enough, you can use some marmalade in the glaze, too–but worry not if your jar is smaller. Just use orange juice instead!
This bread has a tender, delicious crumb. You get some orange in every bite, and the pecans pieces add a great crunch for contrast.
This is ideal for a breakfast or brunch, but really, it would be a nice bedtime snack, too. Something cozy, delicious, and a touch sweet.
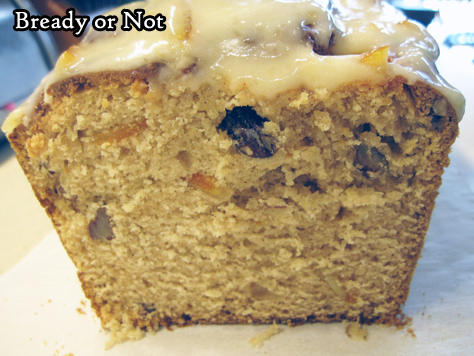
I cut the bread into slices and found it froze and thawed well, too. A tiny bit of glaze stuck to the plastic wrap, but it wasn’t that bad at all.
Modified from Taste of Home Church Potluck 2015.
Bready or Not Original: Marmalade Pecan Bread
Equipment
- 9x5 loaf pan
- parchment paper
Ingredients
- 12 ounce orange marmalade jar or a 10oz jar with a modified glaze
- 1/2 cup unsalted butter 1 stick, softened
- 1/2 cup brown sugar packed
- 2 eggs room temperature
- 2 2/3 cups all-purpose flour
- 3 teaspoons baking powder
- 2 teaspoons ground cinnamon
- 1 teaspoon salt
- 1/3 cup orange juice plus more, if needed for glaze
- 1/2 cup pecans chopped
- 1/2 cup confectioners' sugar
Instructions
- Preheat oven at 350-degrees. Cut a piece of parchment to fit long-ways in the loaf pan, extending up either side. Grease the pan, place the paper inside, then grease again. Set aside.
- If using a 12 ounce jar of marmalade, measure out two ounces to set aside.
- In a large bowl, beat together butter and brown sugar until blended. Add eggs, one at a time. Gradually mix in the 10 ounces of marmalade.
- In a separate bowl, mix together flour, baking powder, cinnamon, and salt.
- Slowly beat the dry ingredients into the wet, until just combined. Fold in the pecans.
- Pour batter into the loaf pan. Bake for 45 minutes; check on bread, and cover with foil if it is becoming too browned on top. Continue baking for another 15 to 20 minutes (that is 60 to 65 minutes total), until the very middle passes the toothpick test. Let rest in pan for about 10 minutes, then use the parchment sling to pull the bread out to set on a cooling rack.
- After the bread cools completely, mix together the remaining marmalade and the confectioners' sugar to form a thick glaze; alternatively, if a smaller jar was used, add orange juice by teaspoons into the sugar until a thick glaze is formed.
- Let set for 20 minutes before slicing in. Store at room temperature in a sealed beg or plastic wrap. Bread can also be sliced and frozen for later enjoyment.
OM NOM NOM!
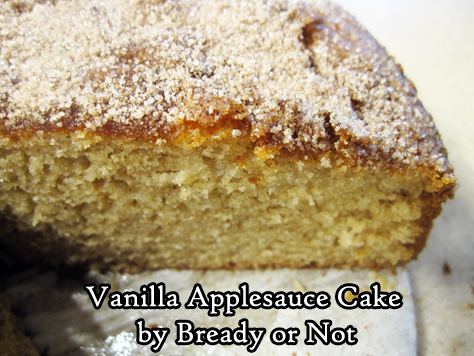
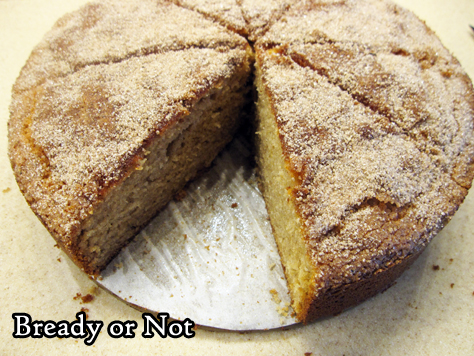
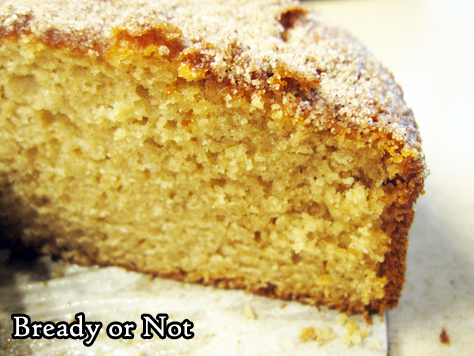
Bready or Not Original: Vanilla Applesauce Cake
Some days call for a no-fuss apple cake. This Vanilla Applesauce Cake is for those kinds of days.
There is no need to worry about procuring apples, or having them go bad, or the effort to peel and slice them. This cake uses applesauce, which loads the cake with beautiful flavor.
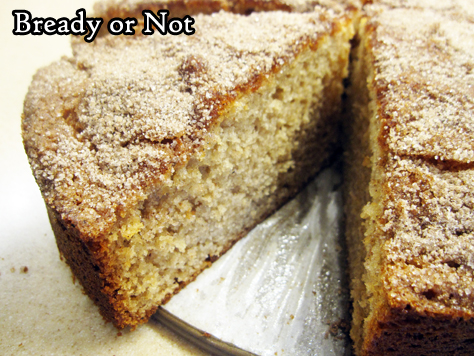
The cake also has the gentle flavor of a great combination of spices. The finisher is no-fuss, too: a top crusted with coarse sugar that adds a touch more sweet and a tiny crunch.
Want to serve this cake for just a few people? No problem. Slice up the cake, and freeze individual slices for later.
Modified greatly from a Heilala Vanilla ad in Bake from Scratch Magazine, September/October 2019.
Bready or Not Original: Vanilla Applesauce Cake
Equipment
- 9-inch springform pan
- offset spatula
- parchment paper
Ingredients
- 2 cups all-purpose flour
- 2 teaspoons baking powder
- 2 teaspoons ground cinnamon
- 1 teaspoon kosher salt
- 1/2 teaspoon baking soda
- 1/2 teaspoon ground ginger
- 1/4 teaspoon ground cloves
- 1 cup white sugar
- 1 cup applesauce or about 2 individual serving cups of applesauce
- 1/2 cup buttermilk or soured milk (see note)
- 1/2 cup vegetable oil
- 2 large eggs room temperature
- 1 teaspoon vanilla extract
- 1/4 cup coarse sugar as topping, such as turbinado, maple, etc
Instructions
- Preheat oven at 350-degrees. Cut parchment paper to fit in the base of a 9-inch springform pan. Apply nonstick spray with flour to bottom and sides of pan. Add parchment and spray again. Set aside.
- In a big bowl, combine flour, baking powder, cinnamon, salt, baking soda, ginger, and cloves.
- In another bowl, whisk together the sugar, applesauce, buttermilk or soured milk, oil, eggs, and vanilla. Gradually pour the wet ingredients into the dry, mixing well.
- Pour batter into the pan and smooth out with an uneven spatula. There will likely be bubbles in the batter. Gently tap the sides of the pan and thump it on the counter to get them to rise and burst. Using a spoon, sprinkle the coarse sugar all over the top as evenly as possible.
- Bake for 35 to 40 minutes, until the middle passes the toothpick test. Let cool in pan for 10 minutes, then release sides. Let cake cool completely on base for several hours.
- Slice into wedges and serve. Cake keeps well in a sealed container at room temperature and pieces can also be wrapped individually and frozen for later enjoyment.
OM NOM NOM!
Notes
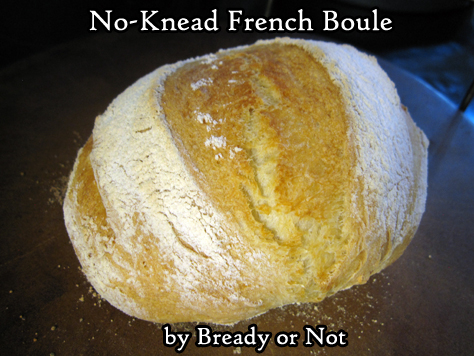
Bready or Not: No-Knead French Boule (French Bread Round)
French bread is one of the best things in the world and it is super-easy to make. All you need are four ingredients and some time.
The time element is not that much of an issue, though, because this takes all of five minutes to mix up. After an initial rise, the dough can then be tucked away in the fridge for up to two weeks.
If this technique looks familiar, it’s because it’s similar to the recipe I shared in February for my favorite pizza dough. They are both modified from the book Artisan Bread in Five Minutes a Day.
The boule, or bread round, is the most traditional form of French bread. The baguette is actually an innovation from the 1920s. The boule was first, and is, arguably, the best.
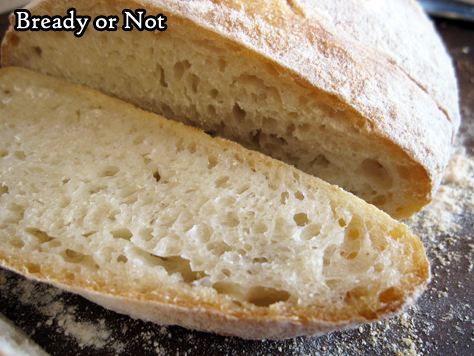
This bread is perfect to slice up, butter, and toast. It’s great for sandwiches. For charcuterie and cheese. To make French toast. Any way you can eat bread, really.
It’s also great to freeze and thaw for later enjoyment! This is really a recipe that is all about convenience, before and after baking.
Bready or Not: No-Knead French Boule (French Bread Round)
Equipment
- baking stone or baking steel
- small metal cake or casserole pan
Ingredients
- 1 1/2 cups lukewarm water
- 2 1/4 teaspoons active yeast or one store packet
- 3 1/4 cups all-purpose flour
- 2 1/4 teaspoons kosher salt
Instructions
- Warm the water to just above body heat, about 100-degrees. Pour it into a large bowl. Add the yeast, flour, and salt. Stir until everything is uniformly moist, no dry patches to be found.
- Loosely cover the bowl with plastic wrap, waxed paper, or an off-kilter lid, and set in a warm spot in the kitchen.
- After about 2 hours, it should double in size and flatten out on the top; a colder kitchen may need as long as 5 hours, which is fine.
- The dough can be used now, but is very sticky. It's easier to work with if it has chilled in the fridge for at least 2 hours, but can idle in there overnight or for as long as 2 weeks. Keep loosely covered so that it doesn't dry out.
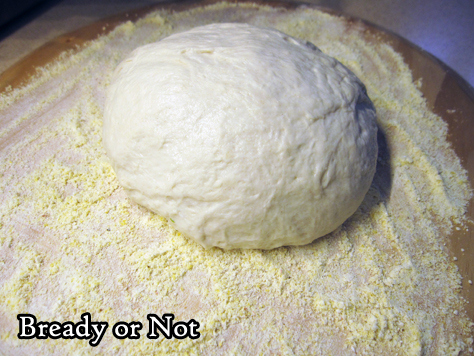
- Prepare a piece of parchment with a dusting or flour, semolina, or fine cornmeal. To shape the dough into a round, dust hands with flour then gently shape dough into a ball, tucking and smoothing rough bits into what will become the bottom. Set dough on prepared parchment. Let rise for 20 to 30 minutes. It may not rise a lot, but should puff a bit.
- Start preheating oven at 450-degrees. Place baking stone or steel in the middle rack of the oven. Place the empty metal cake or casserole pan beneath it. Let the oven heat for 20 minutes.
- Measure out 1 cup of water.
- After the bread has risen for about 40 minutes, lightly dust the top of the dough with flour. Use a lame or serrated knife to slash lines across the top.
- Pull the hot stone or steel from the oven. Use the parchment to carefully transfer the dough onto the hot surface. Set baking sheet into oven. Pull out the heated pan on the shelf below. With care, pour the water into the pan; do not overfill! Gingerly push the shelf back into place and close the oven so that the steaming water can work its magic on the baking bread.
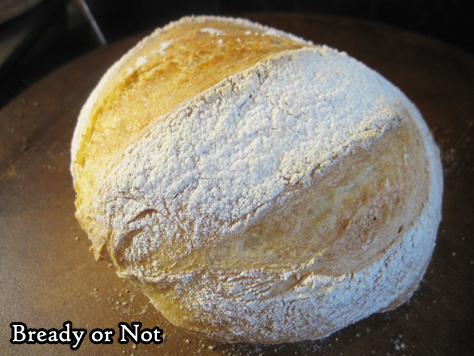
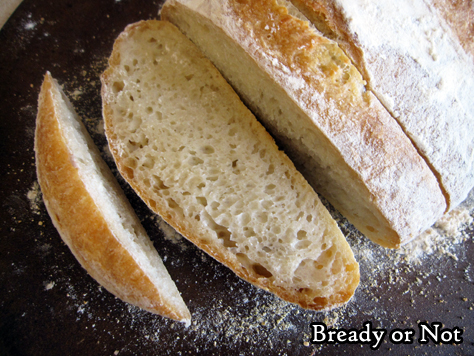
- Bake for about 30 minutes. Do NOT open the oven until the end of that time! The bread should look crusty and golden over the top. Pull out the pan and let the bread cool. It may emit a crackling sound as it cools down. If the bottom is carefully thumped, the bread should sound hollow.
- Let cool about 20 or 30 minutes before cutting into the bowl. Store in a sealed bag for up to 2 days. If freezing portions of the bread, do so within the first day so they will be as fresh as possible.
OM NOM NOM!
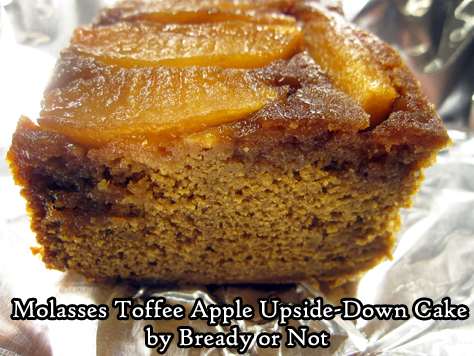
Bready or Not: Molasses Toffee Apple Upside-Down Cake
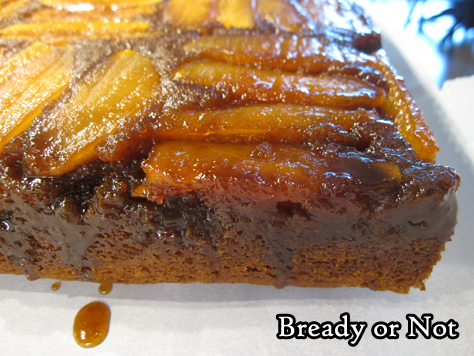
This Molasses Toffee Apple Upside-Down Cake is as delicious as it is beautiful!
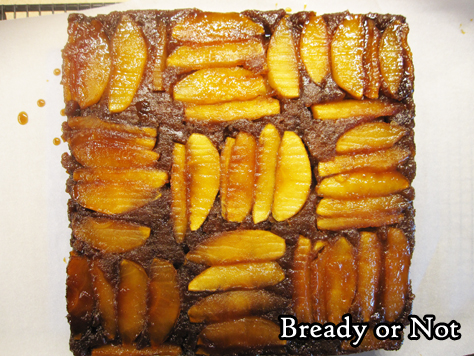
This cake does take a little extra effort. You have to give some thought to placing the apple slices instead of just mixing in the apples. It also dirties a lot of dishes.
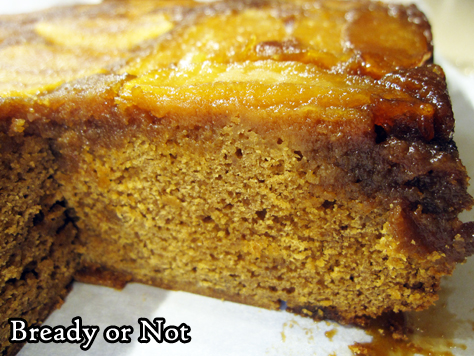
But the end result? The cake crumb is reminiscent of a dense, moist gingerbread cake–which goes perfectly with the apples. The combo is sheer bliss.

So, what kind of apples are best? Three medium baking apples! You can always Google that subject for a wide range of recommendations. I can recommend Granny Smiths, Galas, and Pink Lady.
The resulting cake is great warm, recently from the oven. It’s also good cold from the fridge. And reheated, warmed just a touch in the microwave or toaster oven. But not reheated to be super-hot–that actually makes the apples go too soft.
This cake is also great to slice into blocks, wrap in plastic, and freeze for later. It keeps wonderfully that way! Thaw and enjoy at your leisure.
Modified from Bake from Scratch September/October 2019.
Bready or Not: Molasses Toffee Apple Upside Down Cake
Equipment
- 9x9 square pan
- offset spatula
Ingredients
- 1 2/3 cups light brown sugar packed, divided
- 1/4 cup unsalted butter half stick, melted
- 1/2 cup plus 2 Tablespoons molasses divided
- 3 large baking apples about 450 grams after being peeled, cored, and thinly sliced; Granny Smith, Gala, and Pink Lady work well
- 1/2 cup plus 1 Tablespoon unsalted butter softened
- 2 large eggs room temperature
- 1 large egg yolk
- 2 teaspoons vanilla extract
- 2 2/3 cups all-purpose flour
- 2 1/2 teaspoons baking powder
- 1 1/2 teaspoons ground cinnamon
- 3/4 teaspoon kosher salt
- 3/4 teaspoon ground ginger
- 1/2 teaspoon ground nutmeg
- 1/8 teaspoon ground cloves
- 3/4 cup whole milk
Instructions
- Preheat oven to 350-degrees. Cut a square of parchment paper to fit in the bottom of a 9x9 square pan. Grease pan with butter or nonstick spray. Place parchment, and grease paper as well. Set aside.
- In a small bowl, whisk together 2/3 cup brown sugar, melted butter, and 2 tablespoons molasses. Pour into prepared pan. Arrange apple slices in groups of 5 in alternating patterns on top of sugar mixture.
- In a big mixing bowl, beat softened butter and remaining 1 cup brown sugar until fluffy. This will be about 3 to 4 minutes in a stand mixer. Scrape sides of bowl as needed.
- Beat in remaining 1/2 cup molasses until no streaks remain. One at a time, add the eggs and egg yolk followed by the vanilla.
- In a medium bowl, whisk together the dry ingredients: the flour, baking powder, cinnamon, salt, ginger, nutmeg, and cloves.
- Gradually mix the dry ingredients into butter mixture alternately with the milk. Beat until just smooth. Pour batter over apples, smoothing with an offset spatula.
- Bake until the middle passes the toothpick test, about 45 to 50 minutes. Let cool in pan for 10 minutes. Run a knife around edges of pan to release sides of cake, if needed. Carefully invert onto a flat serving plate or small cutting board.
- The cake is fantastic eaten fresh, cold, or just warmed. It can also be cut into squares and frozen for later enjoyment.
OM NOM NOM!
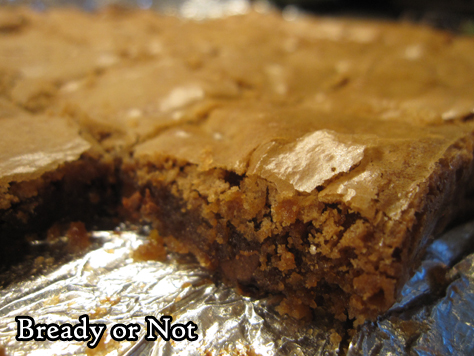
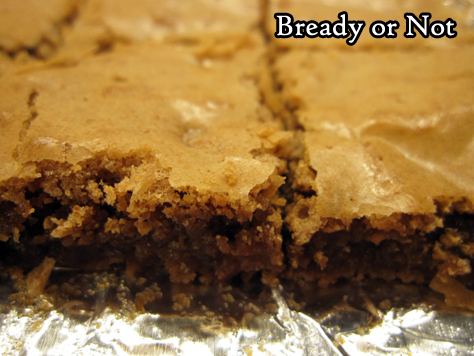
Bready or Not Original: Small Batch Cakey Brownies
Sometimes you just need a few brownies. That’s the perfect time for this Small Batch Cakey Brownies recipe.
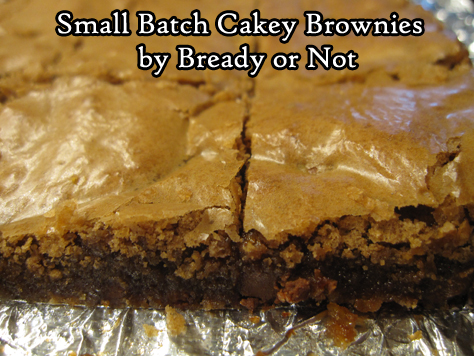
These are not monstrously thick brownies. They are thin with a crackled top, with a nice, cakey moist crumb.
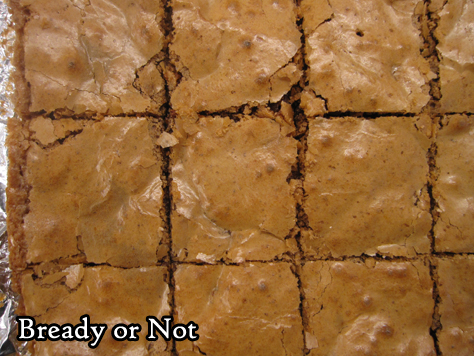
I created this recipe by combining about four other recipes, trying to find a middle ground recipe that my son would like. This is the one that turned out to be the winner.
Even better, I found out these brownies kept well for an entire week in a sealed container at room temperature–and who knows, maybe they could last a lot longer? In any case, there’s no urgent need to gorge on them lest they go bad.
These brownies are all about goodness.
Bready or Not Original: Small Batch Cakey Brownies
Ingredients
- 2 ounces semi-sweet chocolate
- 6 Tablespoons unsalted butter
- 1 cup white sugar
- 2 large eggs
- 1/2 teaspoon vanilla extract
- 1/2 teaspoon fine sea salt
- 1/4 cup all-purpose flour
- 1/4 cup cake flour
- 1/2 cup milk chocolate chips
Instructions
- Preheat the oven to 350-degrees. Line a 9x9 or 8×8-inch pan with foil, letting foil overhang each side. Apply nonstick cooking spray.
- In a microwave-safe bowl, microwave the chocolate and butter on high in 30 second increments, stirring between each burst, until everything is melted. Let cool slightly.
- Using a stand mixer or hand mixer, in a large bowl beat together the sugar and eggs for 3 to 5 minutes, until they are pale, light, and fluffy. Pour in the cooled chocolate and butter mixture, followed by the vanilla.
- Combine the salt and both flours in a bowl. Stir in the chocolate chips. Fold flour mix into the wet ingredients. Pour into the prepared pan and even out.
- Bake for 20 minutes, or until a toothpick inserted in the center comes out with moist crumbs attached. Cool completely. Use foil onto a cutting board to slice into bars.
- Brownies will keep for upwards of a week in a sealed container at room temperature.
OM NOM NOM!
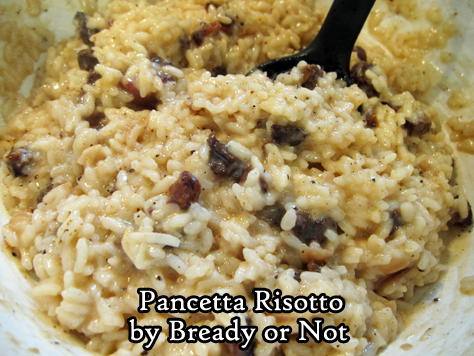
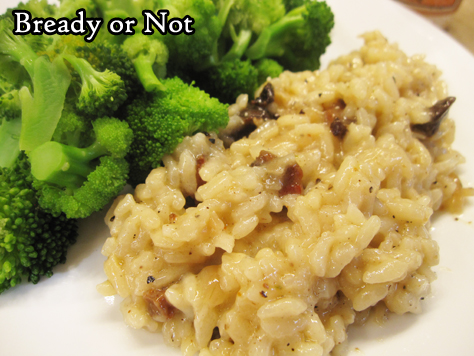
Bready or Not Original: Pancetta Risotto
This Pancetta Risotto is a fantastic meal for two people, or a delicious side for a group. It’s time-consuming but very straightforward to make.
I confess, I spent years being intimidated by the very idea of a risotto. I would see it done on cooking shows. So much stirring! When I finally got up the gumption to give it a try, I found risotto wasn’t hard at all. It really is about lots of stirring.
This recipe here is my fancy occasion recipe, especially when I have some good pancetta on hand, such as the kind carried by Smoking Goose Meatery out of Indianapolis.

As for the wine, I’ve tried this with fancier Sauvignon Blanc from Total Wine (Cloudy Bay from New Zealand) as well as a $6 Trader Joe’s Coastal Sauvignon Blanc. Both versions turned out great! You don’t need to go all-out, but get something that is (hopefully) drinkable with the finished meal.
Bready or Not Original: Pancetta Risotto
Equipment
- large stock pot
- medium saucepan
Ingredients
- 8 oz pancetta diced
- 1 Tablespoon dried shallots or fresh shallot, finely minced
- 3 cloves garlic minced
- 1 1/4 cups Arborio rice
- 1 cup dry white wine Sauvignon Blanc works well
- 4 cups chicken broth or chicken stock, equal to a 32 oz box or 2 cans
- 1/2 cup shredded Parmesan or Pecorino Romano or Grana Padano, plus more to top rice
- salt and pepper to taste
Instructions
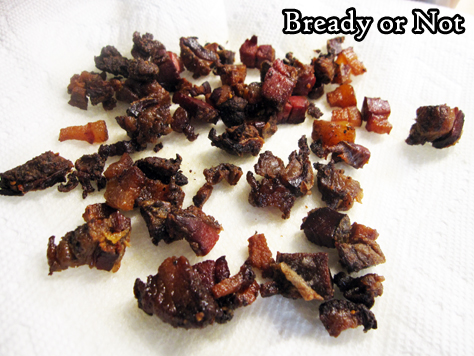
- In a large stock pot, cook the pancetta for 10 to 12 minutes, until it starts to turn brown and crispy. At the same time, on another stove burner, use a medium sauce pan to bring the chicken broth to a very low simmer.
- Use a slotted spoon to transfer pancetta to a paper towel-lined plate; set aside. Add dry shallots and garlic to the fat in the big pot. Sauté for two minutes. Add the Arborio rice and a pinch of salt. Sauté another 2 minutes, until the rice looks glossy with translucent edges.
- Add the white wine and stir until it is absorbed. Add chicken broth in 1/2 cup increments, stirring well after each addition until it is absorbed. After about 12 to 15 minutes, when most of the broth has been added, begin to taste the rice. The goal is a chewy, al dente consistency. Add more broth as needed, and remember to turn off the burner for the broth pot when it is empty.
- When the rice is creamy and al dente, stir in the pancetta and cheese. Taste the risotto again, adding more salt and pepper as needed. Serve with the remaining white wine.
